
Nowadays, every computer and laptop needs a microphone as we need those devices for various types of tasks. However, as prevalent as computer microphones are, it is still somewhat common to experience different issues with them regardless of whether we are talking about external microphones that most desktop computers use or internal ones that are built-in components of all modern laptops.
Obviously, one of the most common microphone related issues is if the device isn’t working whatsoever. If you are a Windows 7 or 10 user and your microphone isn’t working for one reason or another, you can read through the next lines in order to figure out the exact cause for the issue and then fix it by following the troubleshooting instructions.
There could indeed be many causes for this issue so you will have to check every possibility in order to eventually single out the root of the problem (and deal with it).
Note that the following guidelines are applicable to both desktop PCs with external mics and laptops with internal ones.
Fix 1: Check the connection of your mic
Oftentimes, a simple problem such as not having properly connected the mic to your computer could be the cause of the issue. One common instance of this is when users connect their external mics to the front port of their computers. In many cases, these ports tend to be faulty/not as reliable as the ones at the back. If you’ve connected your mic to the front port, try connecting it to the rear one instead.
Another thing you ought to do is to check if the mic itself is working properly. If you have access to another computer (preferable one with a different OS) and test the mic there. That way, you should be able to reliably figure out if the microphone is not damaged. If it doesn’t work on the second computer, then you should probably simply get another mic because your current one is likely damaged.
Obviously, if you are using a laptop and you are having issues with its internal mic, you cannot do any of this so you should move on to the following fixes. If none of them work, then there may be some kind of a hardware/connectivity issue with your mic, in which case your only option would be to take your laptop to a computer mechanic to disassemble it and see if there’s a hardware problem.
Fix 2: See if the mic is enabled
It is perfectly possible that your microphone is simply not enabled. Here’s how to check and fix this:
- Open the Start Menu and select the Settings option.
- Open the Privacy icon, locate the option labeled Microphone from the left panel, and select it.
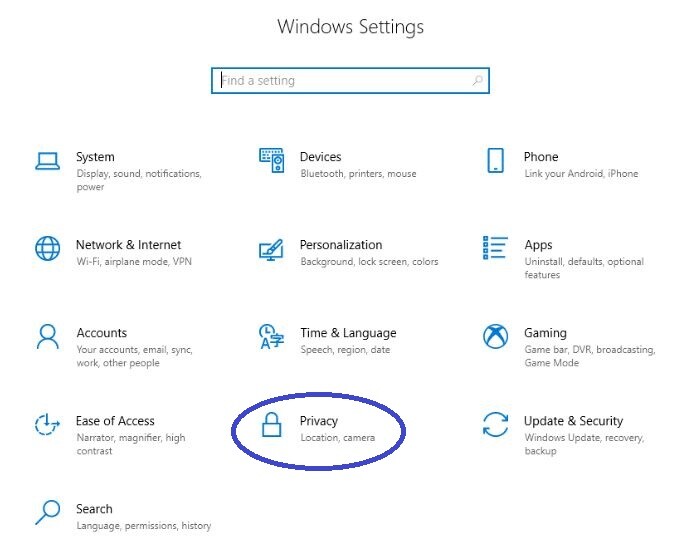
- See if the Let apps use my microphone option to the left is enabled. If it isn’t, toggle it on.
- Next, take a look below that option, at the specific apps that need permission to use your mic. Choose the apps you want to allow to use your mic and then toggle on the permission button next to them.

- See if the problem with your microphone has been fixed.


Fix 3: Make your mic your default recording device
It is also possible that your computer is simply trying (unsuccessfully) to use another device as a microphone and not your actual mic. Here’s the fix for that:
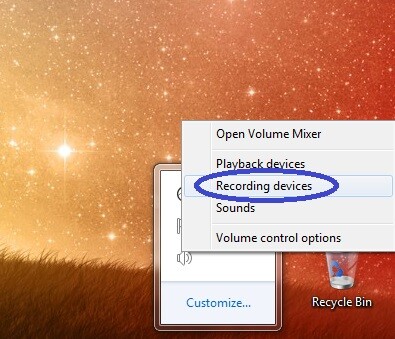
- In the lower-right corner of your screen, locate and right-click on the volume (speaker) icon and select Recording devices.
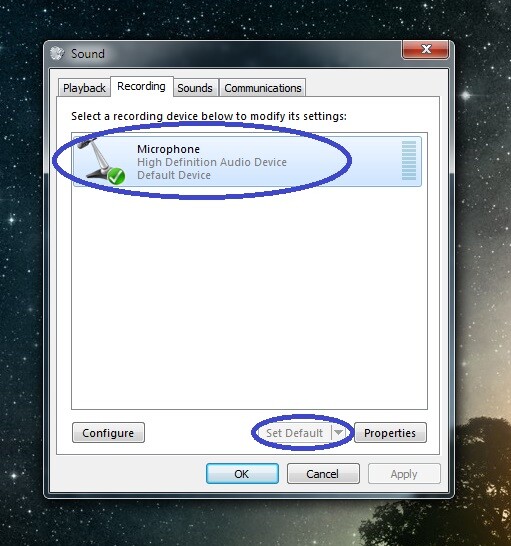
- If you see the icon of your mic on the list, select it and then click on the Set Default option.
- If the icon of your mic isn’t displayed, right-click in the empty space and check both of the options (Show disconnected devices and Show disabled devices).
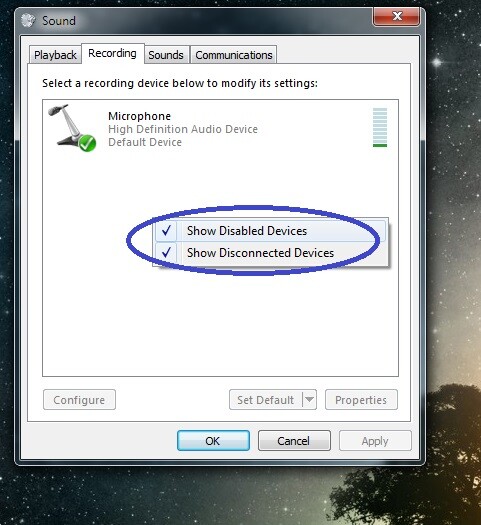
- Your mic should now appear on the list and you should be able to set it as default.


Fix 4: Unmute a muted mic
It is also possible that your mic has been muted, causing it to not work.
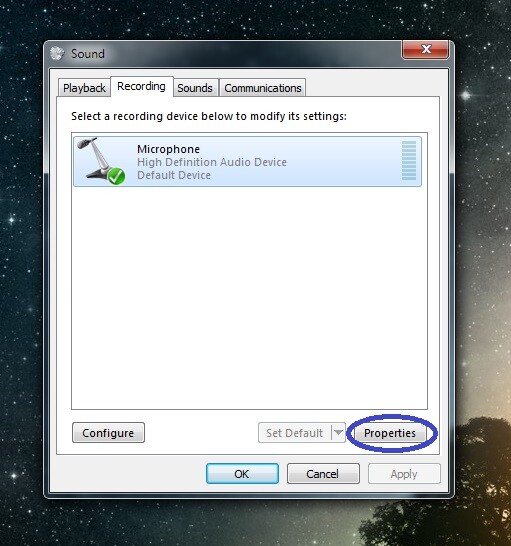
- To troubleshoot this, go back to Recording devices as described in the previous fix and select the icon of the microphone that’s not working properly.
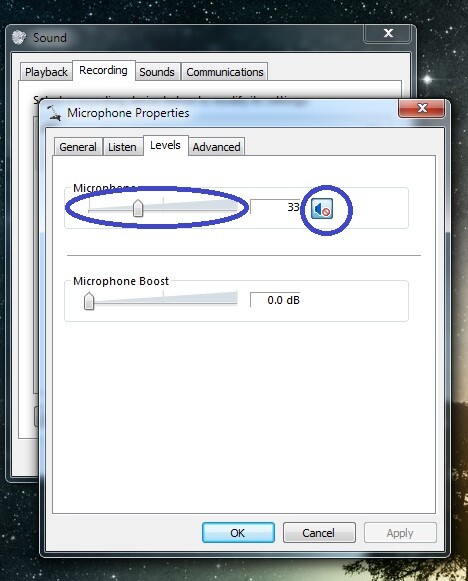
- Now, select the Properties icon and, in the window that opens, go to the Levels tab.
- There, see what the sound level of the select mic is and make sure that it is set to 100%. Also, if there is a red prohibition sign next to it, click on the sign to remove it.
- Save the changes you’ve just made.

Fix 5: Use the Windows Troubleshooter feature
If none of the steps so far have helped you, maybe you should try the built-in troubleshooting function that Windows has.
- Go to Start Menu > Settings and type troubleshoot in the search box at the top.
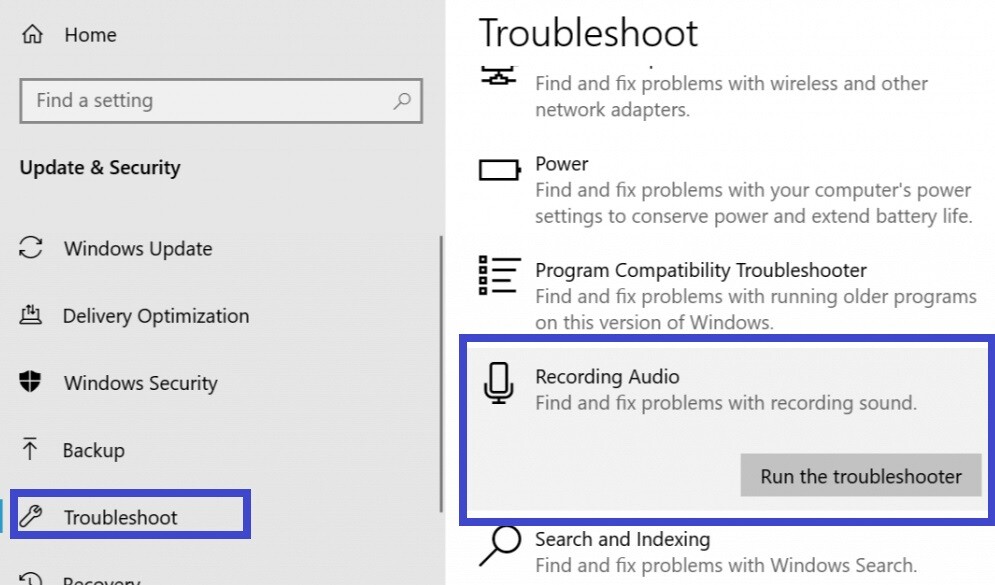
- Select the wrench icon (labeled Troubleshoot) and, from the right panel, locate the Recording Audio option (below Find and Fix other problems).
- Select the Recording Audio option and then click on Run the Troubleshooter.
- Follow the prompts and instructions from Windows to complete the troubleshooting process.
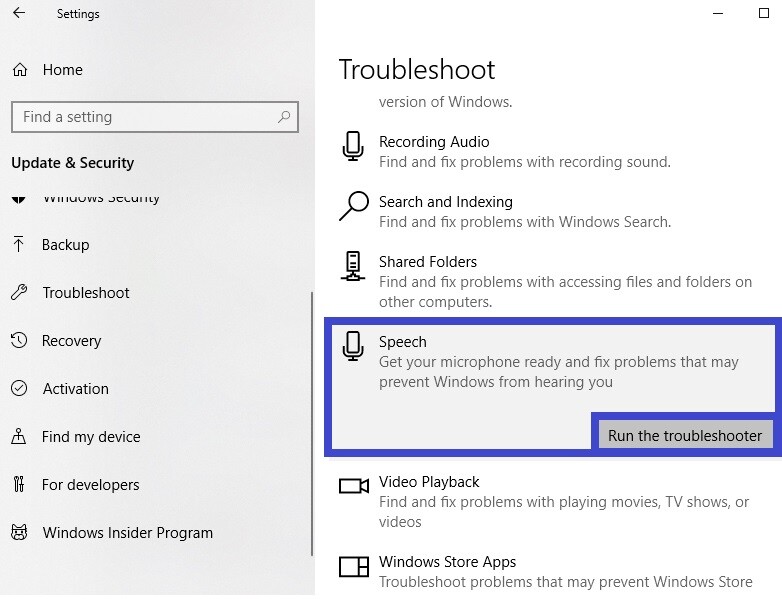
- Next, run the troubleshooter for Speech.
- Restart your computer after both of the troubleshooting processes have been completed.


Fix 6: Restart the Audio Service from Windows Services
Sometimes, a mic-related bug could be fixed by restarting the Windows Audio service so let’s go ahead and do that.
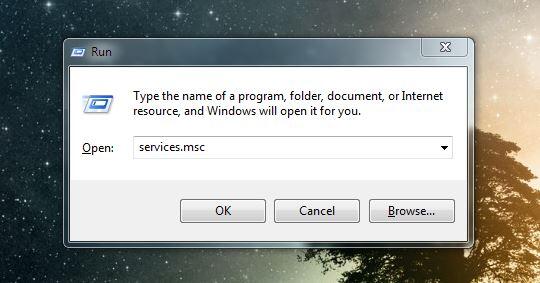
- From your keyboard, press the WinKey + R buttons to open the Run window.
- Type services.msc in the Run search box and hit Enter.
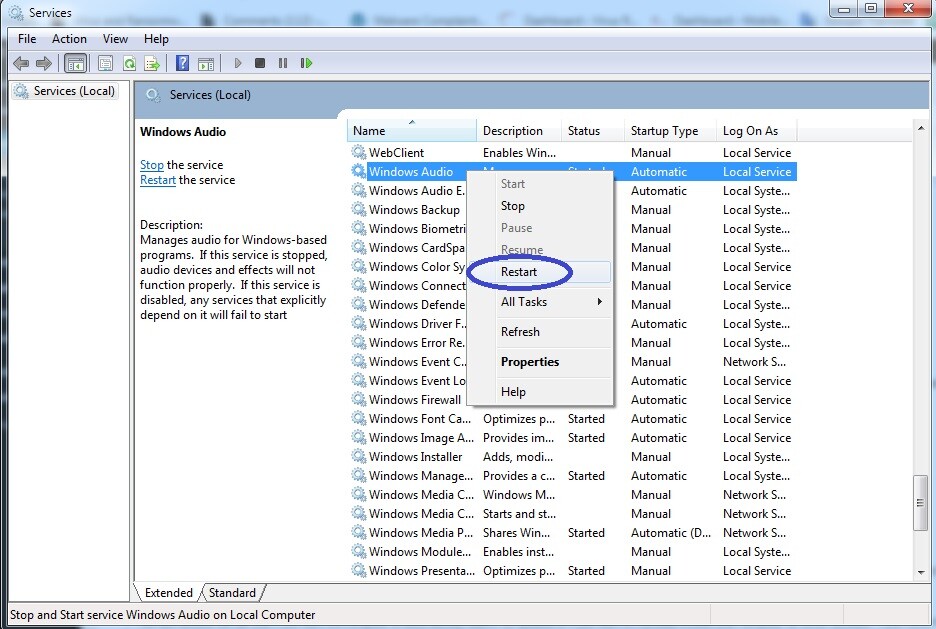
- Once Services opens, locate the service labeled Windows Audio and right-click on it.
- Click on the Restart option or, alternatively, click on Stop and then, subsequently, right-click on the Windows Audion service again and this time select Start.
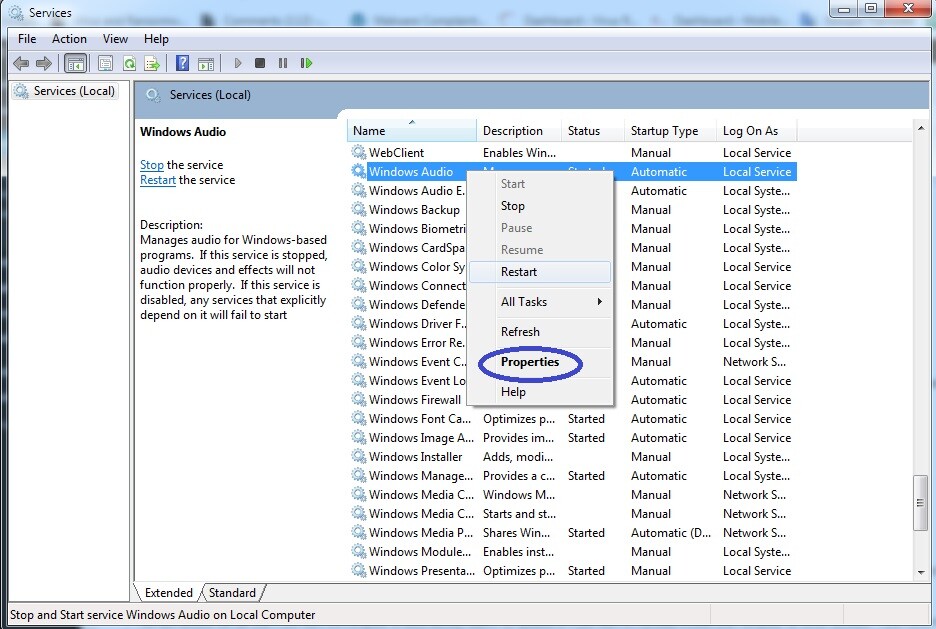
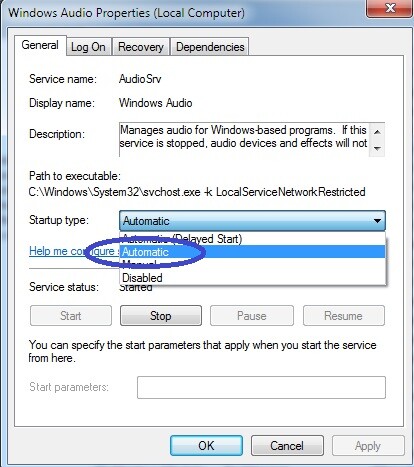
- If the problem doesn’t seem to be solved after this, once again right-click on the Windows Audio service and open its Properties. In the General tab of the Properties window, look at the Startup type setting – see if it is set to Automatic. If it isn’t, set it that way and click on OK to save the changes.
- Restart your PC/laptop and check if your problem has been resolved.


Fix 7: Update Audio Drivers
A problem with your PC’s audio drivers may also be what’s causing your mic to not work properly. Here’s how you can make sure your drivers are properly updated:
- In the Start Menu search box, type Device Manager and hit the Enter button.
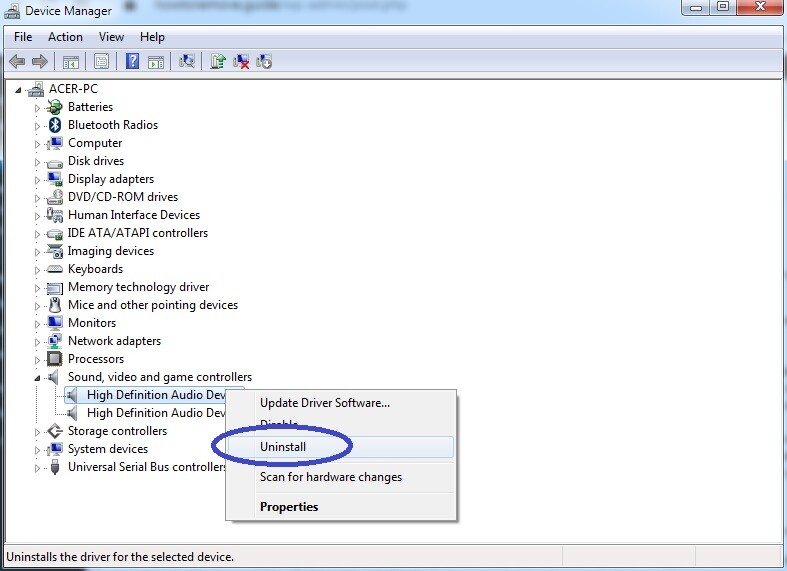
- Once the Device Manager opens, locate the Audio inputs and outputs icon(Sound, video and game controllers if you are on a Windows 7 machine) and expand it.
- Next, right-click on the icon for your microphone device’s driver and select the Uninstall option. If there are two of them, uninstall them both.
- After the uninstallation completes, restart the computer and the proper driver update should get automatically installed.
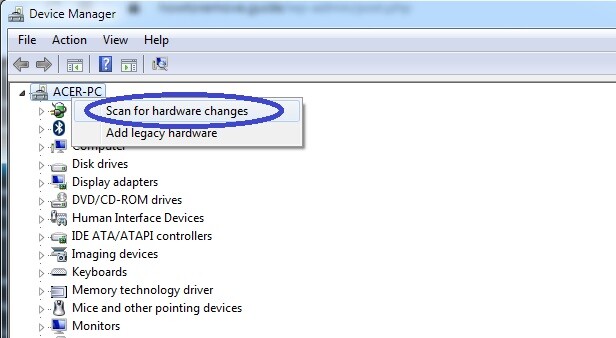
- If, for some reason, Windows fails to reinstall the driver for your mic, you will have to do this manually. To do this, go back to the Device Manager, right-click on the icon that has your computer’s name on it (should be the first icon), and click on Scan for hardware changes. Now, Windows should scan for missing drivers and install them for you.
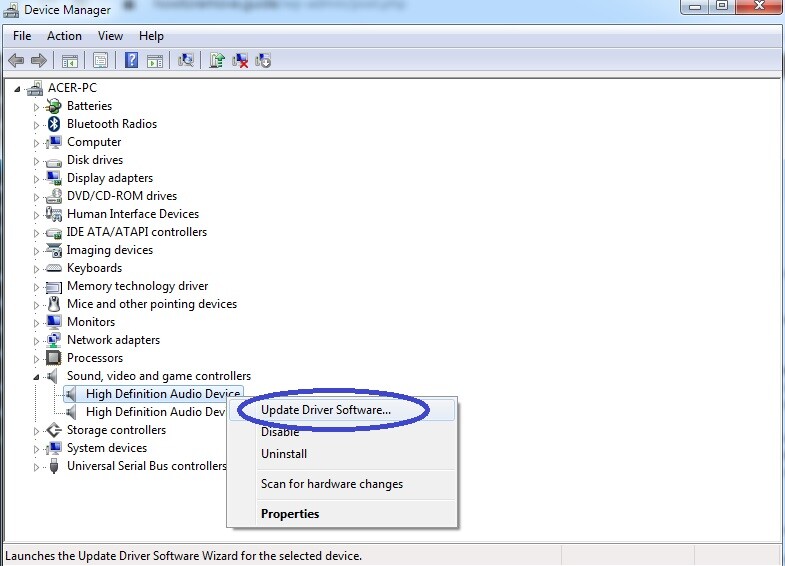
- Another way to install the missing driver is to, once again, expand the Audio inputs and outputs/Sound, video and game controllers icon, right-click on Microphone and select Update driver.
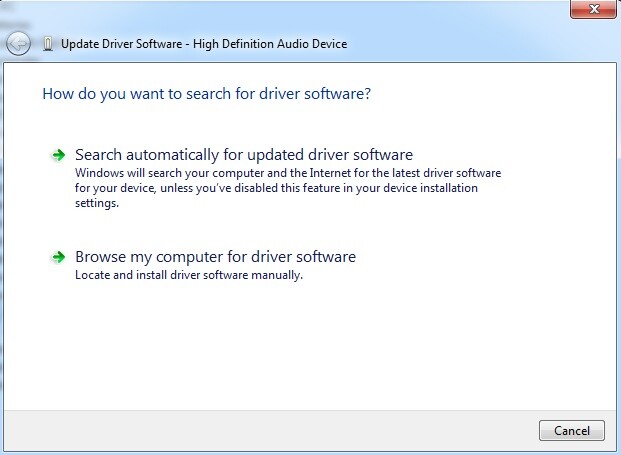
- The next window will ask you if you want the computer to automatically search for updates or if you want to manually browse your computer for driver software. If you haven’t previously downloaded proper mic driver software on your computer, you should go with the first option. If you want to do things as manually as possible (and use the second option) because Windows simply fails to automatically install the driver, you will need to go online and search for driver software for your specific computer/laptop and download it.


Fix 8: Using a Restore Point
This is our last fix suggestion and it can only be used if your computer already has a Restore Point from a moment in time before the mic problem occurred.
Using a Restore Point will bring your system back to an older working state and thus, hopefully, revert any system changes that may have brought about the problem with your microphone. Do not worry about your files because using a Restore point won’t affect it.
- To open the System Restore feature, open Run by pressing the Windows Key + R keys.
- In Run, type rstrui.exe and select OK to open System Restore.
- In the windows that will open, read the description of the tool if you want and click on Next.
- On the next page, you will see the different Restore points that are saved on your computer. Be sure to check the Show more restore points feature to see all available Restore points.
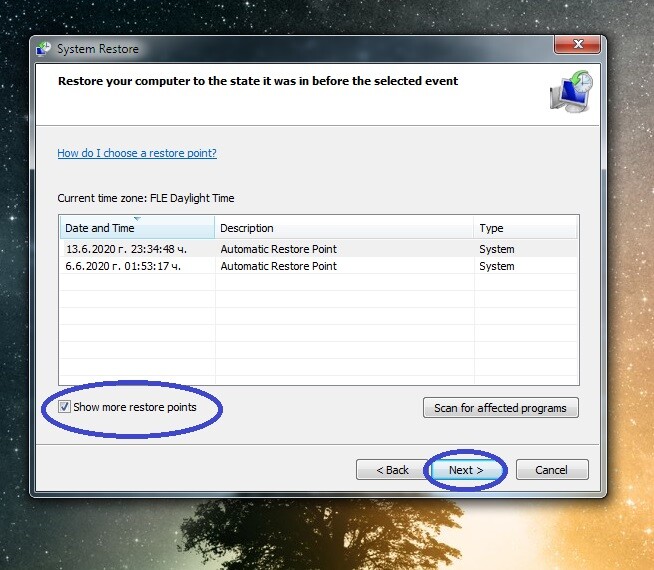
- See if there are any points that date back to a time when the mic issue wasn’t present and select one such point.
- Take a final look at the specifics of the selected Restore point and if you are okay with your choice, click on the Finish button to begin the process.
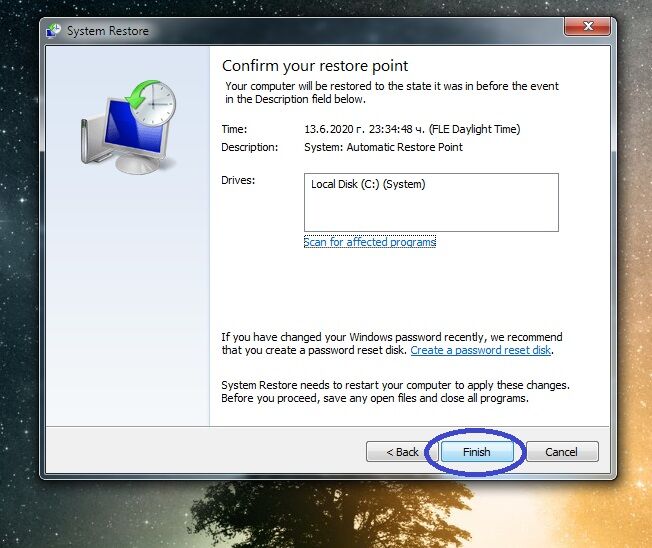
- Wait for the restoration to complete, restart the computer after it is finished, and see if this has helped fix your mic problem.


Final notes
If none of the fixes suggested here has worked, you should probably consider the possibility that there may be a hardware problem on the computer, especially if you are on a laptop that has problems with its built-in mic.
Of course, there could still be a software-related problem that’s causing the mic to not work which we haven’t covered here. If you think you know about another possible cause for the problem (and/or how to fix it), we’d be happy to read about it in the comments section down below.


Leave a Comment X