“App X” is the name of an adware-type unwanted program with some elements of a trojan. It’s more annoying than dangerous, truth be told. But at the same time it’s very hard to remove and requires specific custom instructions for the removal, and in the meanwhile it tries to infect you with more malware, so most users have a hard time dealing with it. Previous iterations of this malware use a different name and include BivaApp, KcozApp, GxuApp among others.

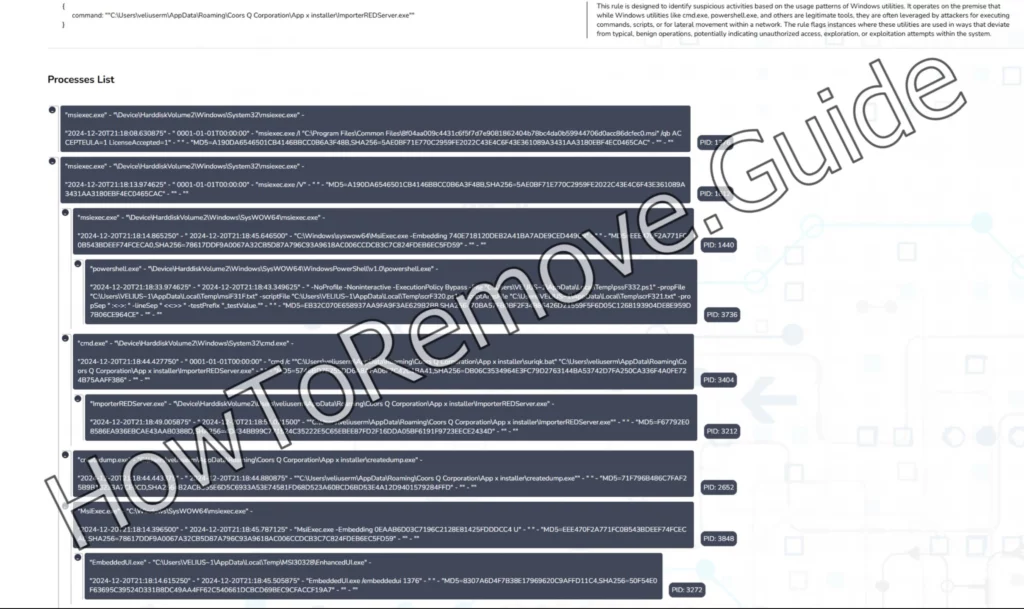
“App X” Removal Tutorial
The full guide takes a while to complete, so if a quicker removal method might do the job, I recommend trying it. Here are a couple easier steps that may rid you of “App X” in some cases:
- Start by opening the Start Menu and navigating to the Apps & Features section.
- Once you’re there, sort the list of programs by installation date. This small step can often reveal a lot—look for anything you don’t recognize, especially if it was added around the time your problems started.
- If “App X” or any suspicious software shows up, uninstall it immediately.
But here’s the thing: uninstalling might not be enough. Malware like “App X” has a sneaky habit of leaving behind leftovers.
- Head to the C:\Program Files and C:\Program Files (x86) directories and sift through them carefully.
- If you spot any files or folders tied to “App X”, delete them manually.
- Once you’ve done all that, restart your computer.
This may or may not take care of “App X”. In case the malware is still present after the restart, you’ll just have to complete the detailed guide below for a more thorough removal.

SUMMARY:
Important! Read Before Continuing
Removing “App X” adware manually can be a challenging and time-consuming task, often requiring over an hour and some technical expertise. For those who prefer a simpler and more efficient approach, SpyHunter 5 provides a reliable solution.
This advanced tool is specifically designed to handle adware removal with ease, eliminating the need for intricate manual steps. It’s an excellent choice for anyone who values speed and convenience in tackling unwanted software. Best of all, SpyHunter 5 is readily available right here, offering a straightforward way to resolve the issue without unnecessary effort.
How to Remove the “App X” Virus
There are two important preparation steps you must first complete before beginning the removal process itself. Do not skip these because they will ensure that you can perform all the following steps without missing any files linked to the malware that must be deleted:
First, you must install LockHunter, which is a free tool perfect for getting rid of files that stubbornly refuse to be deleted.
Also, before diving in, make sure hidden files and folders are visible on your system. Malware thrives in hidden corners, and you’ll need to bring everything into the open. To do this, open Folder Options via the Start Menu, switch to the View tab, and enable “Show hidden files, folders, and drives.” Once you’ve applied the changes, you’re ready to dig deeper.
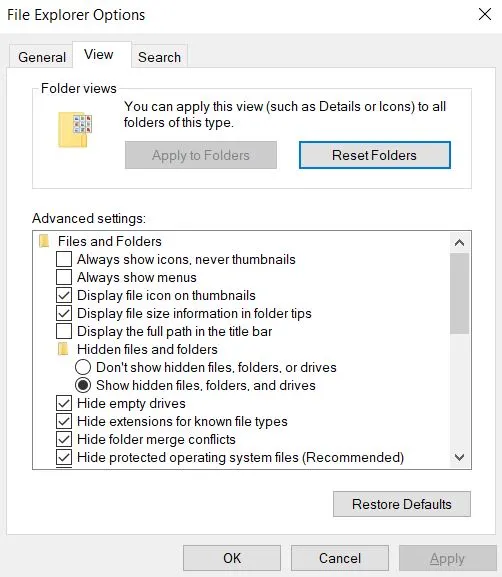
How to Show Hidden Files and Folders
Delete “App X” Virus Files
Now that you have LockHunter on the ready and any hidden files and folders in your system are visible to you, it’s time to begin the malware removal by first hunting down and deleting its files:
Start with the Roaming folder, located at C:\Users\YourUsername\AppData\Roaming. This is a favorite hiding spot for malware. Look for anything unusual—files with strange names or folders that seem out of place. If it looks suspicious, trust your instincts and delete it.
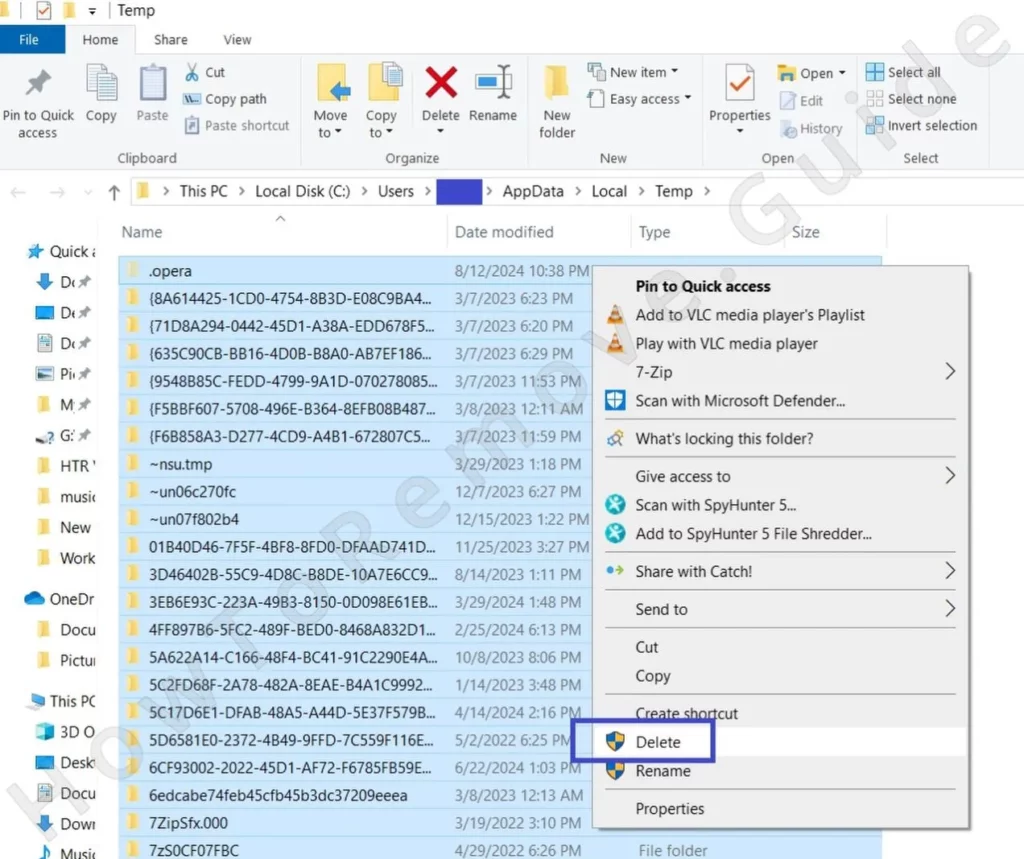
Next, head to the Temp folder, located at C:\Users\YourUsername\AppData\Local\Temp. This folder is essentially a dumping ground for temporary files, and malware often exploits it. Don’t hesitate—clear out the entire folder. It’s safe to do so, and it ensures you’re not leaving any room for malware to hide.
Finally, check the Startup directories, which control what programs launch when you start your computer. Malware loves to sneak in here. Look in the following locations:
- C:\ProgramData\Microsoft\Windows\Start Menu\Programs\Startup
- C:\Users\YourUsername\AppData\Roaming\Microsoft\Windows\Start Menu\Programs\Startup
If you see anything unfamiliar, remove it. And don’t forget to circle back to C:\Program Files and C:\Program Files (x86) one more time to ensure no traces of “App X” are left.
Using LockHunter for Stubborn Files
Sometimes, malware files just won’t budge no matter how hard you try. That’s where LockHunter comes in. This tool is your best friend when dealing with locked files.
Just right-click the stubborn file, click What’s locking this file?, and then click Delete in the next window. This step is crucial for clearing out remnants of “App X” that might otherwise stick around.
How to Delete Persistent Files with Lock Hunter
Get Rid of “App X” in the Task Scheduler
Don’t forget about the Task Scheduler. Many users ignore this step and that’s how the malware is able to return even after they remove it. You must examine this part of your system for tasks linked to “App X” and delete them. Here’s how:
Open the Task Scheduler from the Start Menu (search for it there) and go to the Task Scheduler Library.
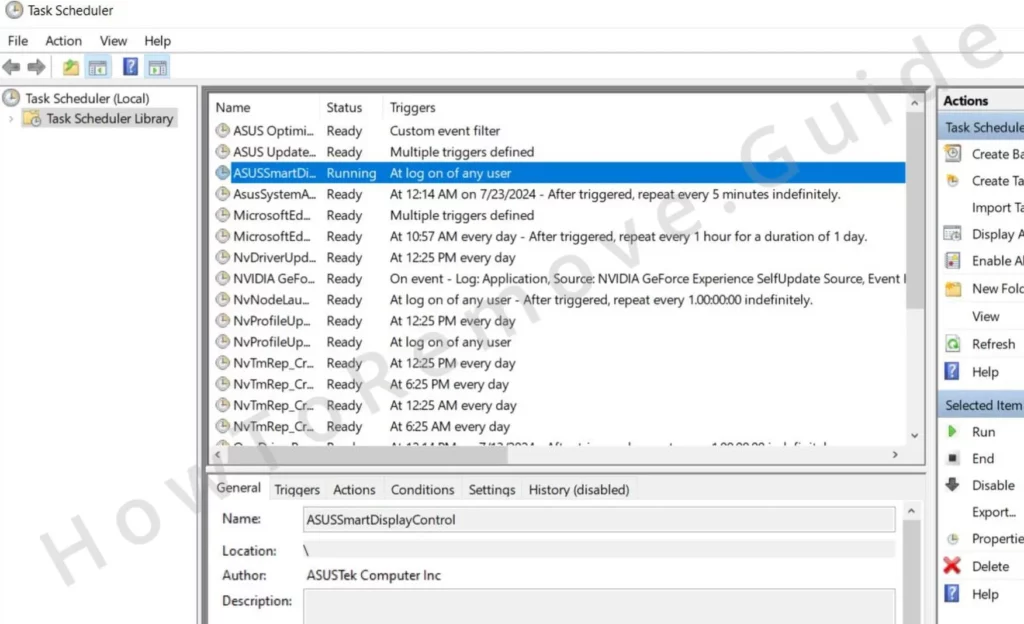
Take a close look at the tasks listed there. Check the Actions tab of each task.
Anything with a suspicious or unfamiliar name should go. Same with any task set to run sketchy-looking .exe files or script files.
Deleting these rogue tasks ensures that “App X” can’t stage a surprise comeback.
Remove “App X” From the System Registry
Performing a Registry cleanup is a must if you are trying to manually remove “App X”. Just note that this step requires you to do most of the leg work and mistakes here, such as deleting something you shouldn’t can lead to problems with the system. So if you don’t feel comfortable cleaning out the Registry on your own, consider using SpyHunter. On the flip side, if you think you can handle it, here’s what you need to do:
Open the Registry Editor by typing “regedit” into the Start Menu and running it as an administrator.
Once you’re in, use the search function (Ctrl + F) to locate entries tied to “App X”. Be thorough—check these key locations:
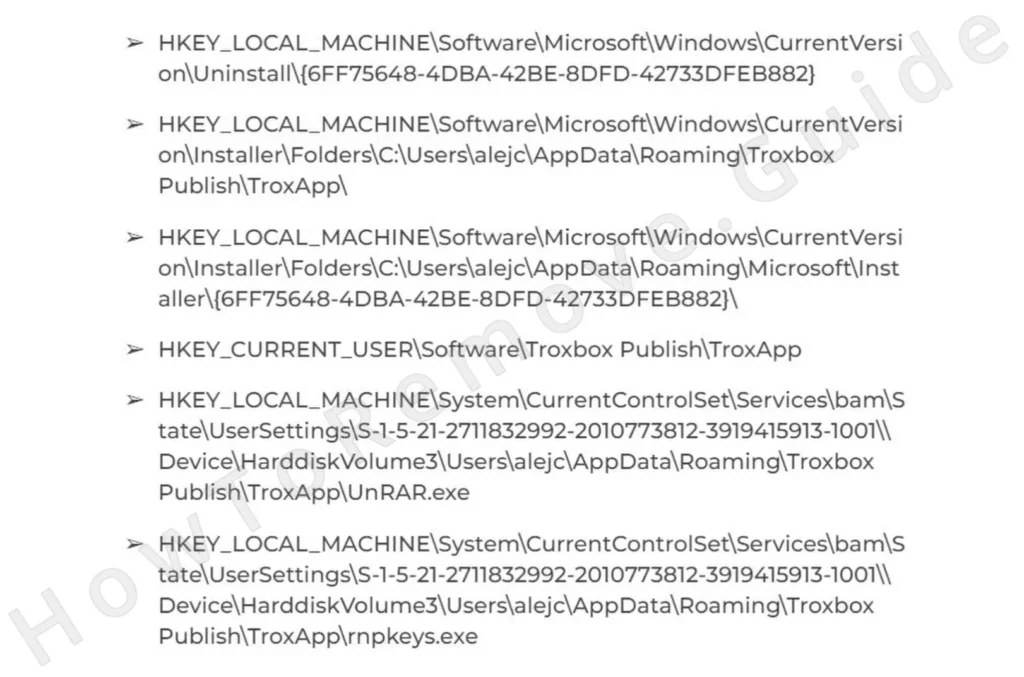
Before you make any changes, back up the registry to avoid potential mishaps. Delete only the entries that are clearly linked to “App X”, as removing the wrong keys could destabilize your system.
Video walkthrough for this step:
Delete “App X” Browser Policies
If you’ve also spotted any unwanted changes in your browser, it’s probably directly tied to the presence of “App X” in you system. Check the bottom of browser’s menu for a “Managed by your organization” message and if you see it, this indicates the presence of a thrid-party policy in the browser that you must remove in the following way:
Search for “Edit Group Policy” in the Start Menu, open the Group Policy Editor, and navigate to Computer Configuration.
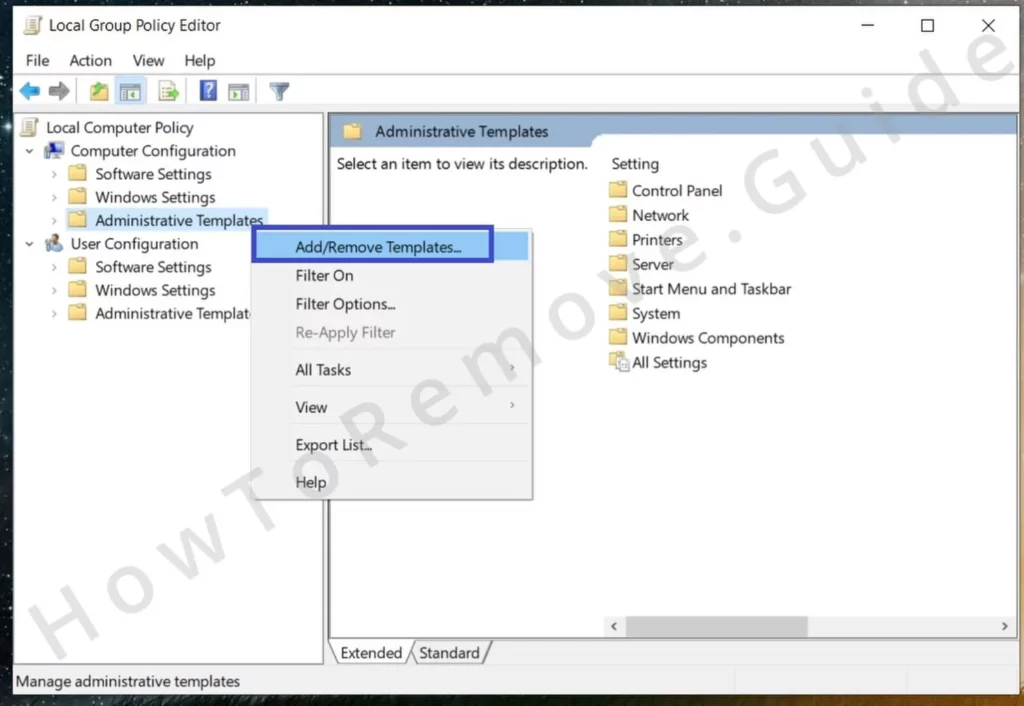
Right-click Administrative Templates, select Add/Remove, and delete everything you see in the next list.
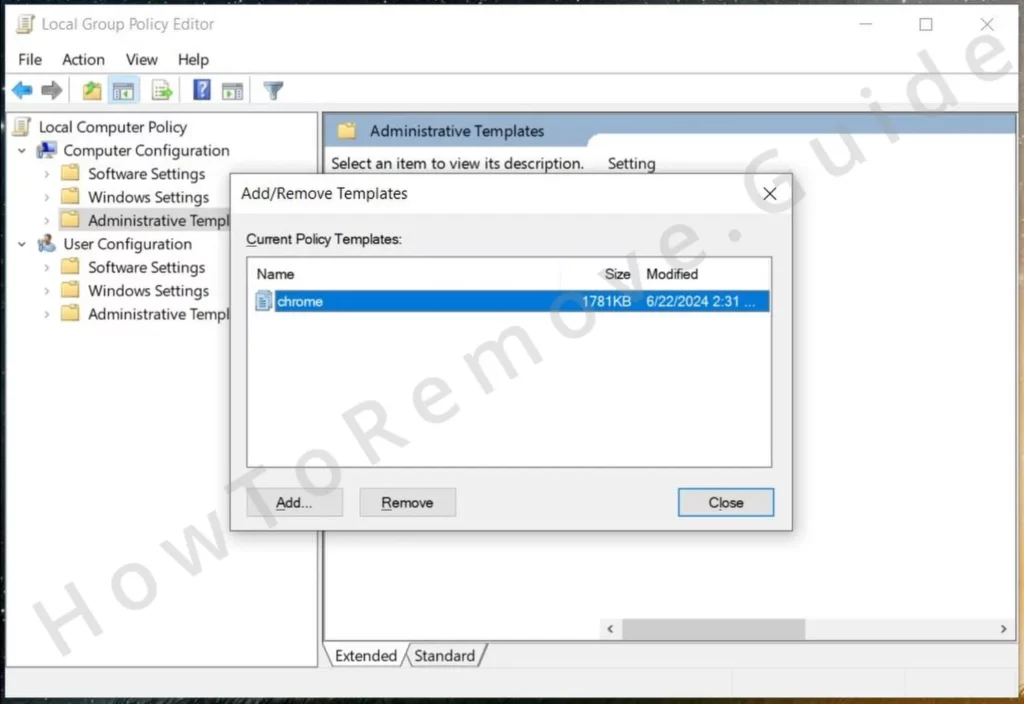
For Chrome users, tools like Chrome Policy Remover can save you time by automating the process of removing these policies.
Uninstall “App X” From Your Chrome, Edge, and Other Browsers
Once the rogue policy is removed from your browser, you’ll be able to reverse any changes “App X” might have made to its settings. Here are the main settings section that the malware has likely modified without your permission – be sure to restore them to the way they were before “App X” got installed on your PC.
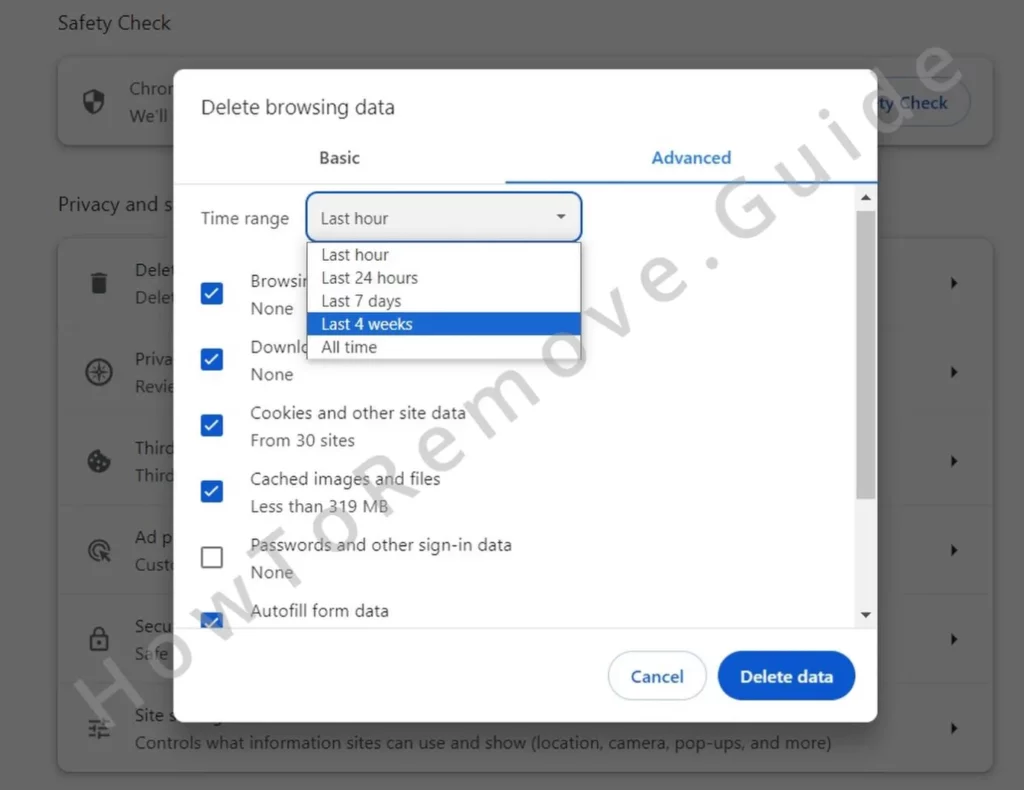
Start by clearing your browser’s cache, making sure to select the “All Time” option. Delete all data types except Passwords.
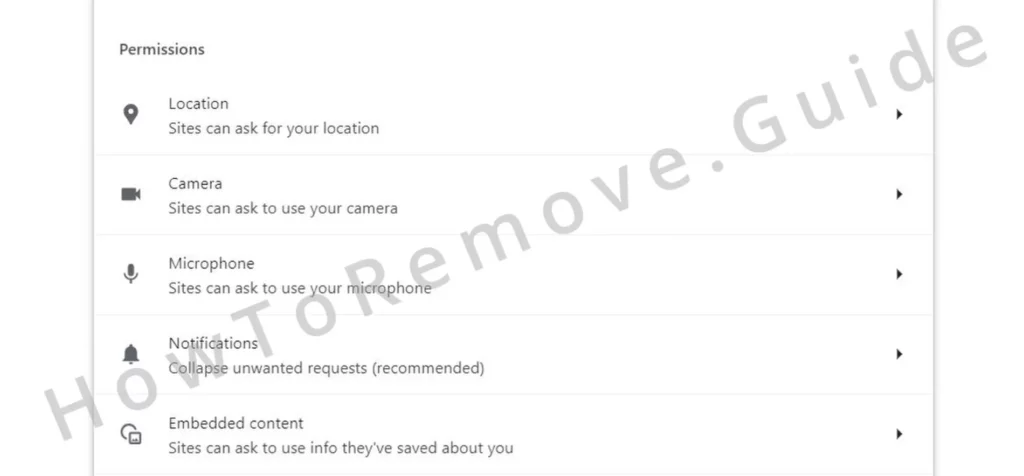
Next, review each permissions category in Site Settings for any unfamiliar URLs and delete anything sketchy you may find.
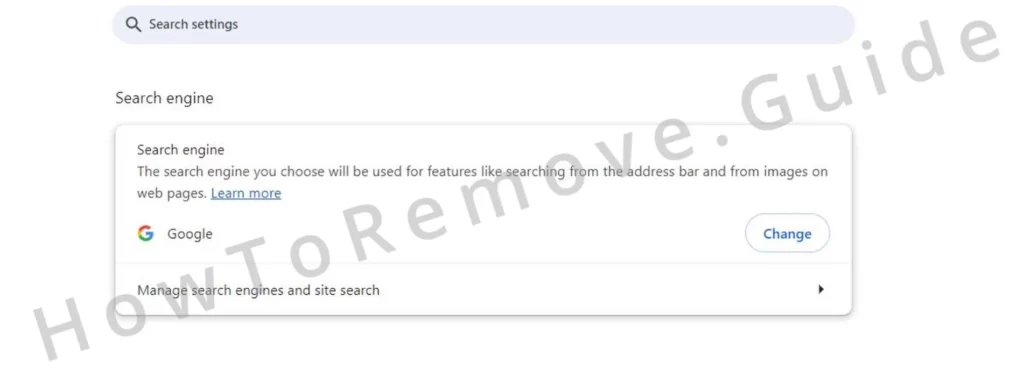
Finally, reset your default search engine, homepage, and startup settings to regain full control of your browsing experience. In the Manage Search Engine section of the Search Engine settings, make sure to remove any unfamiliar URLs that might have been placed there by the hijacker.
Video walkthrough for this step:
Chrome
Microsoft Edge
Mozilla Firefox
Final Thoughts: Stay Vigilant
Removing malware like “App X” takes time and effort, but the results are worth it. Following these steps should rid your system of the problem for good. To prevent future infections, consider installing a reputable antivirus program and keeping your system updated. Be cautious about the websites you visit and the software you download—malware often relies on human error to slip through the cracks.
Stay informed, stay prepared, and you’ll be able to protect your system from threats like “App X” in the future.

Leave a Reply