If your browser suddenly swapped itself out for something called SearchG and now you can’t change it back, you’re not alone – this is exactly what a browser hijacker does. SearchG tends to just appear out of nowhere on a laptop or PC, and once it’s there, you’ll notice the most frustrating part: no way to set another browser as default, no Google search option, and no clear explanation of where it came from. That “locked-in” feeling is the signature move. You dig around online, hoping to find out what SearchG even is, but come up empty – that’s because hijackers like this aren’t well-documented by big companies, even though they’re disruptive. They sneak in through bundled downloads or shady permissions, then limit your choices to push their own search tools, ads, or worse. The sooner you recognize that this isn’t just a quirky new browser but an unwanted hijacker, similar to Searchcalm.com or Pongponger.click, the better your chances of kicking it off your system.
SearchG may expose your browser to redirects, ads, and persistent unwanted components. Install SpyHunter Pro to scan for risks, remove related threats, and enable real-time protection.
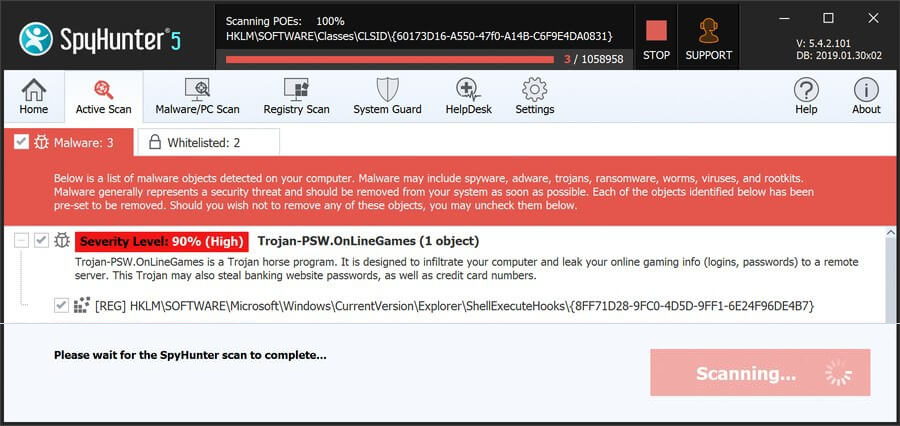
*Source of claim SH can remove it. Trial w/Credit card; image is for illustration; full terms.
SearchG Removal Tutorial
Here’s the part where calm beats speed. When a browser starts misbehaving, people often toggle random settings, install dubious cleaners, and reboot endlessly. That scramble helps SearchG keep a foothold. Slow down. We’ll confirm what changed, undo the obvious tampering, and only then dig deeper. Follow the sequence exactly, avoid improvising, and prefer built-in controls over third-party tools unless noted.
Quick Steps to Remove SearchG
- 1.1Wondering where to begin? Start with your everyday browser’s Settings and work inward. In Chrome, open the ⋮ menu and choose Settings, then Extensions. In Firefox, use the ☰ menu to reach Add-ons. Review every entry with care, not speed. Look for odd publishers, unfamiliar install dates, and generic icons. If anything clearly ties to SearchG or you don’t recall adding it, remove it now to stop it from running during the rest of the cleanup.
- 1.2Because look-alikes exist, treat each extension as suspect until proven harmless. Inspect its name, icon, listed permissions, and description. Excessive permissions for a simple tool are a red flag. Uninstall anything that fails this check. Unsure about one? Search the exact extension name in quotes to find user reports and reputation notes. Favor well-known developers and many recent positive reviews before keeping it.
- 1.3If pop-ups or prompts keep appearing, permissions likely got flipped. Open Privacy and Security in your browser’s settings, then Site Permissions or Site Settings. Expand camera, microphone, location, and notifications. Remove domains you don’t recognize or no longer use. Permissions often outlive the site that requested them, so pruning here immediately reduces pop-ups and forced redirects.
- 1.4Policy changes don’t fully apply until the browser restarts. After trimming those permission lists, close the browser completely and relaunch it to commit the settings. Deleting unknown sites here blocks push notifications and background prompts. If the same symptoms return after this restart, the problem likely sits deeper than extensions alone, so keep going with the full guide below to root it out properly.
Often, this quick fix is enough to restore order. But if SearchG is still hanging around, it’s time to dig deeper.
SUMMARY:
| Name | SearchG |
| Type | Browser Hijacker |
| Detection Tool |
Some threats reinstall themselves if you don’t delete their core files. We recommend downloading SpyHunter to remove harmful programs for you. This may save you hours and ensure you don’t harm your system by deleting the wrong files. |
How to Remove the SearchG Virus
The message “Managed by your organization” at the top of a consumer browser isn’t normal on a personal PC. It means local policies are steering settings and may be locking menus. That control model is attractive to adware because it persists across reboots and new profiles. Treat such a banner as evidence that SearchG slipped in policy keys that must be located, documented, and removed in the right order.

1. Identify the SearchG Policies
- 1.1
 Policies first, because they override preferences. In Chrome, type chrome://policy in the address bar. In Edge, use edge://policy. Wait a moment for entries to load completely, then scan for unfamiliar names, odd URLs, or settings you didn’t configure. Capture screenshots or jot notes so you have an exact list tied to the current state before any deletions touch the machine controlled by SearchG.
 - 1.2Ambiguity helps hijackers. Open each policy entry and read its value carefully. Vague identifiers or gibberish-looking names often accompany forced startup pages and extension installs. Record policy names and values verbatim. Good notes let you search the Registry Editor precisely later. If an entry seems legitimate but you’re unsure, flag it but don’t remove it yet. Verification beats guesswork.
- 1.3Next, correlate policies with installed code. Go back to the browser’s Extensions page and toggle Developer mode. You’ll now see each extension’s ID and install path. Write down any IDs tied to suspicious permissions or forced installs. That mapping reveals the folders to target on disk so deletions are specific, not broad. Precision here prevents breaking unrelated extensions.
- 1.4Some hijacks block the extensions UI outright. If that happens, bypass the browser and use File Explorer instead. You can still audit files even if the settings page is disabled. Keep your earlier list of IDs handy for comparison. This detour avoids wasting time fighting a blocked menu and keeps progress moving.
- 1.5
 With the IDs in hand, open File Explorer and navigate to C:\Users<Your Username>\AppData\Local\Google\Chrome\User Data\Default\Extensions. Each subfolder name matches an extension ID. Compare folders to the IDs you noted. When one aligns with a malicious entry, confirm it isn’t needed, then delete that entire folder. Removing the folder stops the extension from reinstalling itself at browser startup.
 - 1.6
 Use another Chromium browser? Repeat a similar check in its AppData location. Brave, Opera, and others store extensions under their own user-data trees. Delete only folders linked to suspicious IDs. Consistency across browsers closes side doors where a second profile could silently re-seed unwanted settings into your main browser.
 - 1.7Return to the Extensions page with Developer mode still enabled to verify the malicious item is gone. If the extension reappears after a few seconds, sync likely brought it back from your cloud profile. Temporarily disable Sync in the browser’s settings, remove the item again, and keep sync off until the cleanup is fully complete.
Get Rid of SearchG Policies
Registry edits can fix policy locks when the UI won’t. The risk is that one wrong deletion can destabilize Windows, so measured steps matter more than speed. Create a full backup before changes and keep notes on what you remove. If anything looks unrelated, stop and confirm. The aim is to remove only keys that enable SearchG to enforce policies on the browser.
2. How to Delete SearchG Policies Through the Registry
- 2.1Before any edits, open tools safely. Press Windows + R, type regedit, and press Enter to launch Registry Editor. Immediately create a backup via File → Export, choosing All for the export range. Save the file somewhere predictable, like Documents, so you can restore it if needed. That one export protects you while you clear the specific keys linked to SearchG.
- 2.2Targeted searches beat wandering. Press Ctrl + F or use Edit → Find, paste the suspicious extension ID or exact policy name you documented, and search the registry. When a match appears, confirm it’s the same item, then delete the key or value. Press F3 to continue and keep deleting matches until no further results are found. Thorough repetition prevents partial policy leftovers.
- 2.3
 Sometimes Windows blocks deletion of a protected key. Right-click the stubborn key, choose Permissions, then select Advanced. Click Change next to Owner, type Everyone, and hit Check Names to resolve it. Accept the change and return to the permissions window. This ownership shift is temporary and gives you the leverage needed to finish the cleanup.
 - 2.4
 Still in Advanced permissions, enable
– Replace owner on subcontainers and objects
– Replace all child permission entries with inheritable permissions from this object. Click Apply, then OK. Delete the key that refused to budge earlier. Restart Windows to release any cached policy data, then open the browser to confirm the “Managed by your organization” banner is gone.
This gives you the access needed to delete the rogue key.
Alternative Tools to Delete SearchG Policies
Persistent hijacks like this often plant settings in multiple policy stores, group policy templates, or synced profiles. That redundancy is deliberate, designed to survive partial removal attempts. Methodically clearing all the places policies can live is what finally dislodges SearchG for good, even if it seemed to disappear and then return during earlier steps.
3. Other Ways to Get Rid of SearchG Policies
- 3.1
 Centralized policies come next. Press Windows + S, type Edit Group Policy, and open Group Policy Editor. In the left pane, expand Administrative Templates under Computer Configuration and User Configuration. This console applies rules at logon, which is why hijackers target it. We’re looking for unexpected templates or configured items that don’t belong and could reapply unwanted browser policies for SearchG.
 - 3.2
 Templates can hide extra settings. Right-click Administrative Templates and choose Add/Remove Templates. Remove entries you didn’t install yourself. Unknown templates are common vehicles for silently reasserting start pages or forced extensions. Keep at least one known-good template in place, and remove only those that are clearly foreign to your environment.
 - 3.3For Chrome-specific policies, a reputable Chrome Policy Remover utility can speed up cleanup. Download it from a trusted source, then right-click and choose Run as administrator so it has permission to edit protected keys. Tools like this focus on the exact policy branches that drive forced settings and can save time when many values are present.
- 3.4SmartScreen may warn about uncommon downloads. If you trust the source, click More Info → Run Anyway to proceed. Let the tool finish and then restart Windows. After reboot, review both Registry Editor and Group Policy Editor to confirm the problem policies are gone. Removing them in both places prevents the same entries from being re-created at logon.
Uninstall SearchG From Chrome, Edge, and Other Browsers
Even a clean system can feel compromised if the browser keeps outdated data. Caches store redirects, notification permissions linger, and search providers can be replaced quietly. A final pass through the browser’s profile ensures future sessions start from a known-clean state. That’s how you prevent SearchG from riding leftover settings back into daily use.
4. How to Remove SearchG From Your Browser
- 4.1Start with visible add-ons again to confirm nothing returned. Open Extensions or Add-ons and remove any item that reappeared since earlier steps. If something keeps coming back, investigate Sync settings and turn syncing off temporarily. That isolates the local profile from cloud-stored data and stops SearchG-related entries from being restored during sign-in.
- 4.2
 Old data fuels new redirects. Open Clear Browsing Data. Set the time range to All Time. Leave Saved Passwords unchecked, but remove cookies, cached files, and site data. This invalidates stale sessions, purges service workers, and clears cached scripts. Expect some sites to sign you out afterward, which is normal and part of the reset.
 - 4.3
 Next, trim live permissions. In Privacy and Security → Site Settings, remove microphone, camera, and notification access for domains you don’t recognize. Pay attention to entries with “Allowed” status you didn’t explicitly grant. Reducing these vectors cuts off push prompts that can reopen tabs and re-authorize unwanted behavior without fresh user clicks.
 - 4.4
 Hijackers often switch your search tool. Open Search Engine Settings → Manage Search Engines. Remove search providers you didn’t add and set your preferred engine, such as Google, Bing, or DuckDuckGo, as the default. Also check the On-device and Extensions sections for injected providers. Consistency here ensures the address bar behaves predictably.
 - 4.5Finally, confirm startup behavior. Under On Startup or Appearance, clear unfamiliar homepages or startup pages. Set a trusted site or a blank page. If the browser supports multiple startup tabs, remove extras you didn’t create. This prevents surprise loads and ensures the session begins clean, blocking any lingering redirect tied to previous policy entries.
If anything resurfaces later, revisit the policy pages, rescan the registry for the same IDs, and keep Sync disabled until you’ve cleaned other signed-in devices. Malicious settings often hide in more than one place, but the checklist above closes the common loops without risking system stability.