How to Fix Windows Error 126
The 126 error Code is usually related to some issues with the configuration of the system files in Windows operating systems. It may be caused by the damage of some system files and entries, which, in turn, may lead to instability of the entire OS. An incomplete installation of software, incomplete uninstallation of different applications, improper deletion of data or force shutdown of the computer, may all result in the occurrence of the 126 error Code. In some cases, the error may appear if your computer is recovered from a virus attack where the deletion or the corruption of entries in the windows registry may lead to missing and wrongly linked files, which are needed for the proper operation of the PC. If you are recently facing the error 126 Code on your computer, then, on this page, you will find a helpful list of instructions, which could help you to troubleshoot the problem on Windows Windows 8.1/ 8, 7 and Vista operating systems.
Fixes to error 126 Code for Windows 8/8.1, 7 & Vista
Fix 1: Reinstall iTunes and other problematic applications on your computer
If error 126 Code appears when you are trying to use iTunes, other Apple products or different applications that you have installed on your PC, it means that there is something wrong with the system, the program files may be missing or corrupted and, in that case, you may need to reinstall the software products to get rid of the problem.
Reinstall programs in Windows 8.1/ 8:
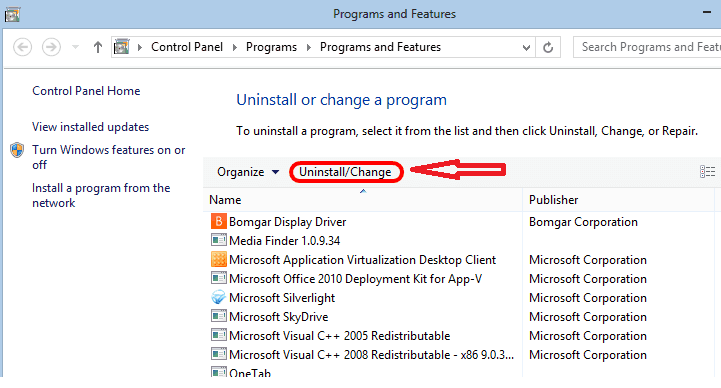
- Press Windows Key + X and then click on “Programs and Features”.
- Right click a program that you would like to uninstall and choose the “Uninstall” option.

It is advisable to first try to uninstall the following programs and see if the problem is fixed: Apple Application Support, Apple Mobile Device Support, Apple Software Update, Bonjour, iCloud, iTunes, MobileMe
- Next, restart your machine.
- Select My Computer desktop shortcut and manually remove the following folders:
C:\Program Files\Bonjour
C:\Program Files\Common Files\Apple
C:\Program Files\iPod
C:\Program Files\iTunes
- Download new setup of iTunes from the official website and install it on your computer.
Reinstall programs in earlier versions of Windows:
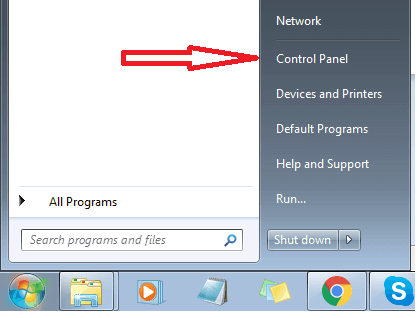
- Click the Start menu and select the Control Panel

- select Programs>Uninstall a Program
- Repeat the steps from 2 to 5 from the Reinstall programs in Windows 8.1/ 8 paragraph.
Fix 2: Modify the system variables as shown below:
For Windows 8.1/ 8 and Earlier Versions:
- Right click on My Computer desktop shortcut.
- Select Properties and click on the “Advanced system settings” link (displayed on left side panel).
- A System Properties dialog box will appear with Advanced tab opened as default.
- Click the “Environment Variables” button and select “System Variables”.
- There, you’ll find “Path” in the “Variable” variable. Select it and click the Edit button.
- You may find some value specified in “Variable Value” textbox. Do not replace it. Just type a semi colon (;) at the end of the existing value and the new path specified: 6.a) In case “Variable Value” textbox is empty, type below command:
%SystemRoot%\system32;%SystemRoot%;%SystemRoot%\System32\wbem 6.b) In case “Variable Value” textbox is filled with some paths, type below command:
;%SystemRoot%\system32;%SystemRoot%;%SystemRoot%\System32\wbem
- Click OK and reboot the computer.
Fix 3: Set Windows Defender to run Automatically
In case that the startup type of Windows Defender has been changed, you’ll have to reset it to “Automatic” in order to fix error 126 Code. 
This is how to do that for Windows 8.1/ 8 and Earlier Versions:
- Press Windows Key + R
- Type “Services.msc” and click “OK”
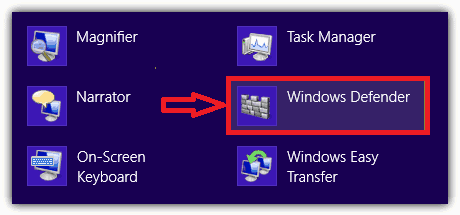
- Scroll down, locate and right click “Windows Defender” and select “Properties”
- Under “General” tab and “Startup Type” drop down box select “Automatic” option
- Click on “Apply”, and then “OK:
Fix 4: Delete Repository Folder
Error 126 may occur when the files in the Repository folder are corrupted. To use this fix, first, stop Windows Management Instrumentation service and then delete this folder. It is very important to stop the service before proceeding since it uses the Repository Folder.
For Windows 8.1/ 8 and Earlier Versions:
- 1.Press Windows Key+ R
- Type “Services.msc” and click “OK”
- Right click “Windows Management Instrumentation” service and select “Stop”
- Close the tool and then select the My Computer desktop icon
- Browse the following folder: C:\Windows\System32\Wbem
- Delete “Repository” folder and restart your PC
Fix 5: Copy Missing File from the Installation Disc
Error 126 Code may appear when “srvsvc.dll” file is missing. This file is located in the i386 folder in Windows installation disc. The same file is copied to your hard disk during Windows installation. To fix the problem, copy the file again to your hard disk with Command Prompt and place it in the correct directory.
Here is how to do it for Windows 8.1/ 8:
- Insert Windows 8.1/ 8 installation disc
- Press the Windows Key + X and click “Command Prompt (Admin)”
- Type the following command:
expand X:\i386\srvsvc.dl_ C:\Windows\system32\srvsvc.dll
(In above command, replace “X” with the appropriate DVD Drive letter)
- Press ENTER
For Earlier Versions of Windows:
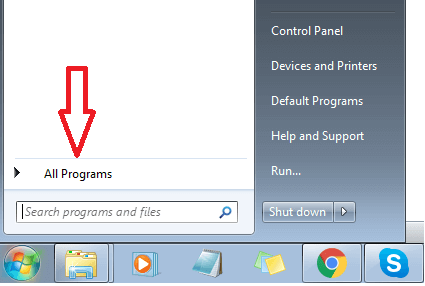
- Click the Start menu, hover your mouse at All Programs | Accessories

- Right click Command Prompt, choose Run as Administrator
- Type the following command:
expand X:\i386\srvsvc.dl_ C:\Windows\system32\srvsvc.dll
(In above command, replace “X” with the appropriate DVD Drive letter)
- Press ENTER
Fix 6: Repair the WinSock with the command given below.
For Windows 8.1/ 8 and Earlier Versions:
- Open Command Prompt as mentioned in “Copy missing file from installation disc” paragraph
- Type the following commands:
netsh winsock reset
netsh advfirewall reset
3. When you’re done with the execution of these commands, reboot your computer.
Fix 7: Reregister DLL File
The 126 error Code may also signify that the DLL file registration entries can be corrupt. Unregister and reregister the DLL file as shown below to fix the issue:
For Windows 8.1/ 8 and Earlier Versions:
- Open Command Prompt as mentioned in “Copy missing file from installation disc” paragraph
- Type the following command- RegSvr32.exe MSSTDFMT.DLL
- Press ENTER.

Leave a Reply