Find It Pro (find-it.pro) is a fake search engine that hijacks the settings of the browser and reroutes the user’s searches to modified search result pages that will often promote rogue sites and harmful content. When I tried visiting this site manually, I tried its search option, which got me redirected to maxask.com (link to our Maxask article), which is another commonly encountered hijacker site/fake search engine.
According to my research, Find It Pro is often enforced within the browser by rogue extensions with innocuous names that may not raise your suspicion at first. Examples of such names are Offline Google Docs, Google Spreadsheets, YouTube Ad-blocker, etc. If you see anything like this in your browser and you haven’t added it yourself, it’s almost certainly linked to the hijacker and so it must be removed.
Below, you’ll find detailed removal steps for Find It Pro, so I strongly recommend completing them if you are presently dealing with this hijacker.
Find It Pro Removal Guide
You might be able to get rid of this hijacker the easy way if you are lucky. That’s why I recommend trying this next more conventional removal method before moving on to the full guide further down the page.
- Access your browser’s settings, then find the Extensions section.
- You probably won’t see Find It Pro there as it probably hides under a different name. Look for any extensions you haven’t installed yourself and delete them.
- Next, for Chrome users, move to the “Privacy and Security” section. In Edge, go to “Cookies and Site Data”.
- Access the Notification and Pop-up permissions categories and look for unfamiliar URLs.
- Anything that looks unsafe must be deleted/blocked immediately. These permissions enable Find It Pro’s intrusive pop-ups.
- Then go to the Search Engine settings and set the default search provider for the browser to Google or another legitimate one.
After you complete these quick steps, restart your browser and see if things are back to normal now. For instance, try to search for something through the browser’s address/search bar and see if you get rerouted to Find It Pro. If all seems fine now, no need to perform the next steps.
But if Find It Pro is still being a nuisance, then head down to the advanced removal tutorial below.
SUMMARY:
| Name | Find It Pro |
| Type | Browser Hijacker |
| Detection Tool |
We tested that SpyHunter successfully removes Find it pro* and we recommend downloading it. Manual removal may take hours, it can harm your system if you re not careful, and Find it pro may reinstall itself at the end if you don’t delete its core files. |
Before you continue, be warned that it’s best to have some technical experience when performing the following steps. Also, note that the completion of the guide can take upwards of an hour.
If you think you won’t be able to complete everything or simply lack the time for it, I recommend opting for the alternative solution of using SpyHunter 5. This is a potent tool capable of dealing with the Find It Pro hijacker that can also protect you against future threats of various types.
How to Remove the Find It Pro Virus
Most hijackers today exploit the enterprise policies feature that many Chromium browsers have to lock you out of the browser’s settings. The “Managed by your organization” label in the browser menu or on the Settings page indicates the presence of such a policy.
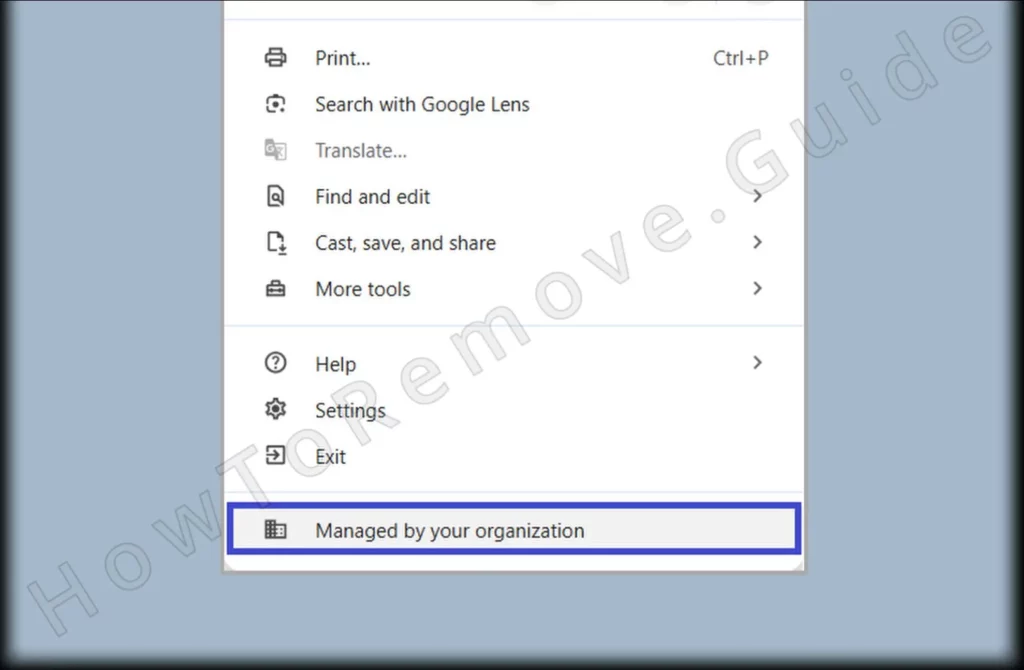
You must first deal with the rogue policy to be able to restore your browser’s normal state.
Open the specific policy page for your browser. Visit one of the following addresses depending on what browser you are using:
- Chrome://policy for Chrome
- Edge://policy for Edge.
- Brave://policy for Brave
…etc. You get the idea – just change the name in the URL with the name of the browser you are using.
On that page, pay attention to the Policy Value section. You’ll likely see a strange entry with random letters. Copy that value and save it in a sticky note or a text file – you’ll need it soon.
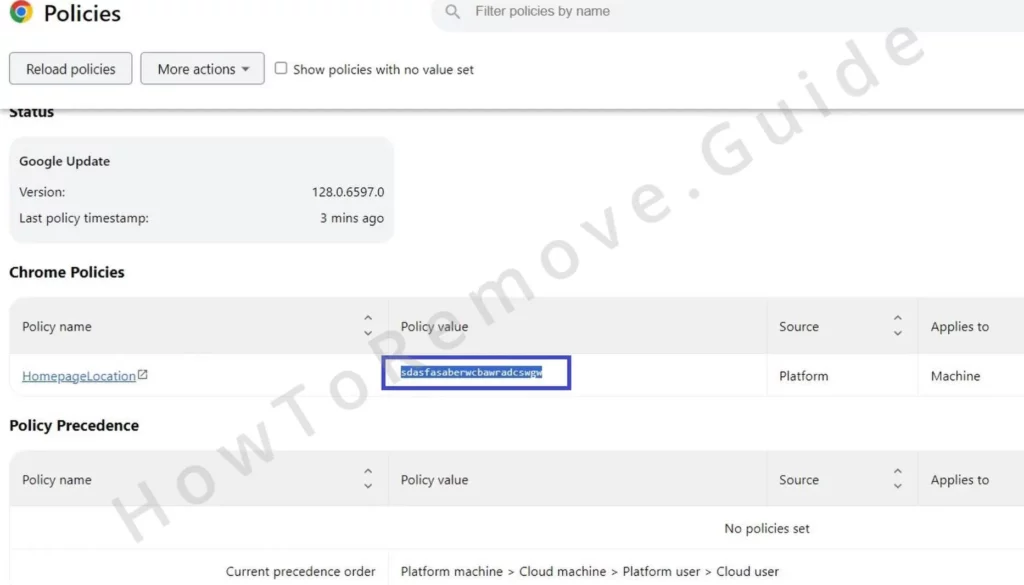
Then visit the Extensions page to collect the ID of any rogue extensions that are still present in the browser.
Note that certain hijackers will lock you out of browser settings by redirecting you to different pages (Google, Yahoo, etc.).
You can bypass this restriction by going to the browser’s extensions data folder and deleting its contents.
Chrome users will find that folder at C:\Users\[Your Username]\AppData\Local\Google\Chrome\User Data\Default\Extensions.
The folders for other browsers have different paths. Here are these paths for several other commonly used browsers:

Once inside the folder, delete all extension folders. Removing these directories eliminates all add-ons, but don’t worry about legitimate extensions – it’s really easy to get them back.
Now that the extensions’ data has been purged, you should be able to return to the Extensions Manager.
Go to it, toggle on Developer Mode, and look for the IDs of the rogue extension/s.
Important!
As noted earlier, Find It Pro will often disguise its extension by giving it a different name – one that looks innocuous and doesn’t raise any suspicion.
For instance, many users report seeing extensions they don’t remember installing, named Offline Google Docs, Google Spreadsheets, YouTube Ad-blocker, or other similar ones. These are all the Find It Pro hijacker in disguise, so if you see any extension you don’t remember adding yourself, note down its ID.
If the IDs aren’t visible on the Extensions Manager page, you need to click each extension individually to see its ID on the next page.
Once you find them, save them next to the rogue policy value/values.

Video walkthrough for this step:
How to Get Rid of Find It Pro in the System Registry
With the data you gathered in the previous step, you’ll now be able to hunt down and delete keys that Find It Pro has added to your System Registry to enforce its third-party policy.
Access the Registry Editor by typing “regedit” in the Start Menu. You must open the Editor with administrator privileges.
Use the “Find” function under Edit and search for each policy value or extension ID you saved.
When a related item is found, delete it in the left panel and search again for the same query. The goal is to keep deleting rogue keys until the search no longer finds anything.
Once you’ve deleted all keys related to one of the values/IDs, search for the next one and continue like that until there are no more rogue entries left in the Registry.
Important!
Some of the malware keys could have restricted access which will result in an error when you try to delete them. The solution I found is this:
- Right-click the parent key and select Permissions.
- Then choose Advanced and click Change from the top.
- Type “everyone“, click Check Names, and then OK.
- Enable the two “Replace” options in the previous window and then click Apply > OK.
The key should now be back under your control.
Once you’ve cleaned the Registry, there should be no more rogue policies in the browser. But if the “Managed by your organization” message is still there or if the Registry cleanup seems too complicated, I’ve got two alternative solutions below.
Video walkthrough for this step:
Alternatives Ways to Delete Find It Pro Malware Policies
Here are two more ways you can get rid of rogue Find It Pro policies:
Alternative 1
- Type “Edit Group Policy” in the Start Menu.
- Navigate to Local Computer Policy > Computer Configuration.
- Right-click Administrative Templates > Add Remove Templates.
- Remove all items in the next list.
Manual Group Policy Removal
Alternative 2
- Download the Chrome Policy Remover tool.
- Open the tool with admin rights.
- If you get a Window Security warning, click “More Info” > “Run Anyway”. The tool is perfectly safe so don’t worry about the warning.
- Let the tool automatically run the policy removal script. Once it’s finished, there will be no more policies in your Chrome browser.
Automatic Group Policy Removal
Note that this method works only for the Google Chrome browser. If you are trying to clean a different browser, opt for one of the other provided methods.
How to Remove Find It Pro From Chrome and Other Browsers
Your browser should now be free of any rogue policies. Time to finalize the cleanup and get rid of any remaining Find It Pro influence.
Return to your browser’s Extensions Manager to eliminate any last rogue extensions.
Once again, carefully look for any items with seemingly normal names that you don’t remember adding yourself. If you find anything like that, remove it, even if it doesn’t look harmful.
After clearing these add-ons, open Privacy and Security settings. Choose the “Clear browsing data” option, select “All Time”, and tick all data types. The only one I recommend leaving unchecked is Passwords and other login data.
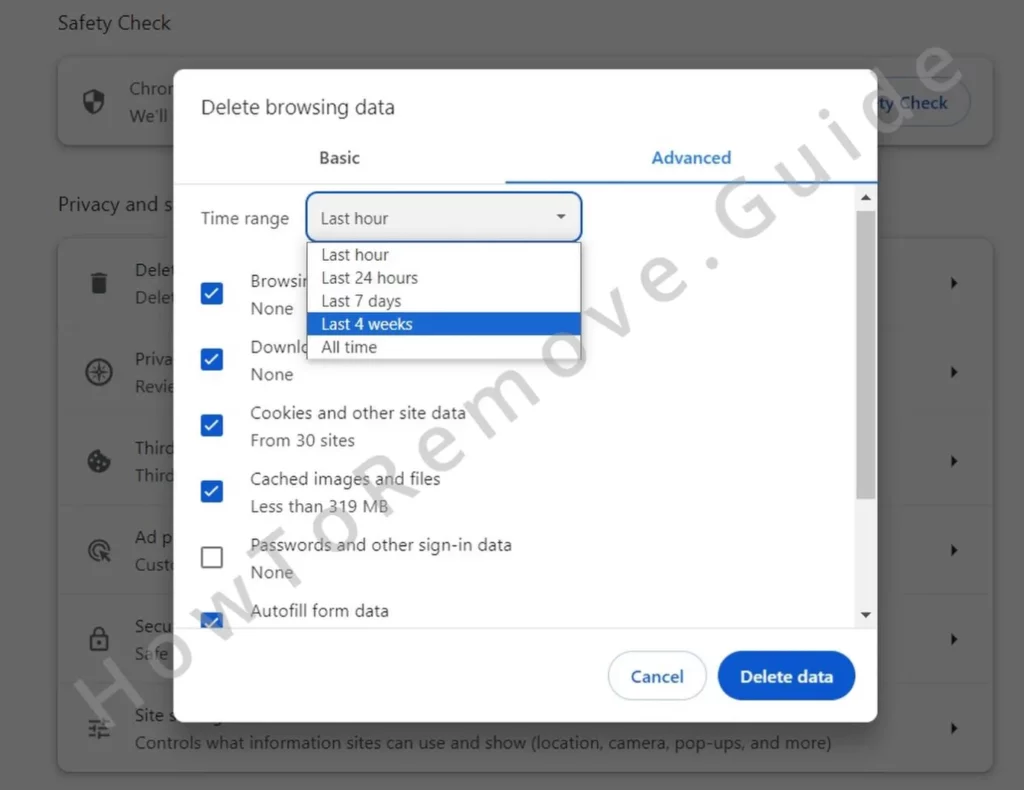
After that, click Delete to clear your browsing data.
If you are using Chrome, click on Site Settings in the same Privacy and Security section. If you are on Edge, click the Cookies and Site Permissions section from the left.
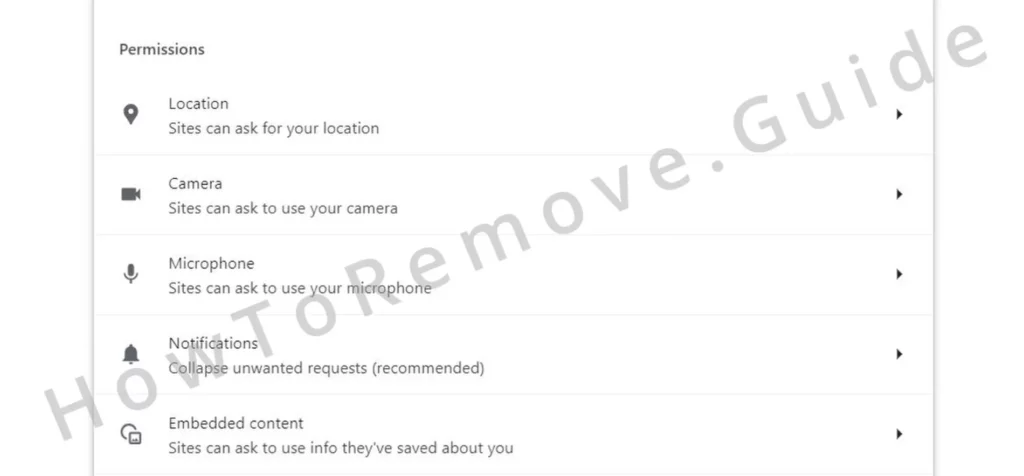
You must now review each permissions category and remove/block any unknown URLs.
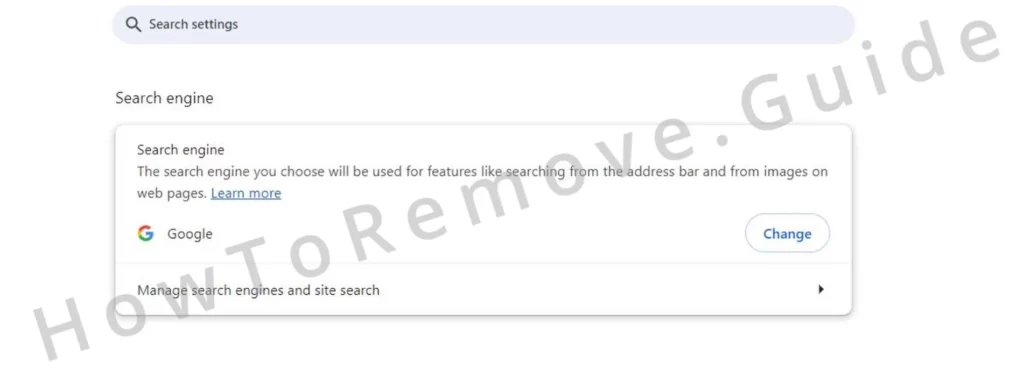
Also, once again check the Search Engine settings. Set a reliable search provider as default, then enter the “Manage Search Engines” section and remove any suspicious entries.
Conclude with a review of the On Startup and Appearance settings. Find It Pro and similar hijackers exploit these configurations by setting their own rogue pages to open upon launch.
Any unknown URLs appearing here must be deleted.
Video walkthrough for this step:
Chrome
Microsoft Edge
Mozilla Firefox
With this out of the way, Find It Pro should be fully removed. And if it isn’t, remember that using SpyHunter 5 is always a valid solution so make sure to give it a go if you are still struggling with the hijacker.

Leave a Reply