It has been months since a new DJVU ransomware variant reared its head into the world. And as we should have expected, a new one was created just in time for the 2024 holiday season: the .Held variant. This is clearly designed to make infected users more confused and have them find relevant information with more difficulty.
Let’s not beat around the bush: .Held is the worst kind of malware. Since you are here, I need to outright tell you that most of your locked information is likely unrecoverable, but there are ways you can restore at least some of the files. You can find these later down the page. But even if you wipe your windows installation, .Held can come back, so destroying its files the correct way is essential if you don’t want repeats in the future. You can find instruction for the in the guide as well.


SUMMARY:
.Held Removal and Decryption Tutorial
The main challenge when dealing with threats like .Held is recovering the files that they’ve encrypted. However, you still need to delete the malware itself. Failure to do so risks re-encryption of any recovered files, undoing your hard work. Therefore, getting rid of the .Held ransomware will be our first priority in this guide.

But before we begin, we strongly recommend that you disconnect your PC from the Internet and access this page via another device, such as your phone. Keeping your PC disconnected from the web may help halt the ransomware’s progress as some threats of this type need to communicate with their creators’ servers to perform the encryption. Hopefully, not all your files have been locked yet and this lets you save the ones that are yet to be encrypted.
How to Remove the .Held Ransomware
Attempting manual removal requires technical know-how and patience, but if you think you can handle it, here’s what needs to be done:
- Launch Task Manager with Ctrl + Shift + Esc to monitor running processes.
- If you are not seeing all processes, click “More Details” to expand the Task Manager.
- Sort the listed processes by CPU and Memory usage. Unfamiliar ones that consume high CPU or memory resources signal a problem.
- Right-click these processes and select “Open File Location”.
- Delete the entire folder you get sent to.
- If deletion fails, use Lock Hunter to force the removal. It’s a free tool, so just download and install it. Then right-click the file/folder in question, click the “What’s locking this…?” option, and then click “Delete It” in the following window.
- Remember to end the task in Task Manager afterward.
Another very important thing you must check is the Task Scheduler. It often harbors ransomware tasks set to restart malicious activities so it must be cleaned from anything sketchy:
- Open it by searching for “Task Scheduler” in the Start Menu search bar.
- Navigate to the Task Scheduler Library and examine the tasks listed in the right panel.
- Double-click each task, go to the Actions tab, and pay attention to the action the task is set to perform.
- Tasks running anything located in folders like Local, Downloads, Temp, or Roaming should be deleted immediately to prevent further issues.
- You should also delete tasks that run strange, unfamiliar .exe files and scripts.
The .Held threat can hide deep within various directories and there’s always a chance that you miss something even if you are tech-savvy and have experience. Anti-malware tools offer a safer, more reliable alternative to eliminate every trace of the threat without any of the guesswork. SpyHunter 5 is one such tool that we highly recommend thanks to its robust detection capabilities. So if you want to be sure that .Held is removed, we advise you to use its assistance.

How to Decrypt .Held Files
Hopefully, you’ve now removed the malware and are ready to try the different methods to recover your data. For this, you’ll need your Internet back, so connect your PC to the web.
Several safer methods exist to recover your data, but we must be honest with you, none guarantees success. At the same time, the recovery of your files isn’t guaranteed with the ransom payment either, so it’s pretty much always better to opt for the alternatives.
But before we explain the specific methods, you must first Identify the ransomware variant using ID Ransomware. This is to confirm you are truly attacked by .Held and not another ransomware variant:
Go to the ID Ransomware site and upload a ransom note or an encrypted file (or both, which is preferable).
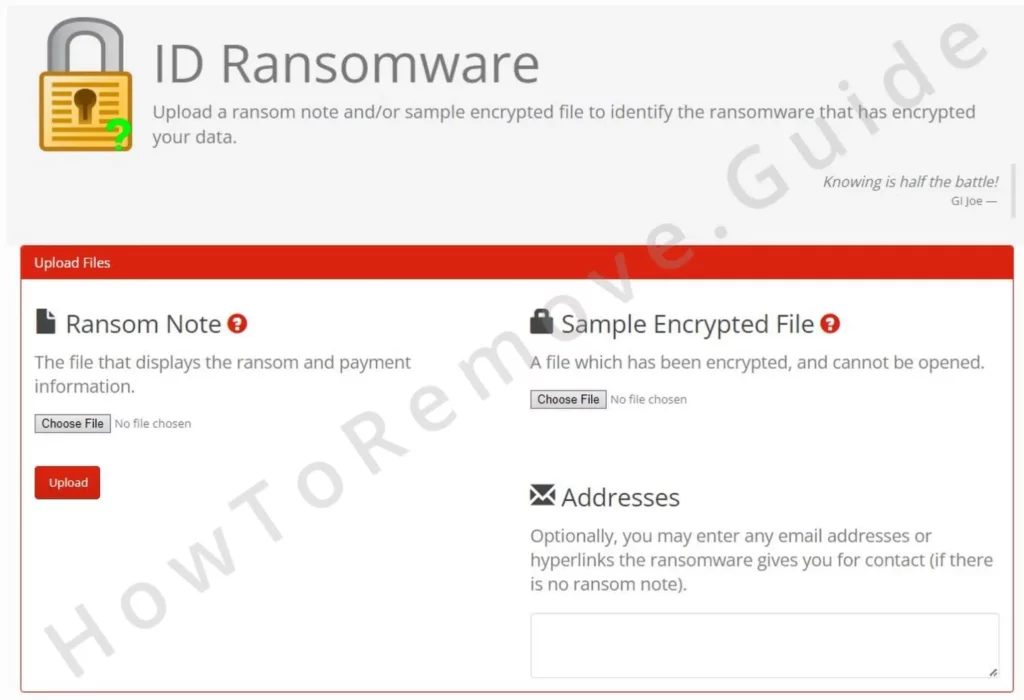
If these are unavailable, details like attacker-provided payment instructions can also aid identification. Once identified as .Held, follow the decryption guide below. If it turns out the ransomware is a different one, search for it on our site to see if we have a guide for it. If not, you can search for it in the NoMoreRansom, where you might be able to find something that can help with file recovery.
Decrypt .Held Files With the Emisoft STOP Djvu Decryptor
The free Emsisoft STOP Djvu Decryptor is a go-to tool for decrypting files locked by many ransomware variants. However, success varies from one ransomware to the other, so the only way to know if this will work is to give it a try.
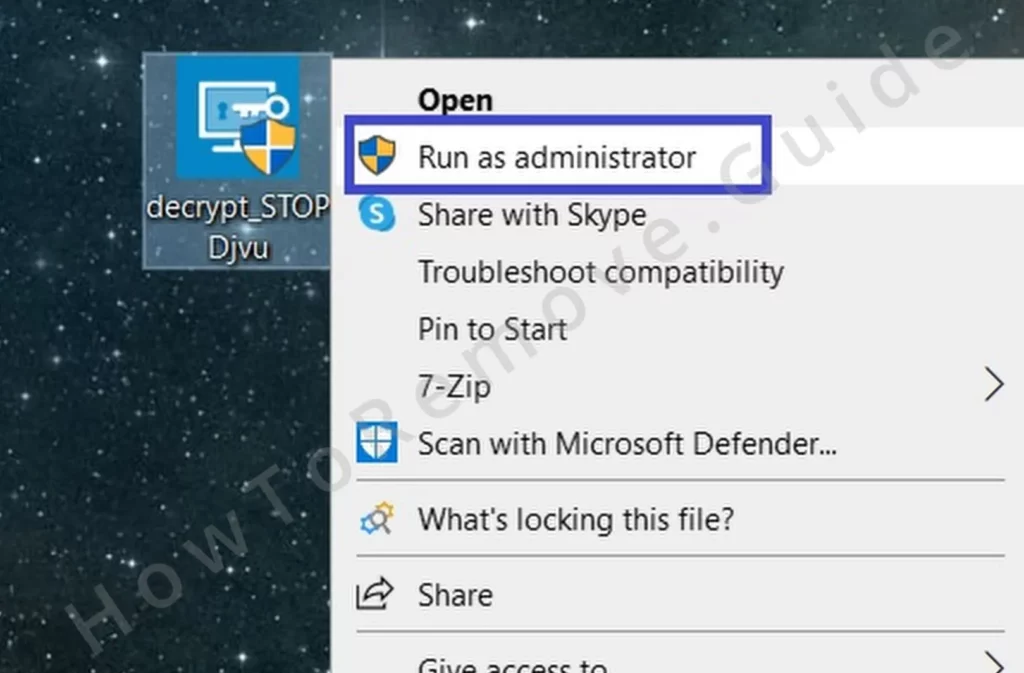
Download the Emisoft STOP DJVU Decryptor and run the decryptor as an administrator. Accept the terms to proceed with the decryption.
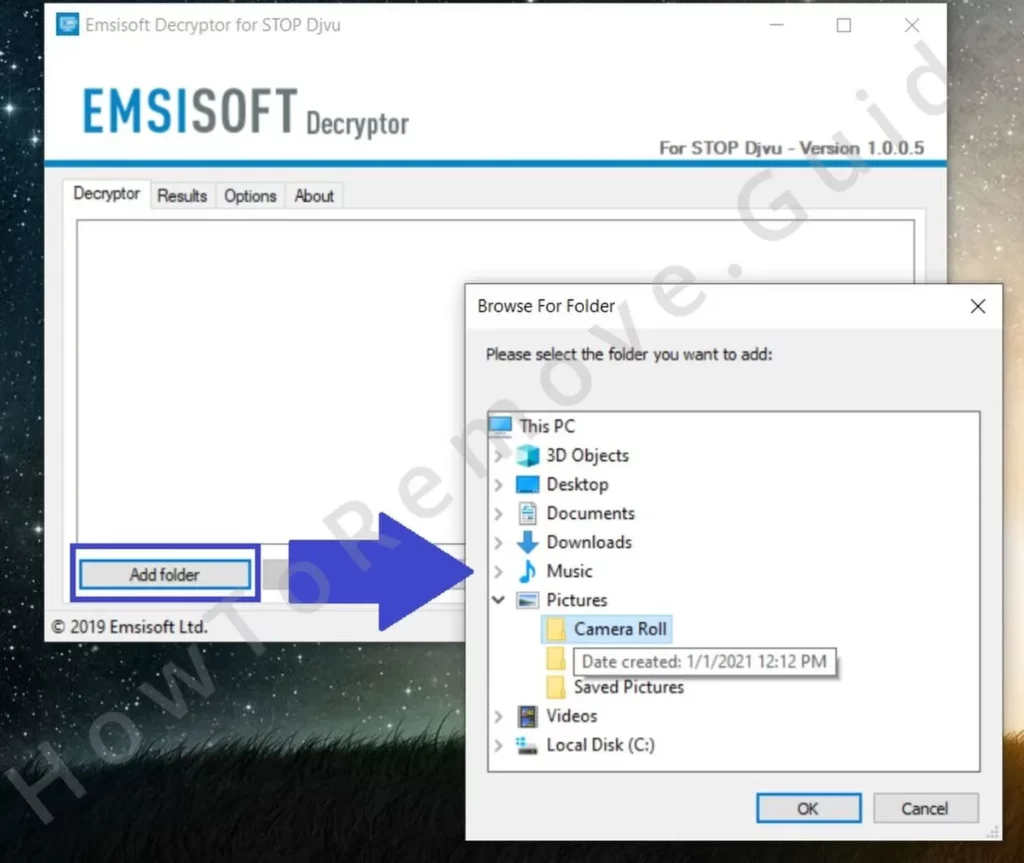
Remove unnecessary items from the scan by clicking Remove All Objects and add the folders that contain the encrypted files. This selective approach speeds up the process and avoids unnecessary complications.
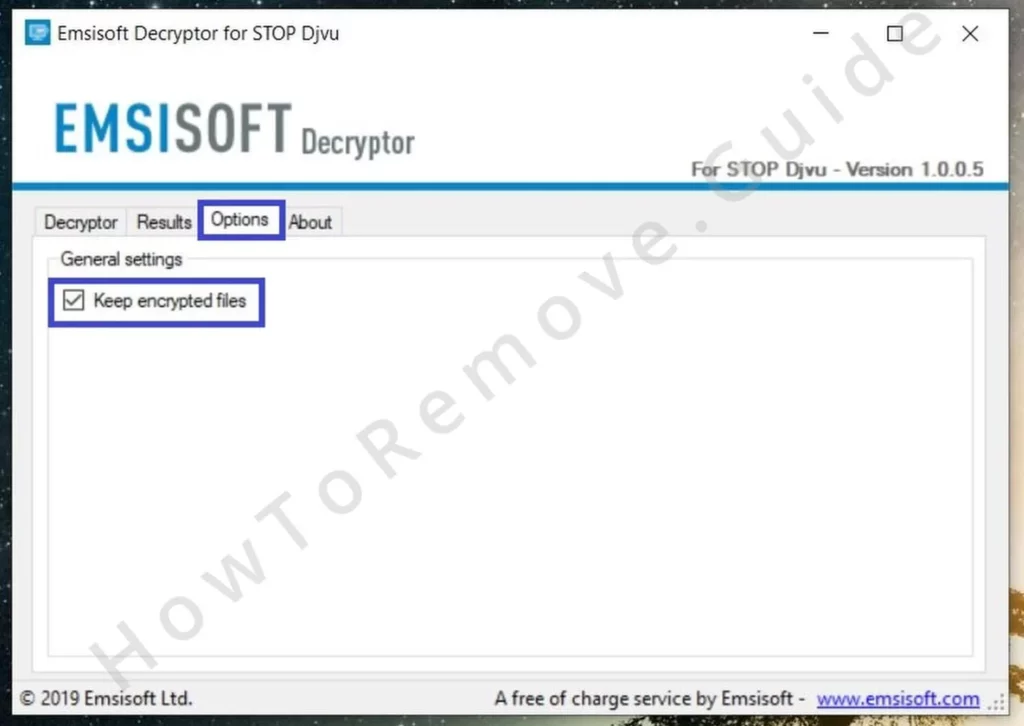
If you are short on storage space, click the Options tab and disable the option to retain encrypted files. However, we recommend that you keep the encrypted copies if you can.
Next, start the decryption by clicking the “Decrypt” button.
Whether the process succeeds depends on the type of key used by the ransomware. If the ransomware uses an offline key, there’s a chance that Emisoft’s servers have it and a decryption could occur. Stay connected to the internet; the decryptor relies on this connection for key retrieval.
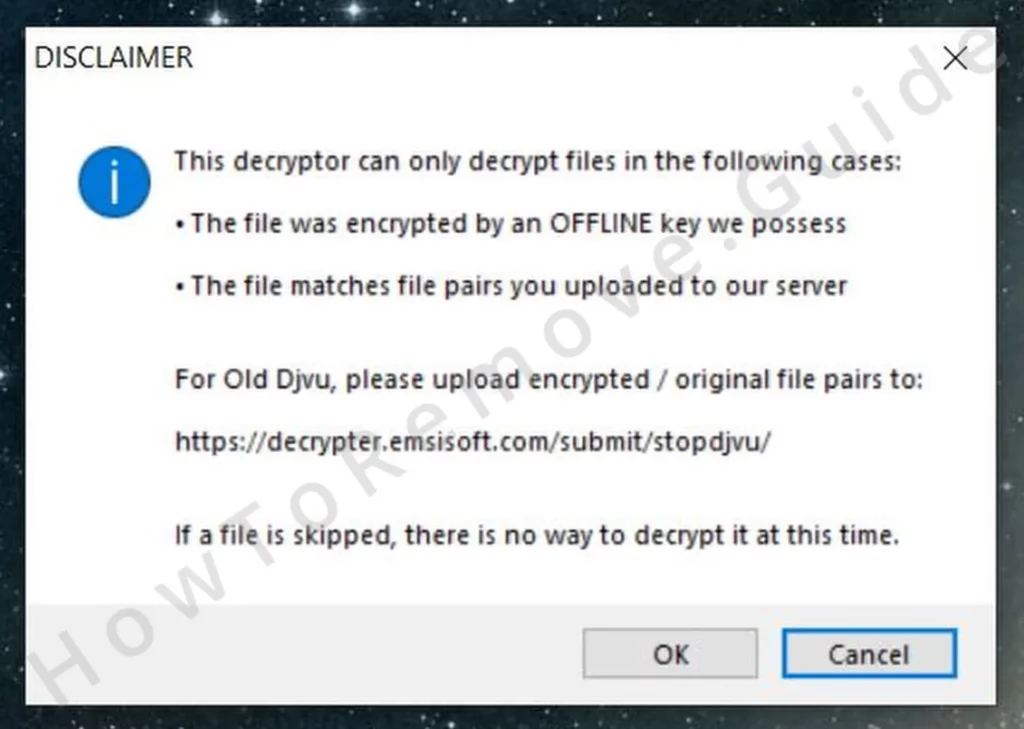
If the ransomware used an online key, the decryptor might not help, in which case you’ll need to try the other options shown next.
How to Recover .Held Files With PhotoRec
If the Emsisoft decryptor fails, PhotoRec offers another path to recovery. PhotoRec doesn’t decrypt files but attempts to recover original data that ransomware might have deleted during encryption. This could be a good alternative to the decryption approach, but it really depends on how thoroughly the ransomware has deleted your original files. Only one way to find out:
After downloading and extracting PhotoRec, run the qphotorec_win program as an administrator.
Then, click the drive selector at the top and choose the drive containing the encrypted files.
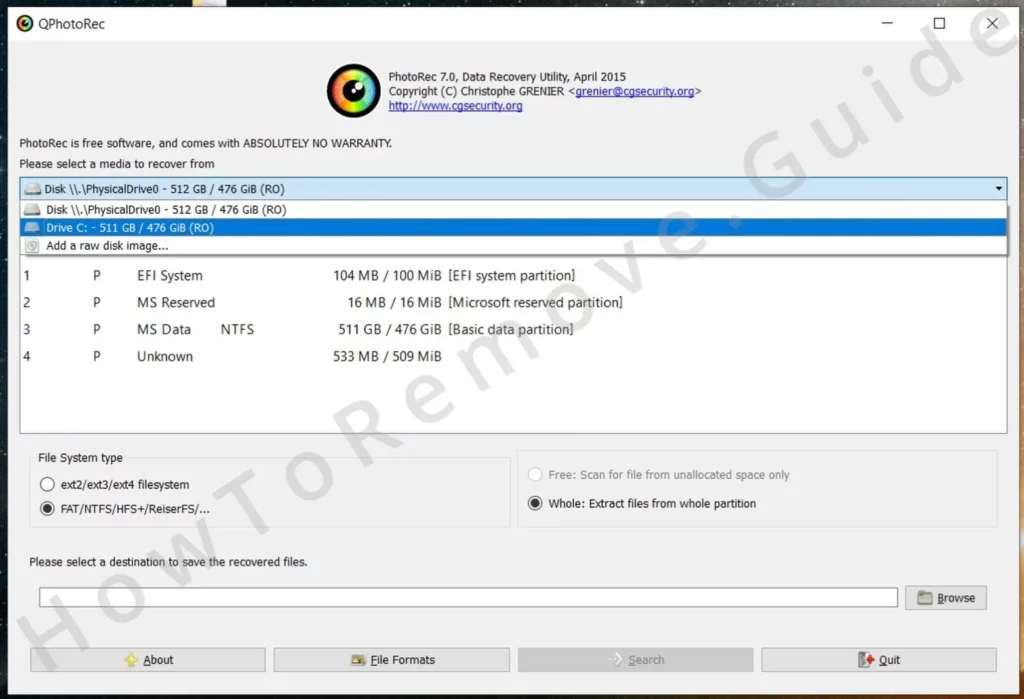
Next, select NTFS partition from the list where the encrypted files are stored.
Specifying the file formats to recover enhances efficiency, directing PhotoRec’s focus. If you leave all file formats checked, this will needlessly increase the time needed to perform the recovery.
Click Browse and choose a directory where you want to save the recovered files. We recommend saving them to an external storage device for added security, keeping them away from any further malware threats.
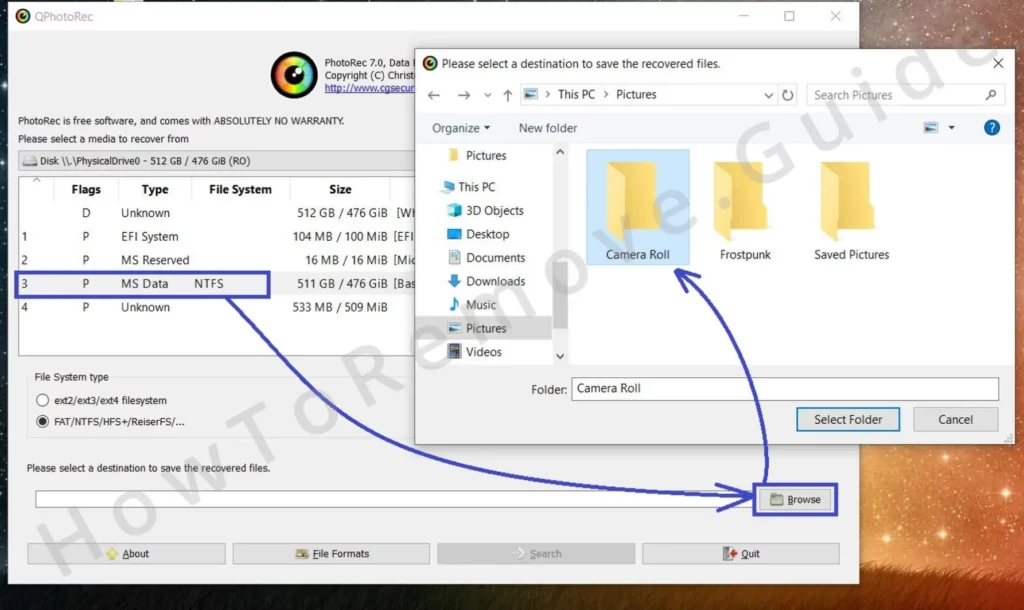
Once you are all set up, click Search and this will start the recovery process.
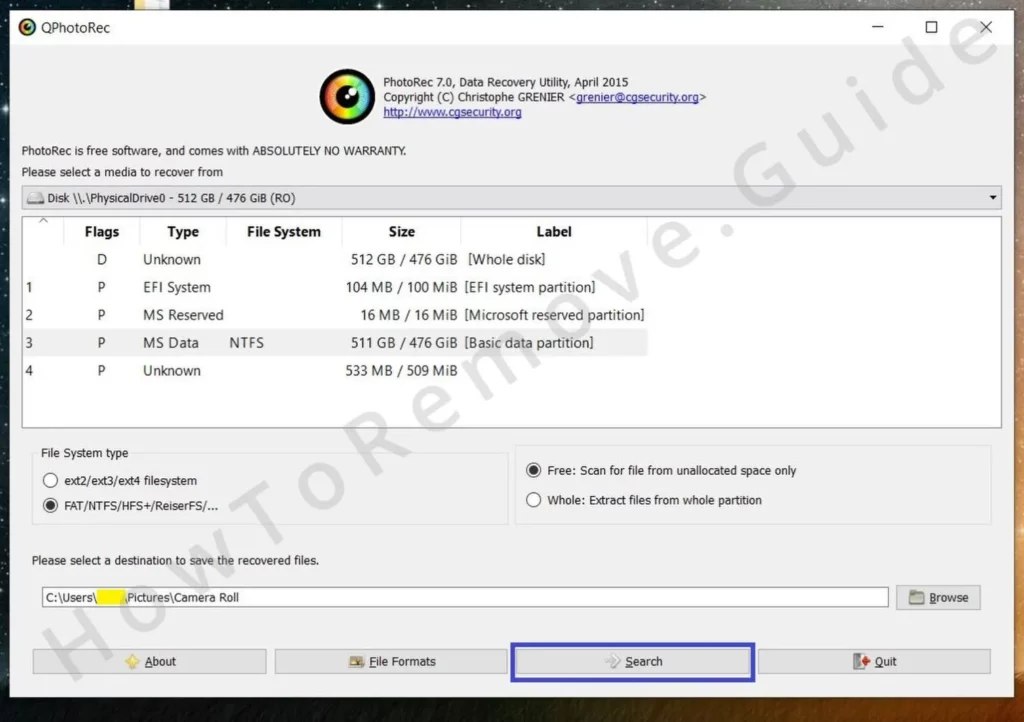
The recovery process requires patience. The size and number of files affect the time needed. Once finished, examine the directory you selected for recovered data to assess the success of the restoration.
Restore .Held Files Using Media_Repair
Media_Repair offers specialized recovery for particular media file types: MP3, WAV, MP4, MOV, 3GP, and M4V. This tool rebuilds partially decrypted files rather than performing traditional decryption. You need a reference file to use it. This is a clean, unencrypted (original) version of one of your encrypted files.
However, what’s cool about this tool is it could also work with a reference file that’s different from the ones that are encrypted, as long as it’s created under the same conditions – recorded by the same camera or microphone or produced by the same program, using the exact same settings (resolution, FPS, aspect ration, etc., depending on the type of file). This second type of reference files will naturally lower your chances of full data recovery, but they can still work in some cases.
If you think you have suitable reference files, here’s how to use them with Media_Repair:
Download, extract, and run Media_Repair.
Use the left panel to point the tool to the folder containing the encrypted files.
In the right panel, select one of the encrypted files and then click the upper icon to the right (a small monitor).
Media_Repair will evaluate the potential chances to recover files of that type.
If the file is potentially repairable, select the reference file and click the lower icon to the right to specify that it must be used for the recovery.
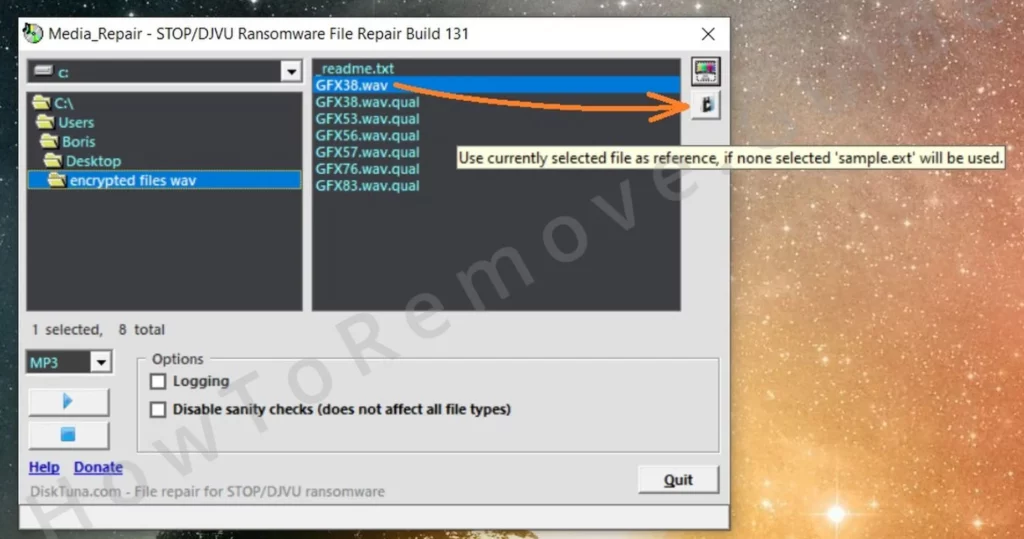
Next, hold down control and select all files you want to decrypt with the specified reference file.
Then click the Play button to begin the process and wait patiently for it to finish.
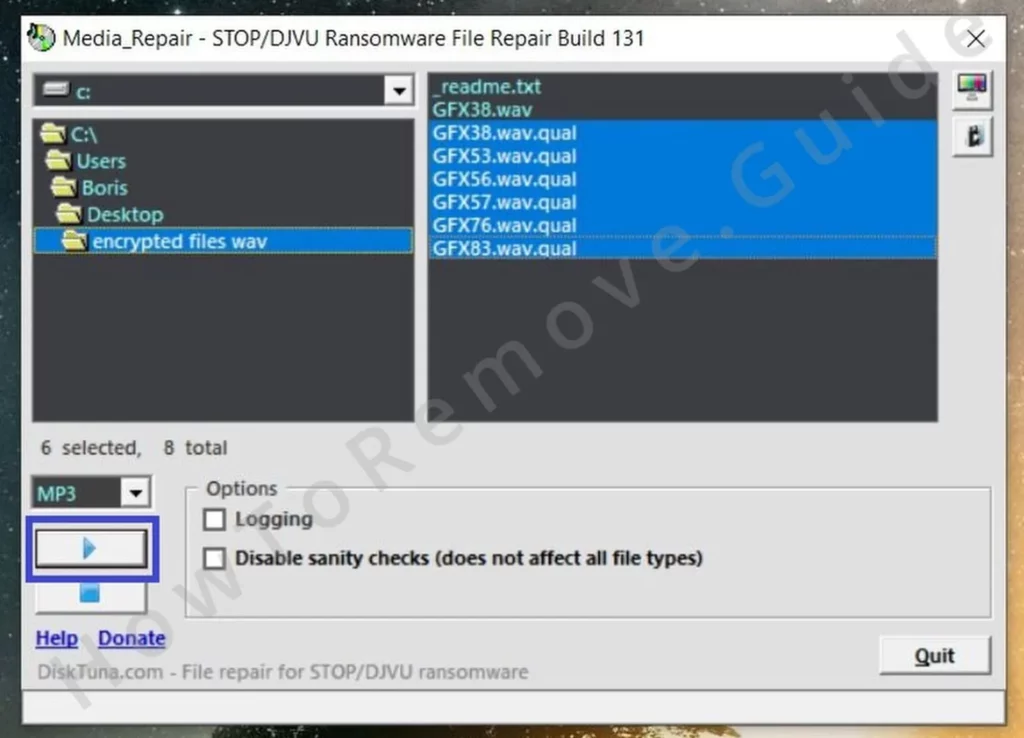
The repaired files appear in a new folder named “FIXED” within the original directory. Assess the quality and completeness of each restored file to determine the success of the operation.
This is the final recovery method we can suggest for files encrypted by .Held. Hopefully, after combining all the steps and advise provided on this page, you’ve managed to restore at least some of your data.
If there are still files important to you that remain locked, don’t delete them. Instead, back them up and keep them stored somewhere, as a valid recovery solution may become available in the future, at which point you’ll be able to get those files back.

Leave a Reply