The Bimq browser hijacker isn’t anything new to us – it’s just an upgraded version of the infamous Bing redirect virus. It’s basically a rogue search engine disguised as the legitimate Bing that will latch onto your browser to reroute your searches, collect your data, and aggressively redirect you to sites you almost certainly don’t want to visit.
We’ve seen various flavors of this particular type of hijacker over the years and addressed them in our articles. But since many users have recently been complaining about Bimq in particular, and since previous solutions don’t seem to work anymore, we had to reexamine the problem.
How to Delete Bimq (Full Guide)
Here, we present you with the most comprehensive and exhaustive guide for deleting Bimq. We dug deep to find anything that’s proven to help against this hijacker, and we can say with high amounts of certainty you won’t find a more detailed tutorial elsewhere on the Internet.
Part 1: Unblock Your Browser From Bimq.co Policies
The gimmick that Bimq uses to be annoyingly difficult to remove is that it enforces its settings in your Chrome (or another Chromium browser) through the built-in Policies feature. This means we must first focus on removing any third-party policies from the browser, which can be done in several ways:
Method 1: Check the Policy Editor
The Policy Editor is where you may find custom policies installed in your browsers that override your ability to make changes to their settings:
- Type gpedit.msc in the Start Menu and hit Enter.
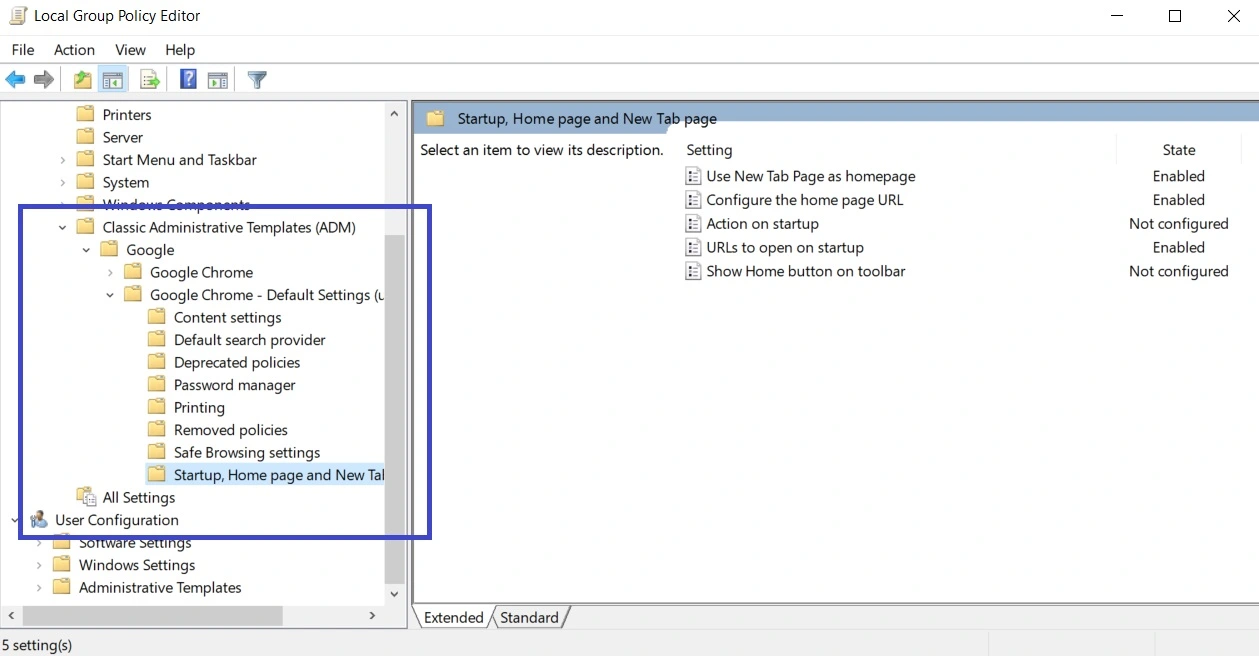
- Expand the Computer Configuration and Administrative Templates folders. If you are on Windows 10, also expand the Classic Administrative Templates (ADM) folder.
- If you are having problems with Chrome, see if there are any “Google” or “Chrome” subfolders shown under Administrative Templates/Classic Administrative Templates (ADM). The image below shows a legitimate Chrome policies folder, but it should still give you an example of the settings you are expected to find.
- If your issues are with another browser like Edge or Brave, look for folders with their names.
- Also, look for any oddly named folders in general – it’s perfectly possible that the hijacker has named its policy folders differently to trick the user.
- If you find a rogue policy folder, expand its subfolders to get a better idea of what it does.
- If you find a policy folder that you think must be deleted, right-click on Classic Administrative Templates (ADM).
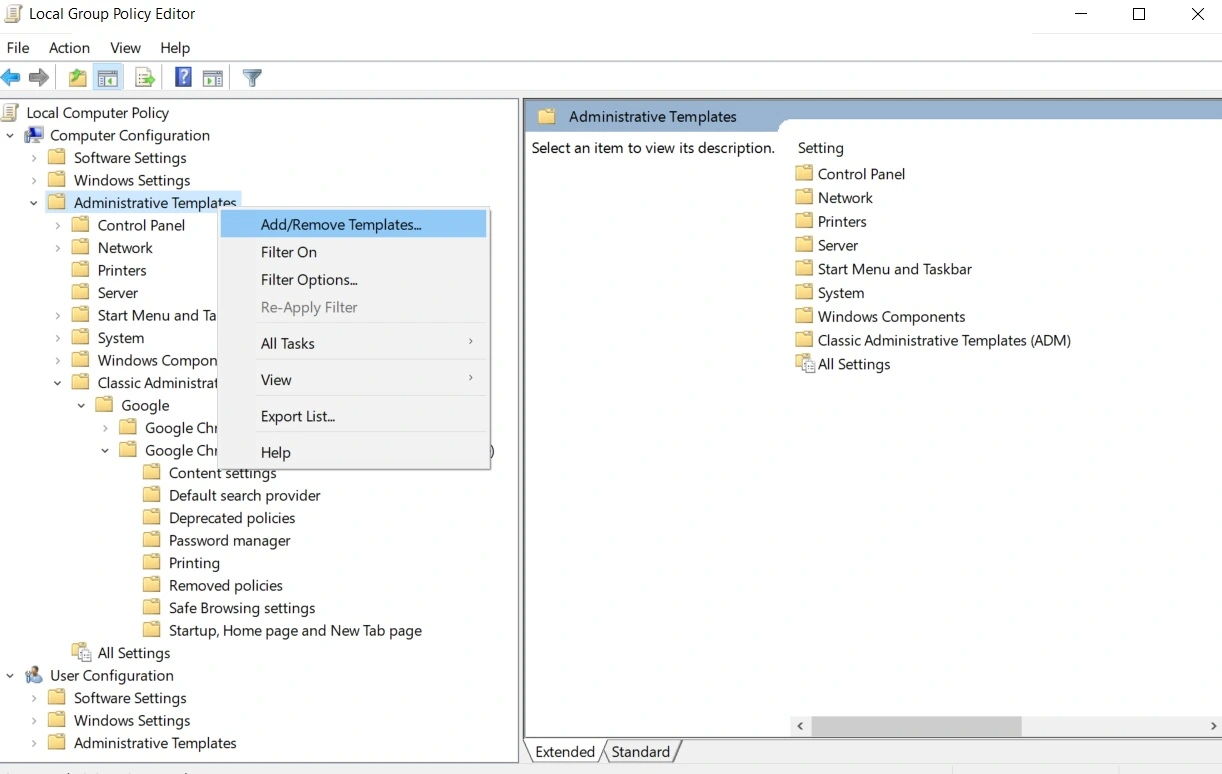
- Then select Add/Remove Templates, select the rogue item, and click Remove.
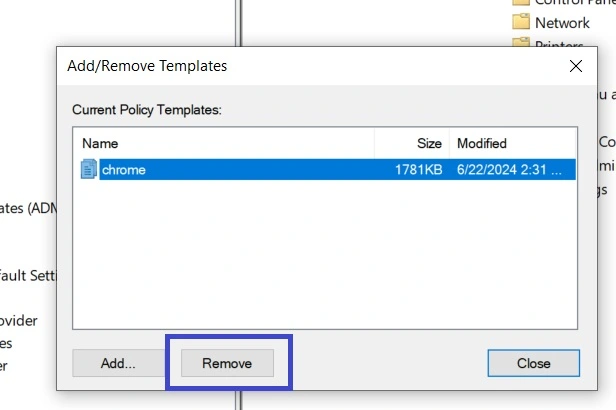
- Finally, restart your PC for the changes to be applied.
It’s possible that you don’t find anything in the Policy Editor – hijackers have other ways of taking over your browser. But even if you did find and delete a rogue policies folder, we still recommend completing the other methods.
Method 2: Clean Your Registry
Your PC’s Registry is another common target for hijackers that want to make themselves difficult to delete, so here’s how to clean it:
Warning: Deleting the wrong thing in the Registry can cause unexpected problems. Proceed at your own discretion.
- Go to the affected browser (we’ll give an example with Chrome), open its menu, and go to Extensions > Manage Extensions.
- Look at the items there and look for suspicious extensions. If you don’t find any, proceed directly to Step 9.
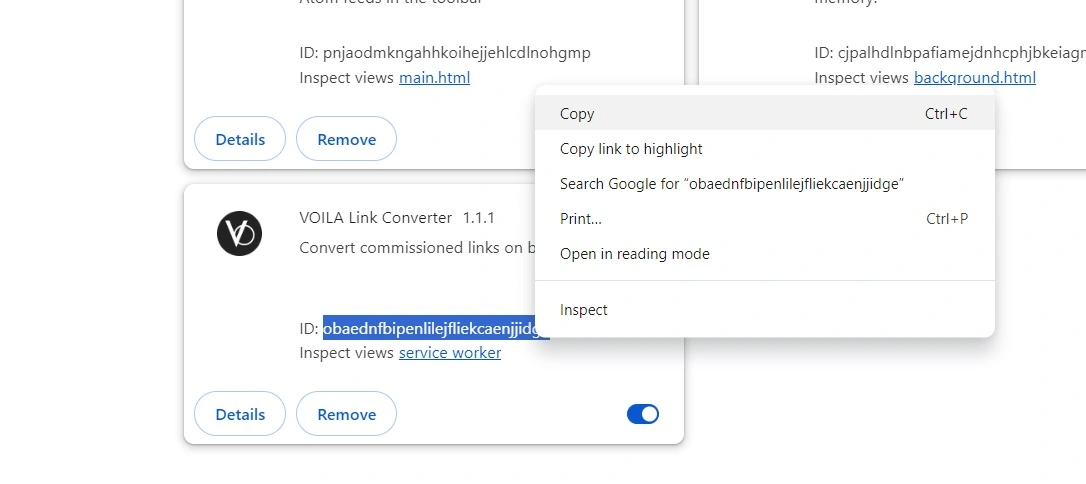
- If there are any extensions you don’t recognize, you must delete them, but the Chrome policy will likely not let you. To solve this, first toggle on the developer mode (top-right).
- Then copy the ID of the rogue extension.
- Next, type regedit in the Start Menu, right-click the first result, and open it as Administrator.
- Press Ctrl + F, paste the copied, and hit Enter.
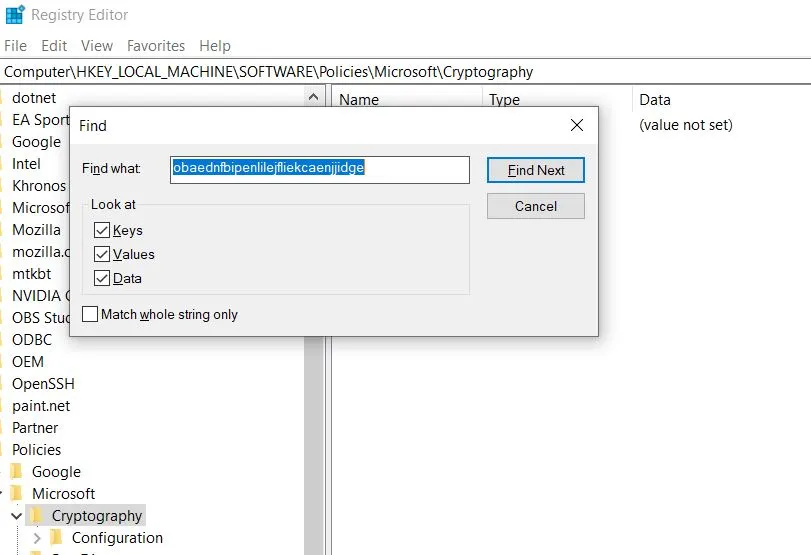
- Delete what gets found, then press Enter again, and rinse and repeat until there are no more results for the rogue extension ID.
- Once this is done, return to your browser’s Extensions Manager, disable the rogue extension, and click its Delete/Remove button to get rid of it.
- Go back to the Registry (type regedit in the Start Menu > right-click > Open As Administrator), visit the following key (Registry folder), and delete all of its sub-keys: HKEY_LOCAL_MACHINE\SOFTWARE\Policies\Google\Chrome
- If you are on another browser, for example, Edge, the Registry path should be the same, except for the last two keys: HKEY_LOCAL_MACHINE\SOFTWARE\Policies\Microsoft\Edge.
- We also recommend that you delete everything in this folder: C:\Users\iAMrein\AppData\Local\Google\Chrome\User Data\Default\Web Data on your PC, because Bimq might have created some files there that are also helping it enforce its policies.
If you’ve successfully deleted all rogue Registry entries and completed the Policy Editor cleanup, your browser should no longer be managed by any third-party policy. Still, we recommend using the automatic Chrome Policy Remover from below to be sure.
Method 3: Use an Automatic Chrome Policy Remover Tool (Google Chrome Users Only)
The Chrome Policy Remover is a small free tool that will automatically free your browser from any rogue policies. Here’s how to use it:
- Visit this page and download the Windows version of the tool.
- If the file gets flagged and deleted/quarantined by your AV, temporarily disable the antivirus and download the file again. Don’t worry, the file isn’t harmful.
- Right-click the Chrome Policy Remover and run it as Administrator.
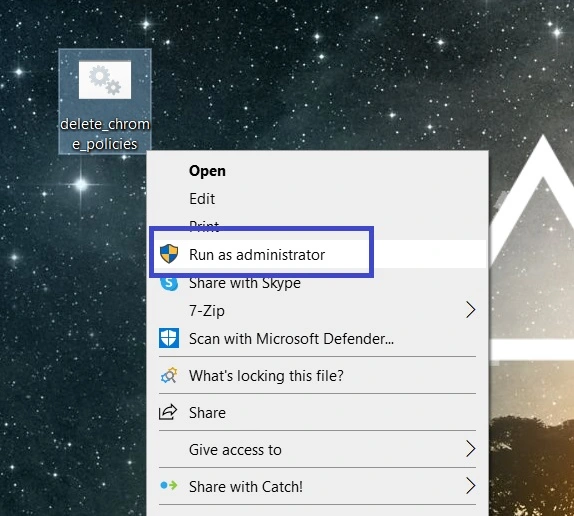
- You’ll see a command prompt window open with a script that runs automatically in it. Wait for it to finish and close the window.
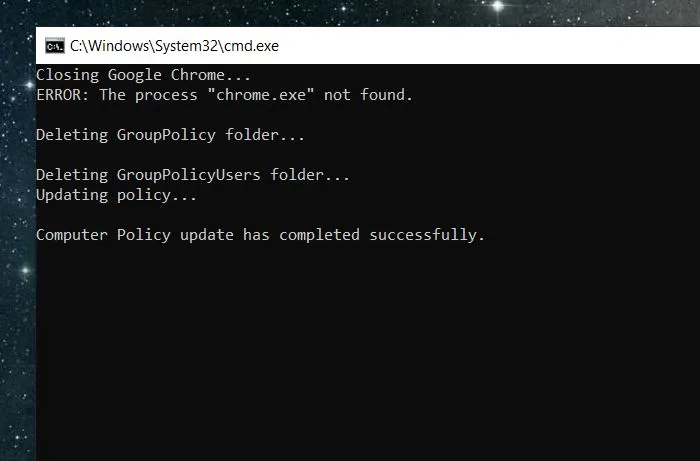
That’s all there is to it – once this is done, your Chrome browser should now be free and you’ll be able to proceed to the cleanup part.
Part 2: Clean Your Browser From Bimq Data and Settings
Hopefully, after you’ve performed the policy removal steps, you’ll now be able to remove bimq.co from your browser and also delete any rogue extensions that might be still be there. We’ll explain how to clean Chrome and Edge, but the steps for other Chromium browsers should be pretty similar.
Before you proceed to the next steps, restart your PC so that any previously made changes are applied.
Chrome Cleanup
Chrome is the browser most commonly affected by the Bimq hijacker and you are likely here because you need a way to clean it. Now that you’ve hopefully removed any foreign policies from Chrome, the process of cleaning the browser should be pretty straightforward:
- Open Chrome, click the three-dot menu in the top-right, and open Settings.
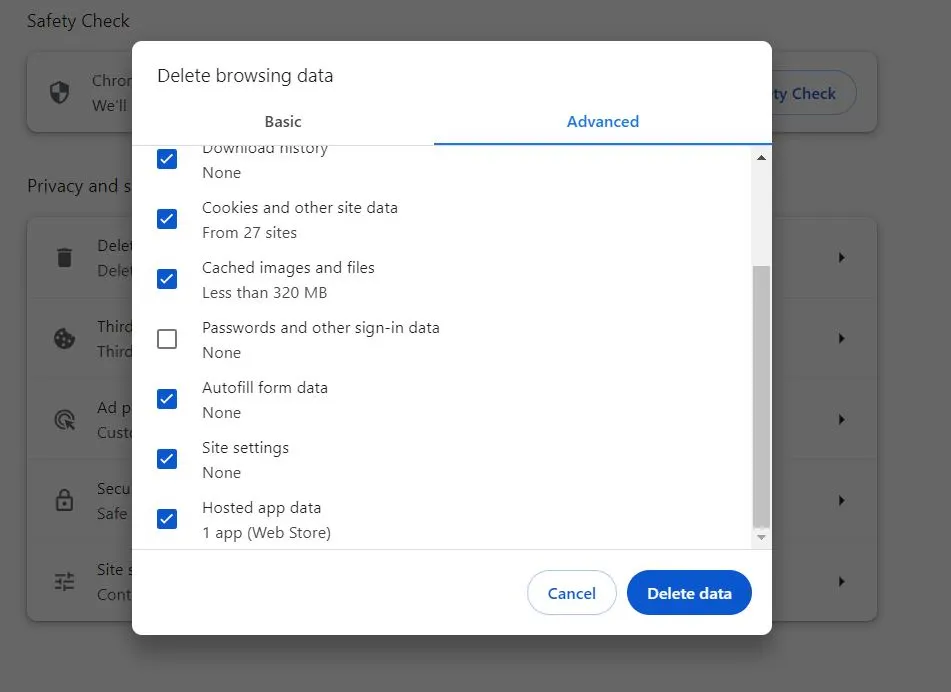
- First visit the Privacy and Security tab, where you must click on Delete browsing data, and open the Advanced tab. Put ticks on everything except Passwords, and click Delete Data.
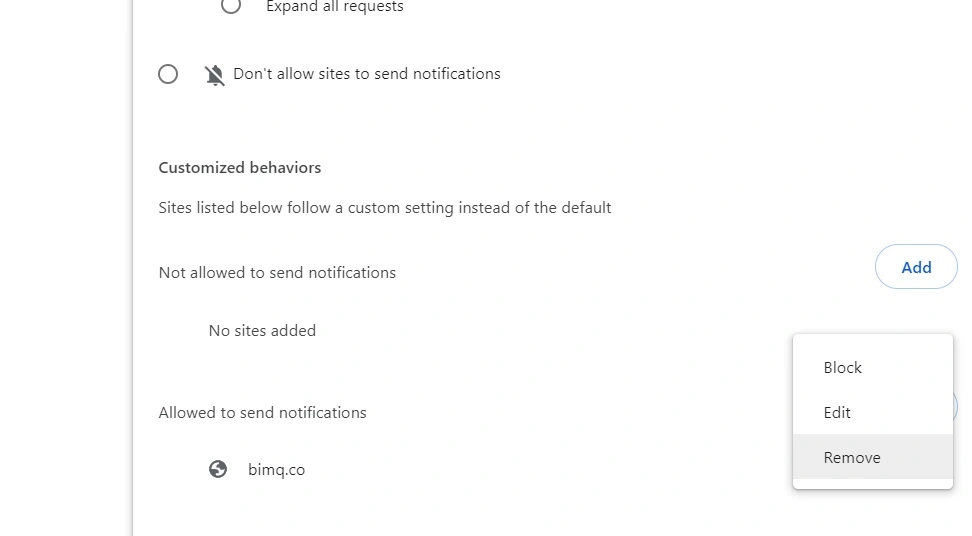
- Then open Site Settings, and scroll to the Permissions section.
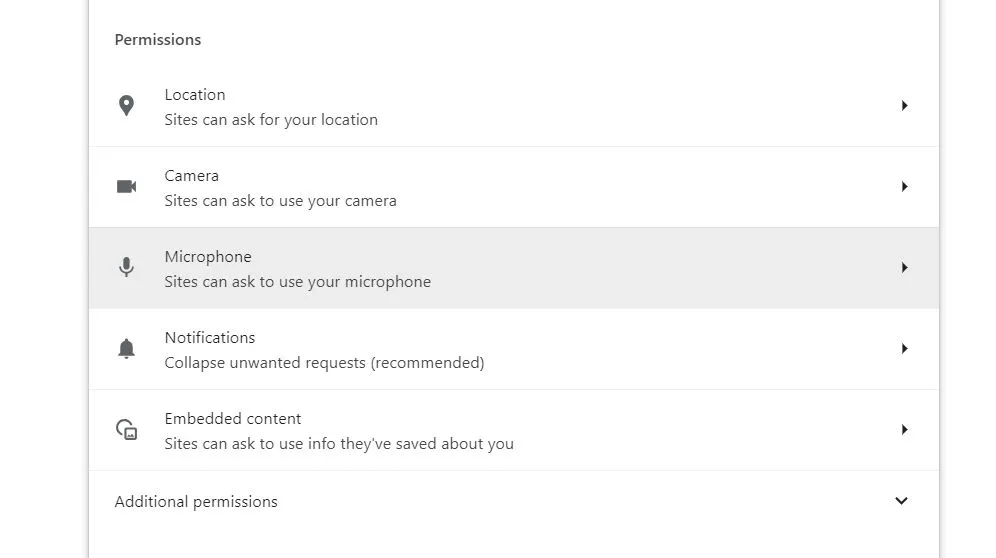
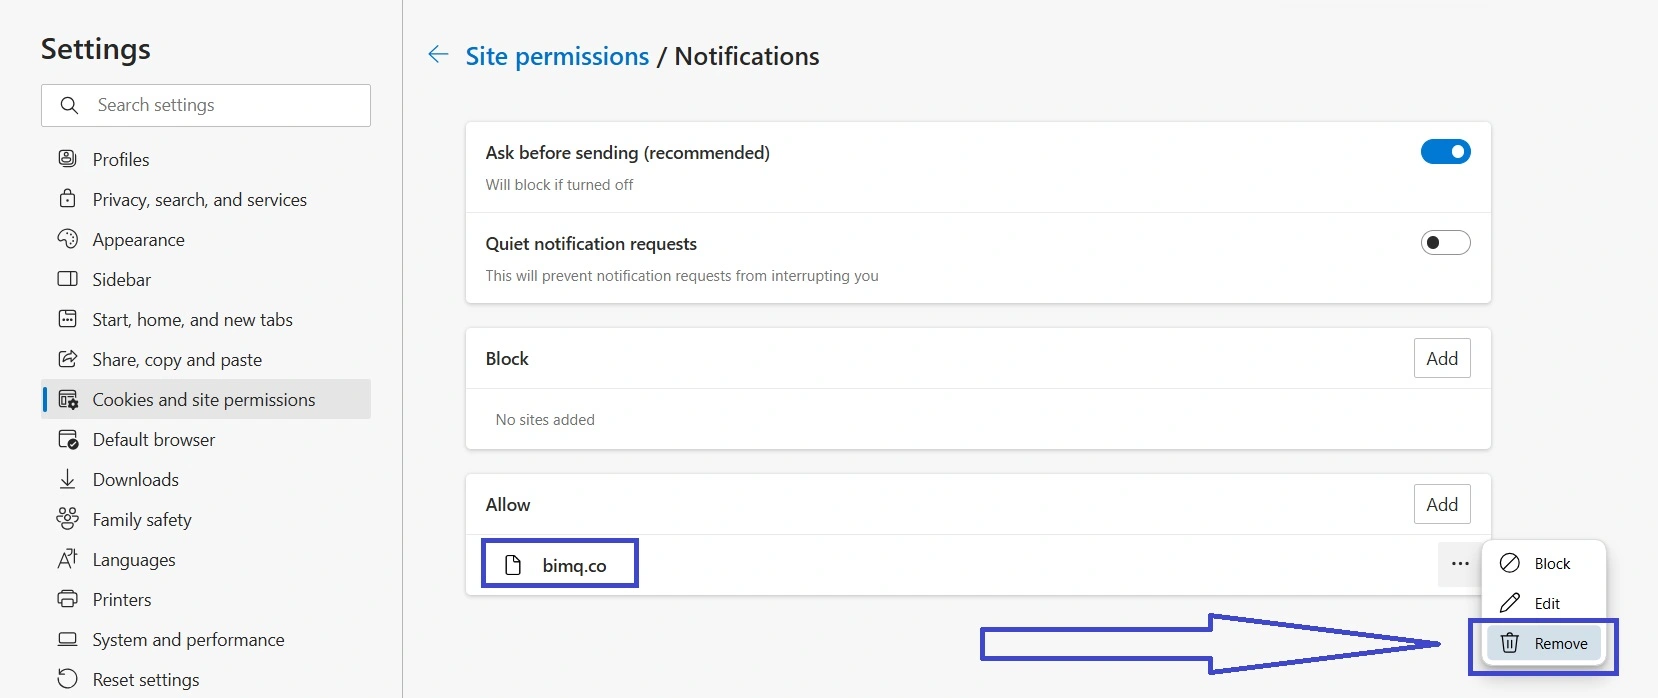
- There, check each permission type for bimq.co or other sketchy sites and if you find anything, click the three dots next to the site and then click Remove.
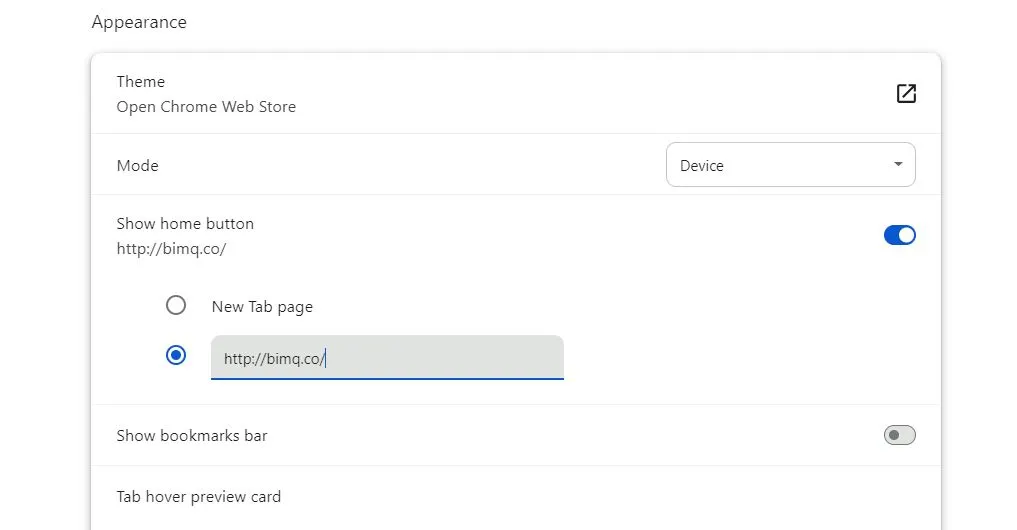
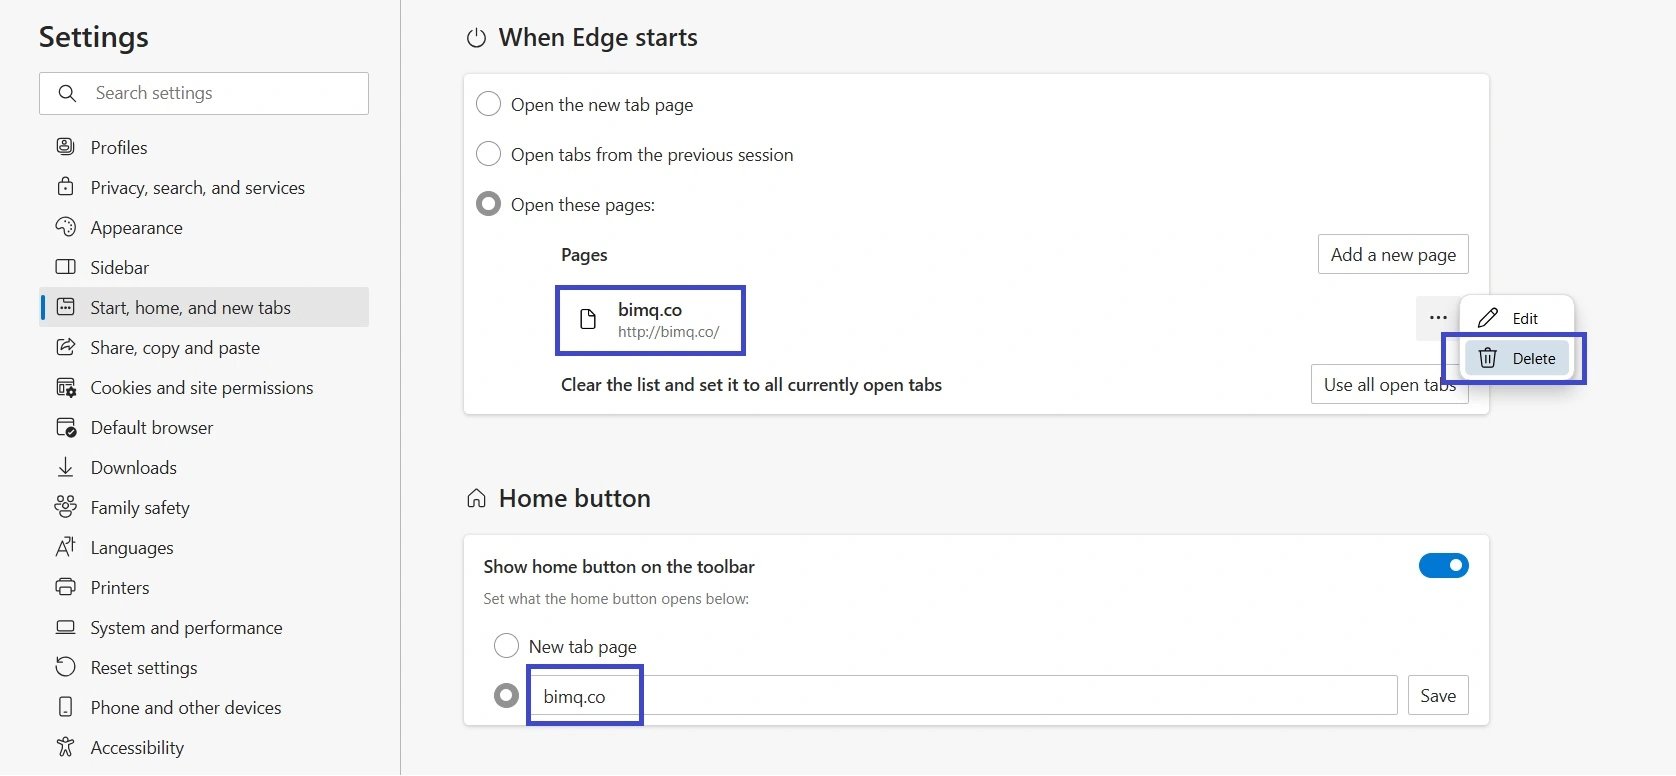
- Now go to the Appearance tab from the left and check the browser’s Home Button. If it’s set to bimq.co, delete it, and change it to something normal.
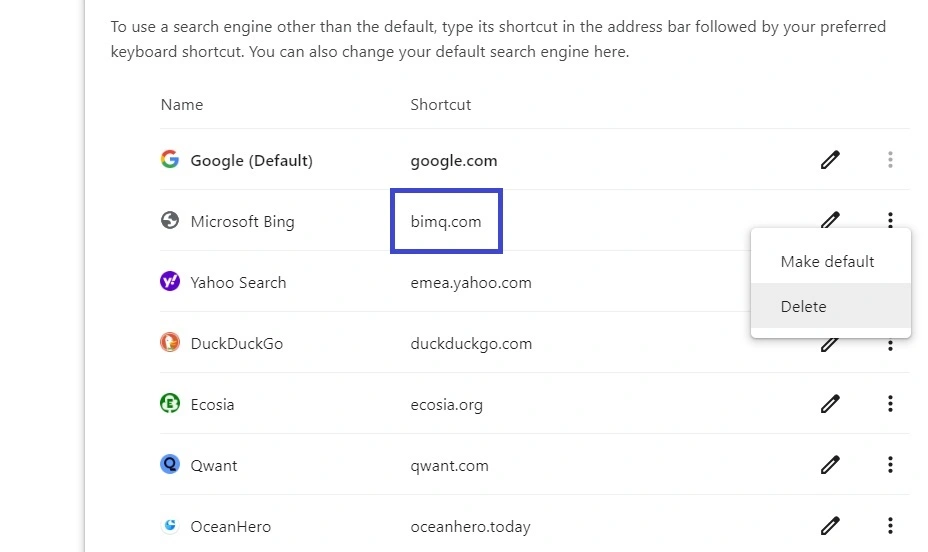
- Next check the Search Engine tab and see change back your search engine to Google or another legitimate one.
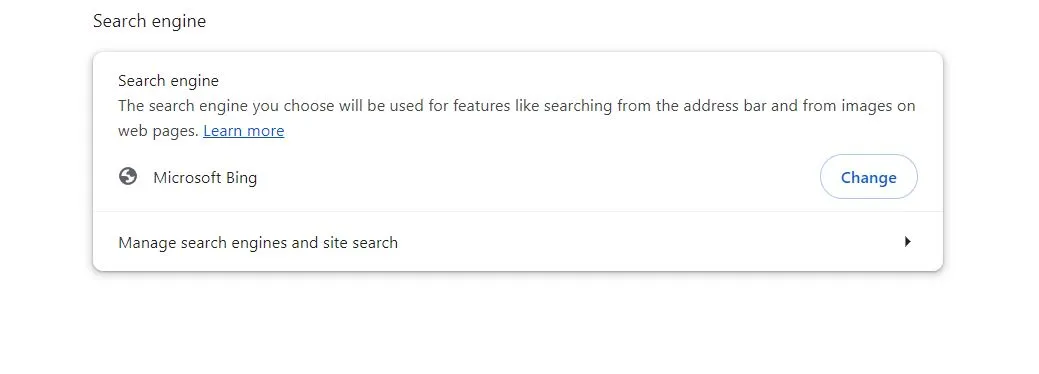
- Then click the Manage Search Engines and Site Search, look at the list of available search engines, find Bimq.co there, and delete it.
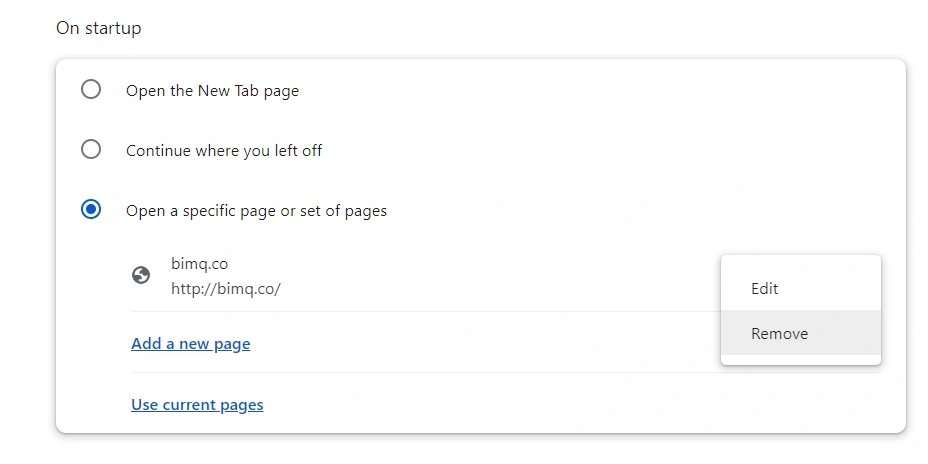
- Then go to the On Startup tab, see if bimq.co or another suspicious page is set to open automatically, and delete it.
- Finally, check the Extensions tab once again and if you notice a sketchy extension, disable it and then delete it.
Edge Cleanup
The Microsoft Edge browser is based on the Chromium engine so it has similar functions to Chrome, including a Policies feature. Many Edge users also complain from the Bimq hijaker, so we’ll show you how to clean it too:
- Open Edge, click the three dots in the top-right, and visit Settings.
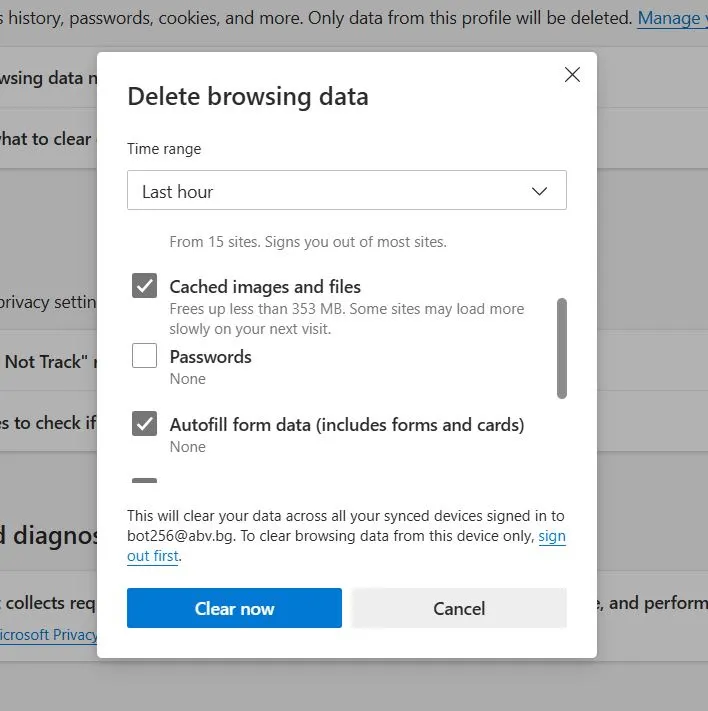
- First, start with the Privacy, search, and services section from the left, scroll down a bit, and click Choose what to clear under Delete Browsing Data.
- Tick everything, leaving only passwords unticked, and click Clear Now.
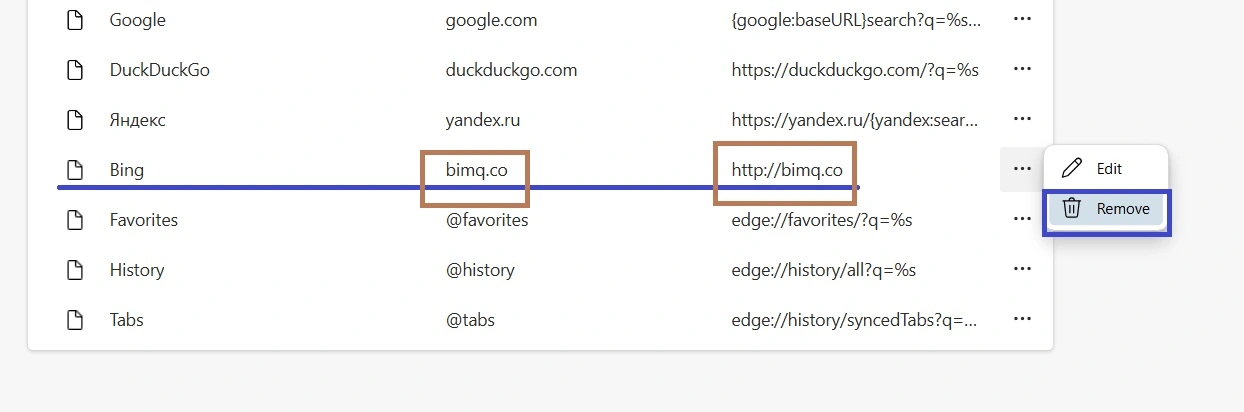
- Then scroll down all the way to the bottom, find Address bar and search, and click it. Then change the default search engine to the one you want and then click on Manage Search Engines.
- Look through the list of tools, find bimq.co, and delete it.
- Now move on to the Start, Home, and New Tabs section. There, delete bimq.co from the home button and startup page settings (if you see it there).
- Open the Cookies and Site Permissions section, check each permission type for Bimq, and delete it.
- Finally, once again check the Edge Extensions by clicking the three-dot menu again, going to Extensions, and then selecting the Manage Extensions button that appears at the top. If you see any suspicious items, be sure to delete them.
All that’s left to do is restart your PC one more time and check to see if your browser is now malware-free.
Finally, if for some reason the hijacker is still bothering you and no matter what you try you can’t get rid of it, you do still have the option to use SpyHunter 5. The program will perform a thorough cleanup of everything on your PC, find any leftover items from the hijacker, and get rid of them for you. It will also protect you from future encounters with anything sketchy and harmful.
What You Must Know About Bimq
As we said at the start, Bimq is a common type of browser hijacker which is actually good news, because it means your system isn’t in any serious danger as long as you are careful. During the time it’s still in your browser, we strongly advise you to not touch anything that it puts on your screen.
Keep away from any pop-up ads and immediately close any pages you may get redirected to by the hijacker. While the rogue search engine itself is not going to damage you, there’s a chance you may get malware or land on a phishing page if you click on any content introduced by Bimq.
How Bimq.co Gets in Chrome
The most frequent method used by hijackers like Bimq to get onto more systems is file-bundles. You’ll download some free program with a condition that allows Bimq to enforce third-party policies in your browser and become its default search engine. Since you agreed to install the program, you also agreed to the changes Bimq introduces. Most of the time the user will be allowed to opt out of this condition and still install the program itself, but people often don’t pay attention to such settings and that’s how they get hijackers.
One good way to outright avoid encountering such sketchy installers is to simply be a bit more careful with what you download and where you download it from. Needless to say, sites for pirated content such as Steamunlocked can easily get you a hijacker as well as much more dangerous forms of malware.
We should say that there are also many legitimate apps that can still have a hijacker attached to them. Game emulators or torrenting programs like uTorrent are two common examples. Therefore, you do still need to be vigilant and check the setup settings of anything you are about to install on your PC.
Leave a Reply