Hsearchs is a browser hijacker extension that targets Google Chrome and other Chromium browsers (Edge, Brave, Opera GX, etc.). It changes the default search engine to boyu.com.tr, redirects user searches, and locks the browser’s settings so they cannot easily be changed by the user.
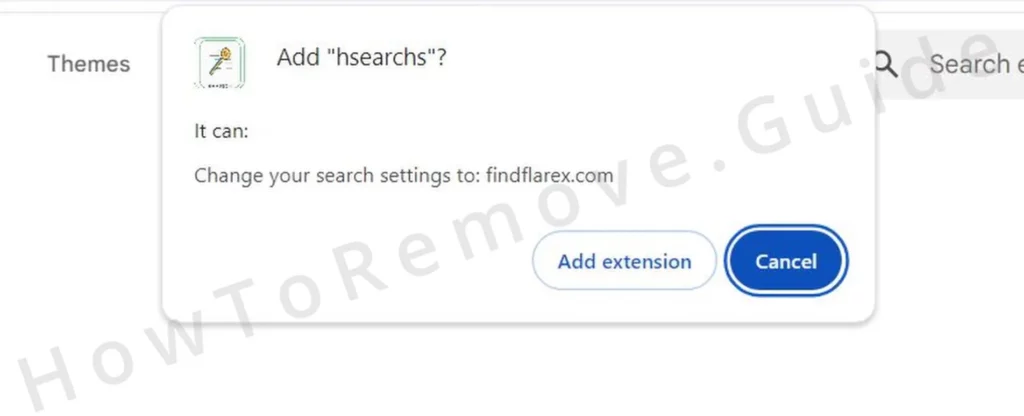
It’s created by Findflarex – a developer known for the creation of many other rogue Chrome extensions, such as SEEKSE and JDISearch. Many findflarex.com extensions are currently present in the Chrome Web Store, but most users get them through file bundles, after downloading console emulators (MuMu, MEmu, Noxplayer, etc.) game mods for Minecraft and Roblox, and pirated software from torrent sites and sites like SteamUnlocked.
Hsearchs Extension Removal Guide
The longer a hijacker like Hsearchs stays in your browser, the more money it makes for its creators through aggressive ads and site promotions. This is the reason it’s designed to be difficult to remove.
You’ve likely already noticed that the extension’s “Remove” button isn’t available and that there’s a “Managed by your organization” note in your browser. This is Hsearchs at work – it’s how it prevents its own removal.
It took us some time to find the right way to circumvent this problem, but we can confidently say that we are able to help anyone whose browser settings have been blocked by a rogue policy. And after the policy is gone, removing Hsearchs itself becomes a piece of cake.
SUMMARY:
| Name | Hsearchs |
| Type | Browser Hijacker |
| Detection Tool |
Some threats reinstall themselves if you don’t delete their core files. We recommend downloading SpyHunter to remove harmful programs for you. This may save you hours and ensure you don’t harm your system by deleting the wrong files. |
!IMPORTANT – READ BEFORE PROCEEDING!
We are confident that the following manual steps will let you remove Hsearchs. However, if some rogue program installed on your PC is responsible for the hijacker’s presence in the browse (which is typically the case), Hsearchs might return soon after it’s removed.
Unfortunately, we have no way of knowing what malware brought you the hijacker so we can’t provide specialized steps to remove it. You can go to the Start Menu > Settings > Apps and uninstall suspicious recent installs and check the Task Manager for questionable processes that you must delete along with their file location folders (right-click > Open File Location), but that may not always be enough.
For this reason, if you suspect the presence of malware within your system, it’s best to use a specialized removal tool like SpyHunter (available on this page). It will scan your system and help you delete anything unsafe or unwanted so that you can rest assured that Hsearchs won’t return to bother you.
How to Delete the Hsearchs Chrome Policy
The first thing to do – address that frustrating “Managed by your organization” issue. A third-party policy has been imposed by the hijacker. This restriction limits your ability to manage extensions and settings.
We suggest that you first try to handle this problem with The Group Policy Editor:
- Open the Start Menu. Search for “Edit Group Policy” and select the first thing that pops-up.
- Navigate to “Local Computer Policy“. Expand “Computer Configuration“, right-click on “Administrative Templates” and select “Add/Remove Templates“.
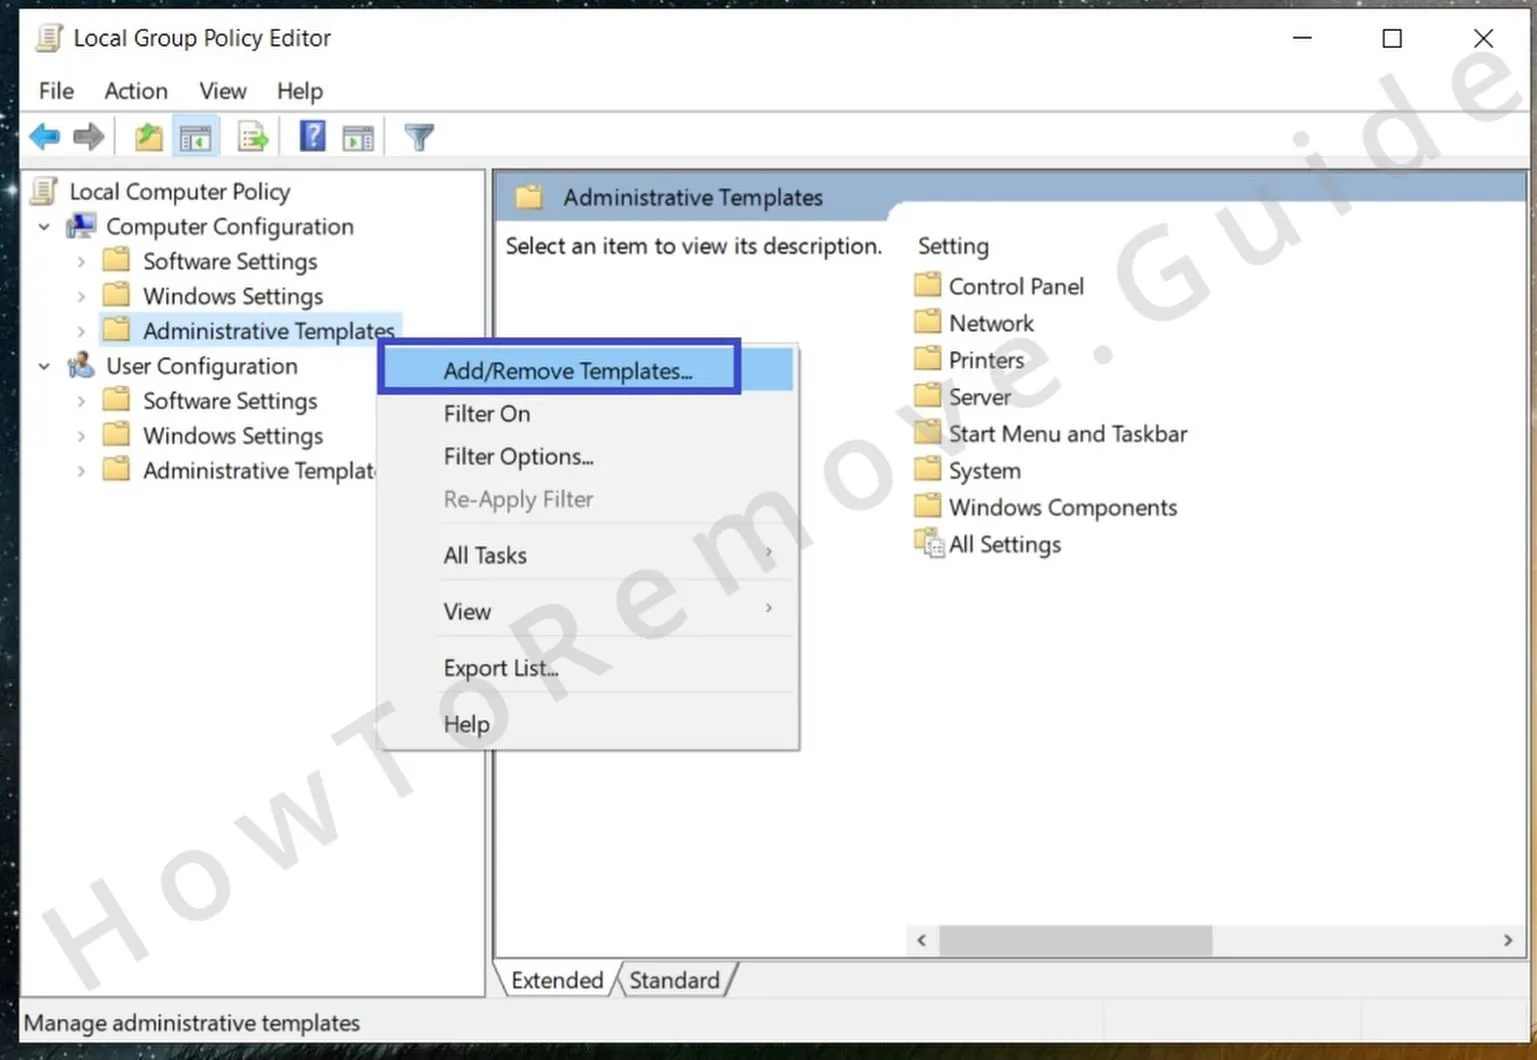
- A list of templates will appear. Any that might have been installed by the hijacker – delete them.
In many cases, this might be enough to free your browser, but it’s best to be exhaustive, so proceed with the following policy-cleaning steps:
- Open Chrome, type “chrome://policy” in the address bar.
- Using a different browser? Change “chrome” in the URL with that browser’s name (e.g. “brave://policy“).
- A list of active policies will show up. Search for any with odd values made of random letters. If you find such a policy, it’s likely from the hijacker.
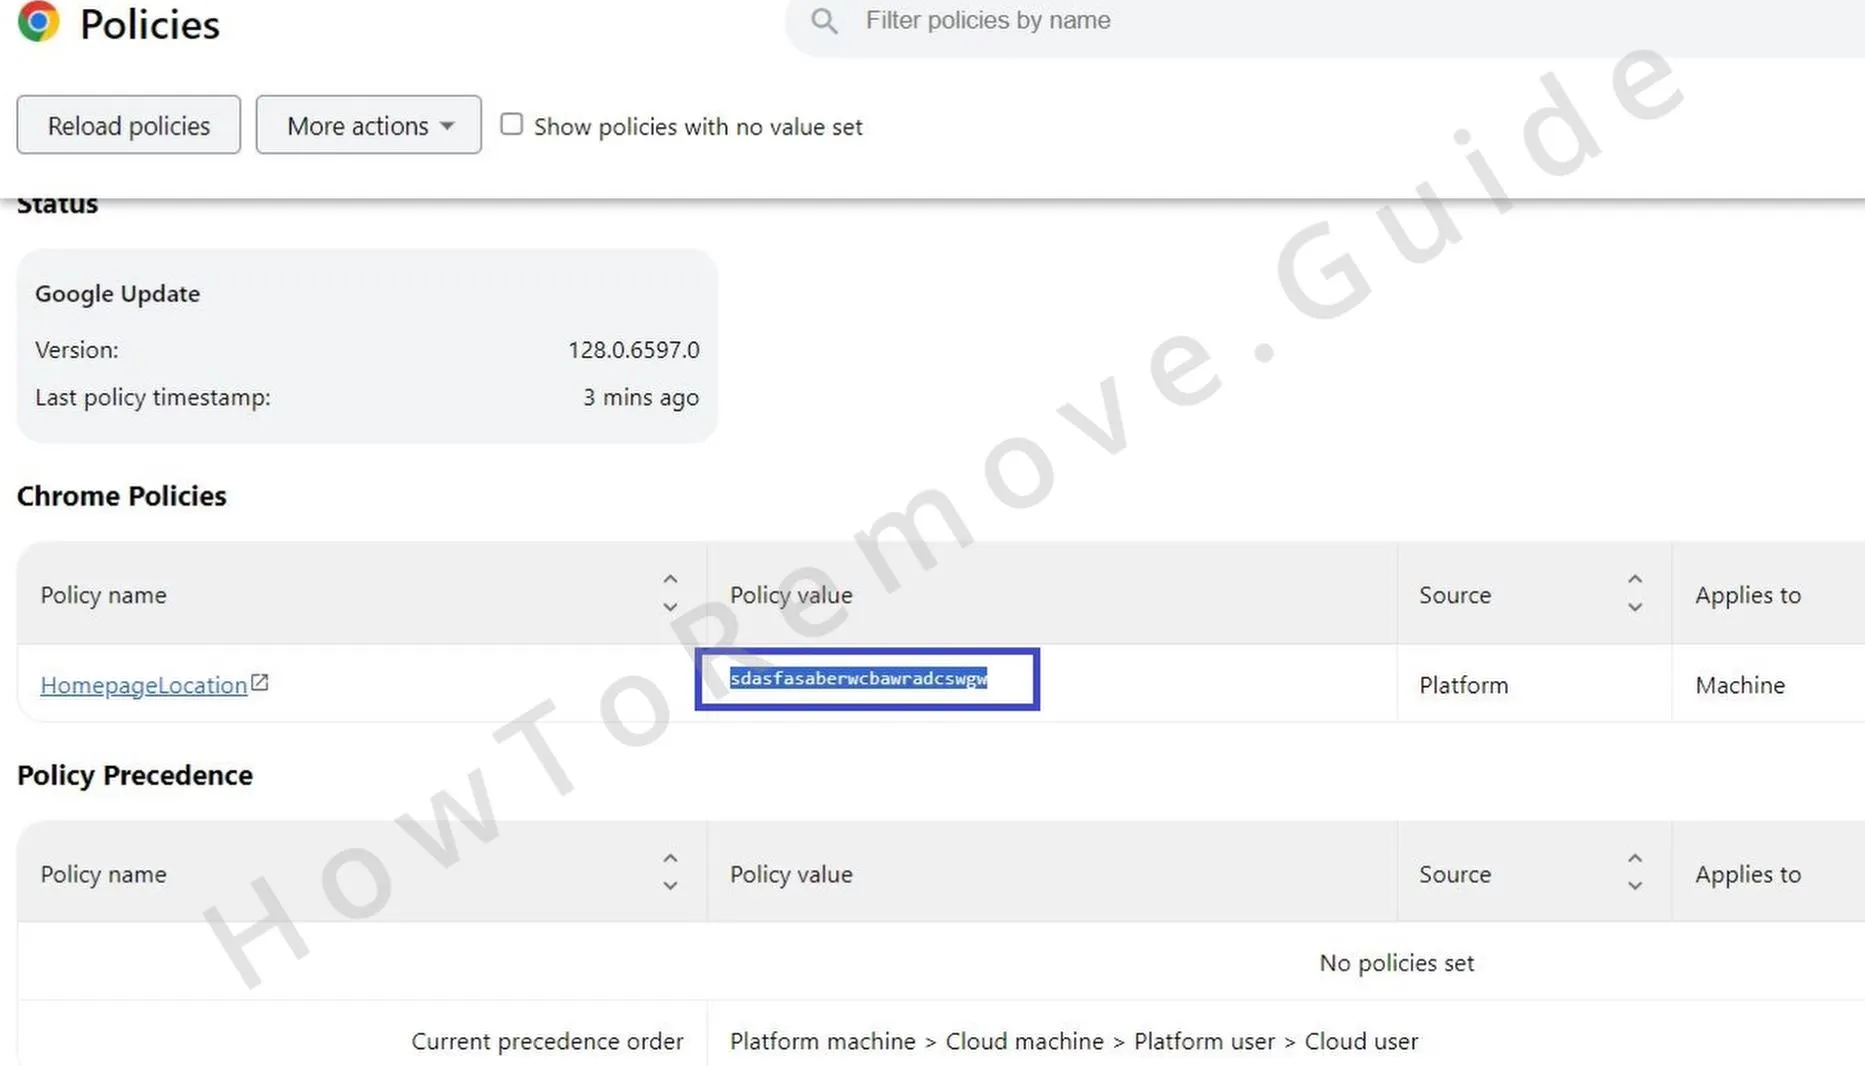
- Copy the suspicious policy values. You’ll need them later, so save them in a text file.
- Move on to the Extensions Manager (Chrome Menu > Extensions > Extensions Manager), enable Developer Mode.
- Copy the ID of Hsearchs and any other suspicious extensions and save them too.
Next, you must make changes in the Registry Editor by finding and deleting keys (registry folders) that are related to the rogue browser policy
Be very careful with this part of the guide. Deleting the wrong thing can make your system unstable and cause other issues. Therefore, we strongly recommend backing up your Registry before deleting anything:
- Open the Registry Editor by pressing Winkey + R, typing “regedit“, and hitting Enter.
- Go to File > Export, set the “All” export range, and create a backup with a name of your choice. If you ever need to use it, go to File > Import, then find and open the backup file.
Now you can proceed to the registry cleanup:
- Use the Edit > Find feature.
- Search for the policy values and extension IDs you copied.
- When found, delete the corresponding folders or keys. This step is essential. You remove the hijacker’s control with each deletion.
- Keep going until everything is erased – not one key related to a rogue policy value or extension ID must be left in the registry.
Some additional registry keys related to Google Chrome might need removal. Look for these specific ones in the left panel of the Editor and delete them:

If you still see the “Managed by your organization” note in Chrome, we recommend nuking any remaining third-party policies by downloading and running the Chrome Policy Remover tool.
It’s totally free and perfectly safe at the time of writing. You need to run it with admin privileges and click More Info > Run Anyway if you get a Windows warning.
Finally, to ensure that no data linked to the rogue extension is left on your PC, you must delete a couple of folders in the system:
- First, configure Windows to show hidden files and folders: Search for “Folder Options” in the Start Menu and open the first thing.
- Go to the View tab. Select “Show Hidden Files and Folders“. Apply the settings.
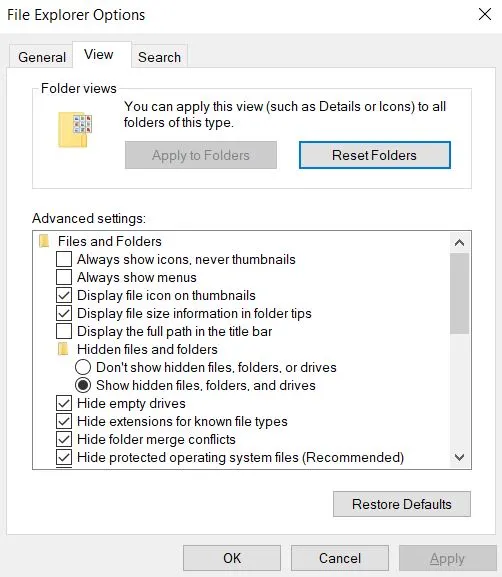
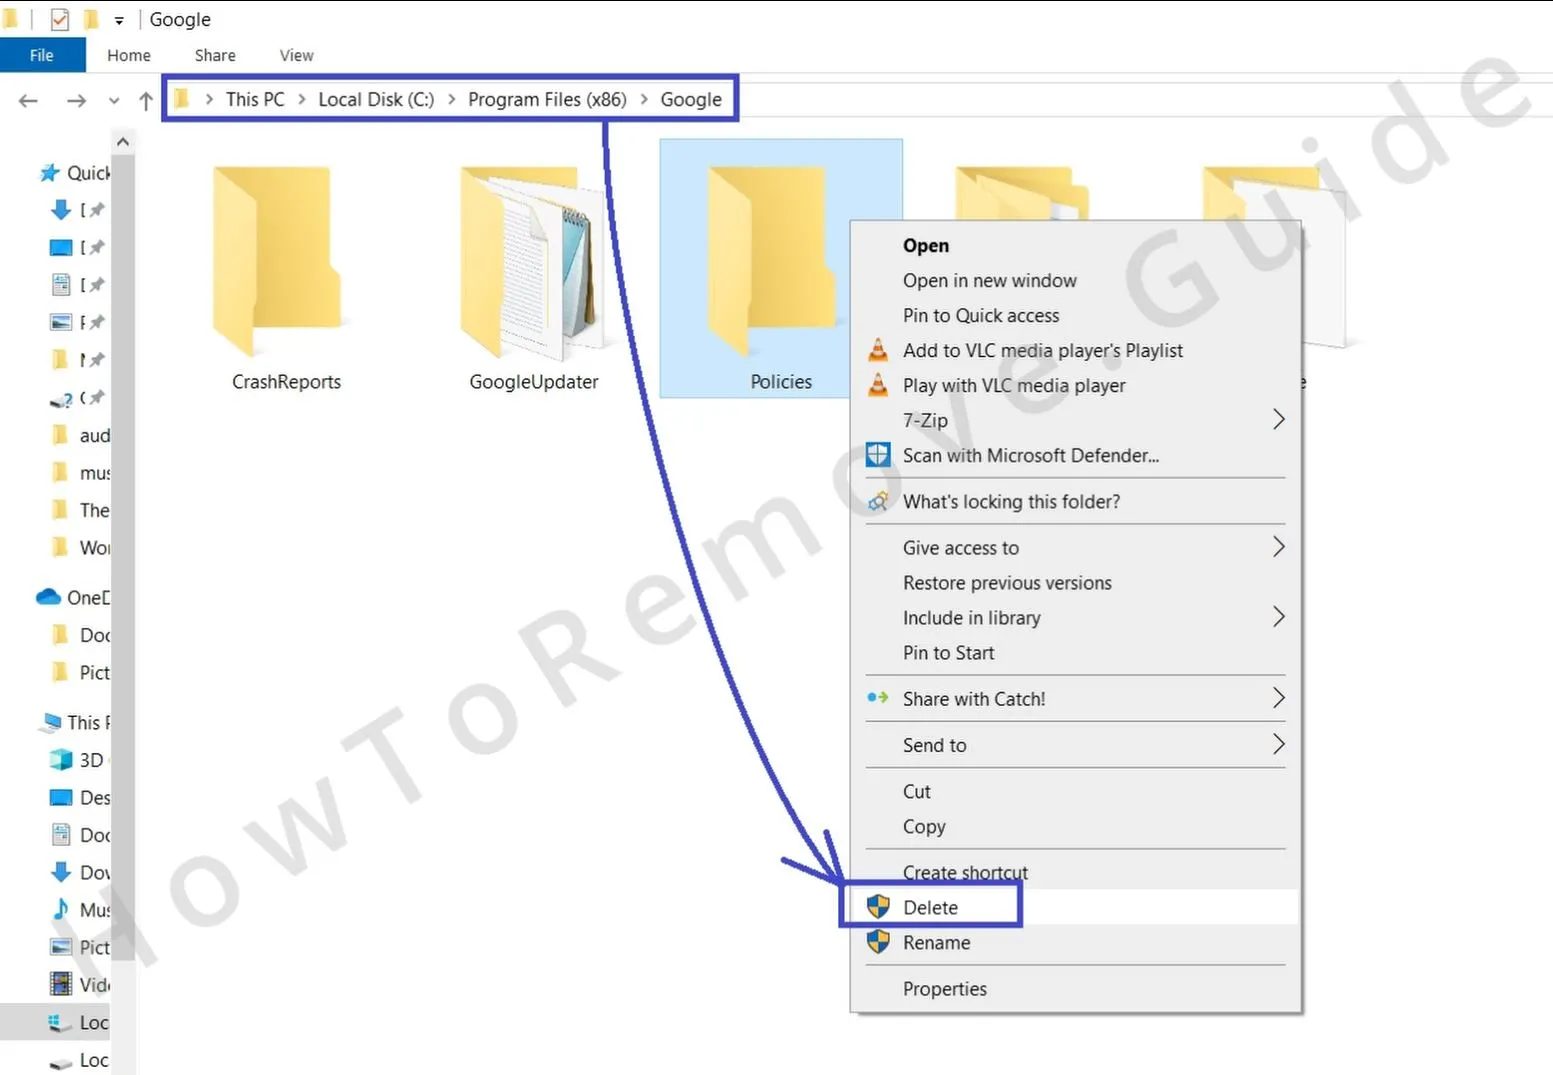
- Head to C:\Windows\System32. Delete the GroupPolicy and GroupPolicyUsers folders if they’re there. These might contain more hijacker policies.
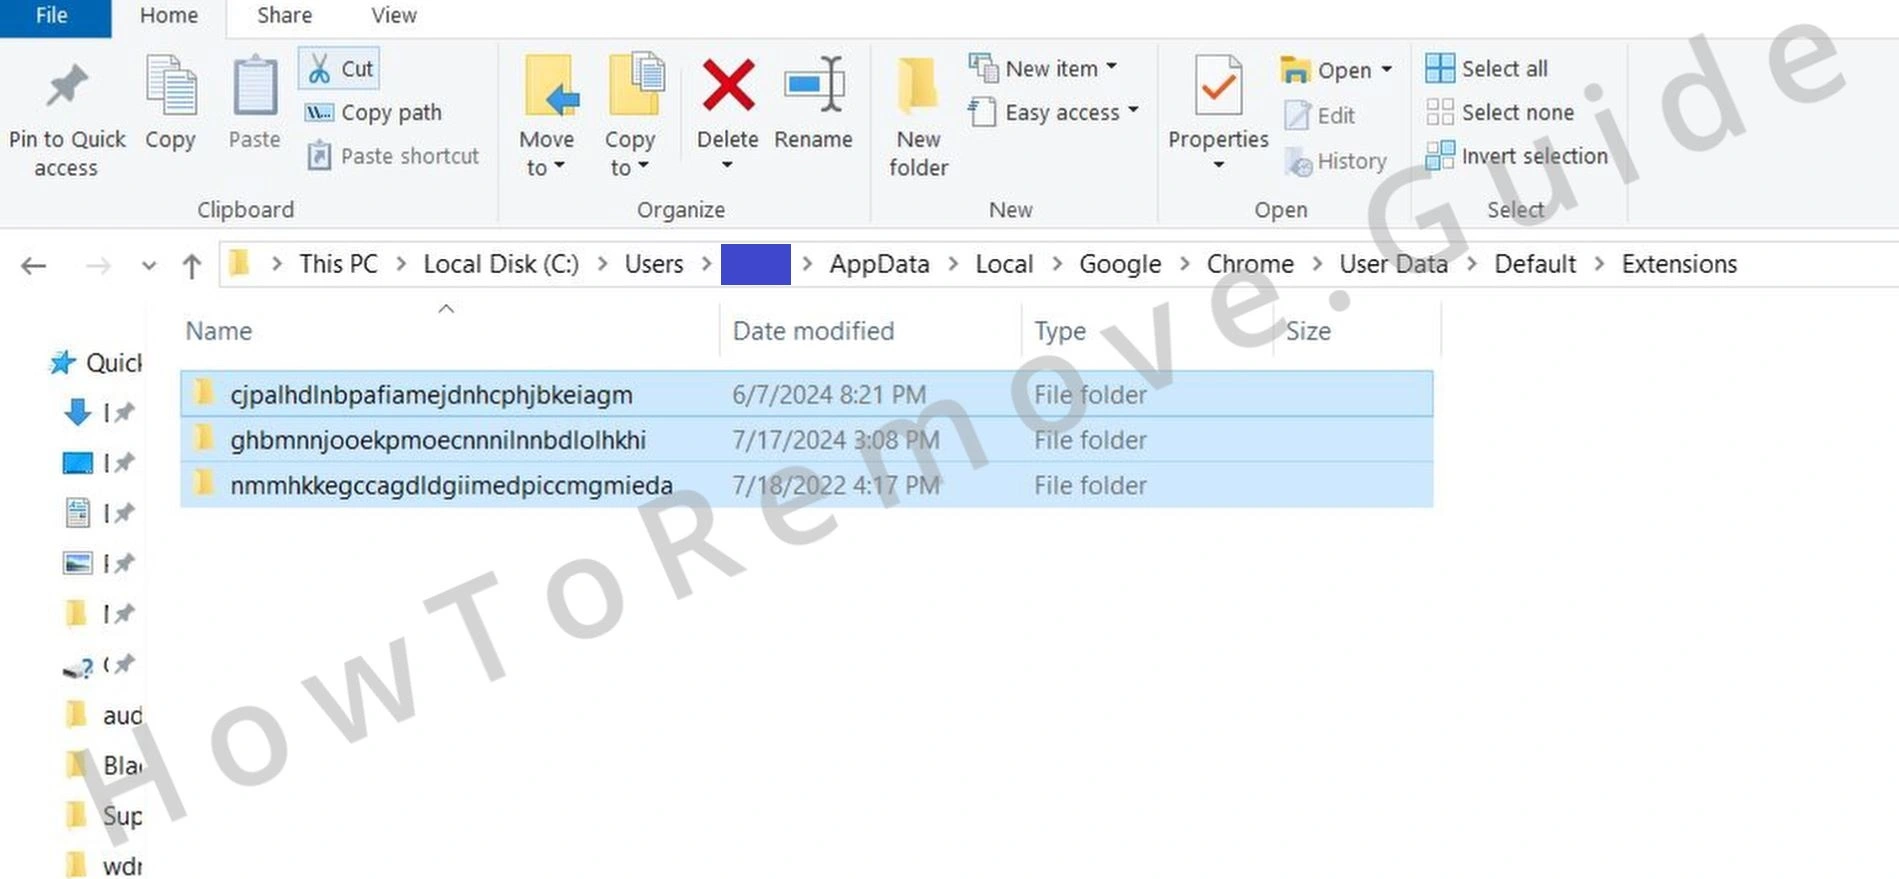
- Go to Users > your user folder > AppData > Local > Google > Chrome > User Data > Default > Extensions and delete everything shown there. This will corrupt all extensions in your Chrome browser, but the legitimate ones can be repaired with the click of a button.
- Press Winkey + R, type “cmd”, hit Enter. In Command Prompt, type “gpupdate /force“. Run the command.
Now you should finally be ready to restore the regular settings of your browser as explained in the next section.
How to Uninstall the Hsearchs Extension From Your Browser
Move on to clean your browser of any extensions or settings tied to the hijacker:
Open the settings menu in your browser, and go to the Extensions page. Inspect all installed extensions. Remove Hsearchs and any other unfamiliar or suspicious ones.
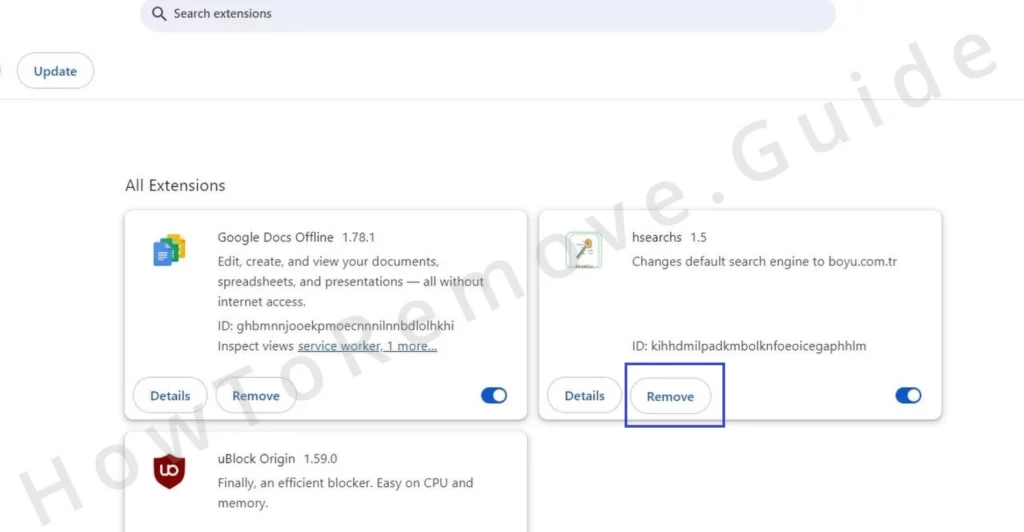
You can click Repair on the add-ons you trust and want to keep in order to restore them.
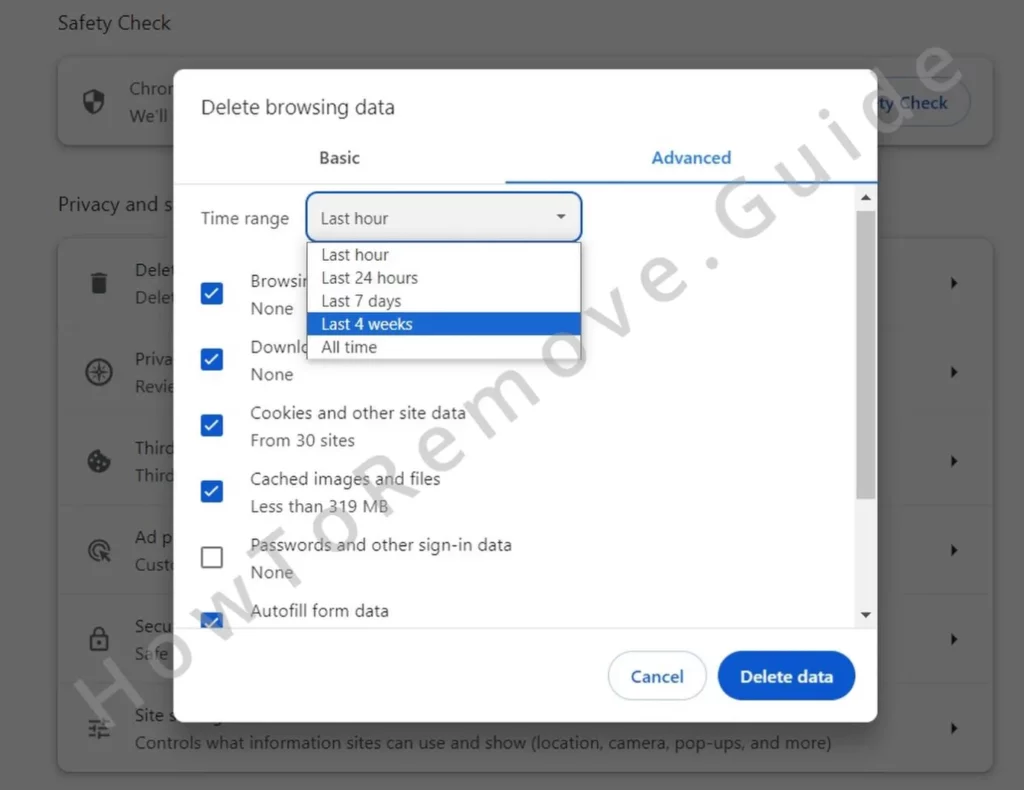
Clear your browsing data next by opening the browser menu and going to Settings > Privacy and Security > Delete Browsing Data. In the Advanced tab, choose a time range that goes back before the hijacker appeared. Check all boxes except Passwords. Delete the data.
Check Site Settings in your browser, still in the Privacy and Security tab. Look at the Notifications section and remove any suspicious URLs listed under “Allow“. Potential URLs to look out for are findflarex.com and boyu.com.tr.
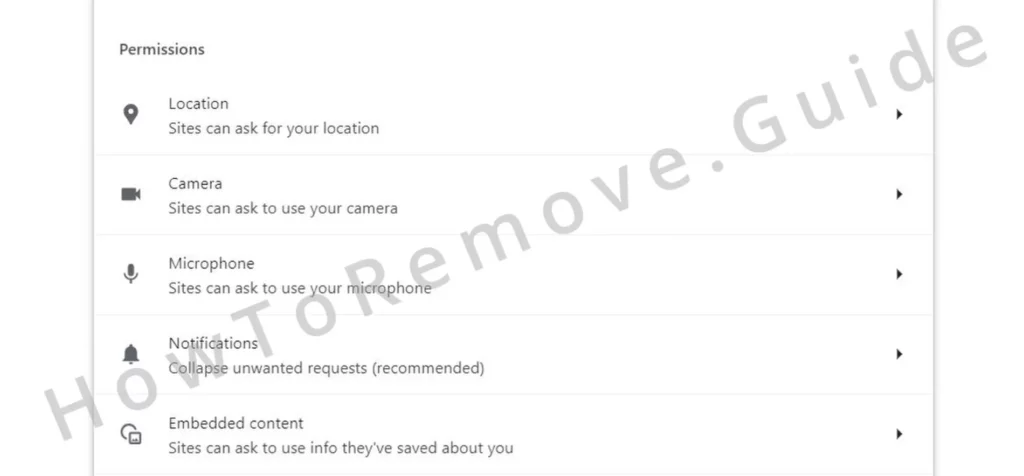
Visit the Appearance and On Startup sections next and remove any suspicious URLs.
Also check your search engine settings. First ensure your default search tool is something legitimate and then make sure no unauthorized search engines got added in the Manage Search Engines section. If you find any unfamiliar ones there, delete them.
After completing all these steps, the Hsearchs hijacker should be gone. If it lingers, or if your antivirus keeps warning you, consider using a specialized tool. SpyHunter might be the solution. It’s designed to target and eliminate persistent threats like browser hijackers. You can trust it to finish the job if the manual steps weren’t enough.

Leave a Reply