We recently came across a rogue software called IcuApp that appears to be linked to adware apps like YuuvApp and BivaApp. It shares a similar obstructive behavior, with a tendency to spam the user with sudden notifications and intrusive ads. And also, like the two other mentioned adware examples, it too tends to be quite difficult to remove.

Therefore, we deemed it necessary to further research the topic with the main objective of creating a detailed and up-to-date removal guide that can help our readers manually eradicate this malware from their systems.
IcuApp Removal Guide
Thoroughness and precision are necessary to successfully tackle the IcuApp malware. This stubborn software digs deep and creates files and processes that are specifically designed to make it hard to remove.
But worry not, this guide will walk you through the steps to completely remove IcuApp from your system. We are familiar with this type of adware apps and have spent a lot of time and effort to put together the most detailed guide to remove them that you’ll find on the web. All you need to do is to simply follow it.
SUMMARY:
READ BEFORE PROCEEDING!
Adware creators constantly find new ways to make their software harder to eliminate. We do our best to keep up with the new tricks they employ and to update our guides accordingly, but it’s always possible that we miss something.
Additionally, manually removing malware requires some level of technical knowledge that not all users have.
If you are struggling to complete the guide or the malware is still on your PC even after you’ve performed all steps, we recommend trying a specialized removal tool like SpyHunter, a professional anti-malware program available on this page.
Preparing for Removal
In all our manual guides we aim to provide you with instructions that don’t require you to download third-party software, but this time, you’ll need to download a free tool called Lock Hunter. It’s essential and non-negotiable. You’ll most likely need it in this guide, so best to get it now.
This app identifies what’s preventing a file or folder from being deleted. It’s totally free and only requires a couple of clicks to install, so be sure to get it now before you continue.
How to Uninstall IcuApp
Start by identifying and uninstalling suspicious programs – IcuApp and anything else that’s in your system, but shouldn’t be there:
- Open the Start Menu. Type “Apps & Features” > open it.
- Sort by installation date and review the list of apps.
- Anything unfamiliar, especially installed around the time IcuApp appeared? Uninstall it.
- If IcuApp itself is there, uninstall that too. This step is crucial.
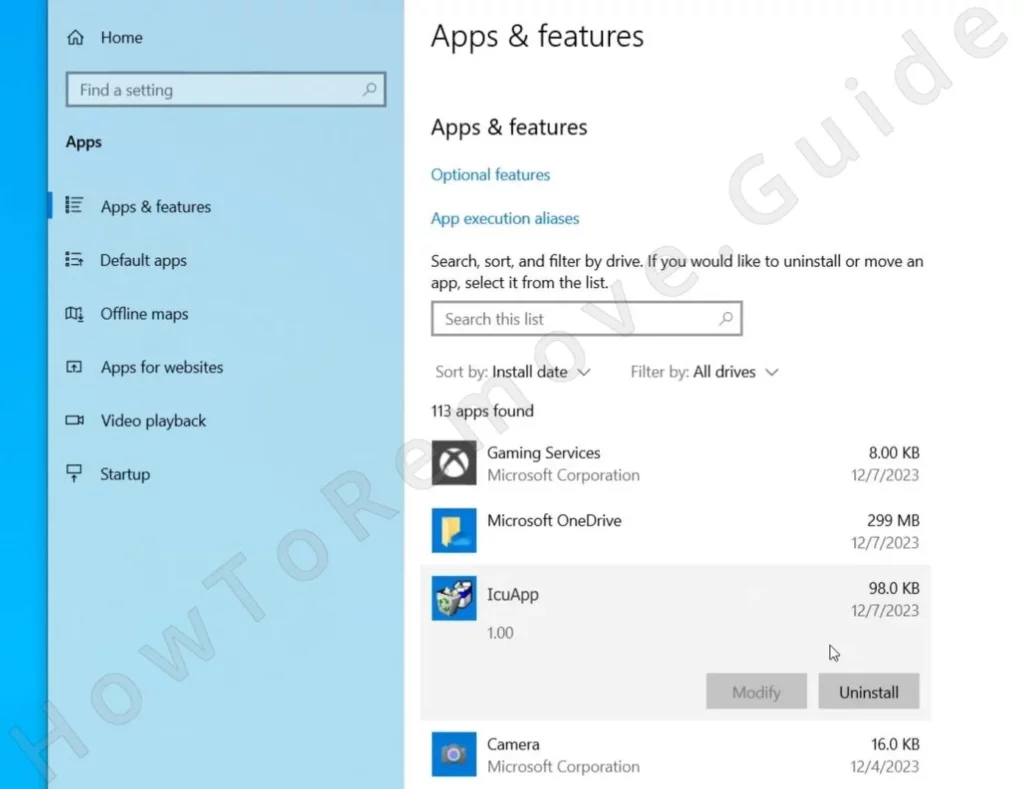
Simply running the uninstaller for IcuApp or any other sketchy app is likely not going to be enough. Furthermore, it’s even possible that you aren’t allowed to go through with the uninstallation. In either case, proceed with the next steps.
Revealing Hidden Files
IcuApp hides its files, so you’ll need to expose them by configuring your system to reveal hidden files.
Open the Start Menu, type “Folder Options”, press Enter.
Go to the View tab. Select “Show hidden files, folders, and drives”. Click OK.
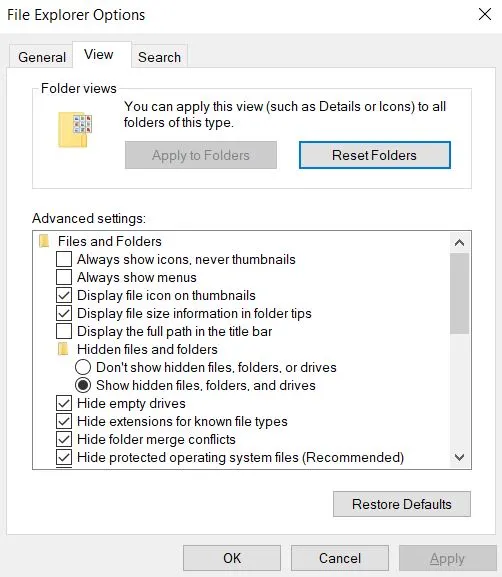
Your system will now display hidden files and folders and their icons will appear semi-transparent.
Deleting the IcuApp Folder
Next, delete the core files of IcuApp. Navigate to C:\Users\YourUsername\AppData\Roaming. Look for a folder named IcuApp or Troxbox Publish.
Find anything suspicious? Try deleting it.
It’s possible that you are blocked from doing that. If you get an error when you try to delete the folder, right-click and select “What’s locking this folder?” – this option will be in your right-click menu if you install Lock Hunter.
In the next window, select the Delete it option to unlock and delete the stubborn file/folder.
This step is pivotal. It targets IcuApp’s main files, so don’t skip it!
Checking the Task Scheduler
IcuApp may reinstall itself through scheduled tasks so you must examine the Task Scheduler.
Search for it in the Start Menu and open it by pressing Enter.
Inspect the list in the Task Scheduler Library. Anything unfamiliar? Right-click, select Properties.
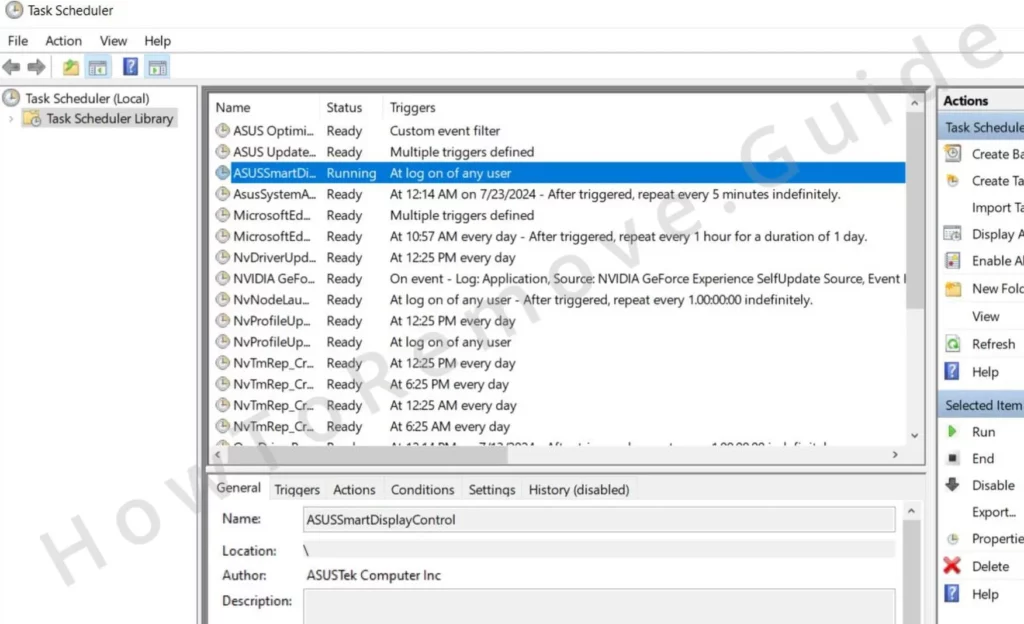
Check the Actions tab. If it points to something in AppData or Roaming, disable or delete the task. Do the same if the task runs some sketchy and unfamiliar program or script.
Missing this step risks IcuApp returning, so don’t overlook it or all your hard work could be in vain.
Clearing the Temp Folder
Clear the Temp folder next. IcuApp may have left remnants there.
Open the Start Menu, type “%Temp%”, hit Enter.
Delete everything inside the Temp folder. These are all temporary files, so it’s safe.
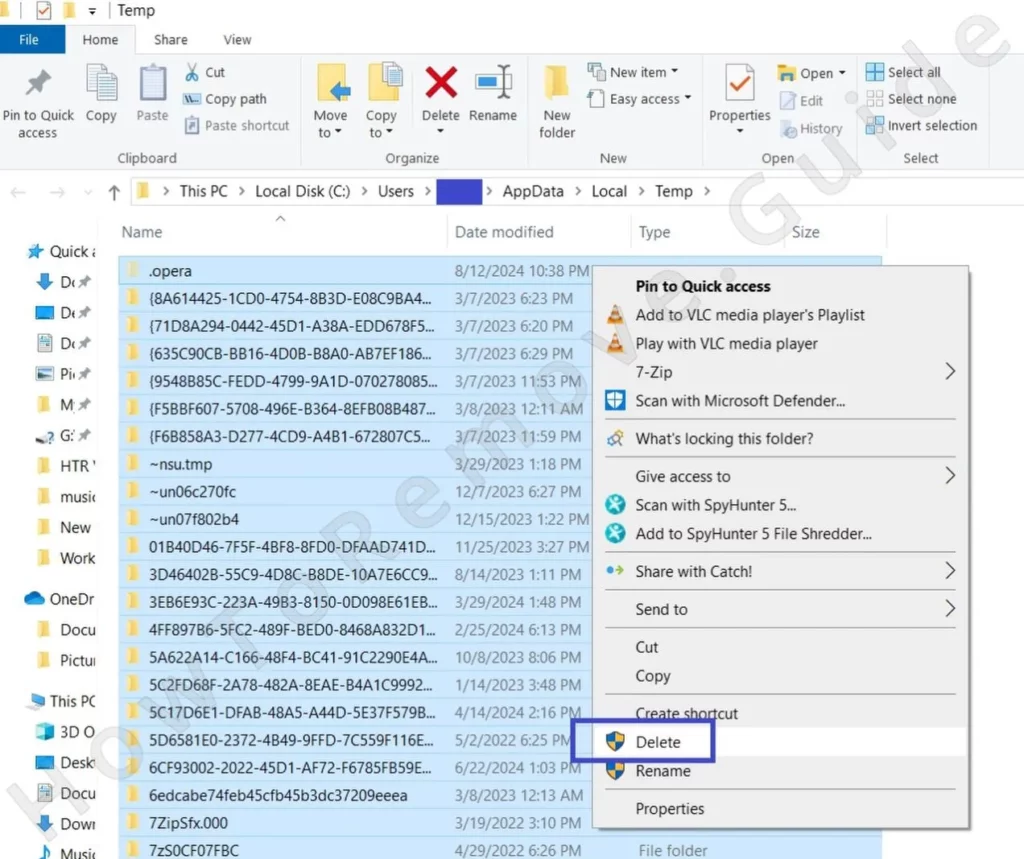
This step ensures no leftover files remain. Reduces the risk of reinfection.
Cleaning the Registry
The Windows Registry is our next step on our way to eliminating the IcuApp.
Access the Registry Editor by typing “regedit” in the Start Menu and running the first app as Administrator.
Use Ctrl + F to bring up the search box and search for “IcuApp”. Delete related entries. Each search will only show a single result, so make sure to repeat the search after each deletion to see if there are any other related items.
Once all IcuApp keys (registry folders) from the left panel are deleted, repeat the process using “Troxbox” as the search term.
Then manually navigate to the following keys and delete them if they exist in your Registry Editor.
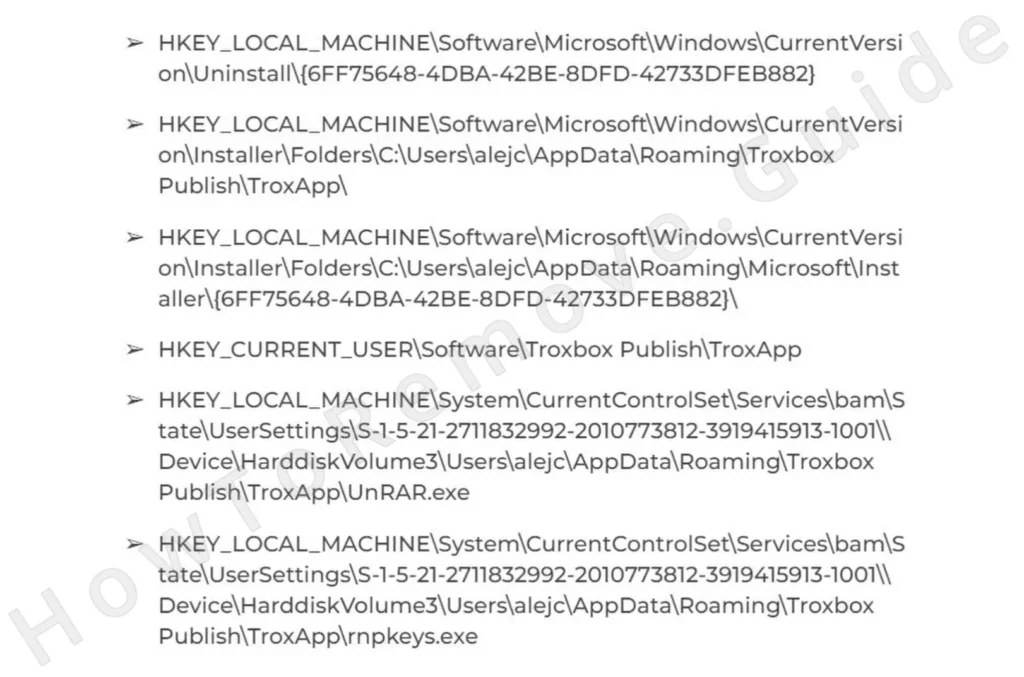
Caution is key here. Deleting the wrong registry key could cause problems, but removing every trace of IcuApp is crucial.
If you are worried about deleting the wrong thing in the registry, consider using SpyHunter to clean your system for you.

How to Get Rid of the IcuApp Virus in Chrome
Lastly, check your browser settings. IcuApp is, after all, an adware app, so it may have modified your browser to show you more ads.
In Chrome, type chrome://management/ into the address bar. Does it say “Managed by your organization”? If yes, a couple more steps are required.
Open the Group Policy Editor (search for “Edit Group Policy” in the Start Menu).
Navigate to Computer Configuration > Administrative Templates, right-click > Add/Remove Templates.
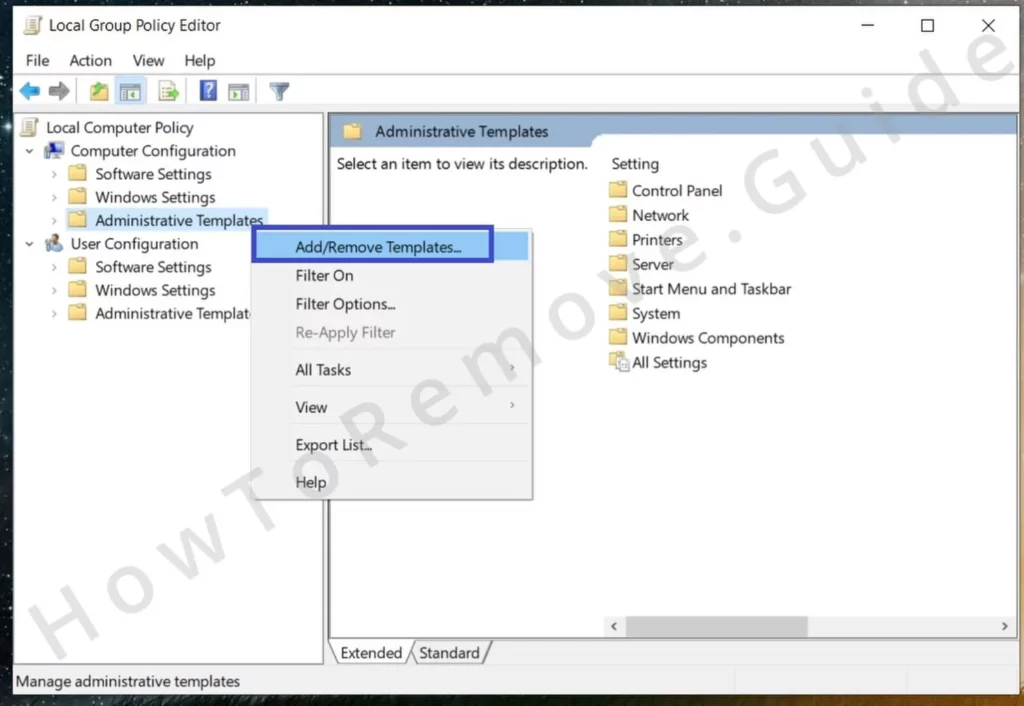
Remove templates not added by you.
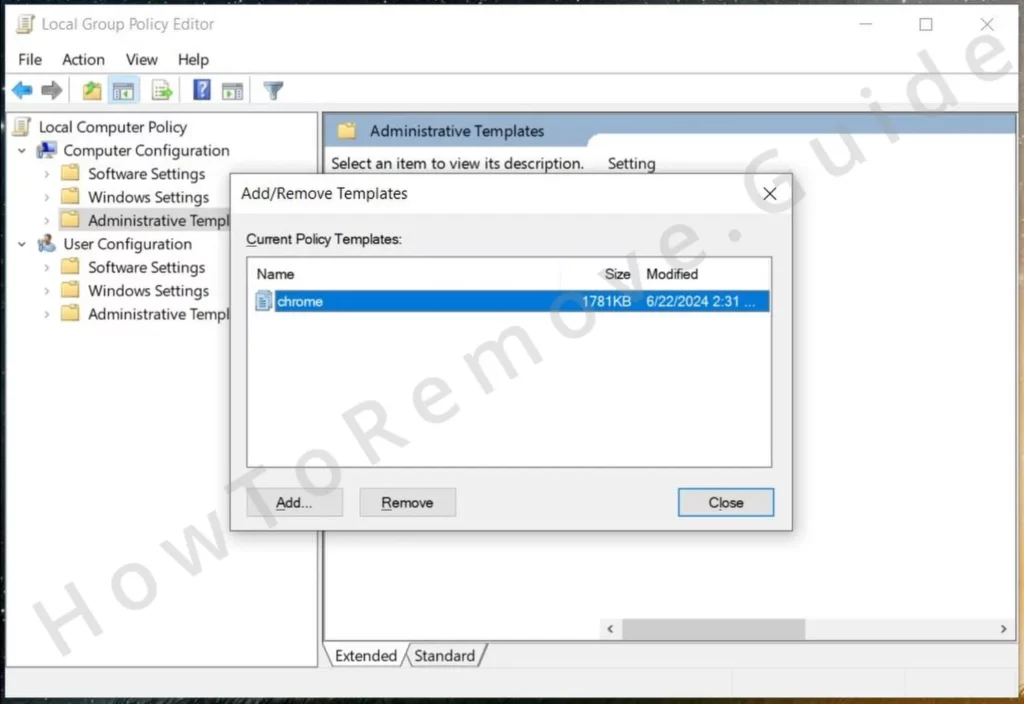
This will usually be enough to free your browser from the adware’s influence, but we recommend going a step further:
Download and run as Administrator the Chrome Policy Remover – it’s another free to use too. The tool may trigger a Windows security warning, but don’t worry, it’s safe. If this happens, just click More Info, and then you’ll be granted the option to run it anyway.
Once run, the Chrome Policy Remover automatically gets rid of remaining policies that might be controlling your browser.
Delete the IcuApp Adware
You now can (and must) go to your browser and restore any unwanted changes that the IcuApp may have made in it.
Check your browser settings at chrome://settings/.
In the Privacy and Security tab, clear browsing data from before the adware appeared. Leave passwords intact.
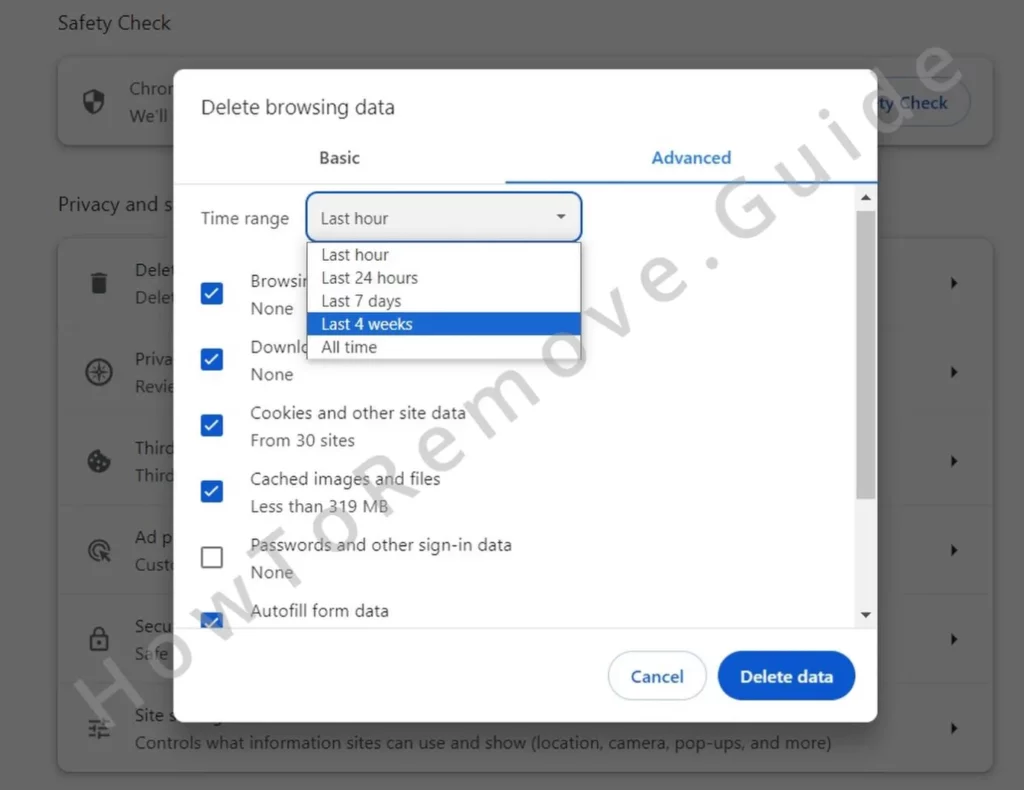
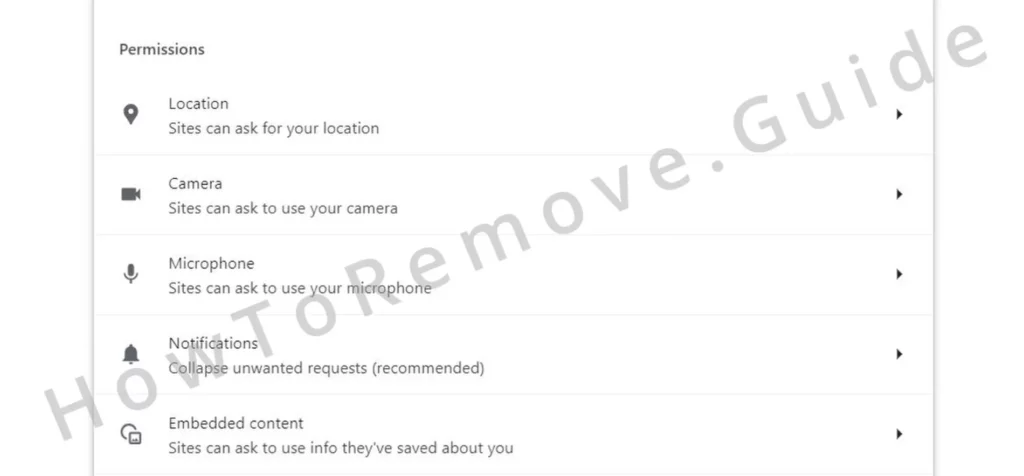
Then, in the same tab, open Site settings and review each type of permissions. If you notice any suspicious URLs there (in the “Allow” sections), remove them from the three-dot menu next to them.
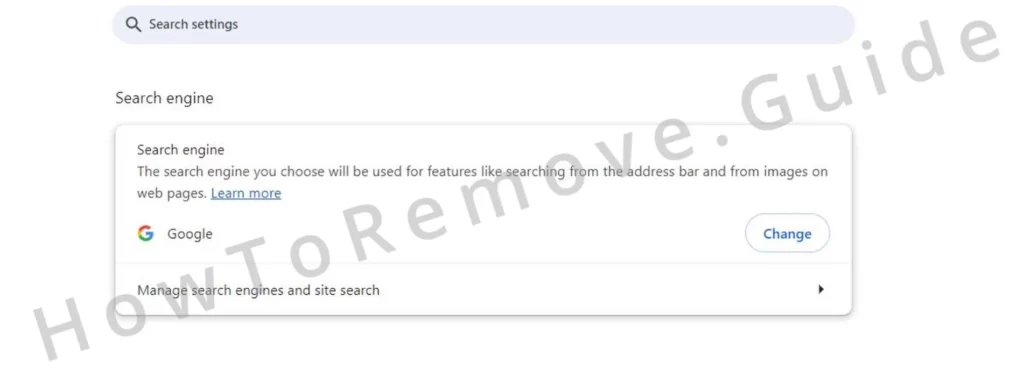
Then check the search engines tab. Ensure the default search tool of your browser is something trusted, then examine the items in the Manage Search Engines section, and delete anything unfamiliar.
Also check the Appearance and On Startup for suspicious URLs. Remove anything unfamiliar.
Last but not least, don’t forget to go to the Extensions Manager in the browser and remove any you don’t recognize.
Follow these steps. Carefully. You can remove IcuApp malware from your system by yourself, but you need to be thorough and not rush anything.
And, of course, if the manual steps prove too demanding or simply don’t work in your case, don’t forget about the alternative solution of using SpyHunter or another reliable removal software to resolve the adware situation.

Leave a Reply