Just as we thought that the wave of browser hijacker extensions that promote the rogue boyu.com.tr search engine was over, the creators of these extensions seem to have rebranded themselves to create even more unwanted browser add-ons.
Today’s culprit is called InstantQuest and it is basically the same thing as other similar hijackers we’ve dealt with in the past – Funny Tool Redirect, ISEEK, etc. Like those other ones, InstantQuest has an actual Chrome Web Store page, but most users don’t get it from there. Instead, it gets installed through file bundles: pirated games, console game emulators, mods for Roblox and Minecraft, and other open-source software.
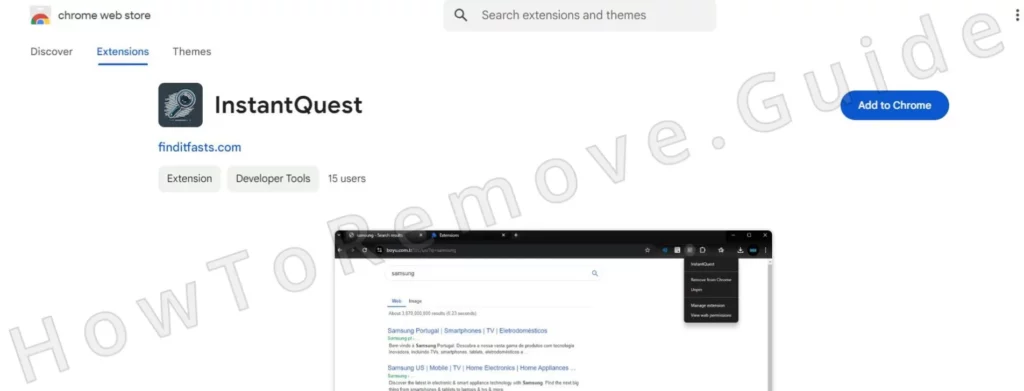
Once it gets inside the browser, the default search engine is changed to boyu, which is not only annoying, but can also lead to security issues. For example, the results shown by this fake search engine can be unsafe and expose you to malware or online scams, which is one of the many reasons you must remove InstantQuest.
InstantQuest Removal Instructions
Due to a third-party policy that InstantQuest introduces to the browser, removing this hijacker manually typically requires some semi-advanced steps that take some time to complete. However, if you are lucky, the shorter removal below could also work and save you time, so we recommend trying it first:
- Open the affected browser, open its menu, and go to Settings > Extensions.
- Look for InstantQuest and if there’s a remove button below it, click it to remove the extension.
- Proceed to Privacy and Security > Site Settings.
- Check the Notification permissions and Pop-ups and Redirects permissions. If you spot boyu.com.tr or another sketchy site delete it.
- Close and restart your browser.
If InstantQuest remains, more advanced methods will be needed. Hijackers use simple tricks, but simple solutions don’t always work. These tricks enable them to reappear or outright “refuse” to be removed. But don’t worry, the next steps hold the solution.
SUMMARY:
| Name | InstantQuest |
| Type | Browser Hijacker |
| Detection Tool |
We tested that SpyHunter successfully removes InstantQuest* and we recommend downloading it. Manual removal may take hours, it can harm your system if you re not careful, and InstantQuest may reinstall itself at the end if you don’t delete its core files. |
If InstantQuest got to you thanks to another rogue app it was bundled with, that app must also be deleted or else the hijacker might return. The Advanced Steps shown below will help you remove InstantQuest, but not the software that brought it to you.
We can’t provide specific steps for it since we don’t know what it is. To get rid of any additional rogue software installed in your system, we recommend using a removal tool, such as the powerful SpyHunter 5, which you’ll find on this page.
How to Get Rid of InstantQuest (Advanced Removal)
The phrase “Managed by your organization” in the browser signals the hijacker has applied a policy. This is what’s most likely preventing you from uninstalling InstantQuest. Policies block your control over the browser and block you from reversing any unwanted changes made to its settings. Therefore, you must first delete them:
Open the Chrome browser and type chrome://policy into the address bar, or use edge://policy for Edge. For other Chromium-based browsers, just change the name in the URL.
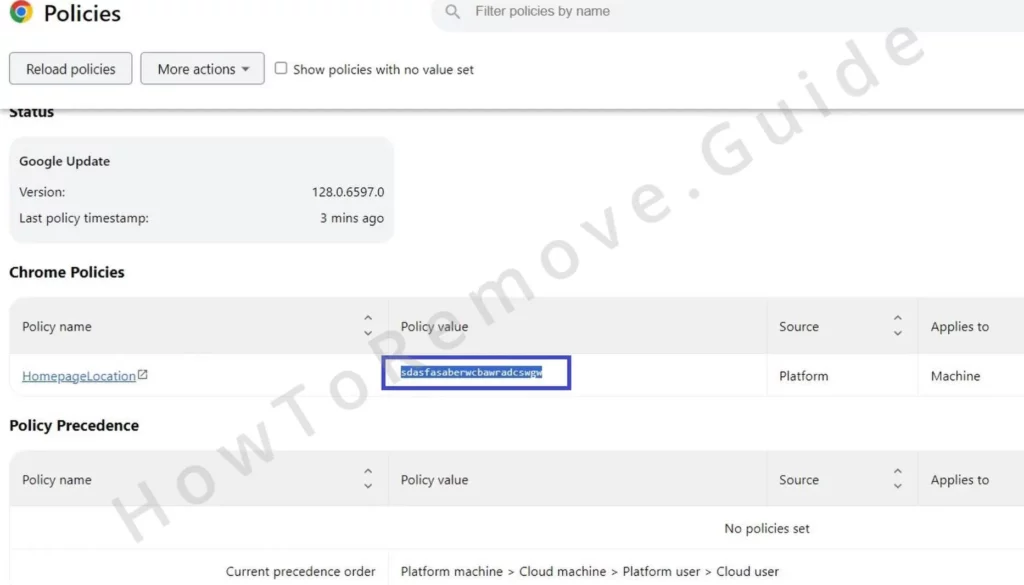
You will see a list of active policies. Search for values that look like random letters and numbers. These are likely rogue, so you must copy and save them in a text file. You will use these values later to regain full browser control.
Next, you must gather some information from the Extensions Manager of the browser, so go to it again.
Sometimes, InstantQuest might block you from accessing the Extensions Manager. If this happens and you are using Chrome, navigate to:C:\Users\[Your Username]\AppData\Local\Google\Chrome\User Data\Default\Extensions
For other browsers, go to the respective folder path:
- Microsoft Edge:
C:\Users\[Your Username]\AppData\Local\Microsoft\Edge\User Data\Default\Extensions - Opera:
C:\Users\[Your Username]\AppData\Roaming\Opera Software\Opera Stable\Default\Extensions - Brave:
C:\Users\[Your Username]\AppData\Local\Brave Software\Brave-Browser\User Data\Default\Extensions
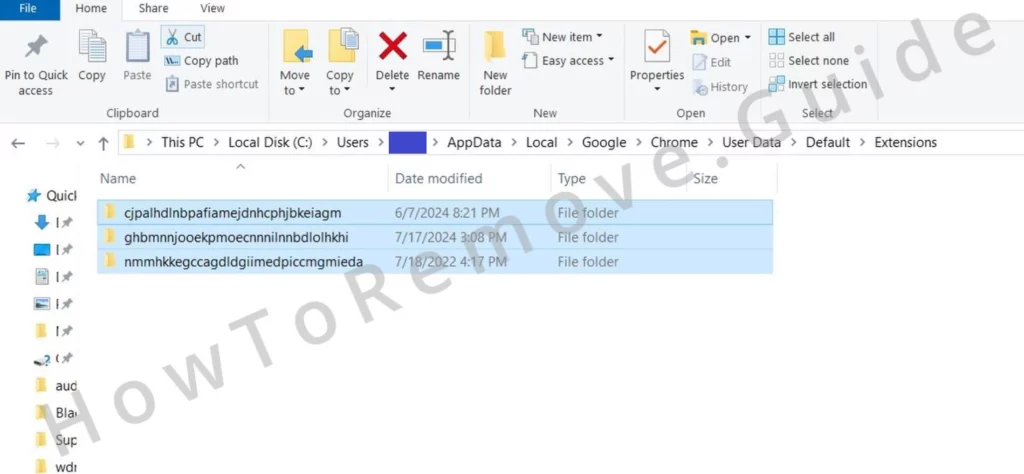
Open the respective folder for your browser and delete everything there. Once complete, revisit the browser Extensions page – it should be accessible now.
In the Extensions Manager, activate Developer Mode to see more information about each extension. Copy the ID of InstantQuest and any other suspicious extensions and store them with the rogue policy values.

Delete InstantQuest Virus Policies
You now have the necessary information to find and delete any rogue InstantQuest policy data from your system’s Registry. Here’s how to do it:
Open the Registry Editor with administrator privileges by pressing Winkey + R, typing regedit, and hitting Enter.
Search for the rogue policies: Press Ctrl + F, then copy-paste the first rogue policy value from earlier, and press Enter to search.
Delete matching registry keys. Keys are like folders in the registry (you’ll see them in the left panel). Remember to run an extra search after each rogue key deletion to ensure there aren’t any others.
Sometimes registry keys resist deletion because the hijacker restricts your access to them. The fix is simple:
Right-click the parent key. Open Permissions, then Advanced, then Change. Type the word “everyone” in the available text field, then click Check Names.
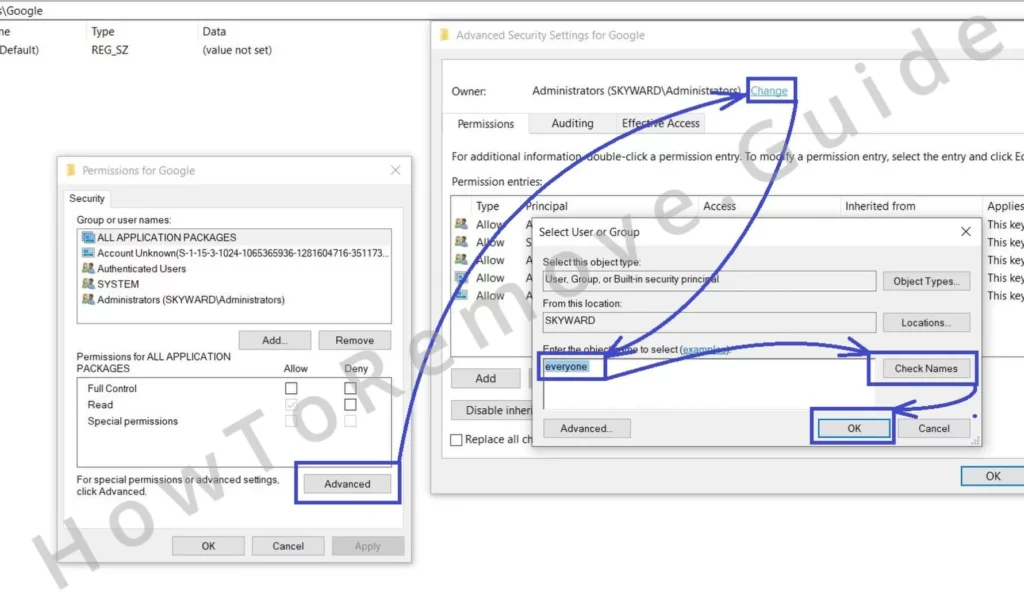
Now click Apple > OK, put ticks in the two new “Replace“ options, and click Apple and OK again.
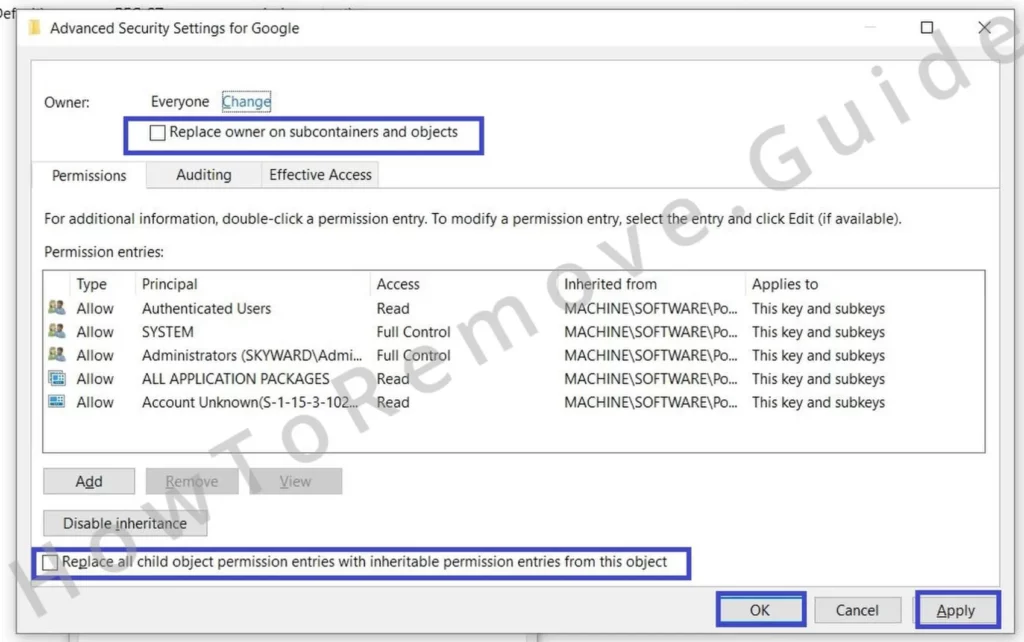
Once you’ve deleted all keys associated with a particular policy value, search again for any other you’ve saved, and also do the same with the rogue extension IDs.
More Methods to Get Rid of InstantQuest Malware Policies
If problems persist, the Group Policy Editor must be checked. Search for it in the Start Menu and open it. Then, right-click Administrative Templates > Add/Remove Templates and delete anything not added by you.
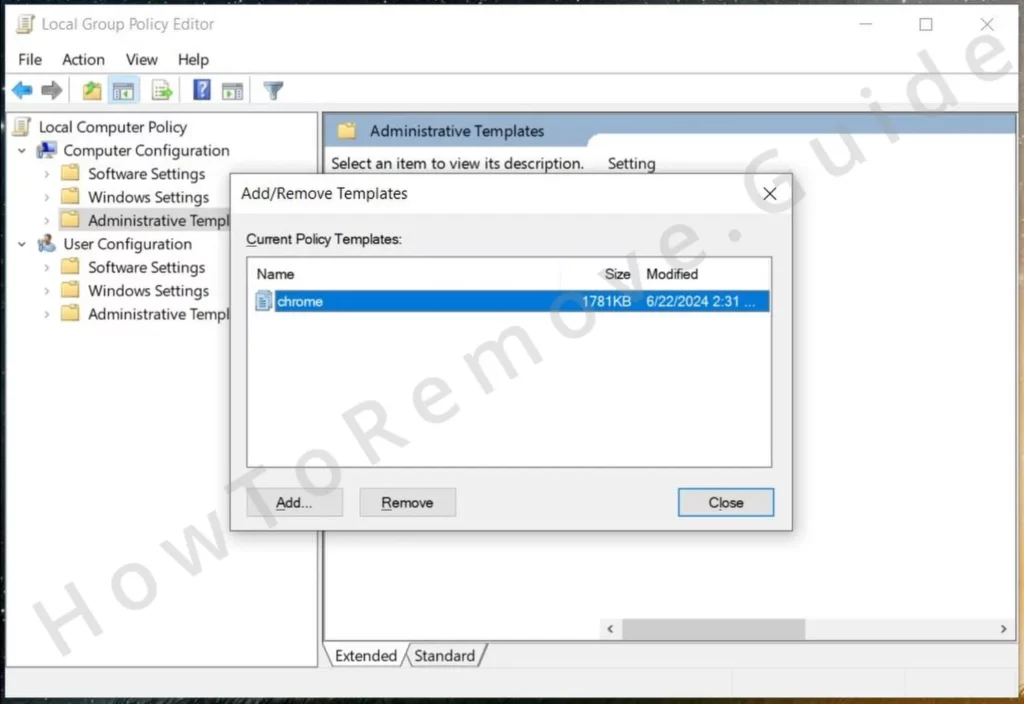
Chrome users can also make use of a free tool called Chrome Policy Remover. Download and run it with administrator rights, and let it handle the rest.
Windows Defender and some third-party antiviruses might give you a warning or even directly delete this tool, but don’t worry, it’s safe to use, so whitelist it and start it anyway. It will automatically run a script that clears all currently active Chrome policies.
Uninstall InstantQuest Extension From Chrome and Edge
The final part of this guide is to delete the hijacker extension and reverse any changes it has made in the browser. You should now be able to do that since you’ve already dealt with the rogue policies.
Yet again, open the browser and return to the Extensions page. Click Remove under the InstantQuest extension and any other add-ons you don’t want in the browser.
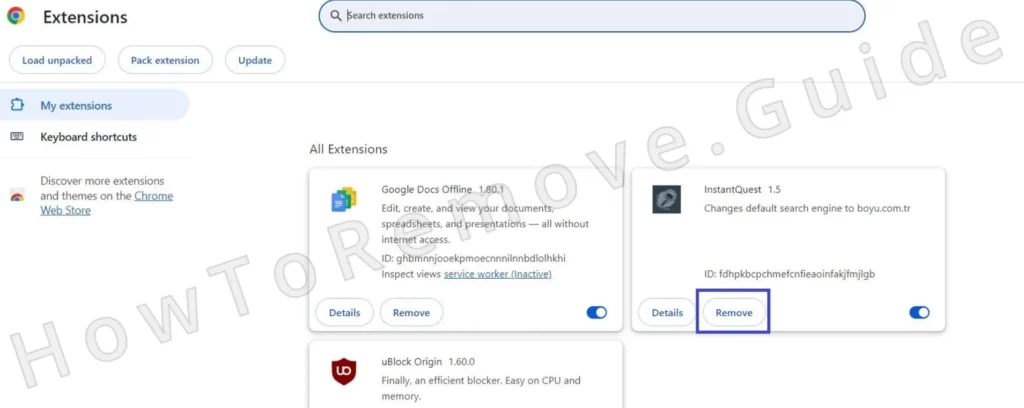
Now is also a good time to repair any legitimate extensions that got corrupted when you deleted their folders earlier in the guide. Just click the Repair button that should appear underneath them when you try to use them.
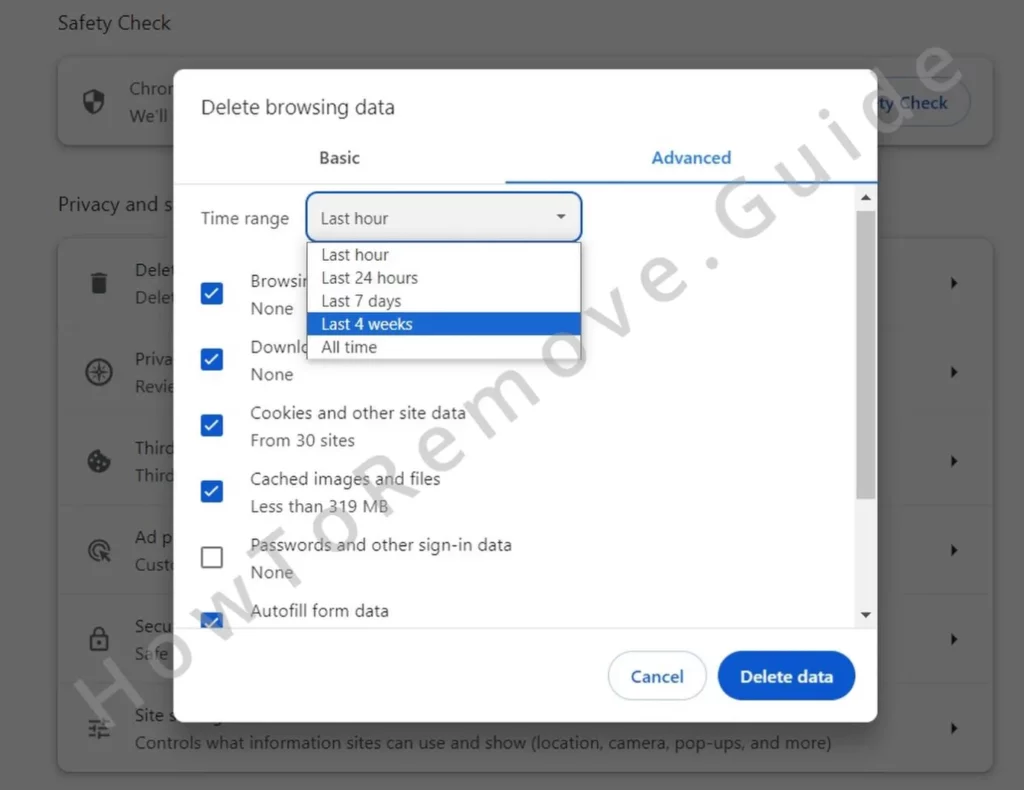
Also, re-visit Privacy and Security. This time make sure to clear browsing data: Clear cache, cookies, and site data for a period that extends to before InstantQuest appeared. Be careful not to delete passwords, though or you’ll have to re-enter all of them manually.
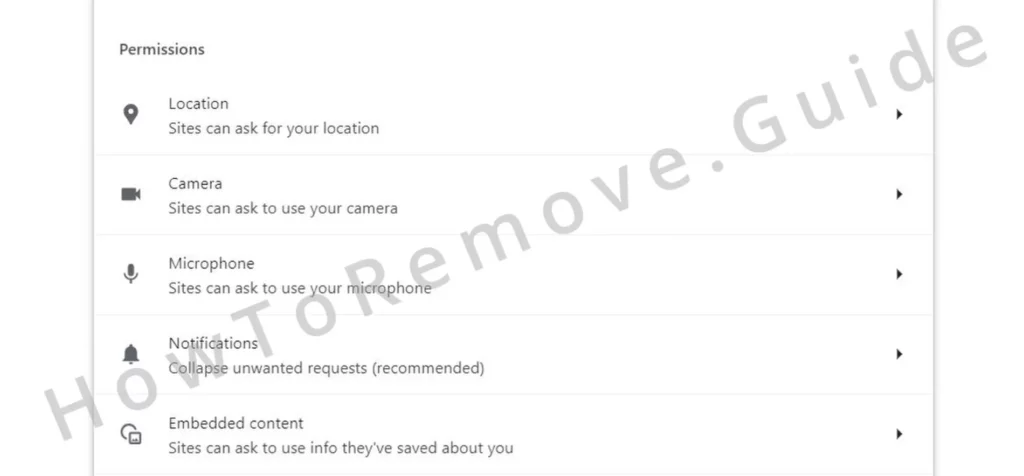
Review the Site Settings one more time. This time check all permissions to ensure InstantQuest or other unknown URLs no longer have access to any aspect of your browser.
Then visit the Search Engine section and choose a trusted provider like Google or Bing.
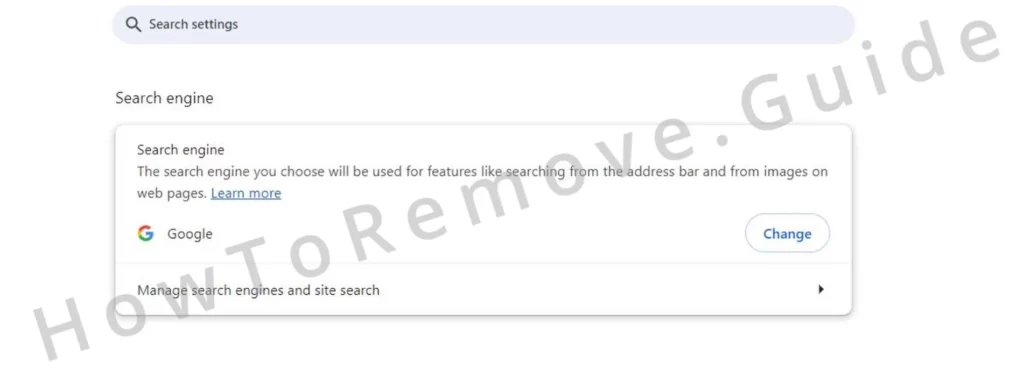
Also, go to Manage Search Engines and delete from there anything untrusted (you’ll likely see the fake boyu.com.tr search engine there).
Next, clean up the On Startup and Appearance tabs. Rogue URLs can sneak into these tabs. Deleting them ensures you won’t see InstantQuest again when you start your browser.
Once you’re done, restart the PC, open the browser again, and see if things are back to normal.
Hopefully, there will be no trace of InstantQuest left in there, but if the hijacker turns out more persistent than expected, always remember that SpyHunter has your back and can help you get rid of it once and for all!

Leave a Reply