One of the simplest, yet most effective ways to trick users into clicking somewhere or doing something they shouldn’t is to show them a misleading customized pop-up. Such is the case with the Karakorampeak hijacker site, which is similar to Potterfun and DSR Search.
This particular hijacker shows a pop-up in the bottom-right corner of the screen that’s made to look like a legitimate McAfee security warning or a subscription payment rejection. The goal is to prompt you to interact with the pop-up which then takes you to a scam page or some other kind of unsafe web address. However, there will usually be a URL in the pop-up – qltuh.karakorampeak.top – which is how you know this is a total scam.
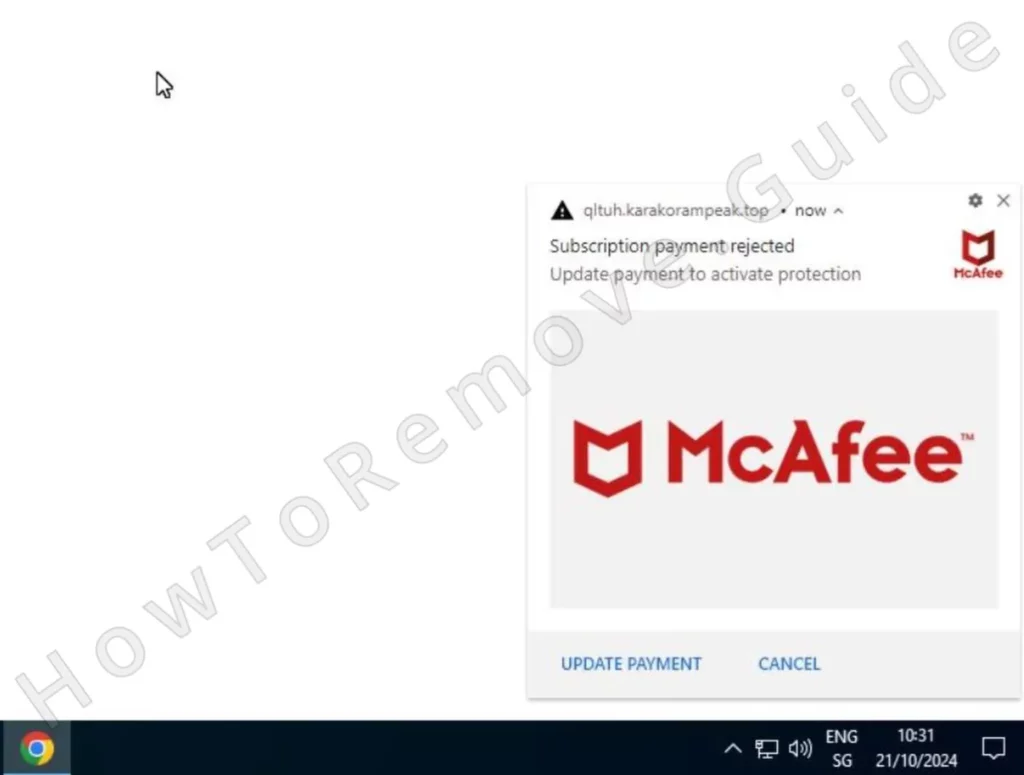
But if you still take the bait, you could be scammed into paying for fake software and services or even providing your banking details on a phishing page which will bring them right into the hands of the scammers. And all that simply because some rogue site is allowed to spam you with notifications.
Karakorampeak Removal Manual
Now that I’ve clarified how this hijacker works, I’ll show you how to get rid of it. There are two ways to approach this: a quick and easy one and a lengthy and time-consuming one. Let’s first try the first option and see if it’ll work for you and save you some time:
- Just open the browser, click its menu, and then click Settings.
- Check the Privacy and Security settings. Specifically, head to the Site Settings section.
- Check each of the following permission categories: Notifications, Pop-ups, and Redirects. Hijackers love to plant themselves here which is how they take over. If you spot Karakorampeak.top or any other strange or unfamiliar URLs, delete them immediately.
- After clearing everything up, restart your browser to see if Karakorampeak has disappeared.
Is the rogue site still bothering you? Or maybe you weren’t able to perform these simple steps? Don’t sweat it. The basic steps don’t always work and that’s to be expected. It just means you’ll have to spend a bit more time on tackling this issue and proceed to the full guide I’ve presented below.
SUMMARY:
| Name | Karakorampeak |
| Type | Browser Hijacker |
| Detection Tool |
We tested that SpyHunter successfully removes Karakorampeak* and we recommend downloading it. Manual removal may take hours, it can harm your system if you re not careful, and Karakorampeak may reinstall itself at the end if you don’t delete its core files. |
Karakorampeak isn’t actual malware, and after you complete the next guide, it will be gone from our browser. However, the fact you got this in the first place means you may have downloaded something sketchy on your PC which then introduced the rogue site into the browser. If you think this might be what has happened, be sure to check your system for malware and delete anything suspicious.
Unfortunately, I can’t offer specific instructions on how to do this manually as I don’t know what might be in your system. However, SpyHunter 5 – a powerful removal tool you’ll find on this page – can take care of this for you. It will run a full scan of your system and let you delete every last bit of malware with a single click.
How to Get Rid of Karakorampeak
Something you need to understand is that, though Karakorampeak is only a site, it is likely being enabled by some rogue extension installed in your browser. That extension has likely introduced a custom third-party policy which is stopping you from removing it or Karakorampeak from the browser’s settings.
So the removal stages of this hijacker should go in the following order:
- Get rid of the rogue policy.
- Eliminate any hijacker extensions.
- Remove the Karakorampeak URL from the browser’s settings.
Let’s begin with the policy removal:
For Google Chrome users, start by typing chrome://policy into the address bar of the browser. Hit Enter. You’ll be taken to a page with all active browser policies.
If you are on another Chromium browser, such as Edge or Brave, just change the name in the URL to edge://policy or brave://policy respectively.
On the policies page, pay attention to the Values column. Look for a random string of letters and numbers. That’s your target. Copy this value and save it in a text file because you’ll need it in the next step.
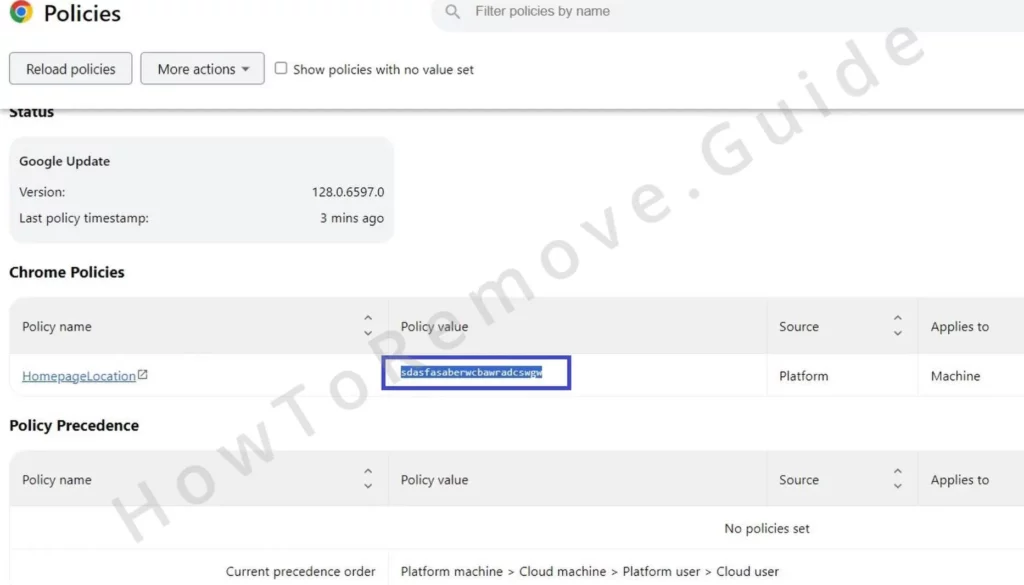
If there are multiple suspicious values, save them all in the text file.
Then you also need to gather some data about your extensions, so click the browser menu and then go to Extensions > Extensions Manager.
Sometimes, Karakorampeak goes a step further and blocks your access to that section of the browser’s settings by redirecting you when you try to visit it.
If that happens to you, go directly to the directory where your browser stores its extensions’ data. The location for Chrome is C:\Users[Your Username]\AppData\Local\Google\Chrome\User Data\Default\Extensions.
Here are the extension folder directory paths for several other commonly used browsers:

Once you are there, you must delete the folders that correspond to any rogue extensions. However, you won’t be able to tell which folder belongs to rogue extensions linked to Karakorampeak, so you’ll need to delete all the extension folders.
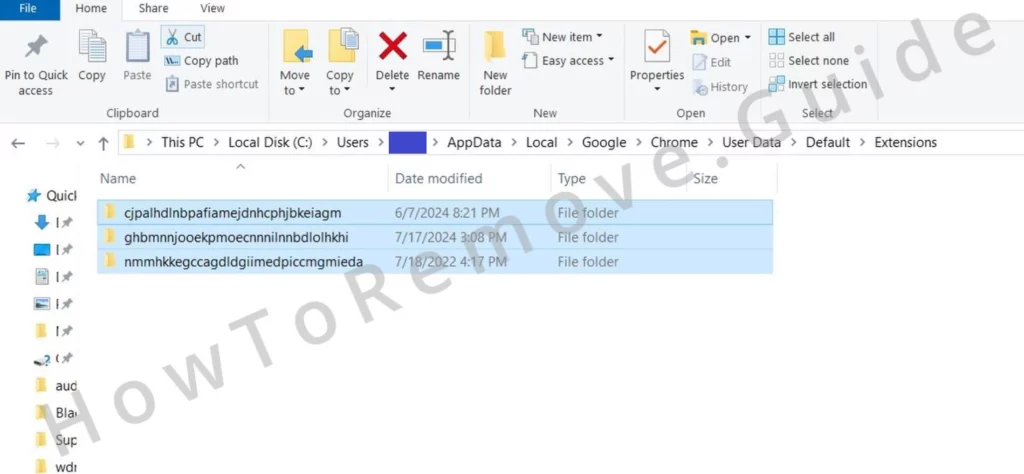
This will temporarily disable all extensions, including your legitimate ones, but you’ll be able to repair them very easily one you’ve dealt with the hijacker.
After deleting the extension folders, return to the Extensions Manager. Turn on the Developer Mode option, look for any suspicious, unknown, or unwanted extensions, and pay attention to their IDs.
If the ID numbers aren’t shown, you must click the extension and you’ll see its ID on the following page.
You must save each rogue ID next to the policy values from earlier. Once you’ve done that, you are ready to proceed to the cleaning-up part.

Video walkthrough for this step:
How to Delete Karakorampeak Virus Policies
Now it’s time to go after the core of the problem. The Karakorampeak policy settings are stored deep within your system’s registry and you must delete them from there.
Open the Registry Editor. You can search for it in the Start Menu search bar and open it as Admin or press Winkey + R, type regedit, and press Enter.
With the Registry Editor open, use the search function (Edit menu > Find) to find items related to the policy values and extension IDs you saved earlier.
Paste each value into the search bar and run the search. When a matching item is found, delete the corresponding registry key (folder) in the left panel.
You’ll need to repeat the search after every key you delete because more could be left.
After you’ve deleted everything linked to the first rogue policy value, repeat the process for other saved values and extension IDs.
If you can’t delete a given key, right-click it and open Permissions.
Go to Advanced, click Change, then type “everyone“.
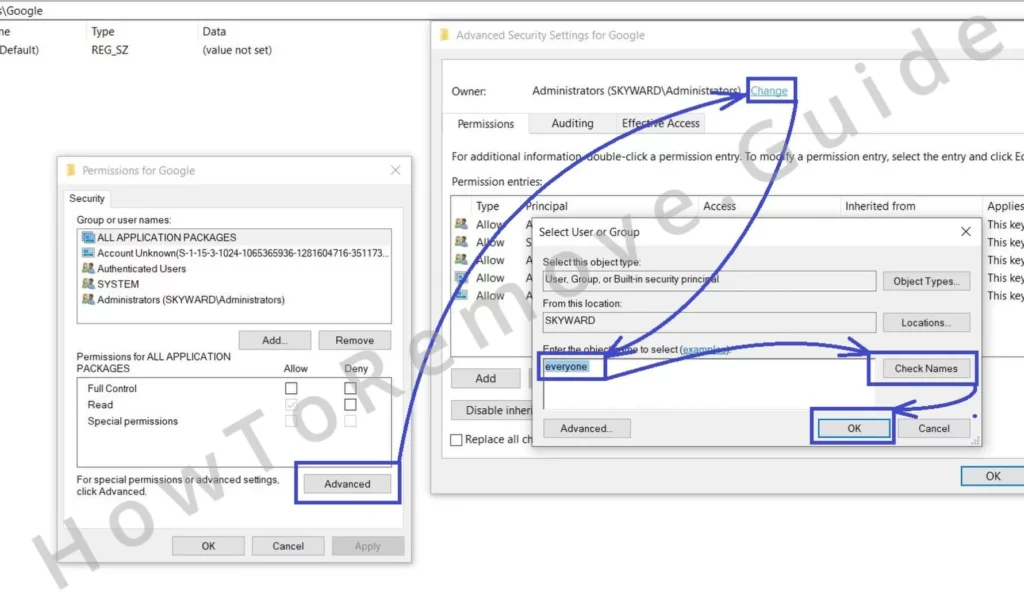
Click on Check Names, then OK, then tick off the two Replace options, and Apply the new changes.
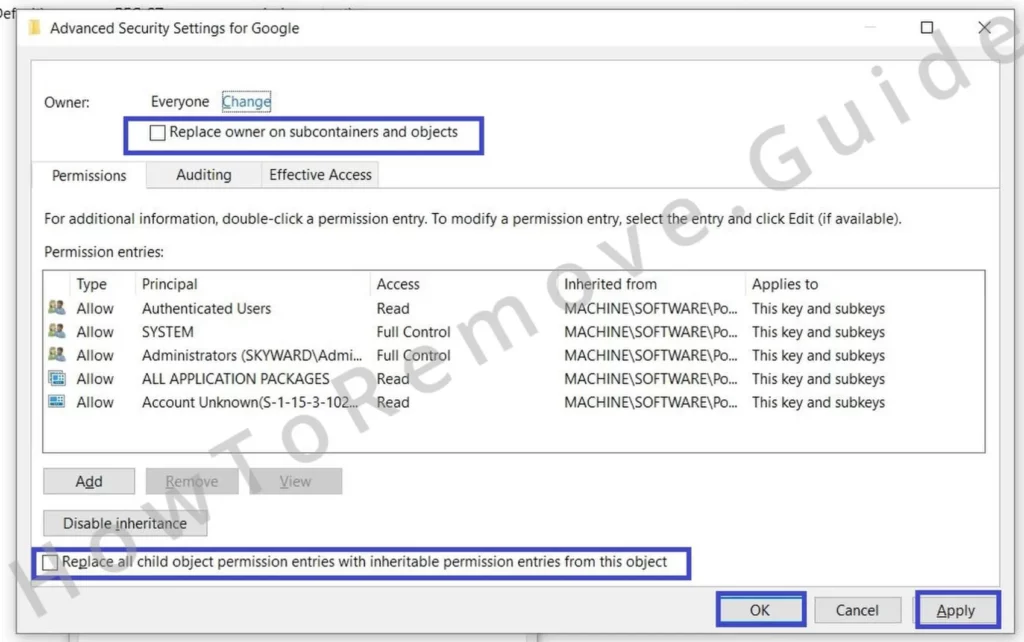
Once you’ve done that, you should be able to delete the key. Continue this process until all rogue policies are eliminated.
Video walkthrough for this step:
Other Methods to Remove Karakorampeak Malware Policies
Another way to check for and delete rogue policies is to use the Group Policy Editor. Open it from the Start Menu.
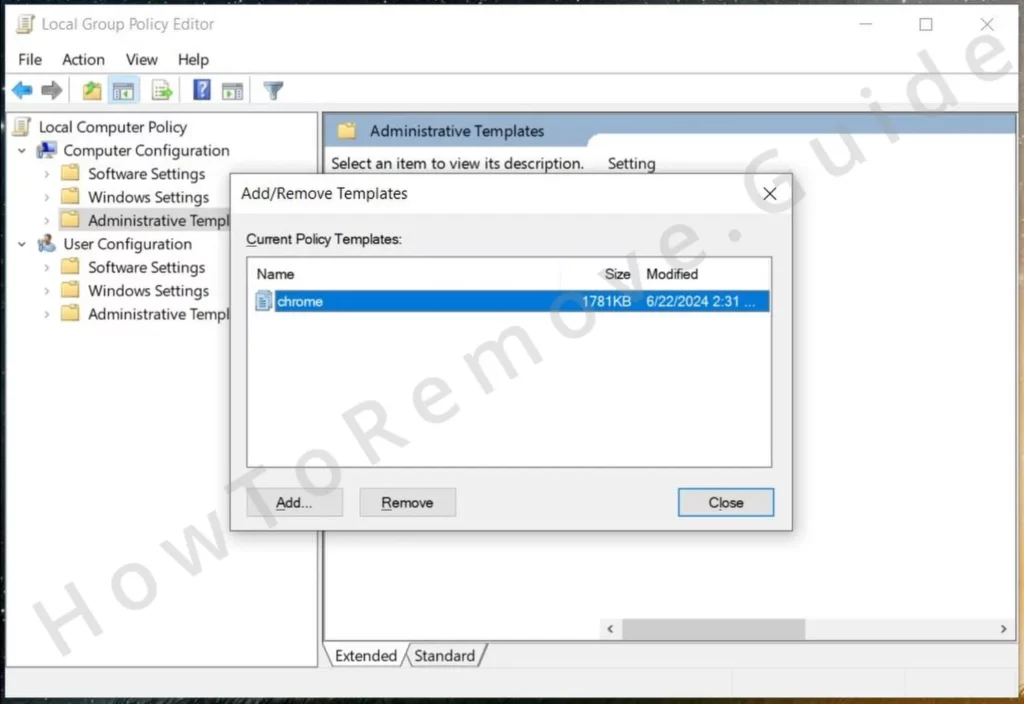
Look for the Administrative Templates section. Right-click on it and select Add/Remove Templates.
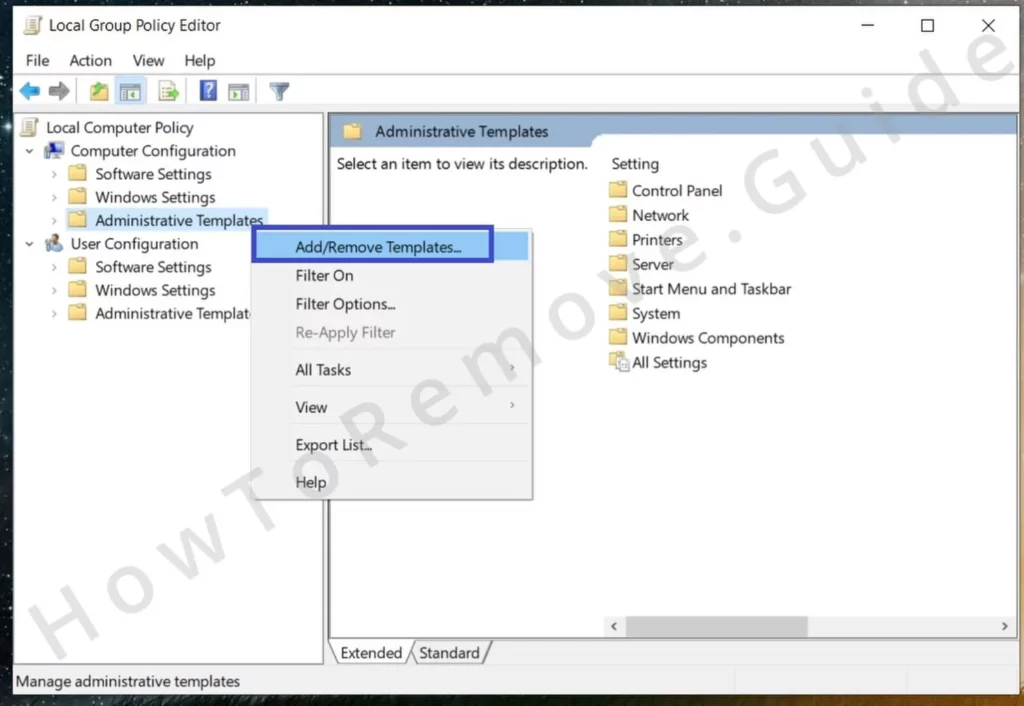
Remove any templates that you don’t recognize – they might be part of the hijacker’s attempt to control your browser.
If you’re a Chrome user, you can just run the free Chrome Policy Remover tool. Click the link, downlaoad it, and run it with Admin rights. Windows Security or your AV might warn you, but you must ignore those warnings. Although the tool isn’t from an official developer, it’s safe to use.
Once you start it, it will automatically wipe out any remaining policies set by Karakorampeak.
Video walkthrough for this step:
Manual Group Policy Removal
Automatic Group Policy Removal
How to Remove Karakorampeak From Chrome and Edge
Once you’ve dealt with the rogue policies, you’re almost in the clear. Now it’s time to clean up the remnants of Karakorampeak and restore your browser to its original settings.
Start the browser and open the Extensions page. Delete any rogue items that are still present there. This is also a good moment to repair the legitimate extensions you damaged earlier.
Click the Repair button under each to restore it. If no such button is visible, try to use the extension and the Repair option will appear.
After handling the extensions, move to the Privacy and Security settings. You’ll want to clear all browsing data except for your passwords. I recommend using the “All Time” time range just to be sure everything rogue is deleted.
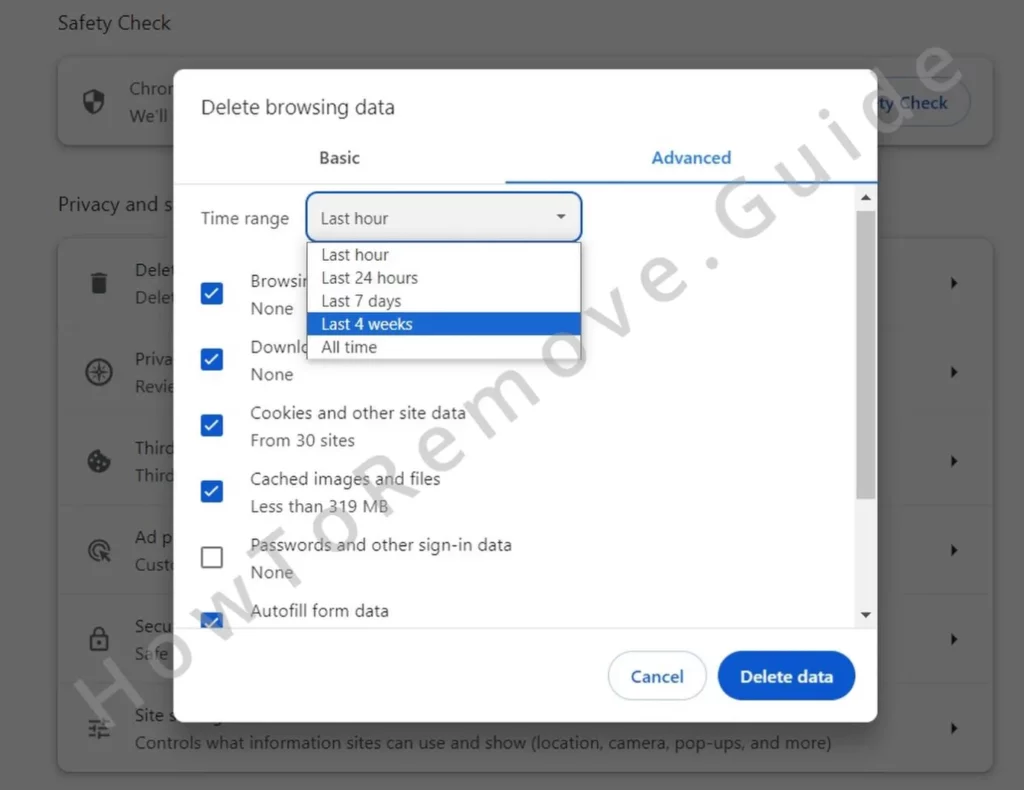
Also revisit the Site Settings section to make sure no rogue URLs remain under notifications, pop-ups, or redirects.
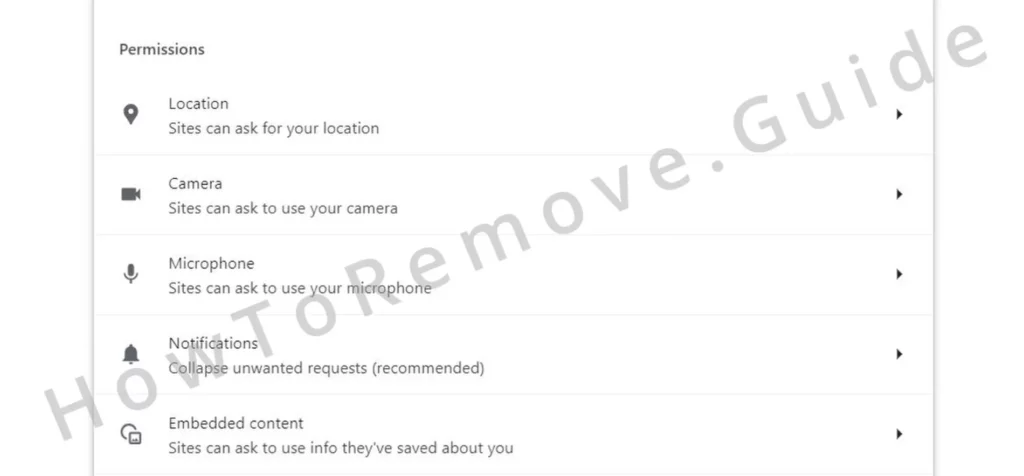
This time, I also recommend checking all other permission categories just in case qltuh.karakorampeak.top has embedded itself there too.
Also check your search engine settings and ensure the default search engine is set to a trusted provider like Google. Then go to Manage Search Engines and if you see any sketchy URLs there, delete them.
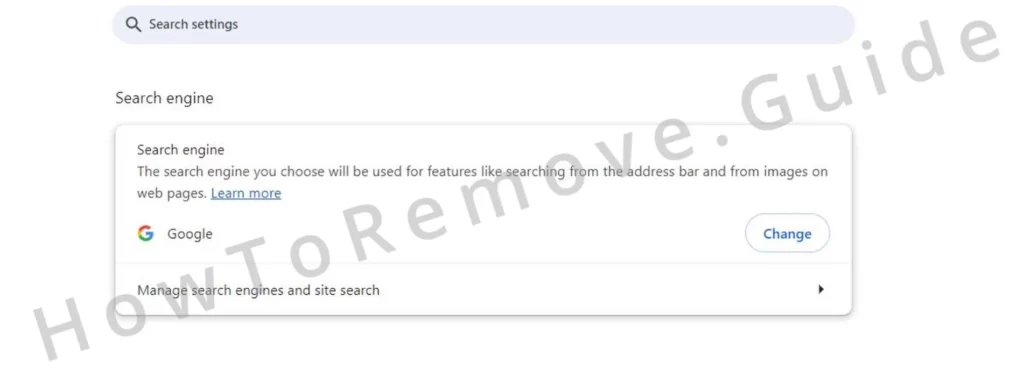
As a final step, I advise you to pay a quick visit to the On Startup and Appearance sections of your browser settings.
Video walkthrough for this step:
Chrome
Edge
Firefox
Hijackers often sneak in rogue URLs here so that the browser loads whenever you launch it or open a new tab. If you spot qltuh.karakorampeak.top or anything else that seems out of place, delete it.
And there you have it, with these final steps completed, I am pretty certain that the Karakorampeak has been dealt with. All that remains is to see if there are any sketchy programs installed on your PC. As I mentioned earlier, SpyHunter 5 can be of great help with that.

Leave a Reply