If you keep getting rerouted to Network-defender.cc and other odd websites, your browser is under the influence of a hijacker. This type of malware embeds itself as a site permission, extension, or bundled add-on, then hijacks traffic to generate ad revenue. To increase clicks, it often disguises its ads as security alerts, update notices, or urgent system messages.
While Network-defender.cc is a virus in the classic sense, leaving it installed, similar to Acio-patron.cc, Holiday-forever.cc (and other hijackers like System-monitor.cc, Fileless-market.cc and Indeanapolice.cc), exposes you to unnecessary risk and nonstop disruption. Removing the hijacker is the only reliable way to control.
We tested that SpyHunter successfully removes Network-defender.cc* and we recommend using it. It will block Network-defender.cc from reinstalling itself and it will make sure your device is clean from any malware.
Buy now15% OFF if you buy straight without trial.
Step-by-Step Network-defender.cc Removal Guide
Follow each item in order and note what you disable or remove so you can undo a change if needed. This method targets Network-defender.cc specifically, reduces repeat pop-ups and redirects, and avoids broad resets that can erase useful preferences while leaving an enforced policy or unwanted extension behind.
Quick Pass to Undo Browser Tweaks
- 1.1Start in your browser’s Settings and reverse changes that Network-defender.cc commonly forces.
In Chrome, click the ⋮ menu in the upper-right; in Firefox, use the ≡ menu for the same area.
Open Extensions or Add-ons, review the list, and mark anything you don’t recognize. - 1.2Check each add-on by its name, icon, requested permissions, and full description.
If the publisher is unclear or the purpose doesn’t match what you installed, click Remove.
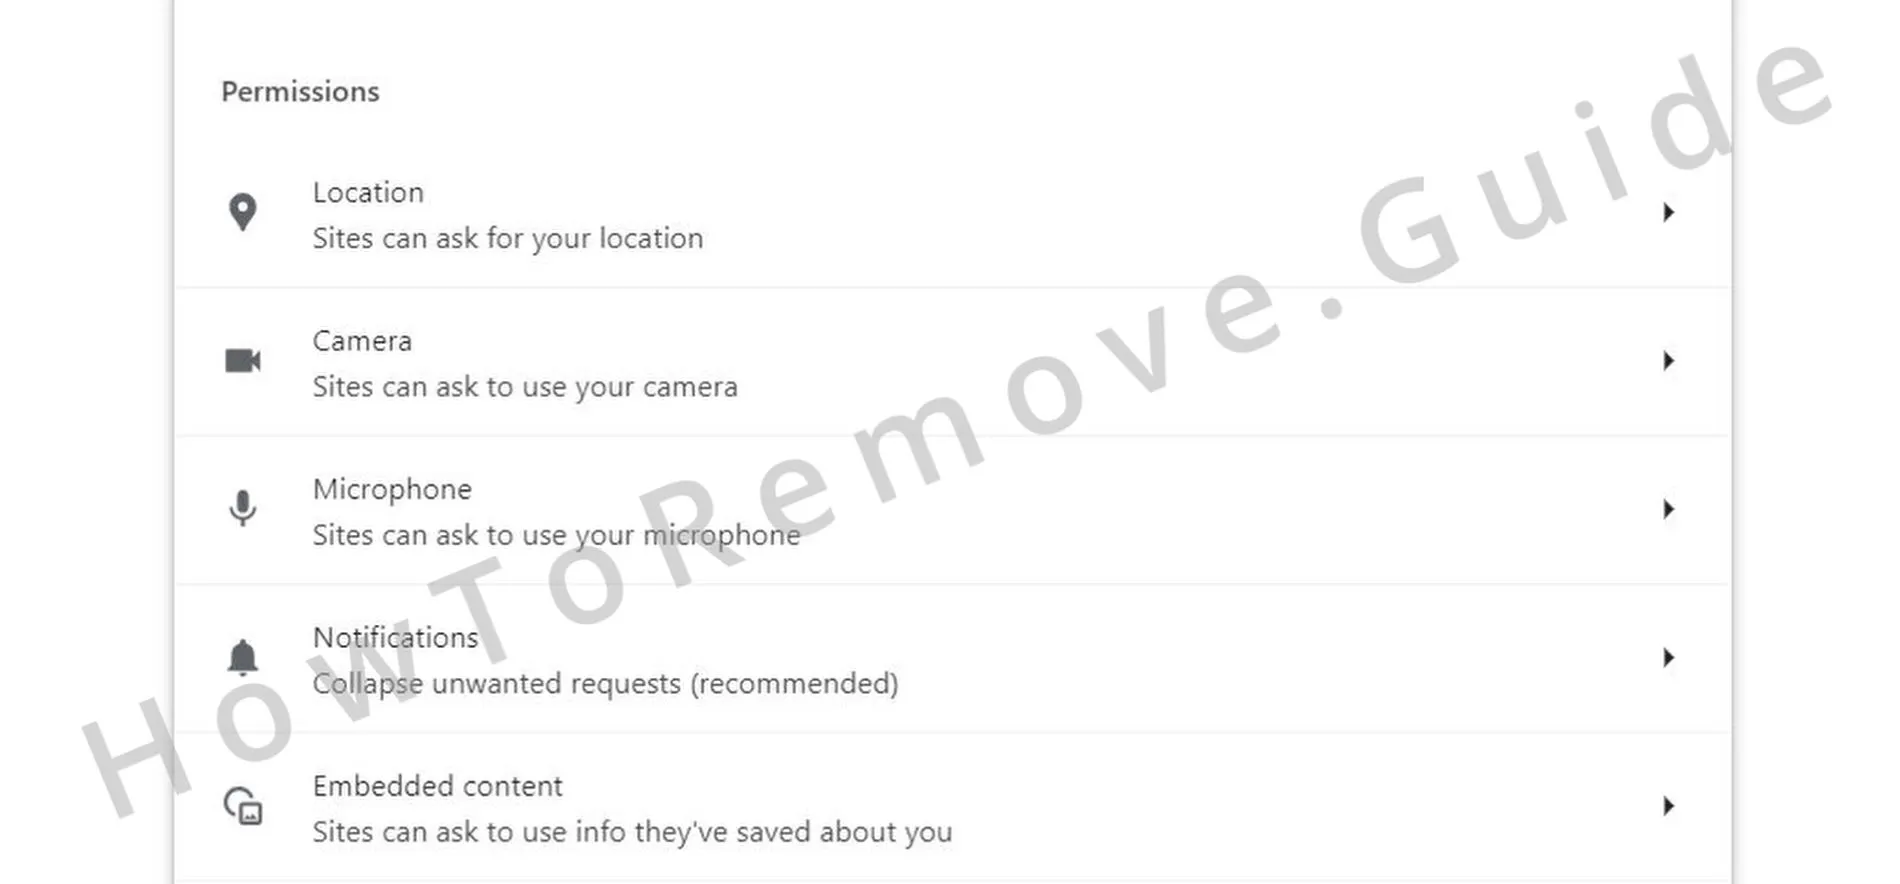
When you’re unsure, search the exact “extension name” to verify the developer and read user reports. - 1.3Open Privacy and security, then Site permissions.
Review which sites can access your microphone, camera, location, and notifications.
Remove entries you don’t remember approving and keep only the sites you actively use. - 1.4Still under Site permissions, delete sites you never intended to allow.
This cuts down repeated prompts, noisy alerts, and surprise redirects at launch.
When you’re done, restart the browser so the changes apply, then confirm the unwanted behavior doesn’t return.
If the pop-ups and redirects stop after this pass, you likely removed the immediate trigger. If they keep coming back, a policy may still be restoring settings at startup. Keep going through the next sections to remove leftovers without relying on broad resets that may miss the real cause.
OVERVIEW:
| Threat | Network-defender.cc |
| Type | Browser hijacker |
| Removal option |
We tested that SpyHunter successfully removes Network-defender.cc* and we recommend downloading it. Manual removal may take hours, it can harm your system if you re not careful, and Network-defender.cc may reinstall itself at the end if you don't delete its core files. |
Manually Remove the Network-defender.cc Hijacker
If you keep seeing “Managed by your organization,” that typically means browser policies are enforcing settings that a standard reset won’t fully overwrite. The steps below help you identify which rules are active, then track down the on-disk items that keep reapplying changes on startup. This approach stays deliberate, so you can reverse a specific edit after a reboot if a legitimate component stops working.

1. Review which browser policies are currently enforced
- 1.1
 Open the browser policy page to see which rules are being enforced and may be tied to Network-defender.cc.
In Chrome: chrome://policy
In Edge: edge://policy
Wait for the entries to load, review anything you don’t recognize, then use Reload policies to refresh or export the list. - 1.2Go through the policy list and look for unusual IDs, odd paths, or values that appear randomly generated.
Record anything that stands out so you can compare it against a folder name or extension ID during the cleanup.
Keep the exact policy Name and Value; those details often point to the keys or locations you’ll remove. - 1.3Open the browser’s Extensions page and turn on Developer mode.
This view exposes extension IDs and install paths that help you trace what’s installed.
Copy any suspicious ID into a text file so you can match it to folders on disk. - 1.4If the Extensions page is blocked or won’t load, switch to File Explorer and continue from there.
Working inside the profile folders lets you proceed even when the browser interface is restricted.
Enable View > Show > Hidden items so AppData is visible. - 1.5
 In File Explorer, open:
C:\Users[Your Username]\AppData\Local\Google\Chrome\User Data\Default\Extensions
Each folder name is an extension ID. Compare IDs to your notes, don’t remove folders you recognize as legitimate, and copy anything you plan to delete to the desktop first as a quick backup. - 1.6
 Other Chromium-based browsers (including Brave and Opera) keep extensions in a comparable AppData structure.
Confirm the extension ID and location before removing any directory associated with an unwanted add-on. - 1.7Once the suspicious folder is removed, go back to Extensions with Developer mode still on.
Make sure the entry no longer appears; if it returns, repeat the folder check and search for leftover items that recreate it.
Use Update in Developer mode to refresh the list and spot quiet reinstalls.
We tested that SpyHunter successfully removes Network-defender.cc* and we recommend using it. It will block Network-defender.cc from reinstalling itself and it will make sure your device is clean from any malware.
Buy now15% OFF if you buy straight without trial.
Remove Network-defender.cc Policies from Windows
Some enforcement can be stored in the Windows Registry, and deleting the wrong key can cause real system issues. Focus only on entries that clearly match the policy names or extension IDs you wrote down, and leave unrelated items alone. This step removes the hooks that let Network-defender.cc survive browser resets while keeping Windows stable.
2. Delete Network-defender.cc Policy Keys from the Registry
- 2.1Press Win + R, type regedit, then press Enter to open Registry Editor and search for policy keys linked to Network-defender.cc.
Before changing anything, open File > Export to save a full registry backup.
Choose All under Export range and store the file in Documents or another easy location. - 2.2Use Ctrl + F or Edit > Find to search for the policy names or extension IDs you recorded.
Click Find Next and delete only exact matches that clearly belong to the unwanted enforcement.
Press F3 repeatedly until no related values remain under HKCU and HKLM. - 2.3
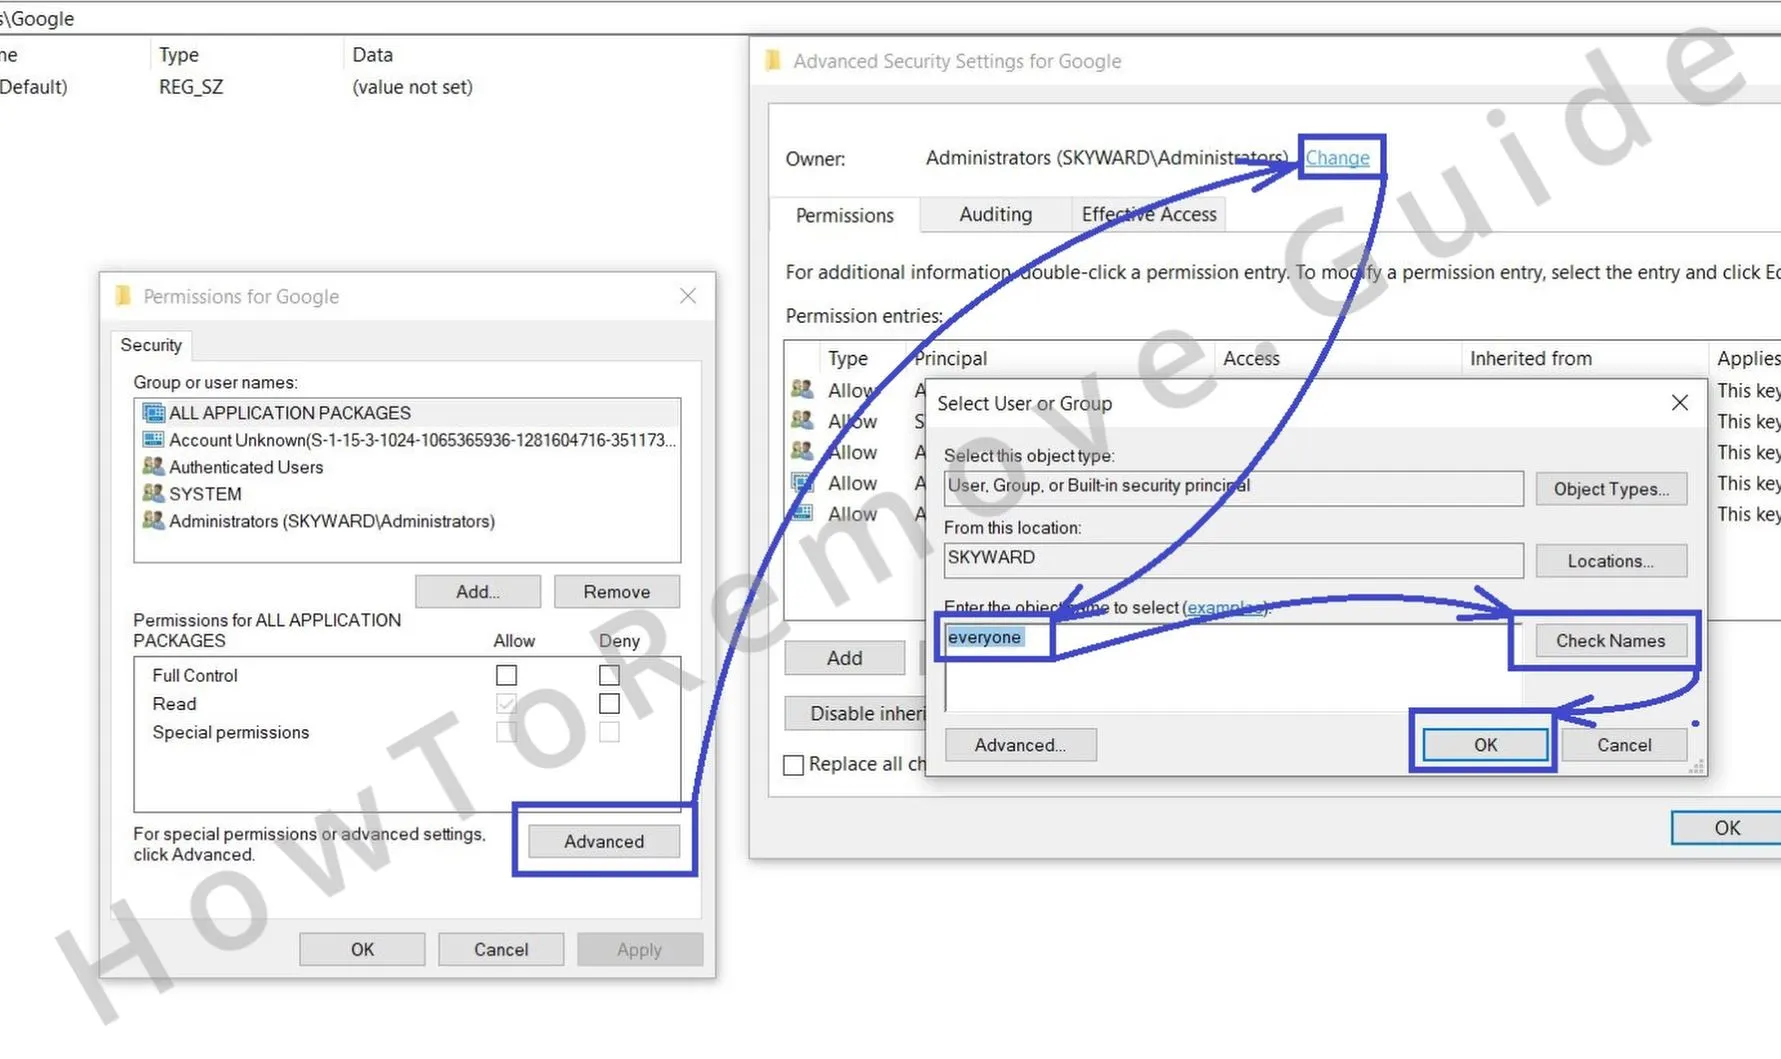 If a key won’t delete, right-click it, choose Permissions, then Advanced.
Under Owner, select Change, type Everyone, click Check Names, and confirm with OK.
Grant Full Control to Administrators and Users so the key and subkeys can be removed. - 2.4
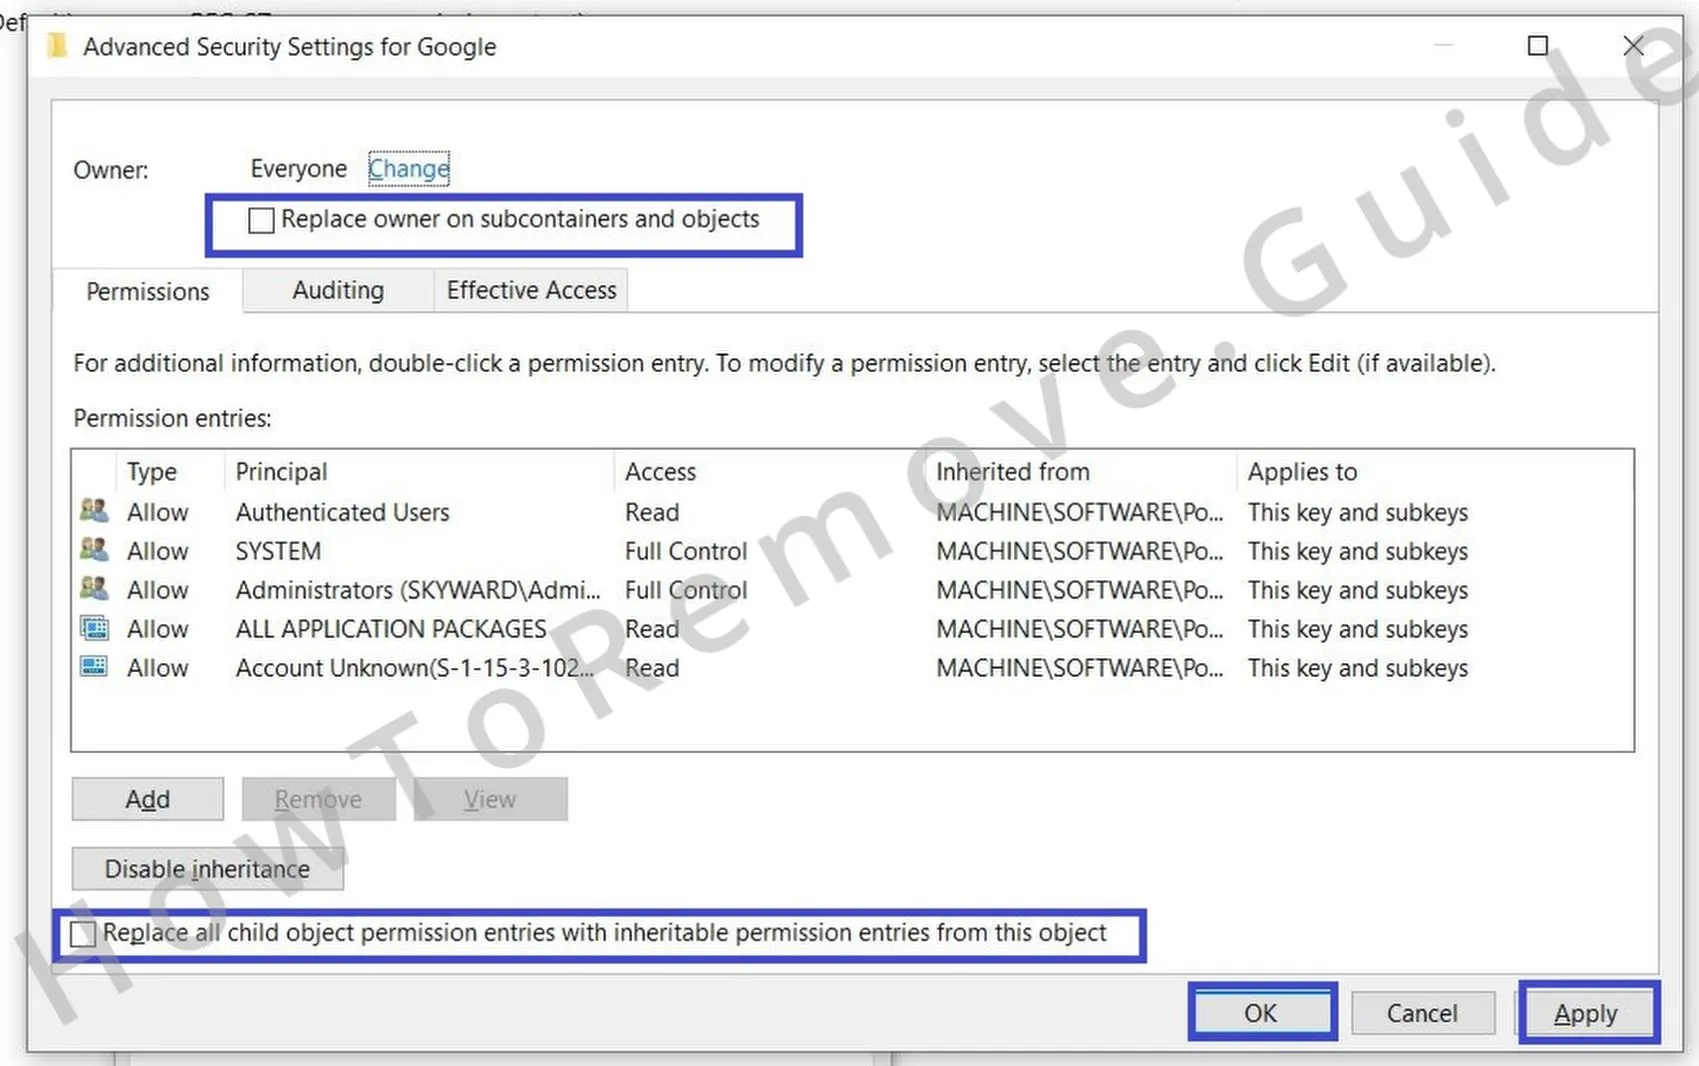 After taking ownership, enable Replace owner on subcontainers and objects and Replace all child object permission entries.
Click Apply, then OK, Reboot, and check whether the Managed by your organization banner remains.
If it’s gone, open regedit again and repeat searches to confirm no related values have returned.
A background service, scheduled task, or local policy can quietly restore the settings you just fixed. Network-defender.cc sometimes uses one of these to reapply enforced preferences after a reboot. Use the targeted options below to remove the specific components responsible, instead of relying on broad system changes that may not touch what’s actually reloading the policy.
Alternative Ways to Clear Network-defender.cc Enforced Policies
3. Extra Options to Remove Network-defender.cc Policy Enforcement
- 3.1
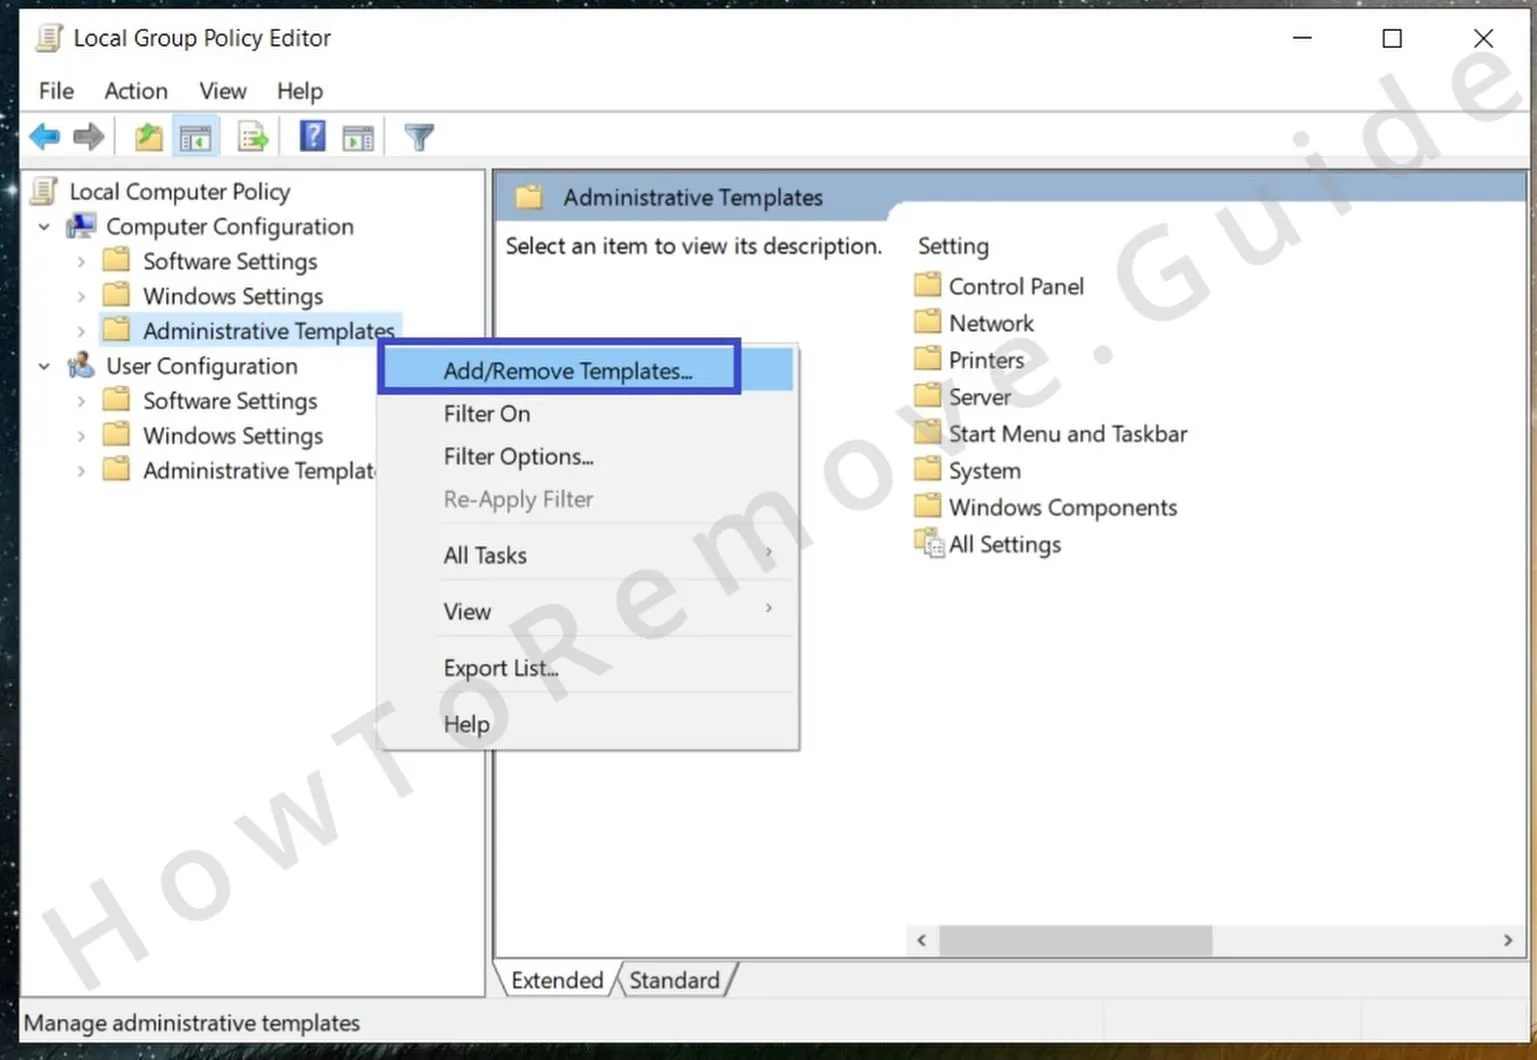 Open Local Group Policy Editor (Win + S → Edit Group Policy) to check for rules that Network-defender.cc may have added.
Expand Administrative Templates in both Computer Configuration and User Configuration to cover machine and user scopes. - 3.2
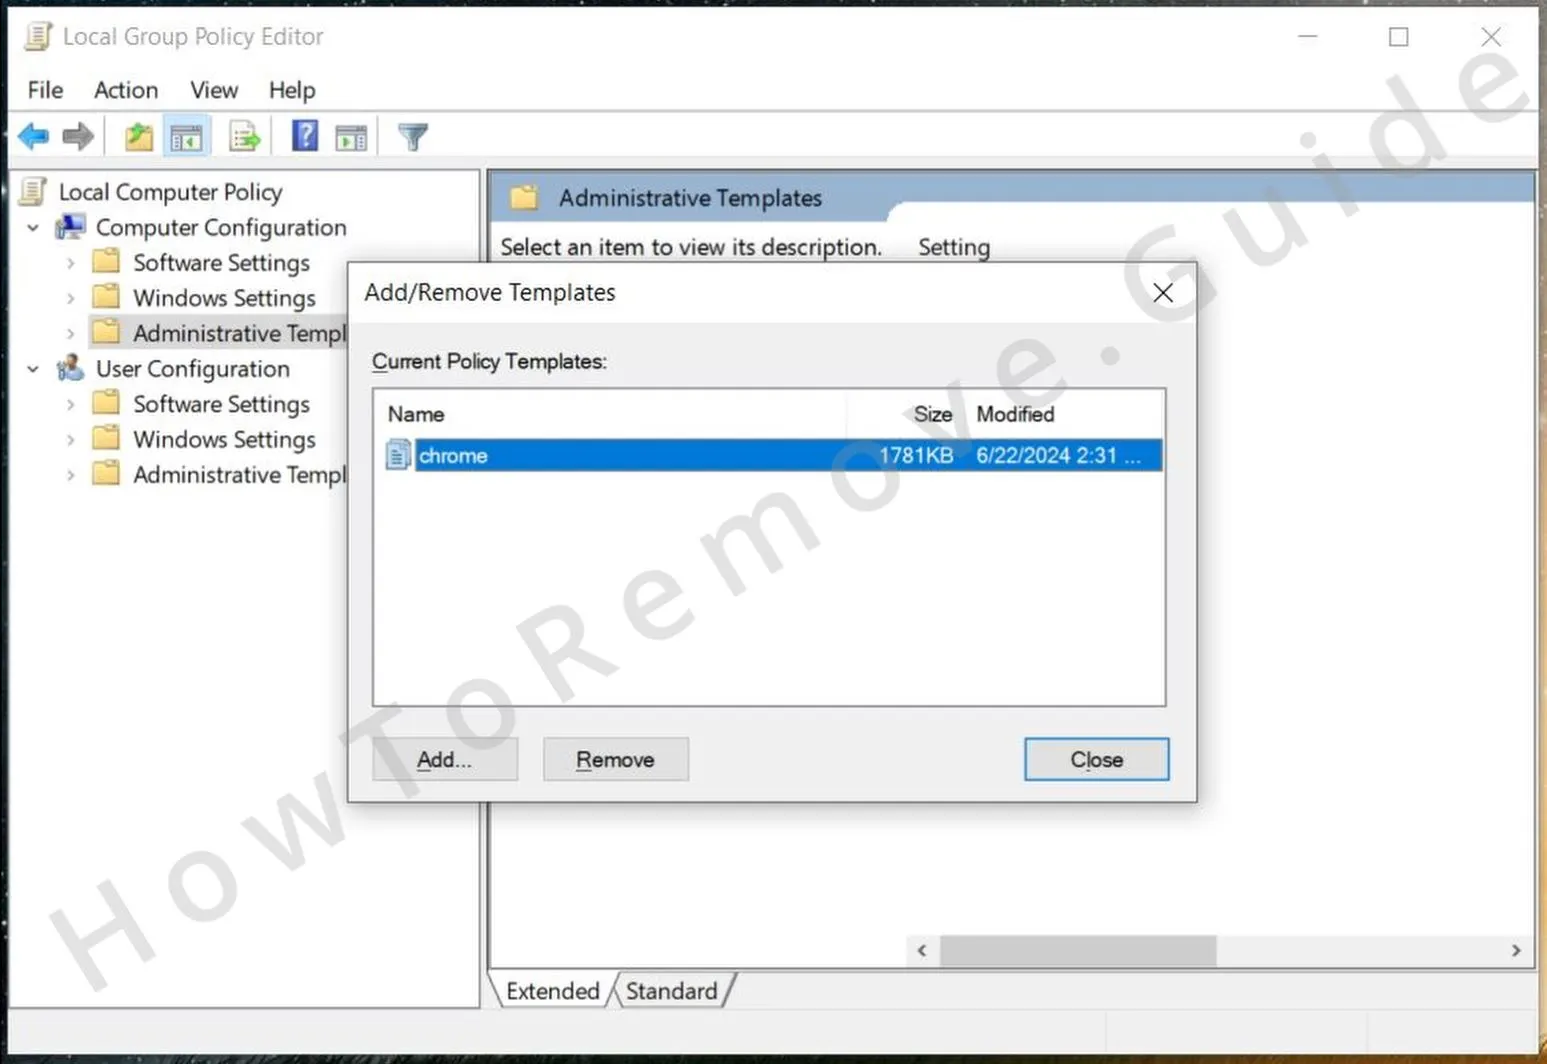 Right-click Administrative Templates → Add/Remove Templates.
Remove items you never installed, then open Windows Components → Microsoft Edge or Google Chrome and set suspicious entries to Not Configured. - 3.3In Chrome, a tool like Chrome Policy Remover can help expose hidden policy folders.
Download only from a trusted source, Run as administrator, then revisit chrome://policy → Reload policies to confirm the list is clean. - 3.4Open Task Scheduler → Task Scheduler Library and delete tasks that launch unknown scripts, CMD/PowerShell, or policy loaders at logon.
Check Services for newly added entries from unfamiliar publishers and disable/remove them only when clearly connected.
Uninstall Network-defender.cc from Chrome, Edge, and Other Browsers
Browser profiles, sync, and cached site data can quietly reintroduce altered preferences after you sign in again, especially when the same account syncs settings across devices. Network-defender.cc can take advantage of that behavior to restore a changed search provider, startup page, or permissions list unless you clear stored data and re-check your defaults.
4. Remove Remaining Network-defender.cc Changes in Your Browsers
- 4.1Reopen Extensions/Add-ons and remove anything linked to Network-defender.cc or clearly out of place.
Use built-in pages like chrome://extensions so the list can’t be hidden by a themed view. - 4.2
 Open Clear browsing data and set Time range to All time.
Clear cache, cookies, hosted app data, and site settings; keep Saved passwords if needed.
Repeat for each active profile; consider Clear data on exit if the changes reappear quickly. - 4.3
 Go to Privacy and Security > Site settings.
Remove or block unfamiliar entries for notifications, camera, microphone, and location.
Use View permissions and data stored across sites to remove noisy domains in bulk. - 4.4
 Under Search engine → Manage search engines and site search, delete untrusted providers and restore a known one (e.g., Google, Bing, DuckDuckGo).
Remove custom site-search rules added by hijackers. - 4.5Open On startup and Appearance.
Remove unfamiliar URLs set for startup, homepage, or new tab.
Switch back to the browser’s Default theme.