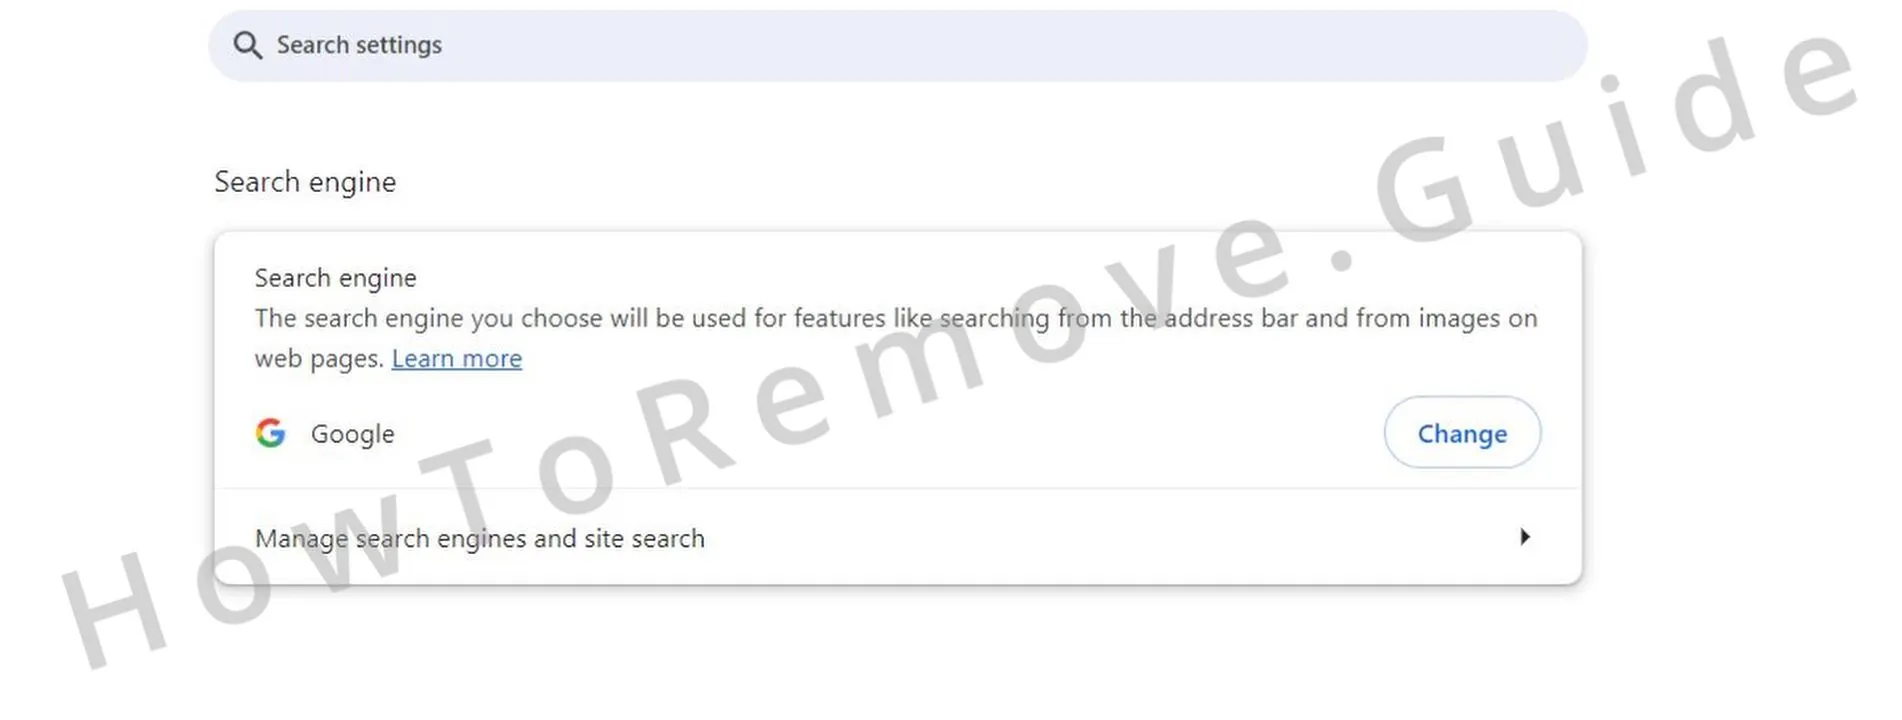
If you’ve been getting random pop-ups on your screen, if your browser is full of ads, or if your searches are often getting redirected to sketchy-looking pages, then that’s a sign you’ve got a browser hijacker on your system. Hijackers can be apps, extensions, or even sites – they can all take over your browser and flood it with obstructive content.
Case in point, Placcolionic is one such hijacker that many users have been complaining about recently. It can gain access and permissions in your browser by tricking you into clicking “Allow” on a fake CAPTCHA prompt or it can attach itself to the browser through file bundling. In either case, the result is that you are no longer in control of your browser, which means you may get exposed to scams, malware downloads, and other problematic content.

The solution here is to perform a thorough browser and system cleanup. This can be done manually, but it takes time and it’s not a particularly simple process. However, with the guide I’ve prepared for you below, you should have no problem successfully getting rid of Placcolionic.
Placcolionic Removal Tutorial
Look, removing Placcolionic doesn’t have to be rocket science. Always tackle the easy stuff first – trust me, it’ll save you tons of headaches and wasted time. If the basic fixes flop, sure, move on to something a little heavier. But jumping straight to complicated solutions is exactly what scammers hope you’ll do – stay organized and keep it simple.
Quick Steps to Remove Placcolionic
- 1.1Launch your browser, access its menu, and open browser settings. For Chrome users, click the three vertical dots at the top-right corner of the browser window. Firefox users will see three horizontal lines in the top-right corner.
After the menu appears, move to the Extensions or Add-ons section, typically located in the sidebar or settings menu. Here, carefully examine all installed extensions, especially those you didn’t intentionally add or that seem suspicious. - 1.2Review each extension carefully, noting their names, icons, permissions, and descriptions in detail to spot irregularities. Be cautious; malicious extensions often have convincing names and icons designed to deceive. If an extension appears suspicious or unfamiliar, select Remove promptly to delete it and reduce security risks.
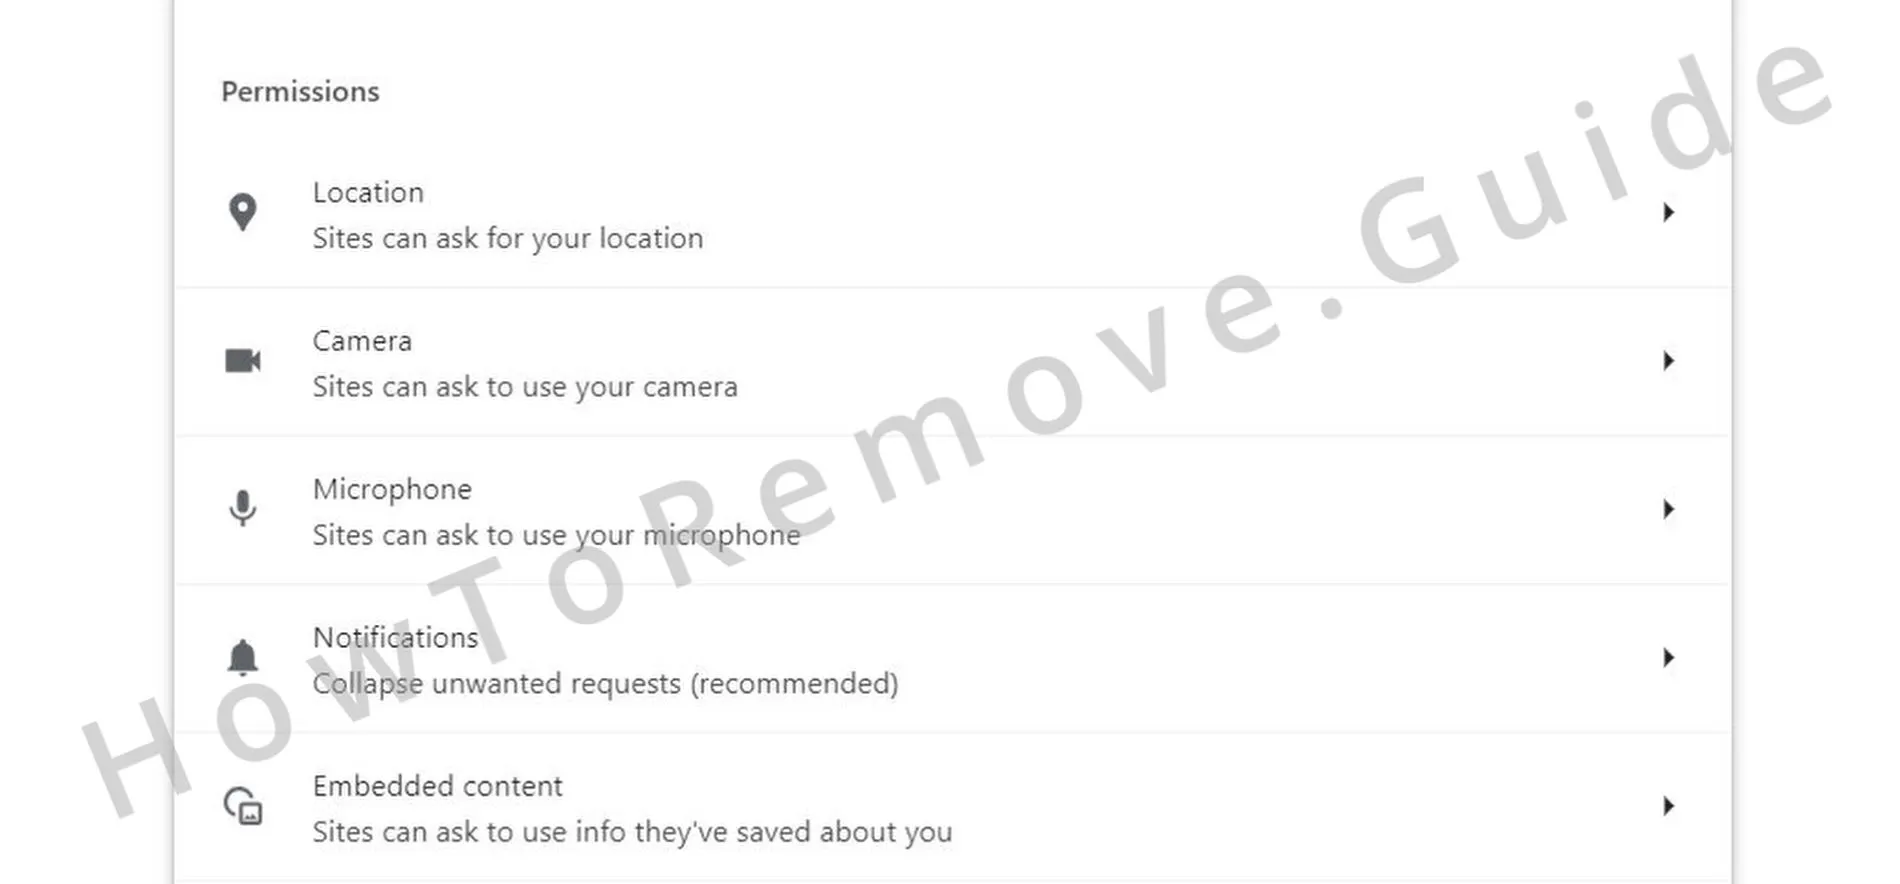
If unsure about an extension’s legitimacy, quickly perform an online search using its exact name or description. Malicious extensions are frequently reported online in user forums and reviews, making them easier to detect and avoid. - 1.3Open your browser’s Privacy and Security settings and locate the Site Permissions section, typically near advanced settings. Here, websites listed may have permissions for notifications, camera, microphone, or location access. While some permissions are legitimate, malicious websites might exploit these to steal data or display persistent ads.
Review the permissions carefully, especially looking for unfamiliar or suspicious sites, and immediately revoke unnecessary access to limit privacy risks. Revoking suspicious permissions effectively reduces unauthorized tracking attempts. - 1.4If you discover unfamiliar websites with extensive permissions you don’t recall authorizing, revoke those permissions immediately within permission settings. This action restricts harmful sites from manipulating your browser or tracking your online activity. After completing this step, fully close and reopen your browser for changes to be applied. If Placcolionic persists afterward, proceed to the advanced removal procedures.
Although this initial approach often resolves common issues, persistent cases of Placcolionic require further intervention.
SUMMARY:
| Name | Placcolionic |
| Type | Browser Hijacker |
| Detection Tool |
Some threats reinstall themselves if you don’t delete their core files. We recommend downloading SpyHunter to remove harmful programs for you. This may save you hours and ensure you don’t harm your system by deleting the wrong files. |
Important! Read Before Continuing
If the thought of troubleshooting your way through a manual guide sounds like a nightmare – or you’re just short on patience – SpyHunter 5 is your best bet. It’s safe, does pretty much everything automatically, and makes cleaning up Placcolionic a breeze. No manual headaches, no confusion – perfect if you prefer to skip straight to the solution.
How to Remove the Placcolionic Virus
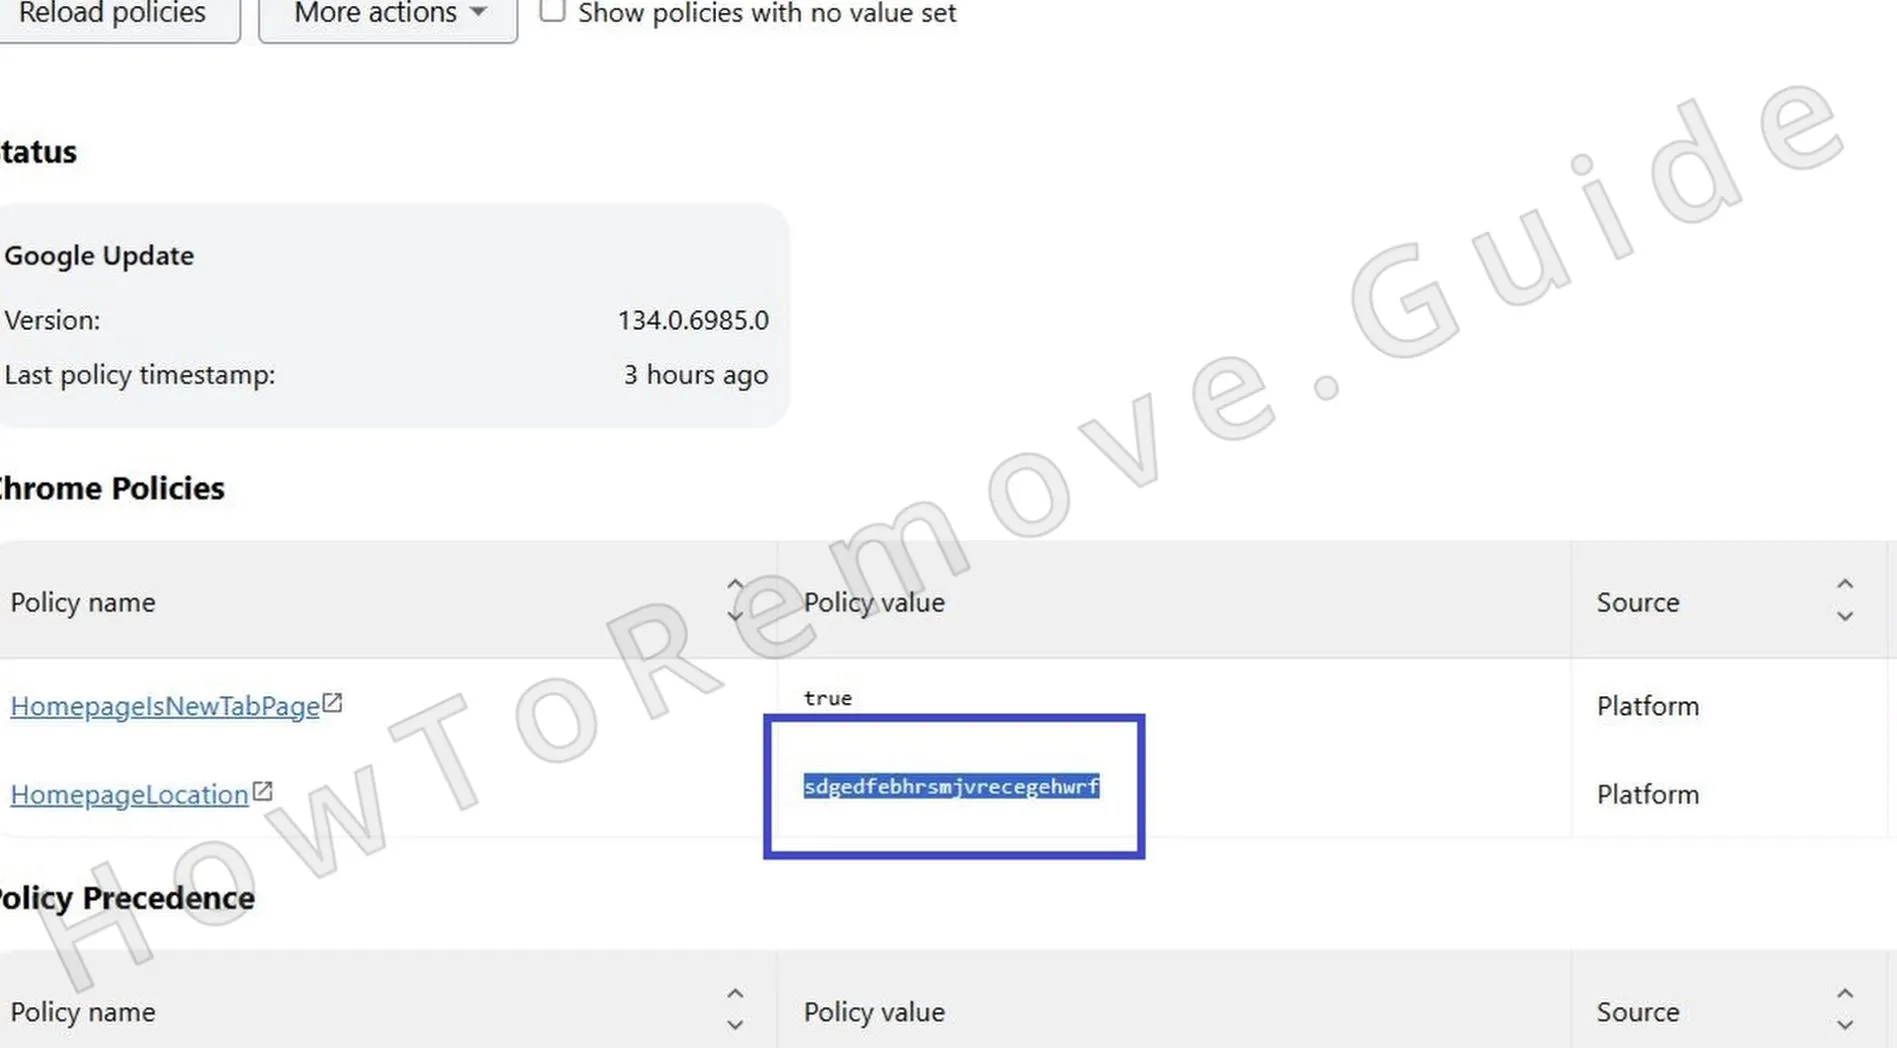
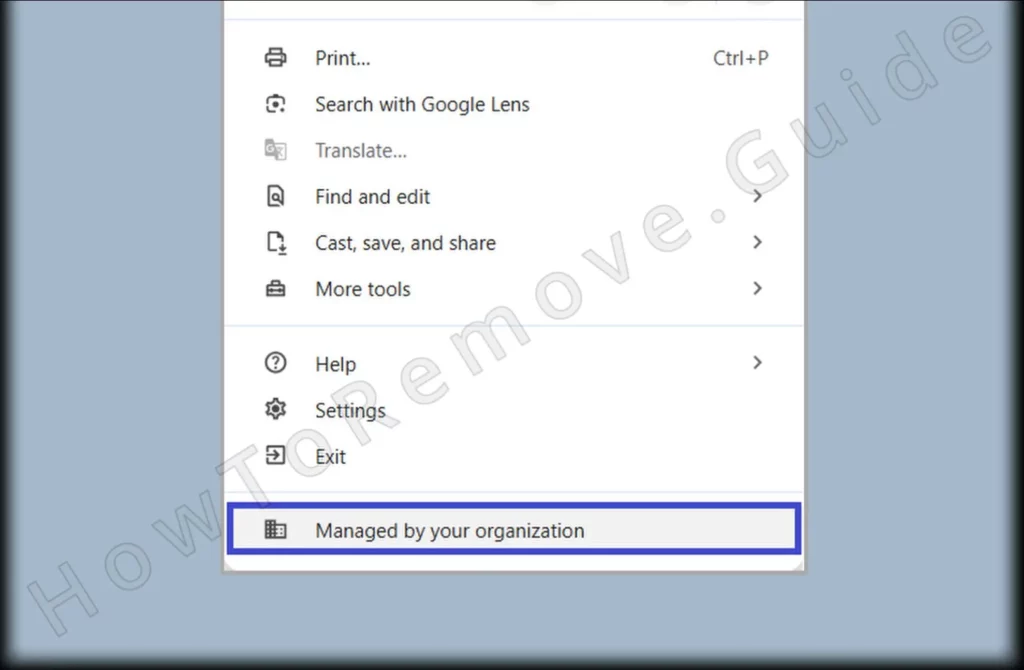
Placcolionic and Infird are one of those sneaky browser hijackers that slips hidden policies into your settings to lock you out. Ever noticed a weird message in your browser saying “Managed by your organization”? Yeah, that means Placcolionic already has control, and basic methods won’t cut it here. You’ll need a few extra steps to fully regain access.
1. Identify the Placcolionic Policies
- 1.1To identify active browser policies, type the specific policy-viewing command directly into your browser’s address bar:
Chrome: chrome://policy
Edge: edge://policyAfter entering the URL, carefully scan the displayed list for suspicious, unknown, or unusual policies that might be connected to Placcolionic.
- 1.2Inspect the displayed policies, giving close attention to entries that appear randomized or nonsensical. Some hijackers use random alphanumeric strings instead of clearly identifiable names. Take notes or screenshots of these suspicious policies, including their exact names and values, for future reference during removal.
- 1.3Return to your browser’s Extensions section and activate Developer Mode using the provided toggle, usually at the top-right corner. Developer Mode uncovers extra information about each extension, like IDs and installation paths, simplifying the identification of suspicious or malicious extensions.
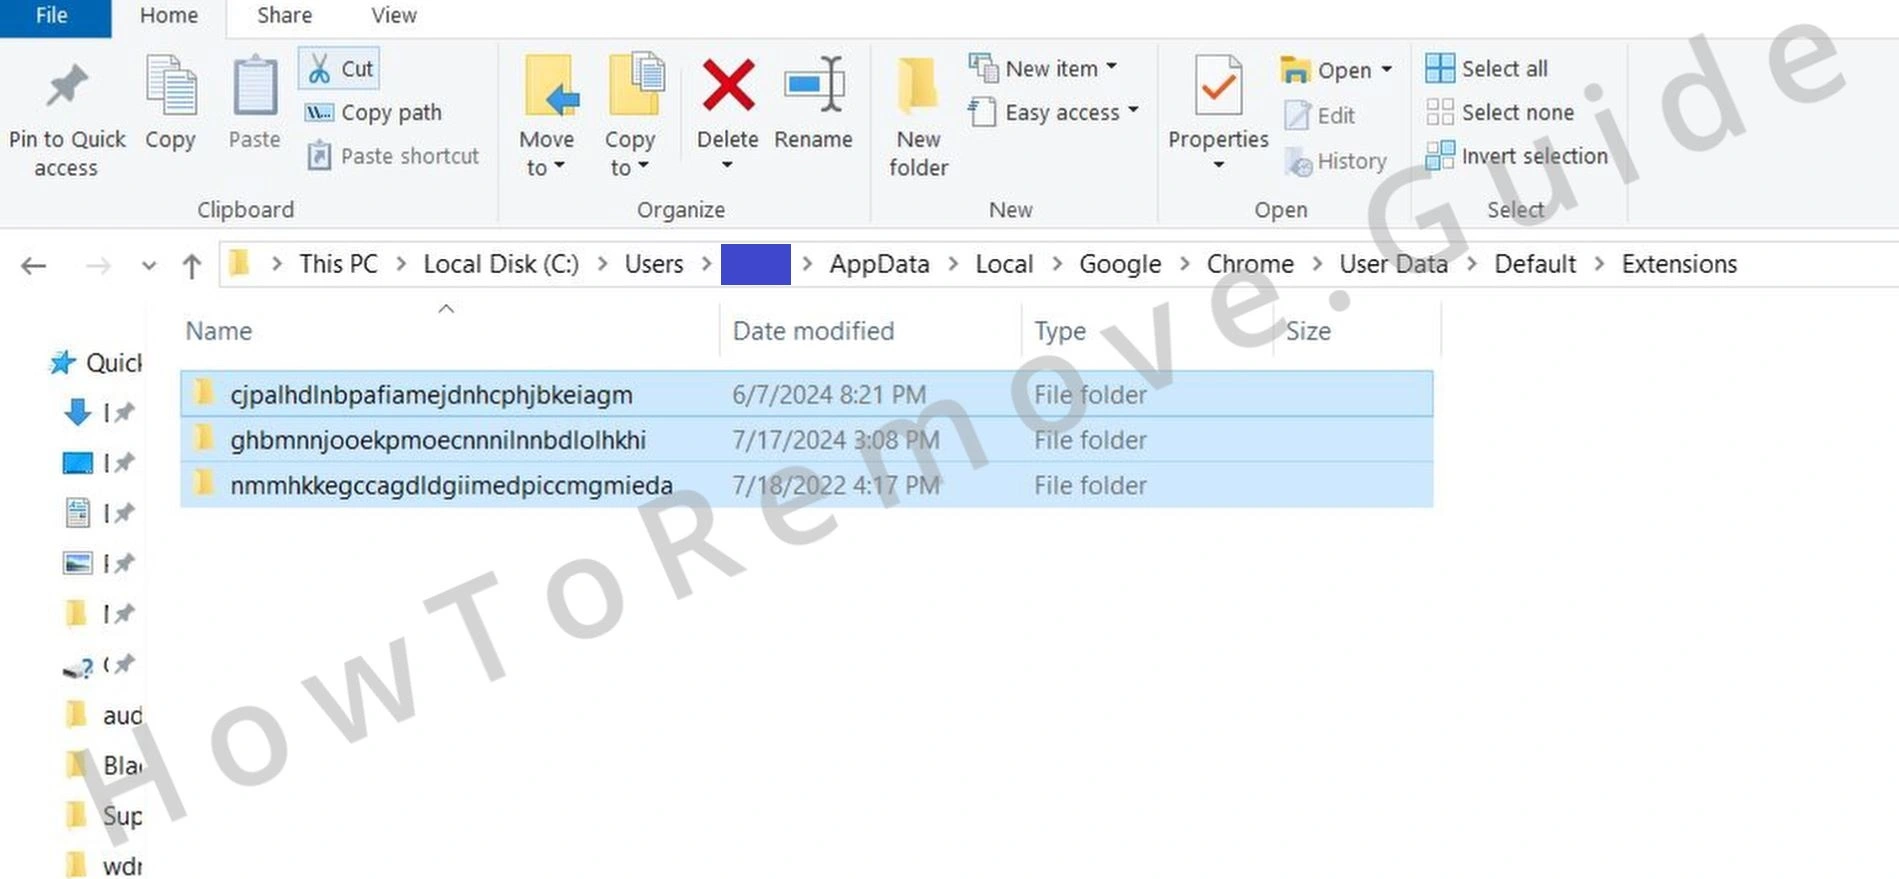
Write down suspicious extension IDs clearly, as you will reference them later when manually removing extensions. - 1.4If Placcolionic restricts your access to the Extensions page, use File Explorer to locate extension files manually.
- 1.6For other Chromium-based browsers, extension files are usually stored in directories resembling the Chrome structure. Although exact locations differ slightly, locate your browser’s extension directory before deleting extensions. Ensure you correctly identify the problematic files to avoid deleting legitimate extensions by mistake.
- 1.7After completing the removal of suspicious files, revisit the Extensions page in your browser, enable Developer Mode, and confirm the problematic extensions have been eliminated. If any suspicious extensions remain, delete them immediately and verify the list again for accuracy to ensure complete removal.
Video walkthrough for this step:
Get Rid of Placcolionic Policies
Sometimes Placcolionic digs in deep, messing with Windows Registry settings to maintain control. Now, messing around in the registry can feel intimidating – and it should, because one wrong move can make things worse. But you’ve got options: either carefully handle it yourself, or better yet, let a trusted tool like SpyHunter 5 safely fix it for you.
2. How to Delete Placcolionic Policies Through the Registry
- 2.1Access the Registry Editor by pressing Win + R, typing regedit, and clicking Enter. Once the Registry Editor opens, navigate cautiously, as unintended modifications can affect system stability. It’s beneficial to create a backup of the registry before making significant changes.
- 2.2Within the Registry Editor, use the Find function located under Edit or by pressing Ctrl + F. Search for suspicious extension IDs or policy values previously documented from the browser policies page or the Developer Mode section.
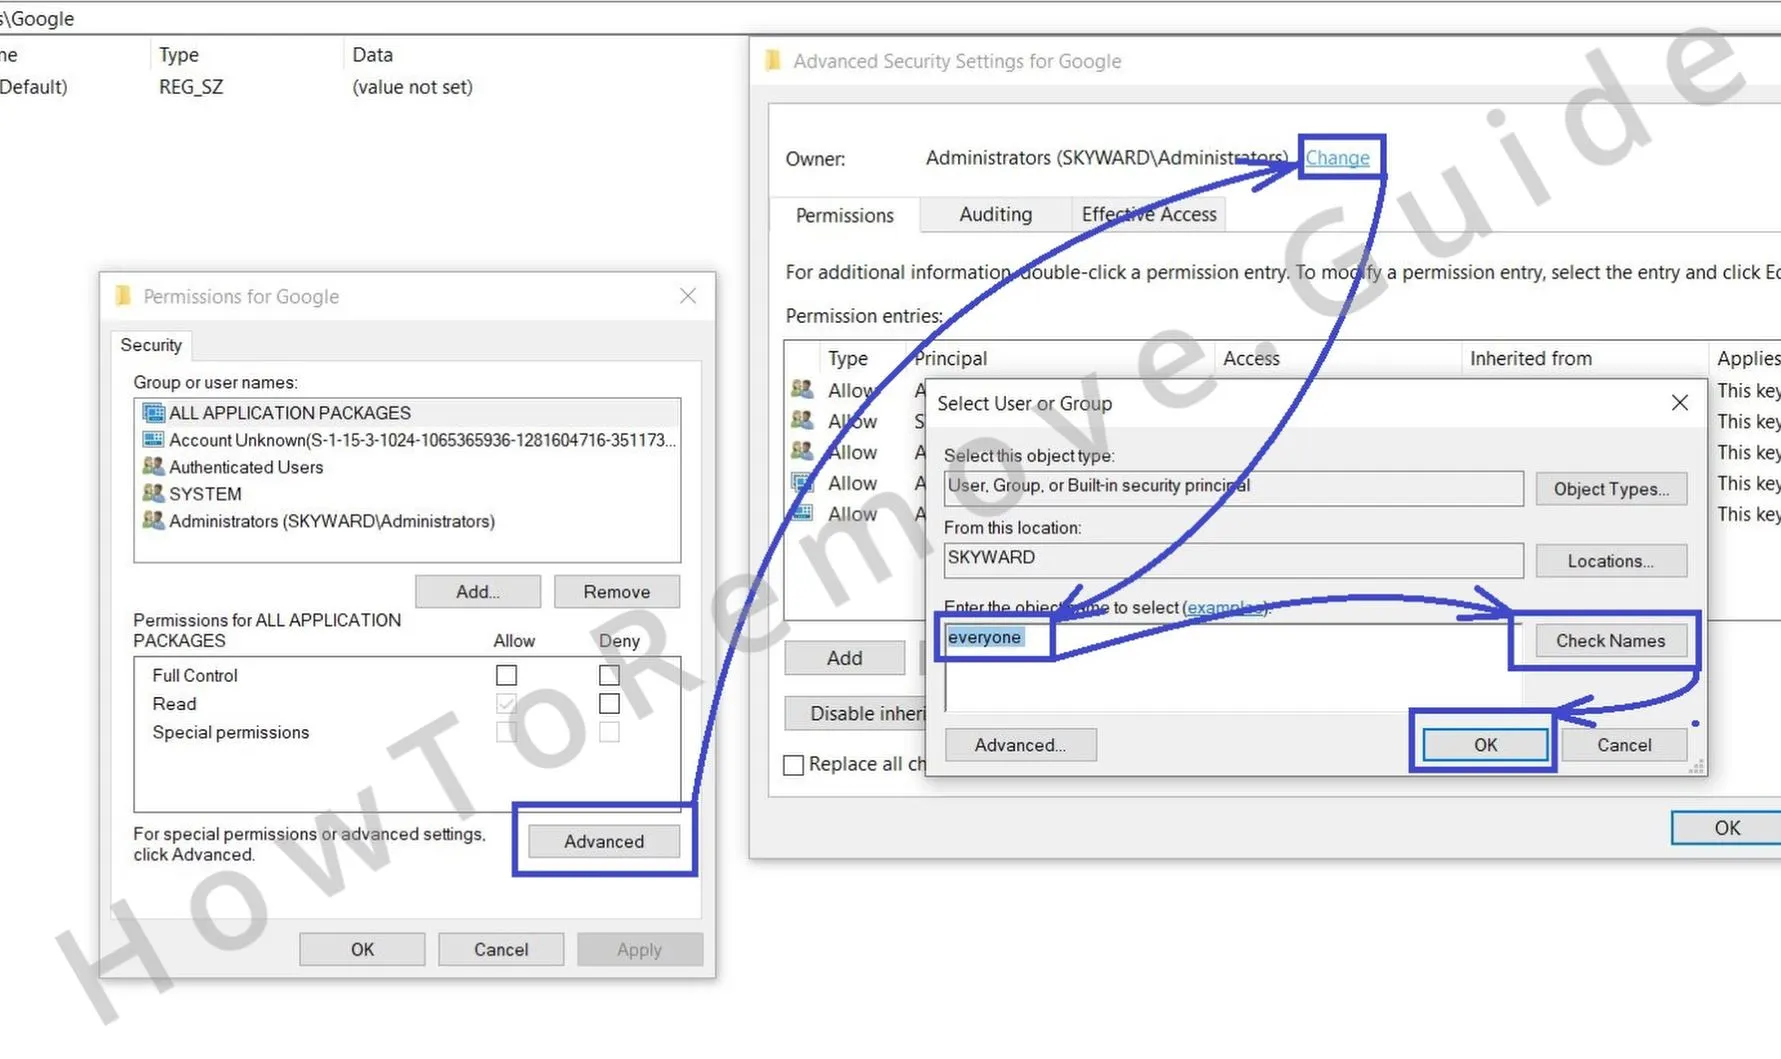
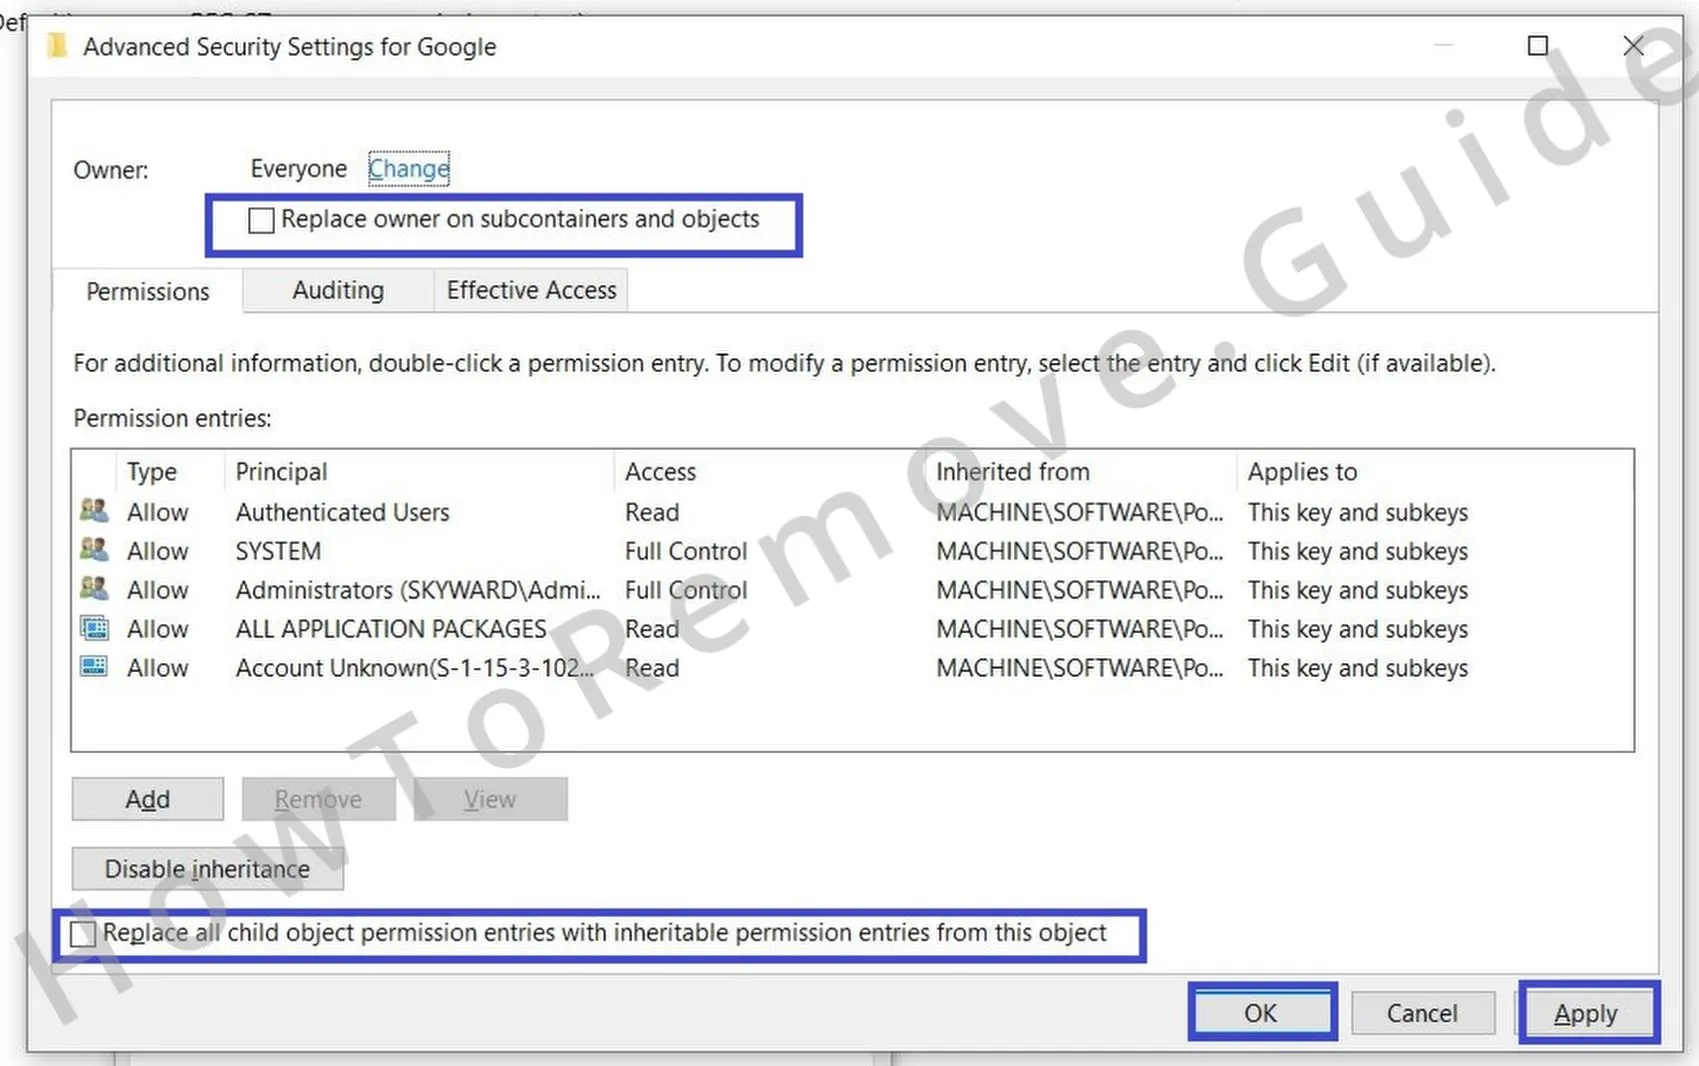
Click Find Next to scan the registry for entries associated with Placcolionic. Delete any matches by right-clicking the identified registry keys and choosing Delete. Repeat searches thoroughly, as malicious entries often appear multiple times across the registry. - 2.4After assigning new ownership, select the checkboxes labeled Replace owner on subcontainers and objects and Replace all child object permission entries with inheritable permission entries from this object. Click Apply followed by OK to finalize these changes. Now retry deleting the previously restricted keys. Upon completion, restart your computer and verify if the “Managed by your organization” notice has vanished.
This gives you the access needed to delete the rogue key.
Video walkthrough for this step:
Alternative Tools to Delete Placcolionic Policies
If Placcolionic is still sticking around after your first try, don’t panic – this thing can be stubborn. Luckily, there’s more than one way to get rid of it. Take a deep breath and stay persistent; keep troubleshooting step-by-step until you’re absolutely certain Placcolionic is completely wiped from your system. Staying calm here is half the battle.
3. Other Ways to Get Rid of Placcolionic Policies
- 3.3For Chrome users, consider using the specialized tool Chrome Policy Remover. This program automatically resets hijacked policies by scanning your browser. To use this tool:
Download it from a verified, secure source.
Right-click the downloaded executable file, selecting Run as administrator to provide necessary permissions.
Allow it to scan your browser thoroughly and reset all altered policies, restoring your browser’s default state effectively. - 3.4If Windows displays a security warning about the Chrome Policy Remover or similar software, click More Info, then Run Anyway after confirming the software’s legitimacy. Restart your PC afterward to confirm the removal of Placcolionic policies. If the issue persists, manually reassess and remove any remaining policies.
Video walkthrough for this step:
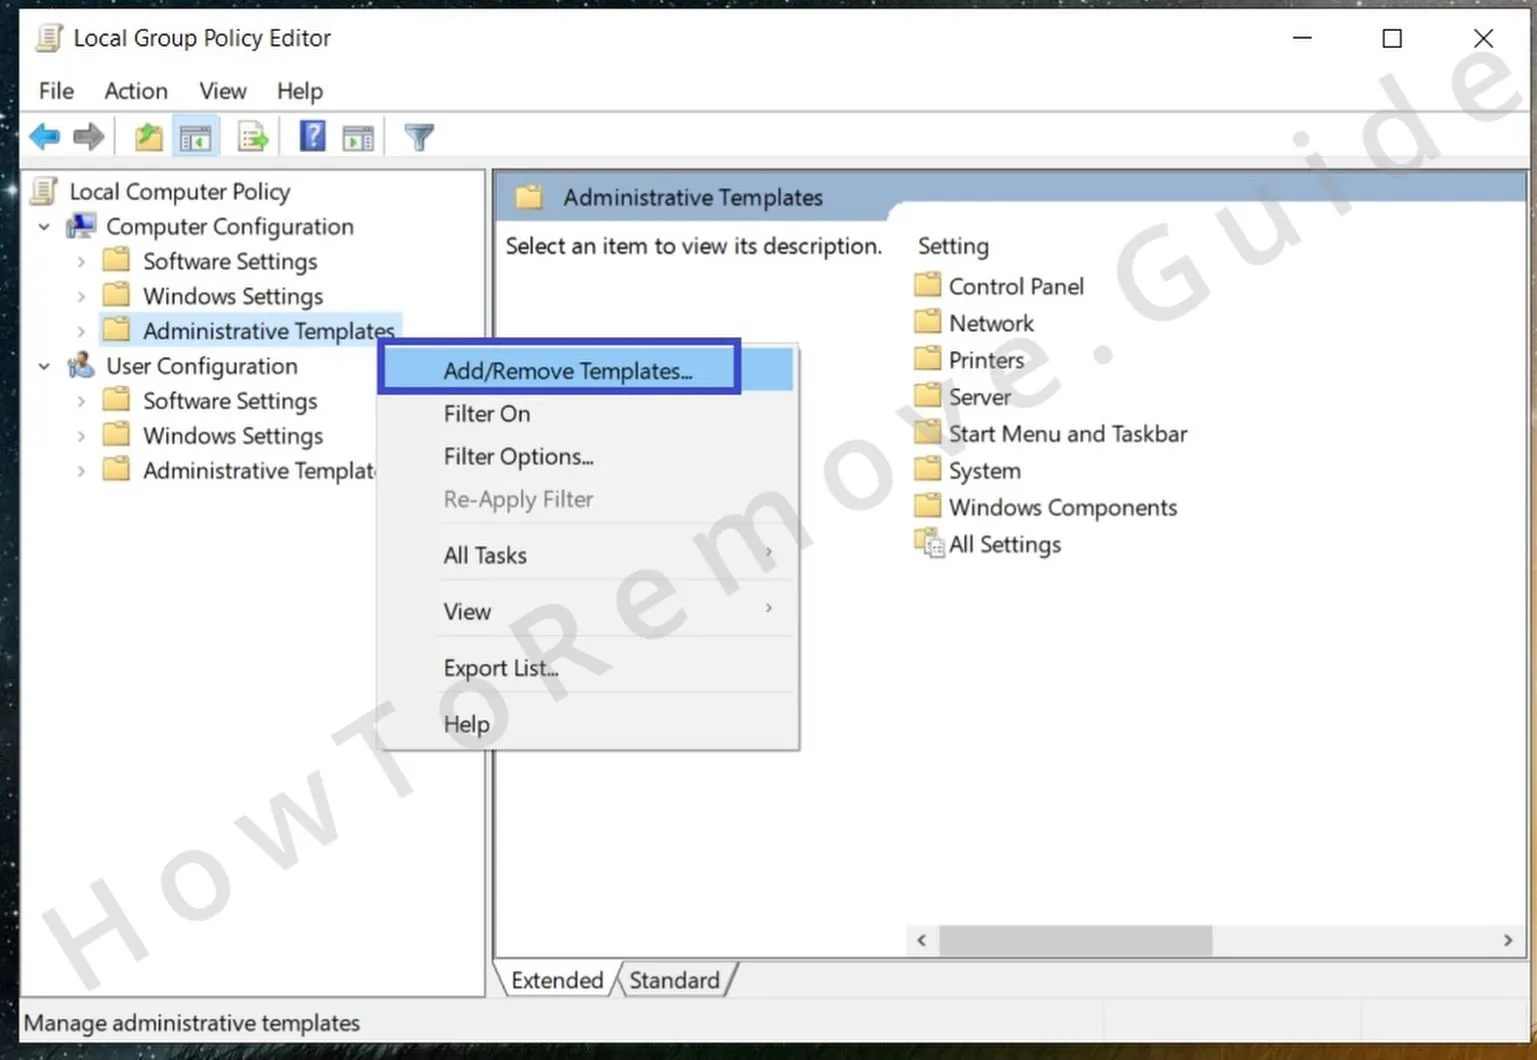
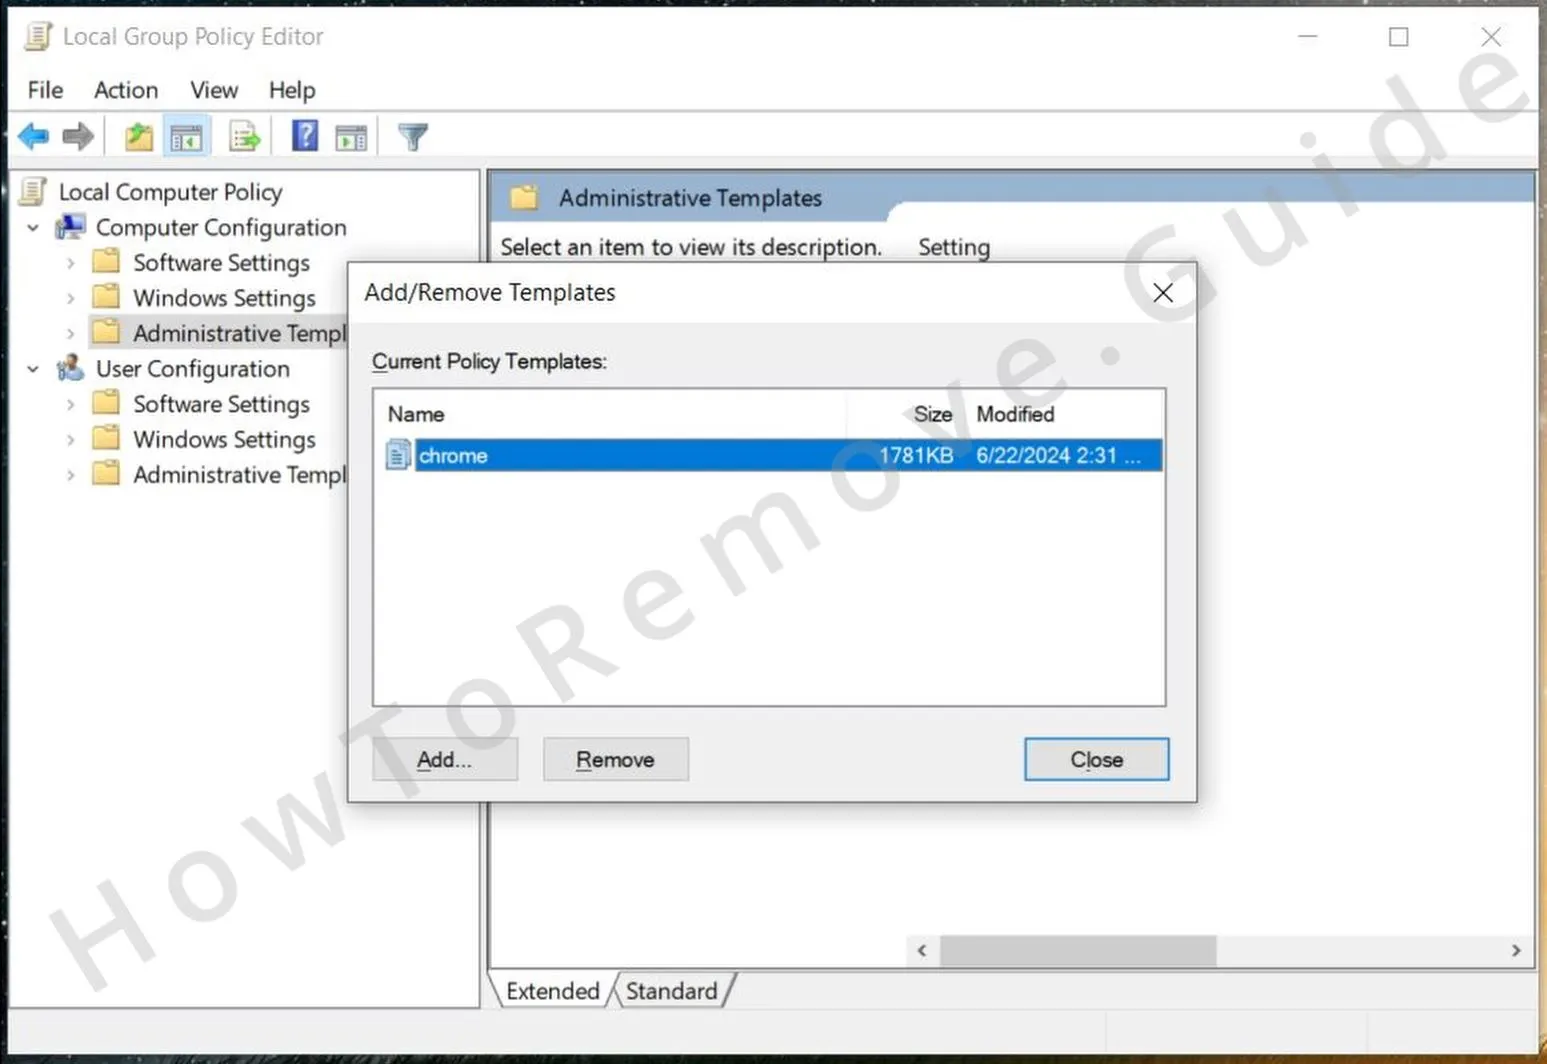
Manual Group Policy Removal
Automatic Group Policy Removal
Uninstall Placcolionic From Chrome, Edge, and Other Browsers
So, by now Placcolionic should be gone, and your browser should feel normal again. But don’t celebrate too early – scammers count on people relaxing too soon. Double-check every setting, because even one sneaky leftover could let Placcolionic crawl right back in. Stay vigilant, stay thorough, and you’ll keep your browser clean and scam-free.
4. How to Remove Placcolionic From Your Browser
- 4.1Return to your browser’s Extensions or Add-ons page for a final inspection. Remove any remaining unknown or suspicious extensions immediately, ensuring previously deleted hijackers haven’t reappeared.
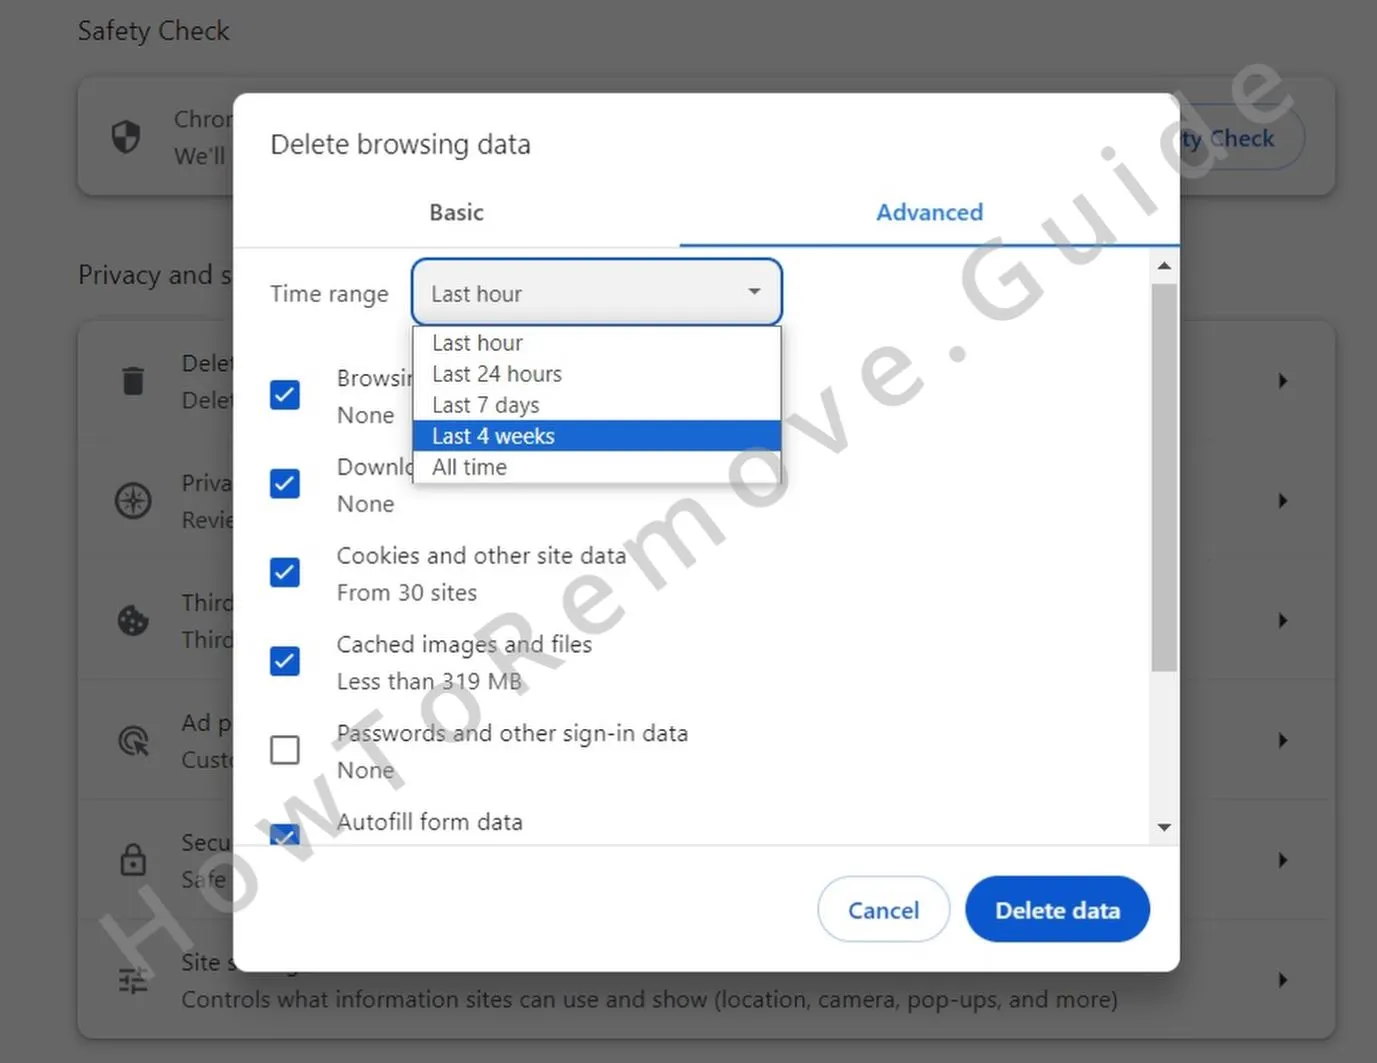
- 4.5Lastly, visit your On Startup and Appearance settings. If an unknown URL appears as your homepage or startup page, promptly remove it and reset to a trusted site. This step guarantees no remaining Placcolionic-related settings exist.
Video walkthrough for this step:
Chrome
Microsoft Edge
Mozilla Firefox

