If you’ve recently noticed something called Signer Digital in your browser, yet you don’t remember installing it yourself, do not worry. I researched this browser extension while working on the current post and it turns out it’s not something malicious, even if it might look unwanted. Signer Digital is a pdf-signing browser add-on that does offer some genuine functionality.
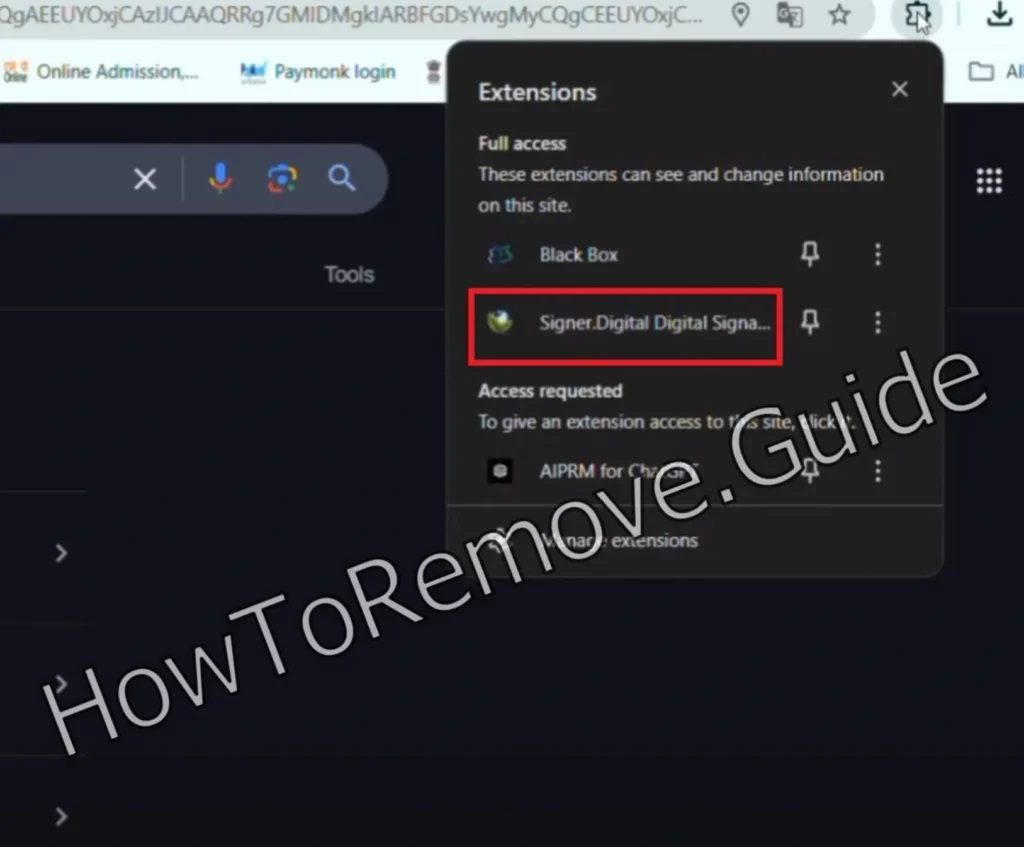
However, the problem is that it tends to get installed in the browser without user permission, mostly done through file bundling. This, combined with the fact that many users who don’t want it have difficulty removing it, is why I view this extension as potentially unwanted. One could even argue it’s a browser hijacker, though that’s up for debate.

Signer Digital is not as intrusive or problematic as Bolingor.co.in, Rokinat.co.in, and other hijackers I’ve encountered before, but it’s still understandable if you want to get rid of it. For this reason, I’ve prepared a detailed removal guide shown below that will help you uninstall this extension.
Signer Digital Removal Guide
Since Signer Digital appears to be a legitimate app with actual functionality, removing it should generally not be too difficult. That’s why I’ll first show you some simpler steps that may let you uninstall it. And if those don’t work for whatever reason, there’s always the advanced removal tutorial shown further down. But for now, here’s what I suggest you try:
- Open your browser—Chrome, Edge, Firefox, or whatever you prefer—and navigate to the settings menu. Chrome users, look for those three vertical dots in the top-right corner. Firefox fans? You’re looking for three horizontal lines.
- Head over to the Extensions or Add-ons section. This is where hijackers often hide in plain sight.
- Take a good look at what’s installed. Signer Digital should be visible there – disable it and remove it.
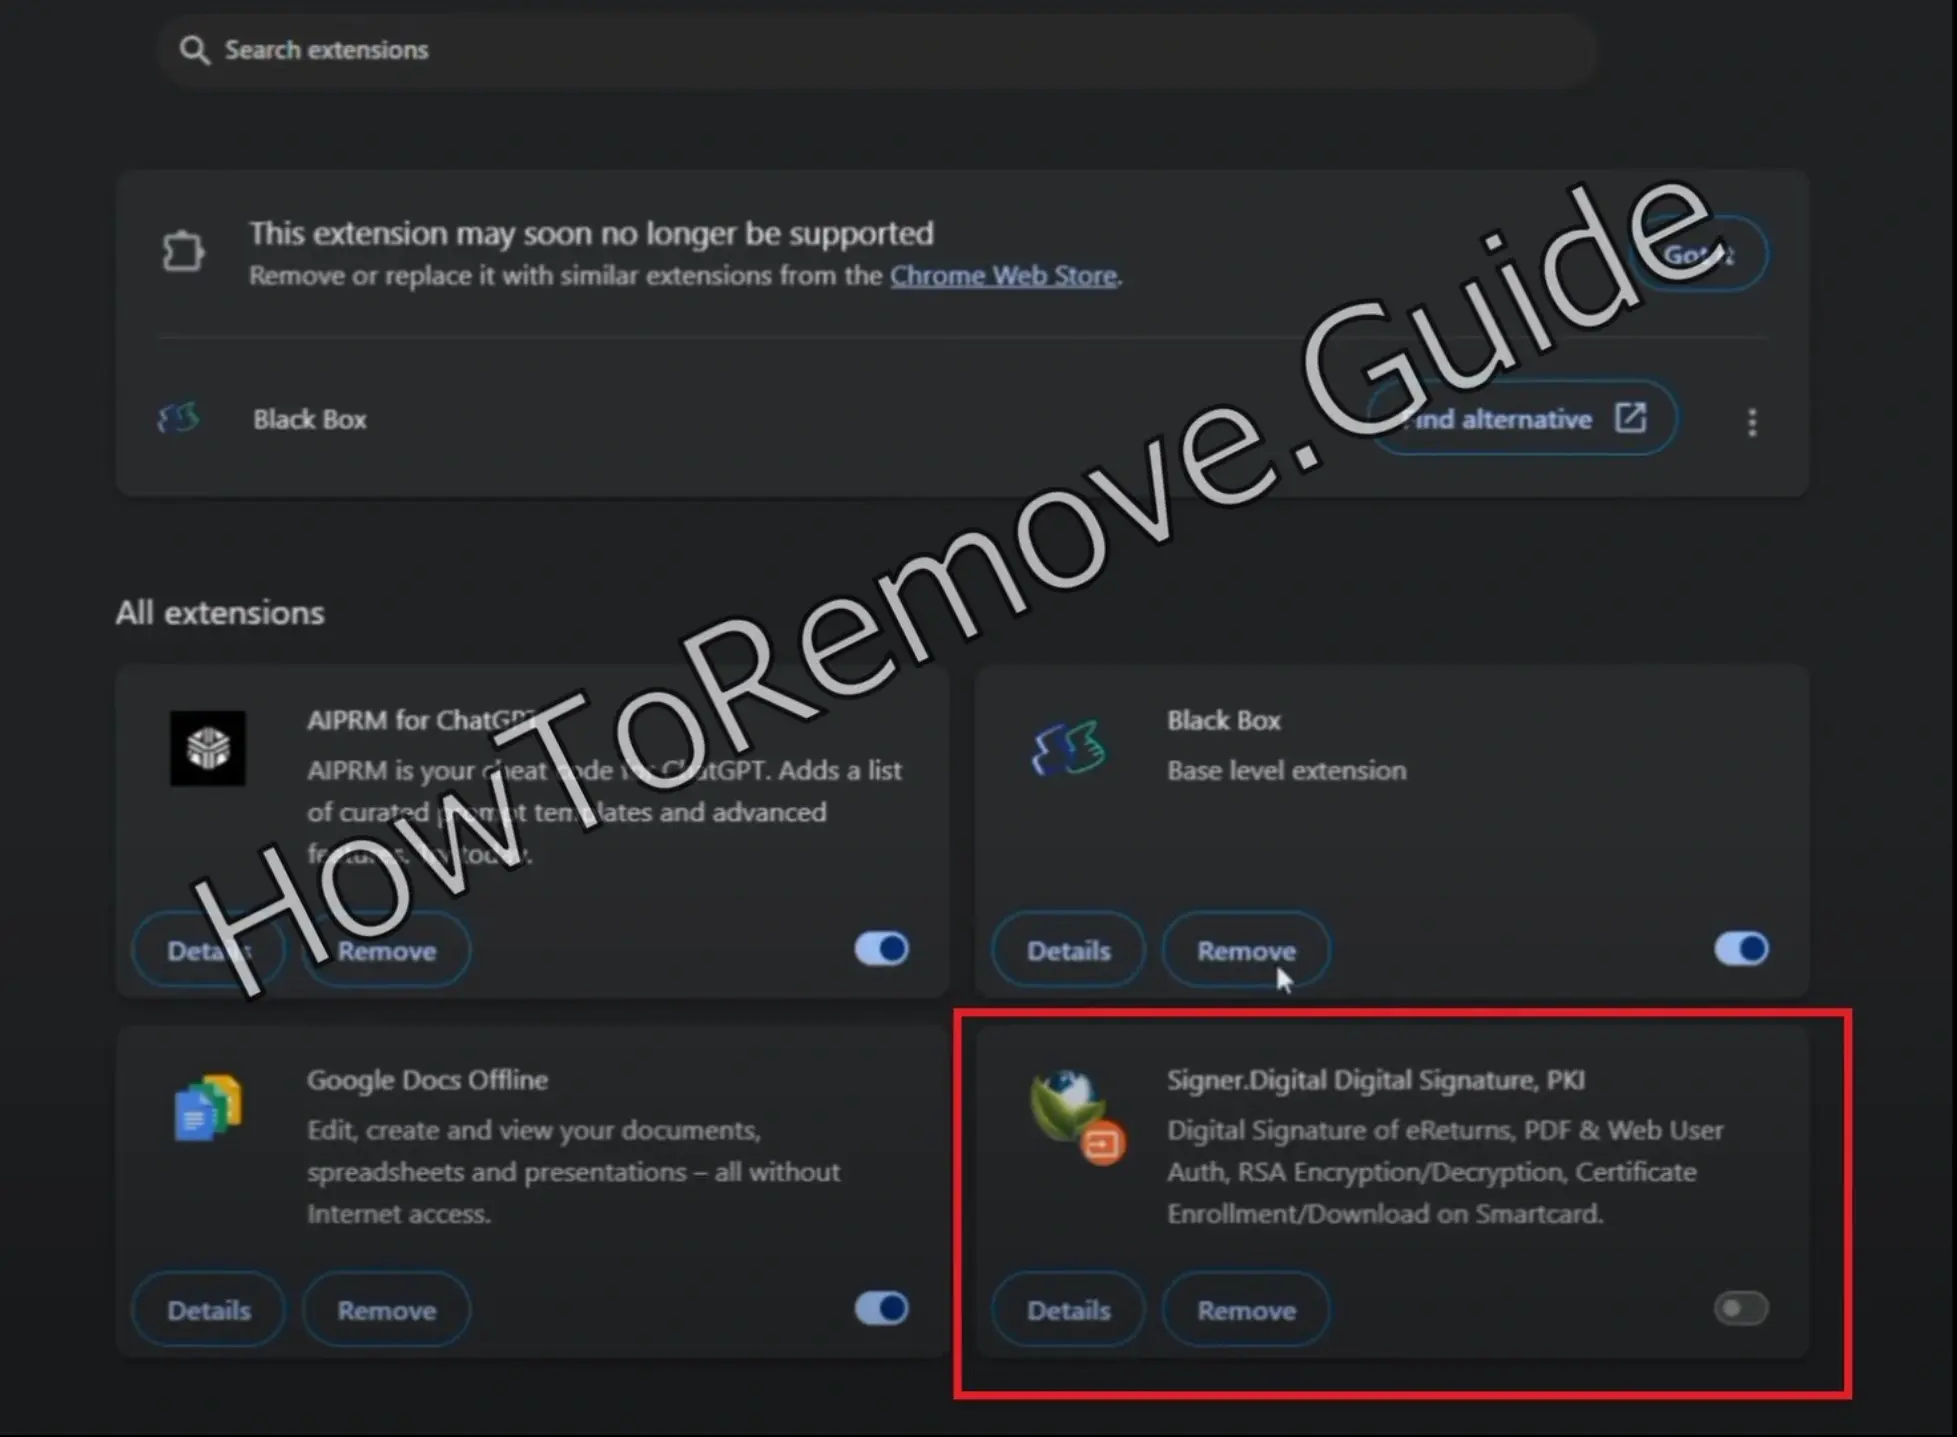
- Also look for other potentially unwanted or unfamiliar items. Is there something promising “enhanced performance” or “faster browsing”? If it seems off or unnecessary, trust your gut and remove it.
- When in doubt, delete—it’s better to be cautious than to leave a suspicious extension lurking in the background.
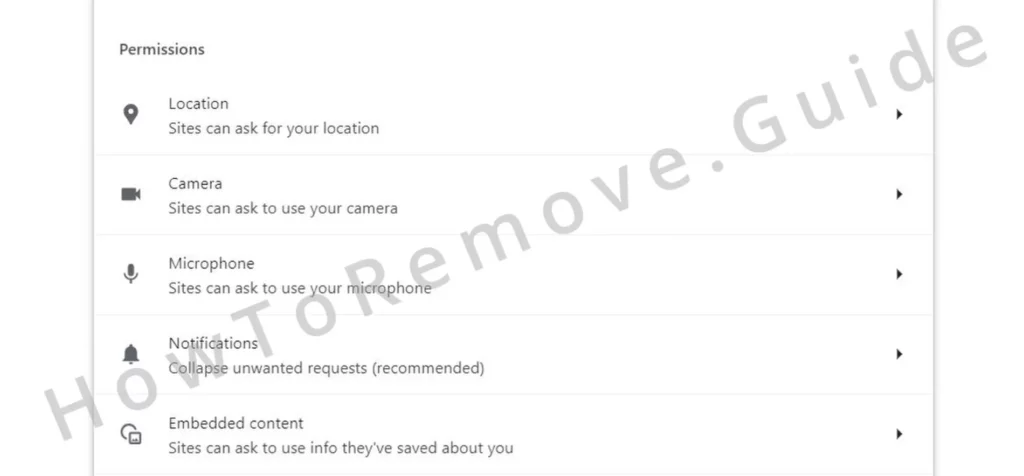
- Next, check your Privacy and Security settings. Scroll down to Site Permissions and review which websites have been granted access to notifications, pop-ups, or other privileges. If something looks unfamiliar, revoke its access immediately.
Once you’ve cleaned up these settings, restart your browser. Sometimes, a simple reboot is all it takes to clear out a hijacker.
Still seeing signs of trouble? No worries—this is just the warm-up. Let’s move on to the heavy lifting.
SUMMARY:
| Name | Signer Digital |
| Type | Browser Hijacker |
| Detection Tool |
Some threats reinstall themselves if you don’t delete their core files. We recommend downloading SpyHunter to remove harmful programs for you. This may save you hours and ensure you don’t harm your system by deleting the wrong files. |
Removing this issue isn’t quick—it’ll take an hour or more, and some technical know-how is definitely helpful to follow all the steps properly.
If that sounds overwhelming or you just don’t have the time, there’s an easier way. SpyHunter 5 is a powerful tool that can take care of Shougnoboassi for you and clean up your PC in the process. It’s designed to handle not just this problem but also any other unwanted programs that may have come along with it, making the whole process fast and hassle-free.
How to Remove the Signer Digital Extension From Your Browser
In some cases, the quick steps I suggested above might not be sufficient to remove the unwanted Signer Digital extension. Here’s a key giveaway: if you see a message like “Managed by your organization” in your browser settings or menu, even though you’re not part of any organization, it’s time to dig deeper.

For Chrome, type chrome://policy into the address bar and hit Enter. Edge users can do the same with edge://policy. What you’ll see is a list of active policies.
Pay attention to the Values column and look for entries that look like randomly-generated strings of characters. These entries might indicate unwanted third-party policies. Take note of anything suspicious (write down the rogue values)—you’ll need this info for the next steps.

Also, revisit the Extensions page. Enable Developer Mode to reveal extension IDs. Write down the Signer Digital ID and the IDs of any other sketchy extensions.
If the hijacker has blocked access to this page, you’ll need to go directly into your computer’s directories.
For Chrome, the path is C:\Users[Your Username]\AppData\Local\Google\Chrome\User Data\Default\Extensions.
The respective extension folders for other popular browsers:

Delete everything in this folder. It forces the browser to reset its extensions, giving you a clean slate.
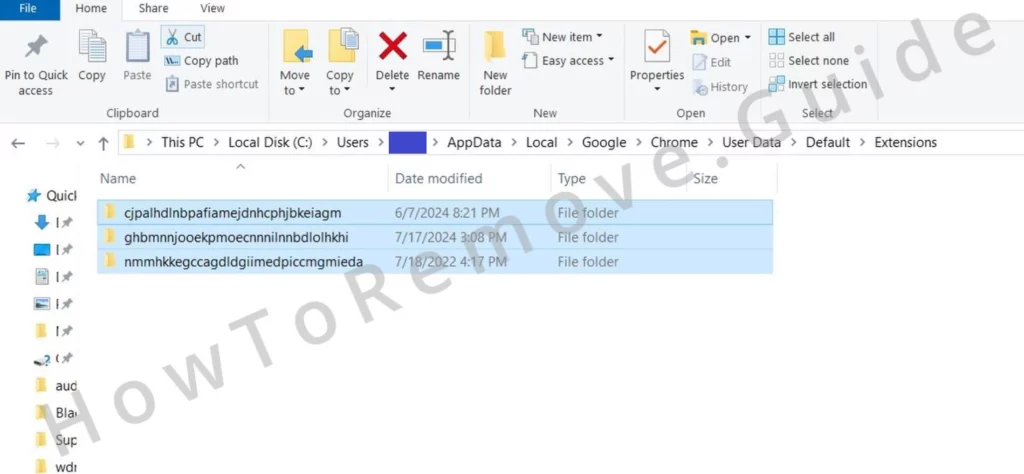
This should allow you to go back to the Extensions page and record the rogue IDs.
Video walkthrough for this step:
Get Rid of Signer Digital Policies
When a hijacker embeds policies into your system, manual cleanup is the next step after you’ve collected the necessary info.
Open the Registry Editor by pressing Win + R, typing regedit, and hitting Enter. Use the search function (Ctrl + F) to locate the suspicious values or extension IDs you identified earlier.
When you find something shady, delete it. But don’t stop there—search again to ensure no traces are left. Do this for all policy values and extension IDs you recorded in the previous step.
Occasionally, a registry entry might resist deletion. If that happens, right-click the entry, select Permissions, and navigate to the Advanced settings.
Change the owner to “Everyone,” check the necessary boxes to replace permissions, and then delete the entry.
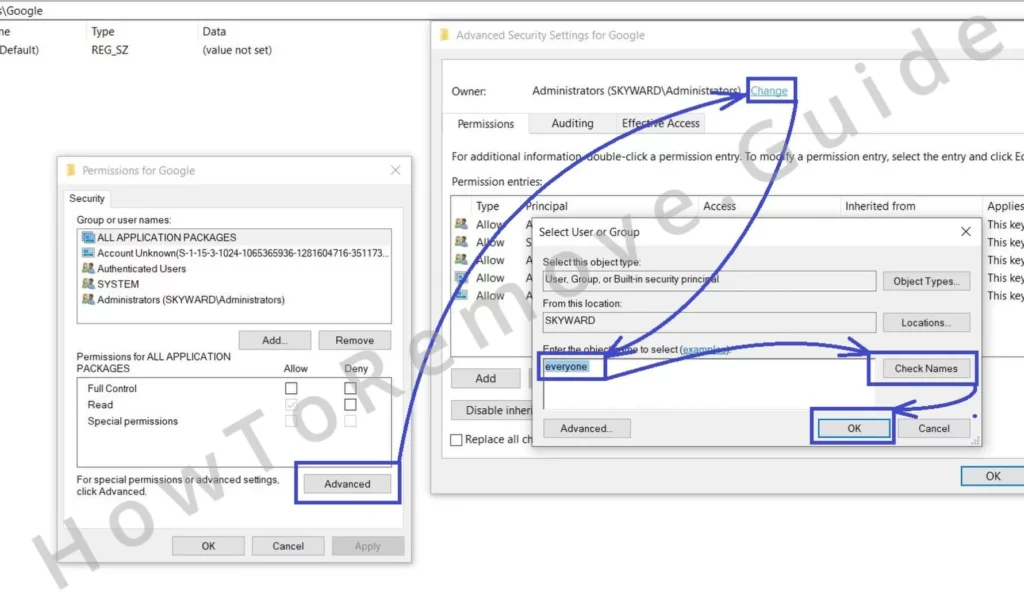
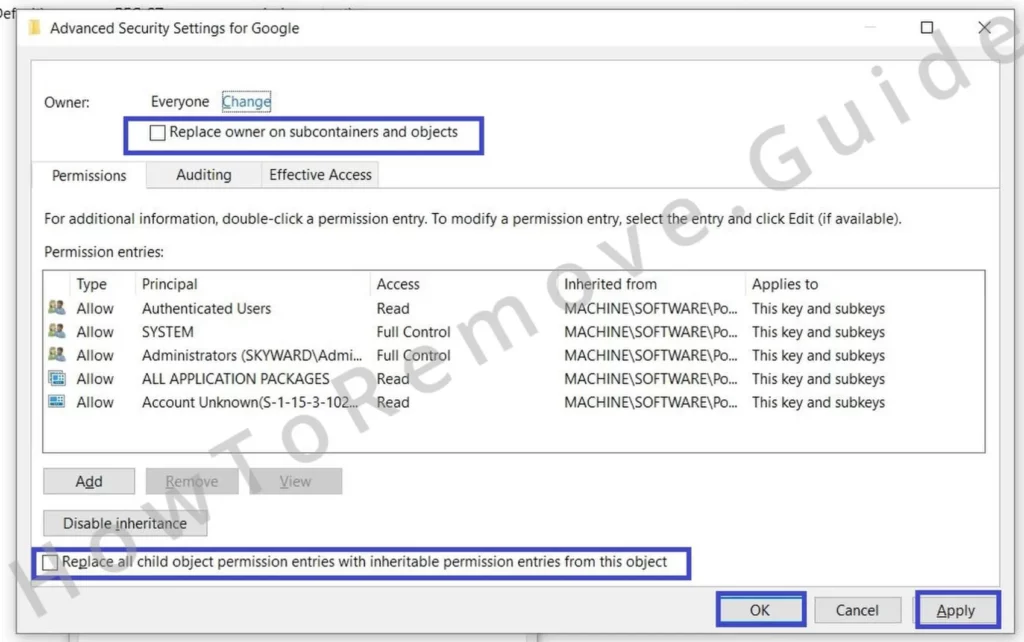
Once you’ve cleared out these unwanted entries, restart your computer and see if the hijacker is gone. If the issue persists, don’t worry—there are alternative methods to explore.
Video walkthrough for this step:
Alternative Ways to Delete Signer Digital Extension Hijacker Policies
If manual registry edits don’t fully resolve the issue, there are a couple of other methods you can try. The first one is to use a built-in system tool called Group Policy Editor. Here’s how to use it:
Search for edit group policy in the Start Menu and open the first result. Then navigate to Administrative Templates, right-click it, and click Add/Remove Templates.
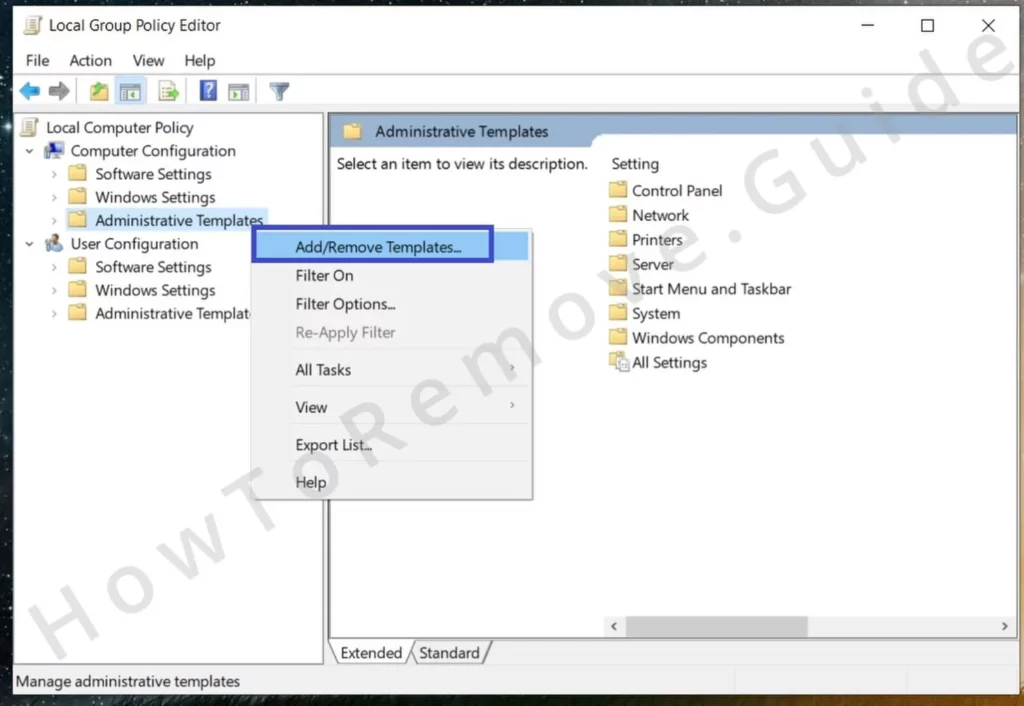
Look for any settings that seem out of place, and remove them.
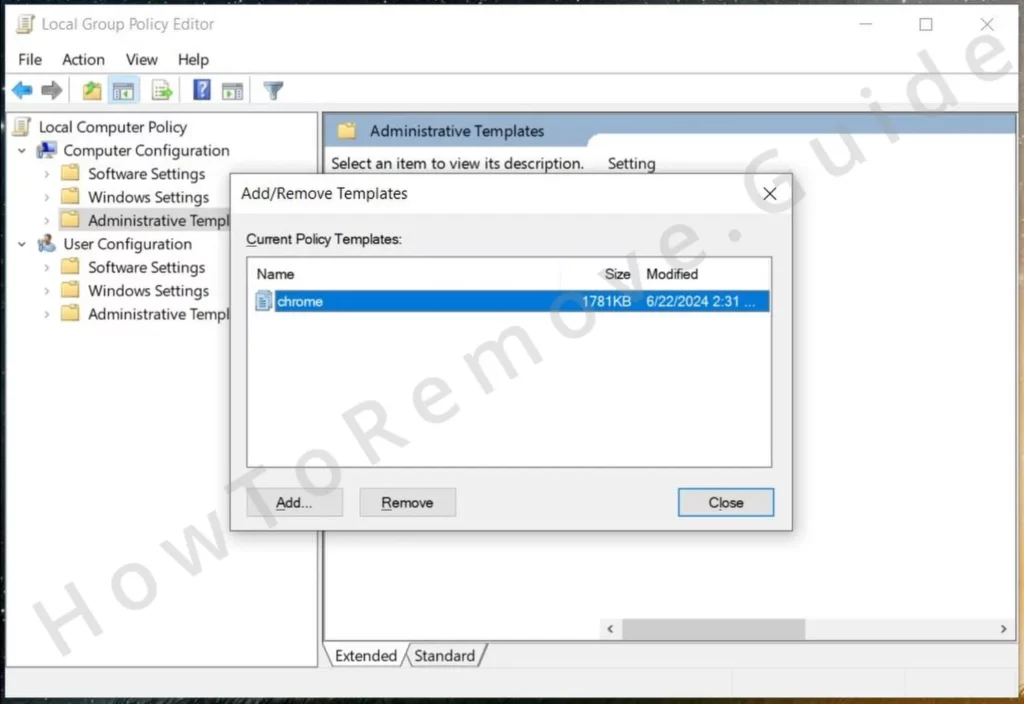
Chrome users also have access to the Chrome Policy Remover Tool, which is specifically designed to eliminate Signer Digital policies.
Download the tool, and run it as an administrator – the tool will automatically take care of the rest. If Windows throws up a warning about the software, you can safely ignore it—this tool is trusted and effective.
With these steps, you’re adding another layer of defense to ensure no policy or extension is left behind.
Video walkthrough for this step:
Manual Group Policy Removal
Automatic Group Policy Removal
Remove Signer Digital From Chrome, Edge, and Other Browsers
After clearing out any Signer Digital policies, it’s time to restore your browser to its original state.
Start by revisiting the Extensions page to confirm there’s nothing suspicious left. Delete Signer Digital if it’s still there and also get rid of anything else that looks questionable or unneeded.
Next, clear your cache and cookies. This step is crucial for removing any lingering traces of the hijacker. Navigate to your browser’s Clear Data settings, select “All Time” as the range, and delete everything except saved passwords.

Don’t forget to review your Site Permissions again and check each permission type for rogue URLs. Block any sketchy websites and ensure only trusted sites have access.
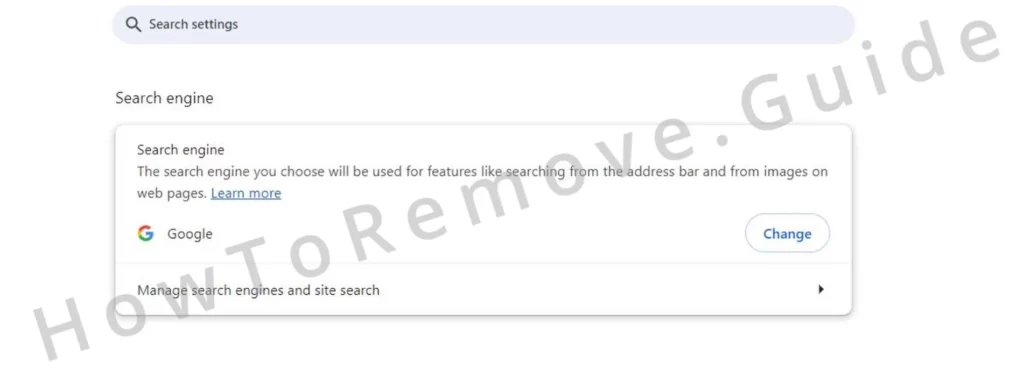
Finally, check your browser’s Search engine, Startup, and Appearance settings. Hijackers often replace your default search provider, homepage, and new tab page with questionable URLs. Restore your preferred settings and remove anything unfamiliar.
Video walkthrough for this step:
Chrome
Microsoft Edge
Mozilla Firefox

Staying Safe: Building Long-Term Browser Security
Congratulations! By now, your browser should be free of hijackers and back to its former glory. But how do you prevent this from happening again? It’s all about proactive habits.
Start by installing a trusted anti-malware program. Programs like SpyHunter 5 are great for running regular scans and catching threats early. Be cautious when downloading software—stick to reputable sources and watch out for “bundled” extras that often carry unwanted extensions.
When it comes to browser extensions, less is more. Only install those you truly need, and make sure they’re from official stores. Review permissions before installing anything new, and enable built-in security features like pop-up blockers.
Lastly, trust your instincts. If a website, email, or message feels off, it probably is. Avoid clicking on unfamiliar links or engaging with unsolicited messages. Staying vigilant is the best way to keep your browsing experience secure.
Wrapping Up: A Clean Browser and Peace of Mind
Removing a browser hijacker like Signer Digital can be a frustrating experience, but with persistence and the right steps, it’s entirely manageable. By following this guide, you’ve not only reclaimed control of your browser but also fortified it against future attacks.
Remember, the key to staying safe online is a proactive mindset. Regular updates, careful browsing, and a sharp eye for anything unusual go a long way. With your browser clean and secure, you can surf the web with confidence, knowing your digital world is once again under your control.

Leave a Reply