
The fact that some piece of unwanted software was installed on your PC without your knowledge or consent doesn’t mean it has to be something dangerous or malicious. It could also be something relatively tame, such as an ad-displaying program or a fake search engine for the browser.
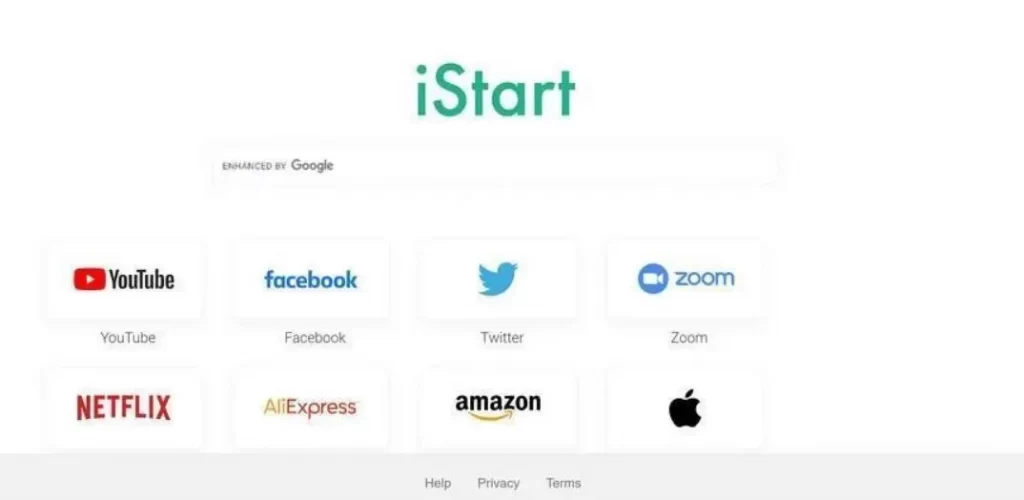
Such is the case with iStart – a search engine that suddenly appears in the browser, seemingly out of nowhere. If you currently have iStart attached to your Chrome, Firefox or another browser, we understand if you are worried about your PC’s safety, but worry not. In this article, you’ll learn everything you need to know about it and its potential effects on your system. As we mentioned, this rogue search engine isn’t a significant threat to your virtual security, yet it’s important to have it and the software that brought it to your PC removed. We can help you with that as well with our detailed removal tutorial at the end of this article.

What is iStart?
iStart is a software component that is designed to make unauthorized changes in the user’s browser, mainly with the goal to earn advertising revenue. It works by sneakily gaining elevated privileges on your computer so that it can make changes in your browser without your informed approval.
The main change this app makes is it replaces your default browser search engine with iStart. The purpose of this change is to reroute your searches through a sequence of intermediate pages that can gather telemetry data from your browser. If you search for anything in the iStart search engine, you will likely notice that your browser goes through several URLs in quick succession before arriving at a Bing or Yahoo search results page.
Each of these URLs are likely sites that seek to collect user browsing data and then sell it to online marketers, while also artificially gaining more traffic. While this doesn’t directly put your system at risk, it’s not a good idea to allow unknown third-parties to collect data from your browser. Besides, the iStart search engine will probably not give you the best results and will more than likely degrade your browsing experience.

But the real problem here isn’t even the search engine itself. It is the fact that some unknown software has managed to get installed on your system and unbeknownst to you has gained permission to make changes. A replaced search engine isn’t such a huge deal but it’s possible that other, more problematic changes are made in your system.
For this reason, you need to do everything in your power to find and delete all rogue software that currently resides on your PC. Again, to help you with that, we’ve provided a detailed removal guide alongside a powerful anti-malware tool.
How Dangerous is iStart?
By itself, iStart isn’t a serious threat to your computer. As we said, its main goal is to promote certain sites and allow them to collect marketing data from users like you. While this is annoying and a privacy breach, it’s typically not a huge deal. However, the real issue here is that iStart was able to get added to your browser in the first place.
According to our research, most users who have this browser hijacker got it after installing something else on their computer that carried the hijacker in its installer. The problem is that other undesirable stuff, such as ReasonLabs, might have also been installed without your knowledge. Common examples of other unwanted programs that often accompany iStart are Webssearches, Searcherbar, and SearcherN. We do not mean to scare you or get you panicked. The truth is that even if something unwanted is running on your computer right now, it’s likely not a huge threat. However, it still makes your system less safe and compromises your virtual privacy, which is why you need to act now to secure your PC.
Is iStart a Virus?
It’s convenient to call any program, app, or browser extension that does something unwanted a “virus”, but the truth is that iStart isn’t technically that. A virus is something more malicious and problematic than a mere browser hijacker like iStart. Still, if by “virus” you mean software that can put your system at risk, then you’d be right to say this for iStart. This is something that mustn’t be on your PC even if it is less dangerous than an actual virus.
How iStart Got on Your PC
Browser hijackers like iStart don’t get on the computer on their own. Instead, they typically install through file bundles on the user’s computer. They are typically attached to the installer of a program that the user willingly installs and they get on the computer alongside said program.
Typically, the software that hijackers like iStart are bundled with isn’t the most reputable but it’s also not harmful or malicious. For example, many users who have iStart got it from installing the DriverPack or the DriverPack Notifier app. Both of those apps are safe but are considered by many users unwanted precisely due to often distributing browser hijackers and other unwanted components.
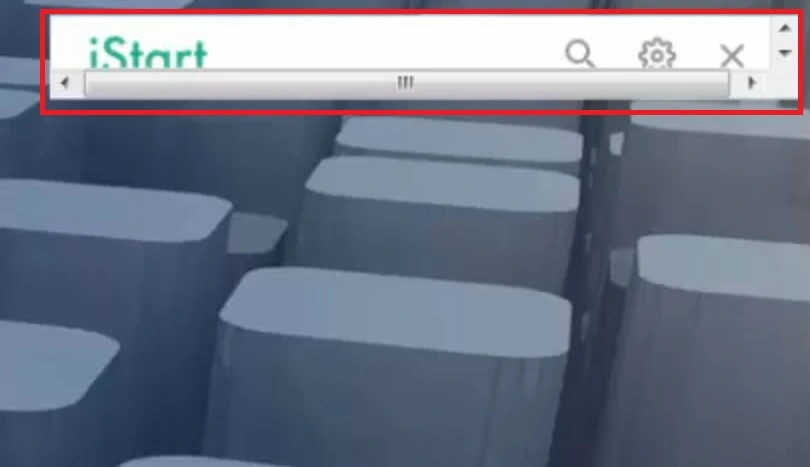
In many instances, the user doesn’t even know that this is what got them the hijacker. Often, the reason for this is that people don’t pay enough attention to the settings in the setup wizards of programs they are about to install. Typically, you will be given the option to leave out any additional components and only install the main thing. But since most users don’t pay attention to those options, they go for the default installation configuration and also get the added hijackers and adware.
If iStart is on your PC right now, it’s recommended to also look for DriverPack/DriverPack Notifier or any other recently installed app and delete it as well. You can learn how to do that in the next guide.
SUMMARY:
| Name | iStart Search Bar |
| Type | Browser Hijacker |
| Detection Tool |
We tested that SpyHunter successfully removes iStart* and we recommend downloading it. Manual removal may take hours, it can harm your system if you re not careful, and iStart may reinstall itself at the end if you don’t delete its core files. |
How to Remove iStart
To manually remove iStart, you will have to first clean your system from any recently installed apps, quit all rogue processes, delete their data, and revoke unwanted changes made to your system settings. After that, you will have to go to each of your browsers, remove from them any unwanted extensions, search bars, and search engines, and reset their settings.
The next instructions will show you how to do everything, but we must warn you that you’ll be performing them at your own discretion. We can’t be held responsible in case something goes wrong. If you prefer a safer way to deal with iStart, you can try the professional removal tool linked on this page which will take care of the hijacker for you.
Delete Suspicious Recent Apps
As we explained above, the most likely way in which you got infected with iStart is that you have installed a new file bundle, which contains the browser hijacking software. That’s why, your task at this point is to find this software and delete any other suspicious apps that are currently present on your PC. Here is how you can do it.
- The first step is to go to the Start menu and search for “Apps & Features”. Double-click it and take a careful look at the programs that are listed there.
- Specifically search for “iStart” and if it is there, click on it, then you need to select the Uninstall option, and follow the instructions that will appear on your screen.
- After you are done, sort the list of apps based on the install date, which will make the most recent installs appear at the top.
- Look for software that you think shouldn’t be on your PC and that might be associated with iStart, as well as some other suspicious software that you do not recognize.
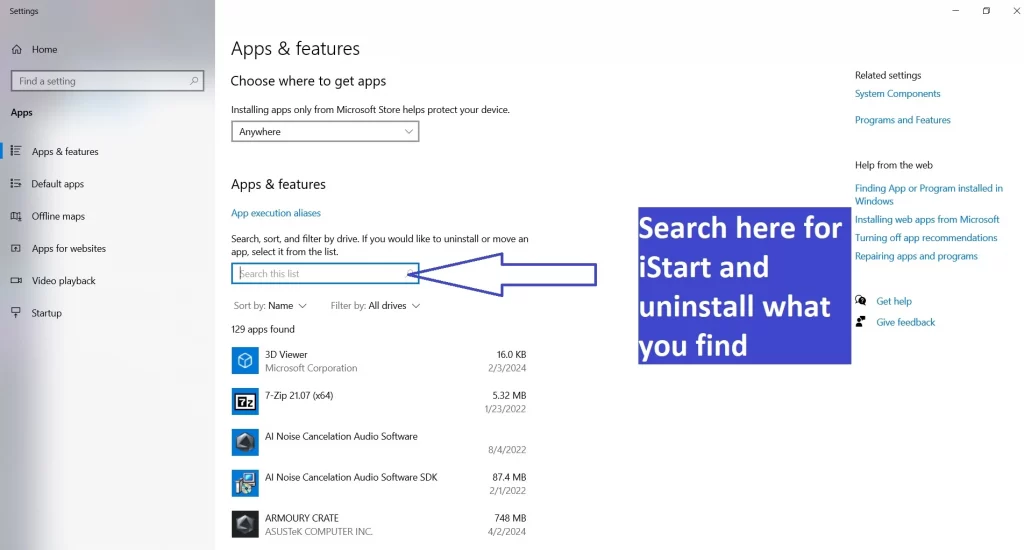
If you find any other sketchy apps, select them, select Uninstall, just as you did above, and follow the instructions for uninstallation.
Video walkthrough for this step:
Clean the Task Manager
You have all the chances to eliminate the hijacker entirely from your PC if you manage to successfully locate and quit the iStart process from your system and delete its data. This is how you can achieve this:
- Press Ctrl + Shift + Esc and then, if not all processes are shown, click on More details.
- Find the iStart process, right-click it, and open the process’s Properties > Security tab > Advanced and choose to Disable Inheritance, click apply.
- When you are done with that, right-click the process once again, select open file location, and then delete all of the folder’s contents.
- Most probably, you will not be able to delete one or more components there; in this case, you can download Lock Hunter. Install this app, and then right-click the locked component, select “What’s locking this file/folder?”, and click “Delete it”.
- Right-click the iStart process for the third time and press “End task”.
You can do the same with other processes that look suspicious – you may sort them by CPU and Memory usage to see which processes are consuming more computer resources than usual. In the worst case, they will have completely inhuman names that you have never seen.
Video walkthrough for this step:
How to Delete Persistent Files with Lock Hunter
Clean Your System Settings
We already explained in the paragraphs above that iStart has probably made changes in different sections of your system. So it’s crucial to undo them in order to protect your computer. This will also ensure that the intrusive software is not going to return to your PC again. Here are the steps that you need to follow:
- Reopen the Task Manager, go to the Startup tab, and search for iStart or any other unfamiliar or suspicious programs there. Select them one by one, press on Disable, and then on OK.
- Now, look up in the Start Menu and open “Task Scheduler”. Choose “Task Scheduler Library” in the top left corner of the window.
- Please pay attention to the tasks on the list. When you see any iStart-related ones, right-click on them and select “Delete”.
- The next step is to click the Start menu button and search there for regedit. Right-click on the first item and select Run as Administrator. When the window pops up, press Yes.
- Then open Edit > Find in the top left corner of the screen, then, in the searching box that appears, type iStart in.
- Finally, you need to press Find next, and if something appears in the results, delete it. Press the Find next button again and delete any other detections until the program does not find the iStart files anymore.
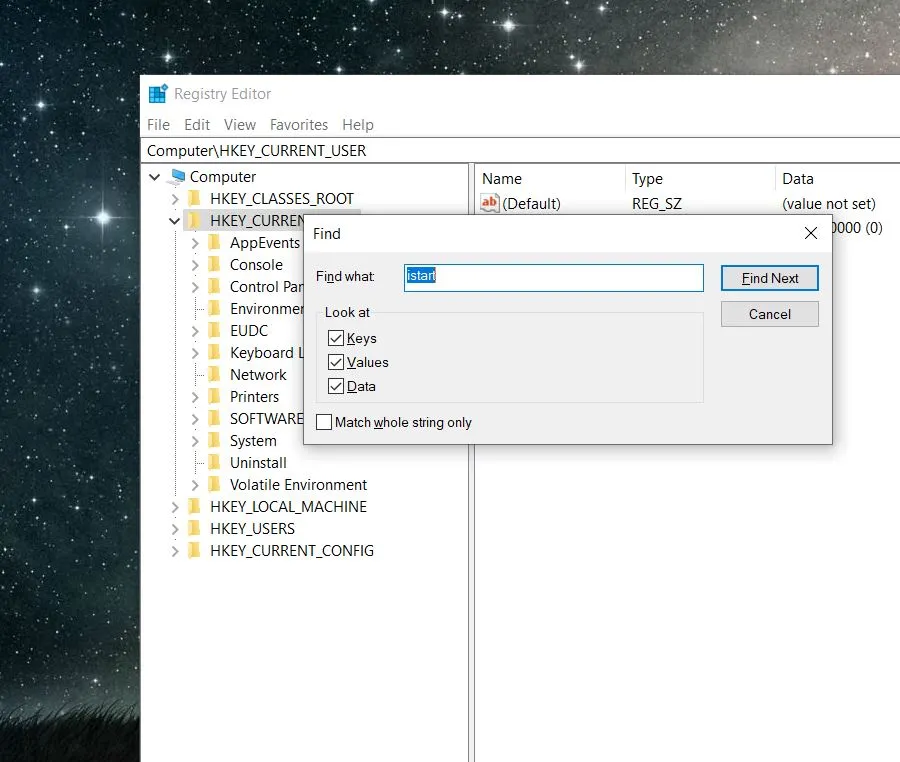
If there are any other questionable applications that you don’t want to keep on your PC, then repeat the same steps with them.
Video walkthrough for this step:
How to Clear the Task Scheduler
How to Clear Your System Registry
Remove iStart from Your Browsers
As mentioned above, iStart may be able to access and change the browsers that have been installed on your system. For this reason, aside from the steps above, you also have to manually check them for unwanted changes and return them to their previous state if iStart has seized them.
Let’s start with Chrome:
- Once you have launched the browser, click on the three-dots menu, tap on Settings, and choose Extensions from the left square.
- Examine what extensions are currently present in Chrome and delete all the extensions that you did not install, do not need, or do not know.
- After that, go back to Settings, access Privacy and Security from the left, and select the Clear Browsing Data option.
- Ensure you are on the Advanced Tab, place a checkmark on everything except Passwords and other sign-in data, and press the Clear Data button.
- Continue to scroll down until you reach Site Settings, and one by one, verify all Permissions and Content category. If there is a site that you do not trust, press the three dots near the specific entry and remove it.
- Then go the Appearance options from the left panel and look at the Home button section to see whether there is a custom URL placed. If there is, and you do not know or recognize it, delete it.
- Next, inspect the Search Engine page, and make sure that the search engine is the one that you intend to use, and go to Manage Search Engines.
- Investigate whether there are some unknown or questionable search engines, and in the event that you find any, press the three dots near their entry and Remove them.
Finally, head to the On Startup tab and see if the third choice is selected there. In the case you have an odd-looking URL, go ahead and remove it.
Video walkthrough for this step:
Chrome
The next one is how to clean Firefox:
- The first thing is, you need to go to the top-right corner of the browser’s window and click the puzzle icon. Then click Manage Extensions, and deleted any unwanted or unknown ones.
- Secondly, click the three lines in the top-right and access the Settings. Open the Home tab and check if there are any unusual URLs in Homepage, New Windows, and New Tabs and if yes, deleted them.
- After you do that, go to the Search tab and check that you are using the search engine that you want as the default one. In addition, scroll down to the table of search engines that Firefox can use and remove any unfamiliar or unwanted ones.
- The next place you need to go to is Privacy and Security. In there, scroll down until you see Cookies and Site Data, then click on Clear Data. Take a quick look if both boxes are checked and then click on the Clear option.
Lastly, go down to Permissions, open the Settings of each category, and remove anything unusual.
Video walkthrough for this step:
Mozilla Firefox
And, last, but not least, this is how to clean the Edge browser:
- Launch Microsoft Edge and immediately click the three-dots menu and then select the Extensions option. In the pop-up that you will see, click the “Manage extensions” button.
- Look for suspicious extensions on the next page and remove them.
- Click the three-dots Edge menu once again and go to Settings. Click the Privacy tab and then click “Choose what to clear” at the Clear Browsing Data.
- Put a checkmark on everything else, but leave only Passwords, (if you select it your passwords will be deleted as well) and click the “Clear Now” button.
- After that, go to the bottom of this section and select Address bar and search.
- Replace the current search engine if you do not want or trust it and then click “Manage search engines”.
- If some of the search engines that are listed there look suspicious, click their three-dots menus and then select Remove.
- Go to the Start, Home, and New Tabs section and delete any unwanted URLs.
Finally, at Cookies and site permissions, check the permission settings for each category for malicious sites and delete them.
Video walkthrough for this step:
Microsoft Edge

Leave a Reply