![]()
*Source of claim SH can remove it.
Poshukach
Poshukach is a browser hijacker that changes the default search engine of the targeted browser with a rogue search engine of the same name. Poshukach also causes the browser to automatically open new tabs and pages in an attempt to promote certain questionable sites.
If you are getting page-redirects all the time while browsing, if ads get spammed on your screen, and if the browser’s search engine and/or home page have been changed to Poshukach, then you are definitely dealing with this rogue browser hijacker and should quickly find a way to remove it from your Chrome, Edge, Firefox, or another browser.
While significantly less dangerous compared to Trojans, Spyware, Ransomware, or other highly-threatening forms of malware, a hijacker such as Poshukach is still not something to be underestimated. Its goal is mainly advertising-oriented, which is why you probably see tons of ads and promotional banners in your browser, but the content that this hijacker may promote could be unsafe and expose your system to danger.
Poshukach engine search
The Poshukach engine search is a fake search engine designed to show advertised search results in an attempt to promote certain low-ranking sites. The Poshukach engine search shouldn’t be allowed to stay in your browser, as it may put your system in danger.
Aside from rerouting your searches to questionable sites with potentially unsafe content, another thing this hijacker may attempt to do is gather data from your browser without first informing you and/or requesting your permission. Considering the already sketchy nature of this fake search engine/browser hijacker, it’s certainly not a good idea to allow it to collect information about your browsing habits, the sites you tend to visit the most, your browsing history, or even your bookmarks. Although such data is mostly used for more accurate and effective targeted advertising, it’s also safe to assume that it will be sold and resold to third parties. It’s even possible that the data from your browser may eventually end up in the hands of hackers and/or scammers, putting your privacy and virtual safety in serious jeopardy.
The Poshukach virus
The Poshukach virus is how most people refer to this unwanted browser hijacker, due to its tendency to enter the browser uninvited and make unauthorized changes in it. While the Poshukach virus isn’t an actual computer virus, it’s still a threat and should be uninstalled.
While it is not totally accurate to refer to Poshukach as a virus, it illustrates how unpleasant and unwelcome the presence of this hijacker is on a computer. Furthermore, considering what we’ve already told you about the potential dangers of having it in your system/browser, it should be clear that removing Poshukach is the only viable course of action if you want to keep your system safe and secure.
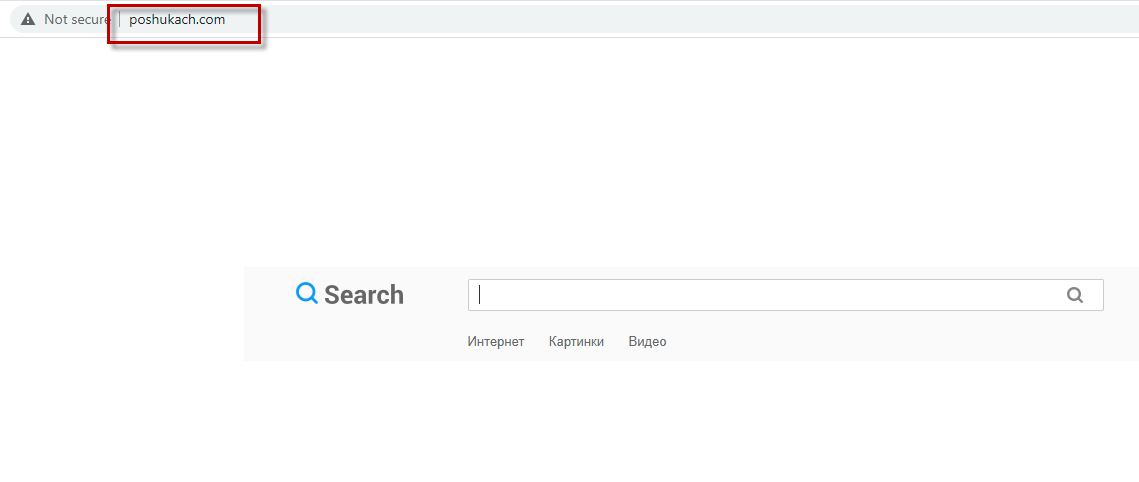
Poshukach.com
Poshukach.com is the fake search engine that this hijacker would add to your browser, replacing your previous search engine. Poshukach.com isn’t reliable, and it’s recommended that you don’t use it for conducting online searches because it may land you on unsafe sites.
To remove the poshukach.com search engine, however, you must first take care of the hijacker component that has placed it there. If you directly try to bring back your preferred search engine, you may find out that you aren’t allowed to do that because the hijacker is overriding your attempts and restoring Poshukach as the default search engine. Still, it is perfectly possible to deal with this issue, and down below, we will show you how you can do it right now.
SUMMARY:
*Source of claim SH can remove it.
Poshukach engine search removal
The Poshukach engine search removal is done by following these next steps:
- Check for suspicious programs – if you think a certain program may have installed Poshukach on your system, delete it.
- Search for processes run by the hijacker and stop them.
- Also change back any system settings modified by the hijacker.
- The last Poshukach engine removal step is to clean each browser in the system.
For a detailed explanation of each step, please, read everything we’ve prepared for you below.
Detailed guidance for each step
It is possible that is connected to the Internet may obstruct the removal of the Poshukach because the hijacker may attempt to automatically reinstall any of its components that you may manage to delete. For that reason, it’s strongly advisable to keep your system disconnected from the web for the duration of the next steps. To have live access to this page, we suggest opening it on your phone or on another device with an Internet connection.
Step 1
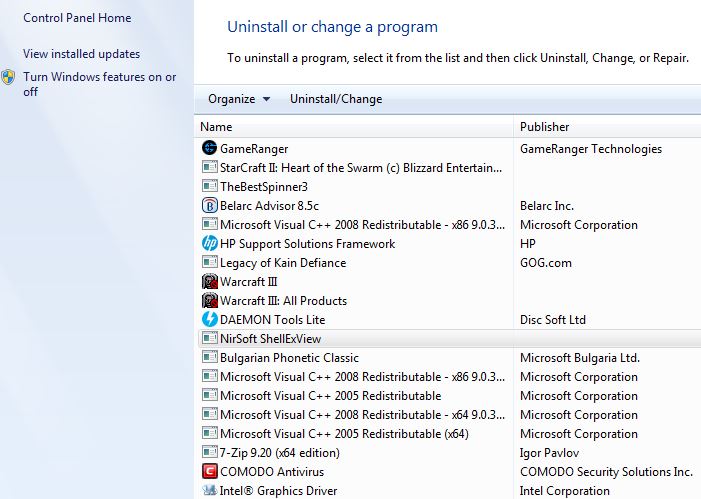
Open the Control Panel from the Start Menu (search for it in the Start Menu search bar if you don’t see its icon) and then open Uninstall a Program. If anything from that list seems like a potentially unwanted program, especially one that you don’t recognize and/or has been installed just before Poshukach started disrupting you, then uninstall that program. If there’s an option in the uninstaller to keep settings for the program you are trying to uninstall, opt-out of said option.
Step 2
*Source of claim SH can remove it.
Open the Task Manager with the Ctrl + Shift + Esc combination from the keyboard, and then open Processes.
See if any of the processes listed there seem like they may be from Poshukach. It’s highly likely that if the hijacker process is still active, its RAM (virtual memory) and CPU usage would be quite high, so it’s suggested to sort the processes list according to the consumption of either of those resources.
If there is a resource-intensive item with an unknown and/or suspicious name, there are two main methods that we recommend for checking if that process is rogue.
The first one is to simply look up the questionable name – you can do that with this free tool.


The other recommended method is to right-click the process, open the File Location folder where its files are saved, and scan those files using the free online malware scanner shown below.

If after you’ve tried both methods you’ve determined that the process may indeed be rogue, right-click it again, the End Process option, and then return to the file location folder to delete it alongside everything inside it. If you are not able to eliminate one or more of the files stored there, leave them for now and delete whatever else you can. Once you get to the end of the guide and have completed all other steps, try again to delete whatever may remain from the file location folder of the rogue process.

Step 3
Even if you have successfully stopped all rogue processes, Poshukach may attempt to start them again. To make sure it cannot do that, restart your system into Safe Mode.
Step 4
*Source of claim SH can remove it.
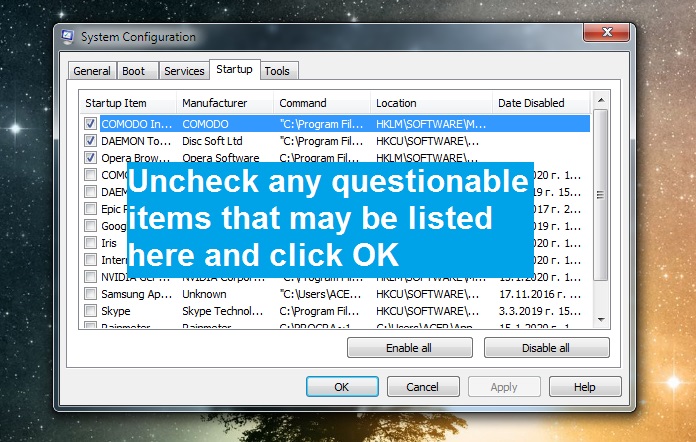
Press Winkey and R together to open the Run search bar, type msconfig in the latter, and hit Enter. When you see System Configuration on your screen, click Startup and explore the different items listed on that page. Normally, the items shown here should be familiar to you – programs that start automatically with Windows. If one or more of the items there are unknown to you, it’s best to uncheck them. It’s also recommended that you uncheck items that have unknown manufacturers (check the manufacturer column). Once you think you have deselected all items that may be unwanted, click OK.
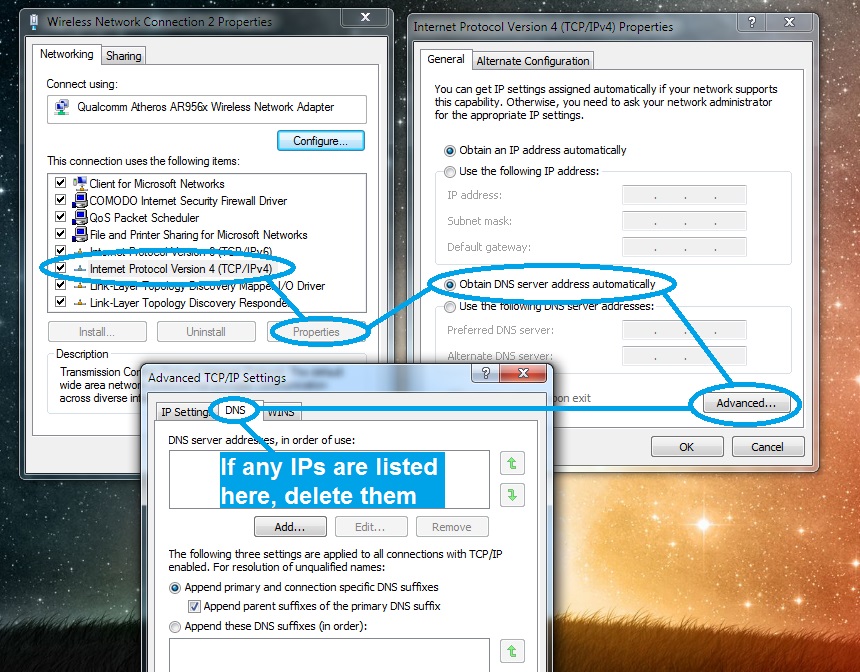
Use the Run search bar once again – this time type in it ncpa.cpl and hit the Enter key again. In the folder that shows up, you should see icons of networks that this computer was connected to at a certain point. Right-click on the icon of the network that you primarily use, and then open its Properties.
From there, click on the item labeled Internet Protocol Version 4 and select the Properties button next to the list of items.
Next, see if the Obtain DNS server automatically option is checked and if it isn’t, check it, and then open Advanced.
Now click on the DNS tab, delete whatever items may be in the DNS server addresses list, and select OK on every window so that the changes you’ve just made would be saved.
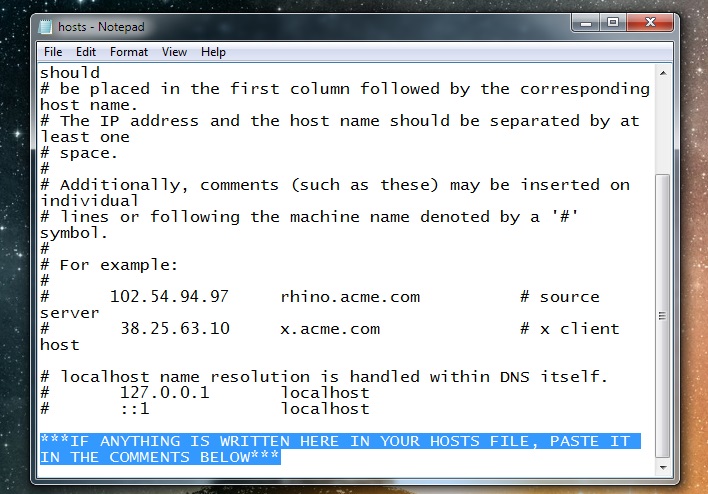
Now copy and paste the next line in the Run window and press Enter to open the Hosts file of your system:
- notepad %windir%/system32/Drivers/etc/hosts
In this file, you must see if there are IP addresses or other strange text right under the last Localhost word. If any text is shown there, it must be copied and posted in the comments, so we can take a look at it and then tell you if it’s from the hijacker. If it turns out that the Hosts file has been compromised by the hijacker, you will have to delete everything written in it below Localhost and then save the changes to the file.
Step 5
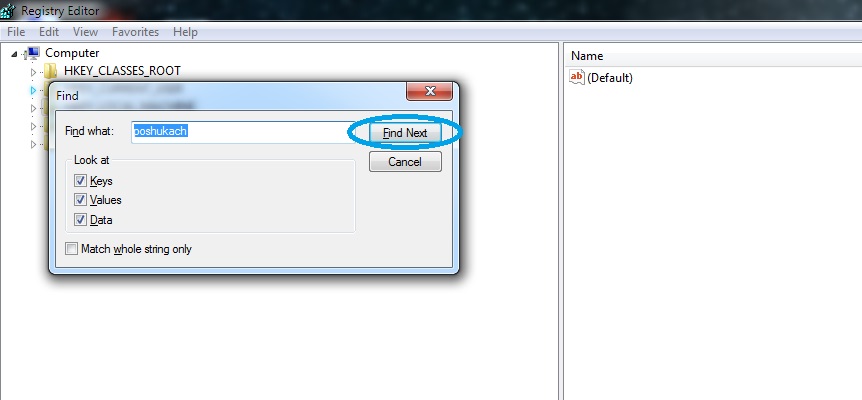
For this step, you must use the Registry Editor tool to find and delete rogue items from the system’s Registry. The name of the executable of this tool is regedit.exe, so search for it in the Start Menu search box and open it. Before the Editor is launched, you will be required to give it your permission to make changes in the system, so select Yes.
After you launch the Registry Editor, go to its Edit menu and select Find. In the “Find” search box, type Poshukach and start the search. Wherever gets found must be deleted, but since each search shows only one item, you must search again after every deletion to see if there are more Poshukach items.
After making sure that every search result for Poshukach is removed, find these folders in the Editor (the left panel).
- HKEY_CURRENT_USER > Software
- HKEY_CURRENT_USER > Software > Microsoft > Windows > CurrentVersion > Run
- HKEY_CURRENT_USER > Software > Microsoft > Internet Explorer > Main
There, you must look for items with randomized names similar to this one “2398ru298398hg498ru3209t0u92r09” and tell us in the comments if you find anything like it. Normally, such items should be deleted, but it’s recommended that you first ask us about them.
How to remove Poshukach from Chrome
To remove Poshukach from Chrome, you need to clean the browser’s extensions list, data, and search engines list.
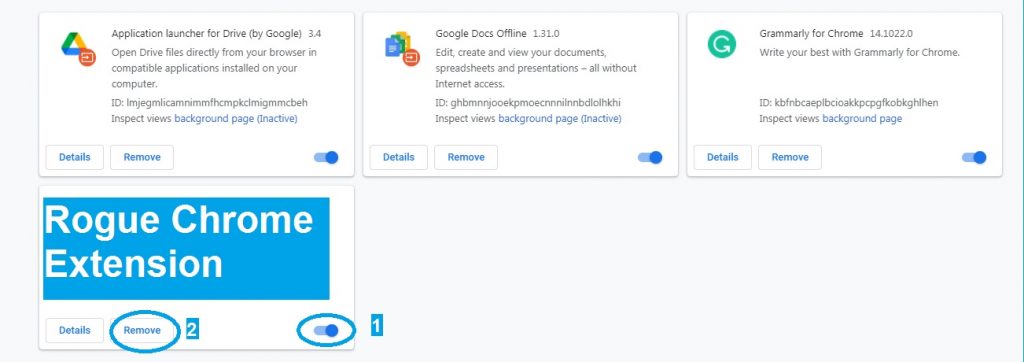
- Open Chrome, go to the menu, select More Tools > Extensions.
- Disable and Remove any unknown or suspicious Chrome extensions you see there.
- From the menu, go to Settings > Search Engine > Manage Search Engines, click the three dots next to any unknown/rogue search engines, and select Remove.
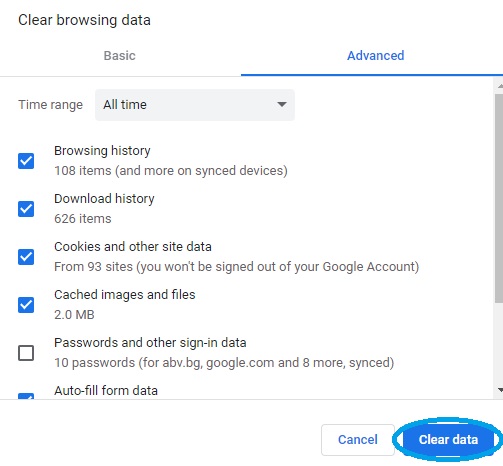
- Go to Settings > Privacy and Security, select Clear Browsing Data, check everything except Passwords, and click on Clear.
Once everything else is done, it’s time to clean your browsers, starting with the main one. Above, we gave you quick instructions on how to clean chrome, and now we will give you a bit more details on how to clean any browser.
First, go to its icon, right-click it, click Properties, and then Shortcut. In the Shortcut tab, look at what’s written next to “Target” and if anything is written after “.exe”, you must delete it.
Next, you must launch the main browser and select its menu (either from the top left or the top-right corner). From the menu, go to Extensions (or Add-ons on some browsers). If you are a Google Chrome user, click the More Tools option from the Chrome menu to see the Extensions button.
Once you get to the Extensions page of your browser, first click the Disable and then the Remove button of any extensions you think may be related to Poshukach.
Once you’ve dealt with the extensions, open the menu again, go to Settings/Options, and select Privacy and Security. If you don’t see the Privacy and Security option at first, click on Advanced/Show Advanced settings to reveal it.
Next, select the Clear Data/Clear Browsing Data/Choose What to Clear option and check all the boxes except the one labeled Passwords. Then click the Clear button to delete the browsing data and wait for the process to be over.
Finally, repeat everything from the current step for each browser that you have on the computer – even ones that the hijacker doesn’t seem to have affected.
If Poshukach is still causing problems
If the hijacker is still obstructing your browsing experience, it’s possible that a more threatening program (such as a Trojan Horse virus or a Rootkit) that’s hidden in the system is hindering your removal attempts. For this reason, in such cases, we advise that you either bring the computer to a specialist or use a dedicated malware-removal tool to clean the system. Obviously, we can’t personally have a look at your machine, but we can recommend to you a potent anti-malware program that has been tested both annoying hijackers and more dangerous programs like the aforementioned Trojans and Rootkits and will be able to clean the system from any rogue software.
Leave a Reply