This page was created to help victims of the latest Djvu family ransomware variant, called .Qual. This is not an official name, only the suffix of the files that the victims see and search for on the internet, just like with the .Watz and .Waqa ransomware threats. All Djvu variants have worked in absolutely the same way for years.
The good news is that we can help in removing the .Qual virus successfully. You need to do this anyway since the ransomware will encrypt your files again even if you unlock them.
The bad news is: there are ways to decrypt the files for free, but they certainly don’t guarantee the successful return of your data. In fact, they can do something only if specific criteria are met from the get-go.
SUMMARY:
First Part – Do This Quickly to Stop the .Qual virus
Turn off the infected device. Read this entire guide before doing anything. Read it on your phone or another laptop. This is important because if your data isn’t entirely encrypted you will pause the process while we show you what to do. Otherwise, you will lose even more data.
As a first step, we recommend downloading a free tool to the PC infected with the .Qual virus – STOP/DJVU Vaccine v1.0 (link is to the GitHub releases of the tool).
All you need to do is run the tool with admin privileges. Right click stop_vaccine.exe and select run as administrator. This will prevent the .Qual virus from continuing the encryption by fooling it into believing it already completed everything. This will at least buy you time to assess the situation.
From then on, you have some options what to do. You NEED to remove the ransomware before attempting to restore your files because it has an active trojan on your PC. Even if you reinstall windows and wipe your PC completely, it has infected the operating system and it will return.
Ransomware infections are one of the few things that absolutely require a software to do anything at all. You should be comfortable downloading things to use this guide.
![]()
Can You Remove the .Qual Virus Manually?
If you don’t want to download any of the programs we recommend, the .Qual virus’s manual removal will be very difficult for you. Ransomware tend to change and access dozens of files. The best leads we can give you are:
- Go to this VirusTotal link and examine in the Behavior tab what the .Qual virus does. You need to hunt all files and stop all processes the ransomware created.
- Start by right-clicking 89A2.exe in your Task Manager, click Open FIle Location, and see where it goes. This is the main process of the infection. Make sure you activate the hidden files and folders option in Windows in case it sends you to a hidden file. After you locate where the process is coming from, Stop it in Task Manager. Then delete the file you were sent to.
- Then press the Windows key, write Task Scheduler, and open it. Once there find out what each entry does by right-clicking on the entry –> Properties –> Actions and see where each entry goes. Pay attention to the name of the task and the folder it starts from. No task here should start from Local, Downloads, Temp, or Roaming. Right click and Delete any task that’s part of the infection. This should remove the triggers that restart the .Qual virus.
From there on, the best we can recommend is throwing any file you suspect in virustotal.com. If it’s flagged by multiple vendors, it’s either part of the .qual virus, or the trojan that helped it get in. Make sure you clean everything for the time being.
The next part of the guide revolves around trying to get your files back. Once you are done with your attempts, we recommend to reinstall Windows and format your hard drives. You may ask why not just do this in the first place? The answer is because a ransomware can come back even on a reinstall. Seriously. So you should break its files and tasks first.
How do you recover the .Qual files?
Let’s not beat around the bush – most people land on pages such as this because the ransomware dropped a note on their desktop. Unfortunately the .Qual virus and all other variants of DJVU only do this once they are done. In other words, your data is already locked if you saw the message. This greatly limits your options and, in all fairness, there are no guarantees you’d ever get your data back.
Despite this, the lockdown on your files doesn’t mean giving them up, especially if the files are important to you. We’ll show several potential recovery methods you can use for free which can work in some cases.
Just remember that it’s essential to first remove the ransomware before attempting to recover any files, because they may simply get locked again if the virus isn’t removed.
Identifying the .Qual Ransomware
Before you try any of the recovery solutions, you should first identify the specific ransomware type you are dealing with. Obviously, since you came on this page, you are probably quite certain your files were encrypted by . Qual. If that’s the case and there’s no doubt in your mind that this is the exact ransomware you are dealing with, feel free to skip this part and move on to the recovery options. However, if you aren’t 100% sure about the identity of the virus, we recommend using a free online tool called ID Ransomware:
- To use ID Ransomware, first go to its site.
- Then click “Choose File” under Ransom Note, navigate to the ransom message file that the virus created on your PC, and upload it.
- If there is no ransom note, use the Addresses section and copy-paste in it any email addresses or hyperlinks provided by the ransomware.
- Then click the “Choose File” option under Sample Encrypted File and upload one or several encrypted files.
- In a couple of moments, the ransomware family should be identified, and if it’s indeed .Qual, you can move on to the decryption options we’ll show you next.

Note that the suggested recovery options below are intended to work for .Qual files specifically. They could still work for other ransomware variants, but the chances are lower.
If it turns out you are dealing with a different type of Ransomware, we recommend searching for it on our site to see if we have a dedicated removal and recovery guide. If don’t yet have a guide for that other threat, we recommend searching for it on the NoMoreRansom site, where you’ll find the fullest list of currently available recovery tools.
How to Decrypt .Qual files with the Emisoft STOP Djvu Decryptor
To our knowledge, Emisoft is currently the only security vendor that offers a decryption tool for files locked by STOP Djvu ransomware viruses, such as the .Qual ransomware. This does not mean that using their tool guarantees your files will be restored, but it’s among the best options you have at the moment.
The Emisoft STOP Djvu decryptor can only unlock files encrypted by an offline key available on its servers. Therefore, you must maintain a constant connection to the Internet during the decryption process. If the respective offline key isn’t available on the Emisoft servers or an online key was used instead, this tool won’t restore your data.

With that out of the way, here’s how to use the decryptor:
- Click this link to download the Emisoft Djvu decryptor.
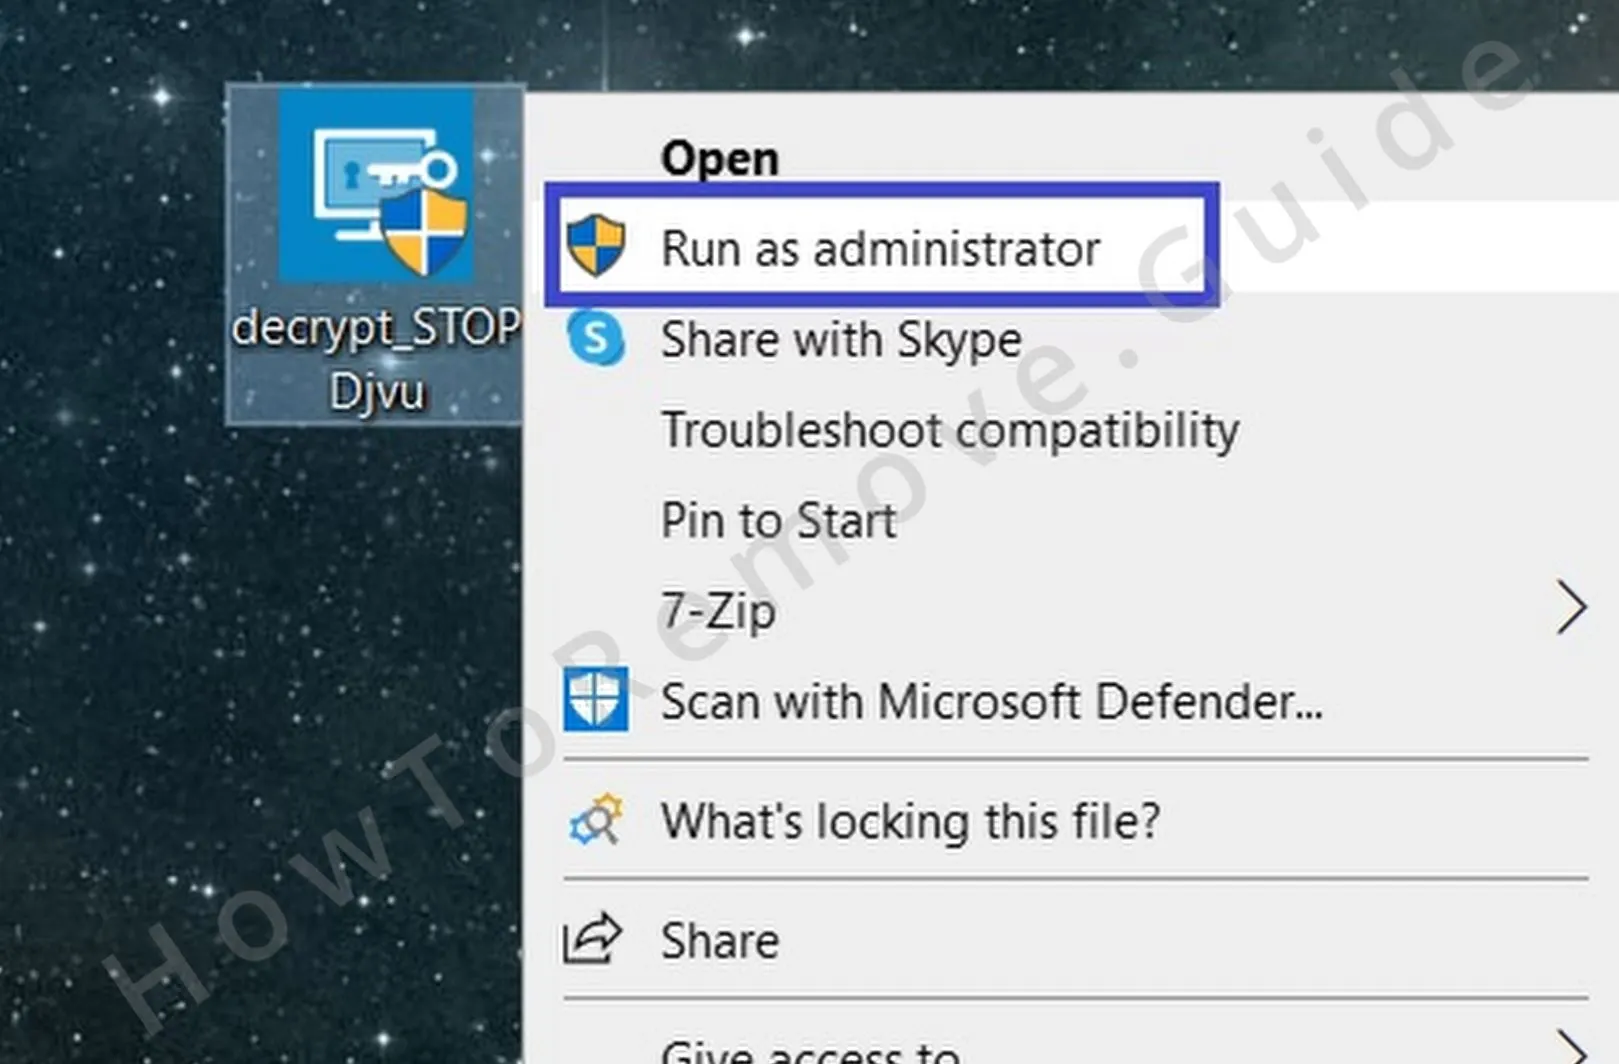
- Right-click the downloaded file, select Run as administrator, and then click Yes in the license agreement window.
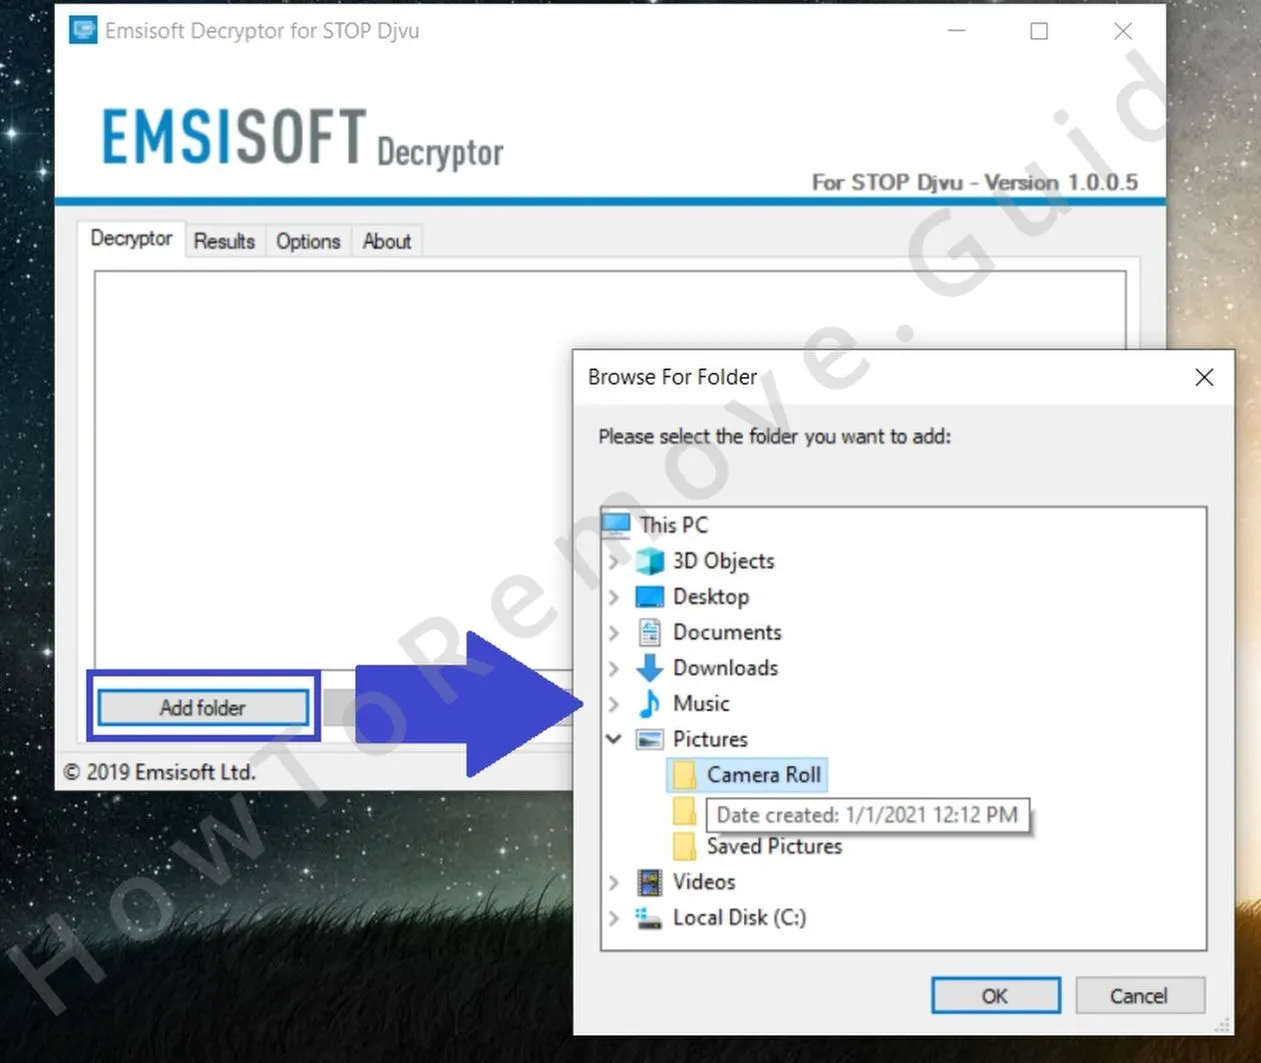
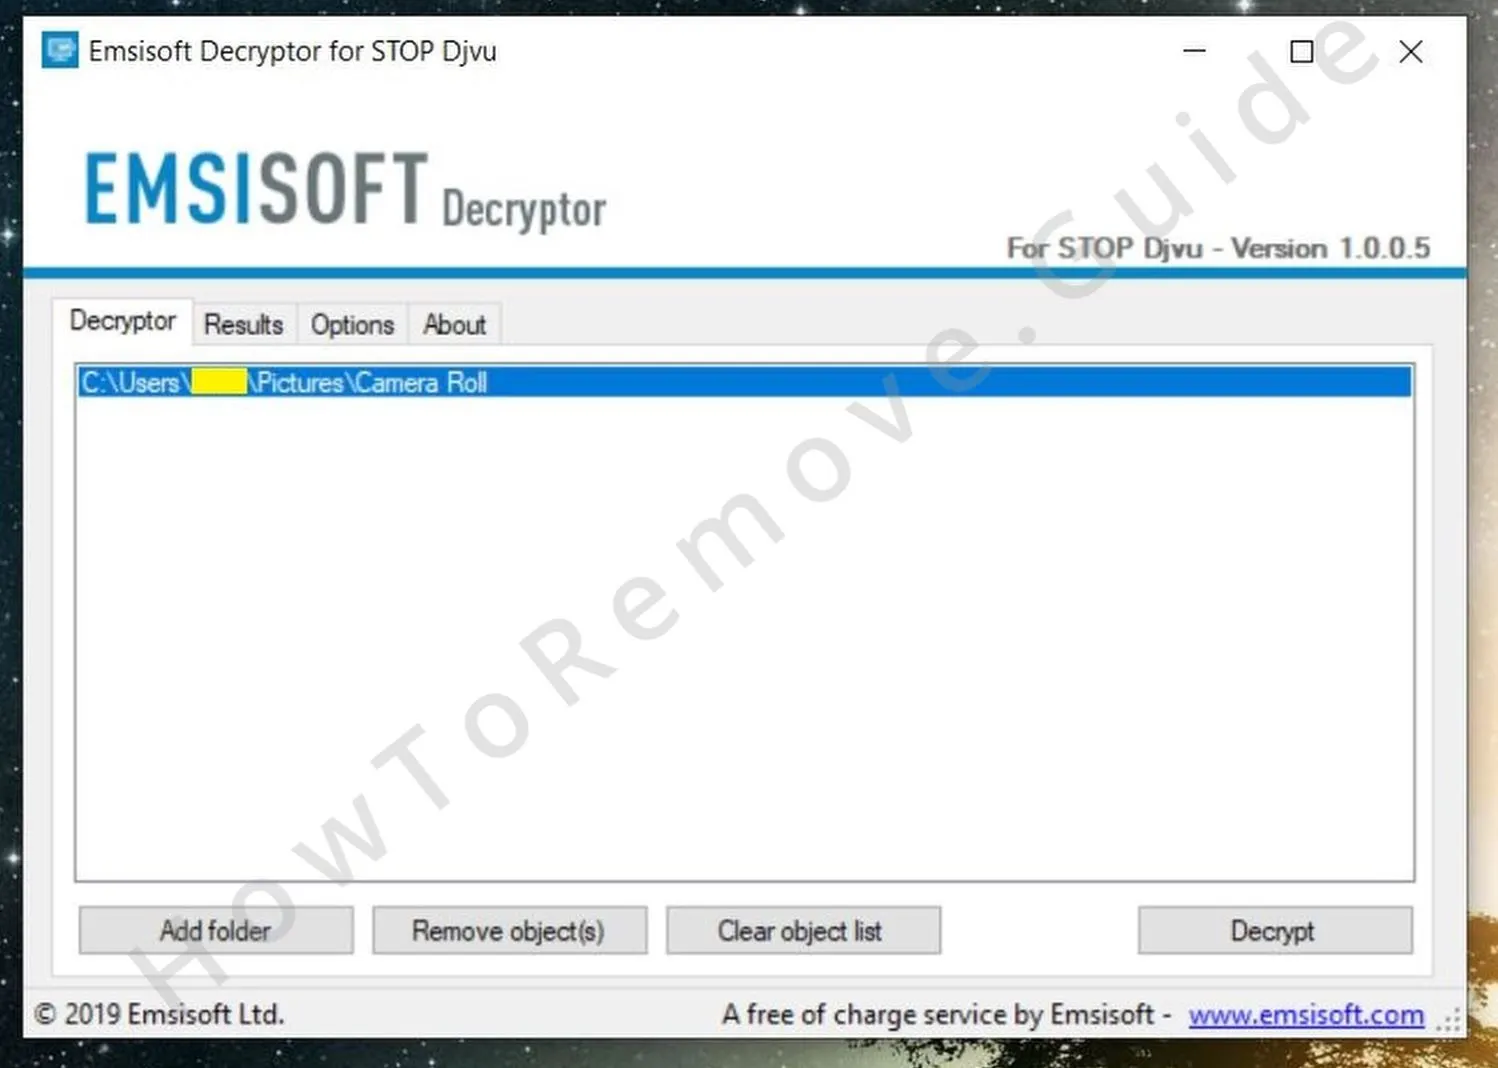
- The decryptor will start and list your PC drives. Though you can simply click Decrypt, this will slow down the process, so we recommend that you first select Clear object list, and then add one by one add the exact directories where the encrypted files are stored.
- After that, click the Decrypt button and wait for the tool to do its job.
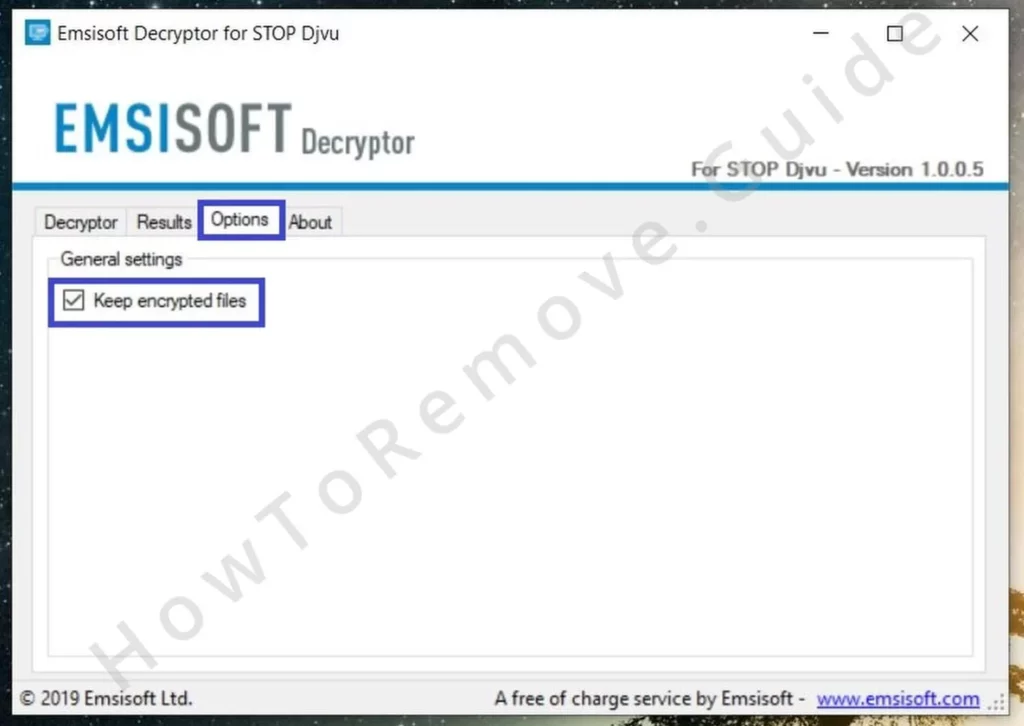
Important: The decryptor will copy any files it manages to recover, leaving the original locked copies on your PC. This is done to prevent loss of data in case some of the files aren’t recovered correctly. However, note this could quickly fill up the storage space on your PC if you are decrypting a lot of data at once or if your free space is limited. If you want to disable this feature, go to the Options tab and remove the checkmark.
Recover .Qual Files With PhotoRec
Another potential way to restore locked files is to recover their original versions that the ransomware has deleted. Many ransomware threats work by copying the targeted files in the PC’s RAM, encrypting them, and then deleting the originals. You can try using a free tool called PhotoRec to restore those originals.
Not all ransomware viruses work in this way, but it’s still worth the shot to try this method, so here’s what you must do:
- Download the PhotoRec tool from here, right-click it, and extract its contents.
- Open the folder that appears, find and right-click on qphotorec_win, and run it as administrator.
- Click the box under “Please select a media drive” and then choose the drive where the encrypted files are stored.
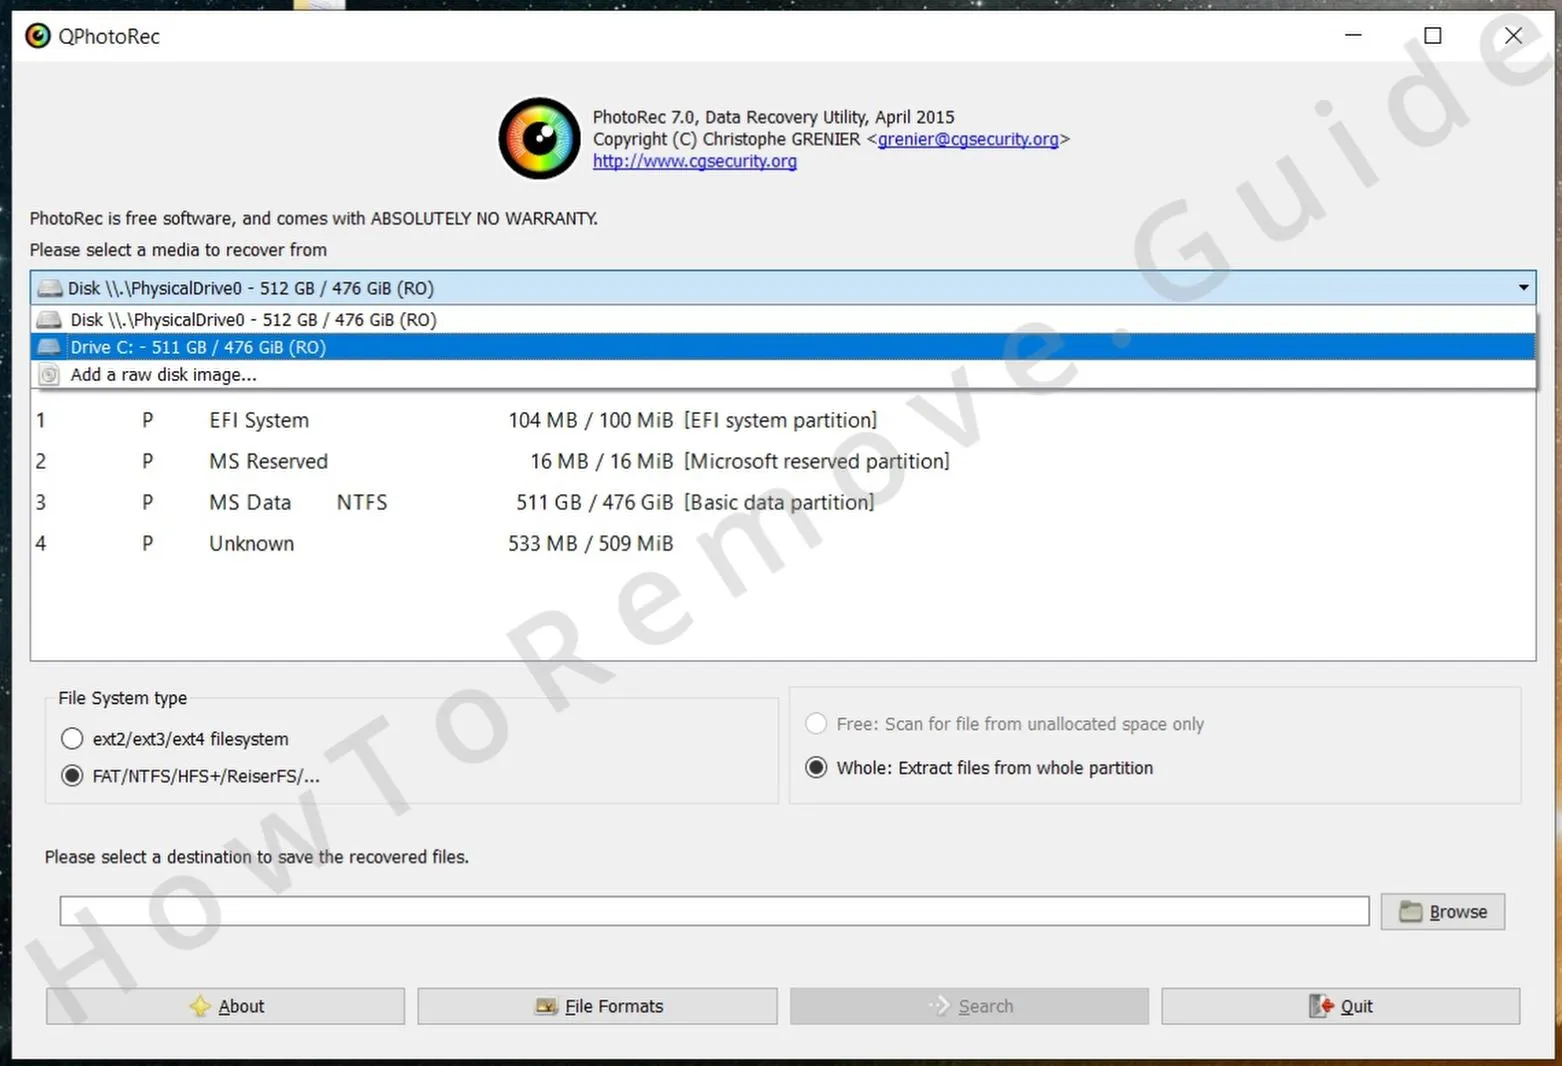
- Once PhotoRec scans the drive, it will show a list of its partitions. Select the partition where the locked files are – it should have an NTFS file system.
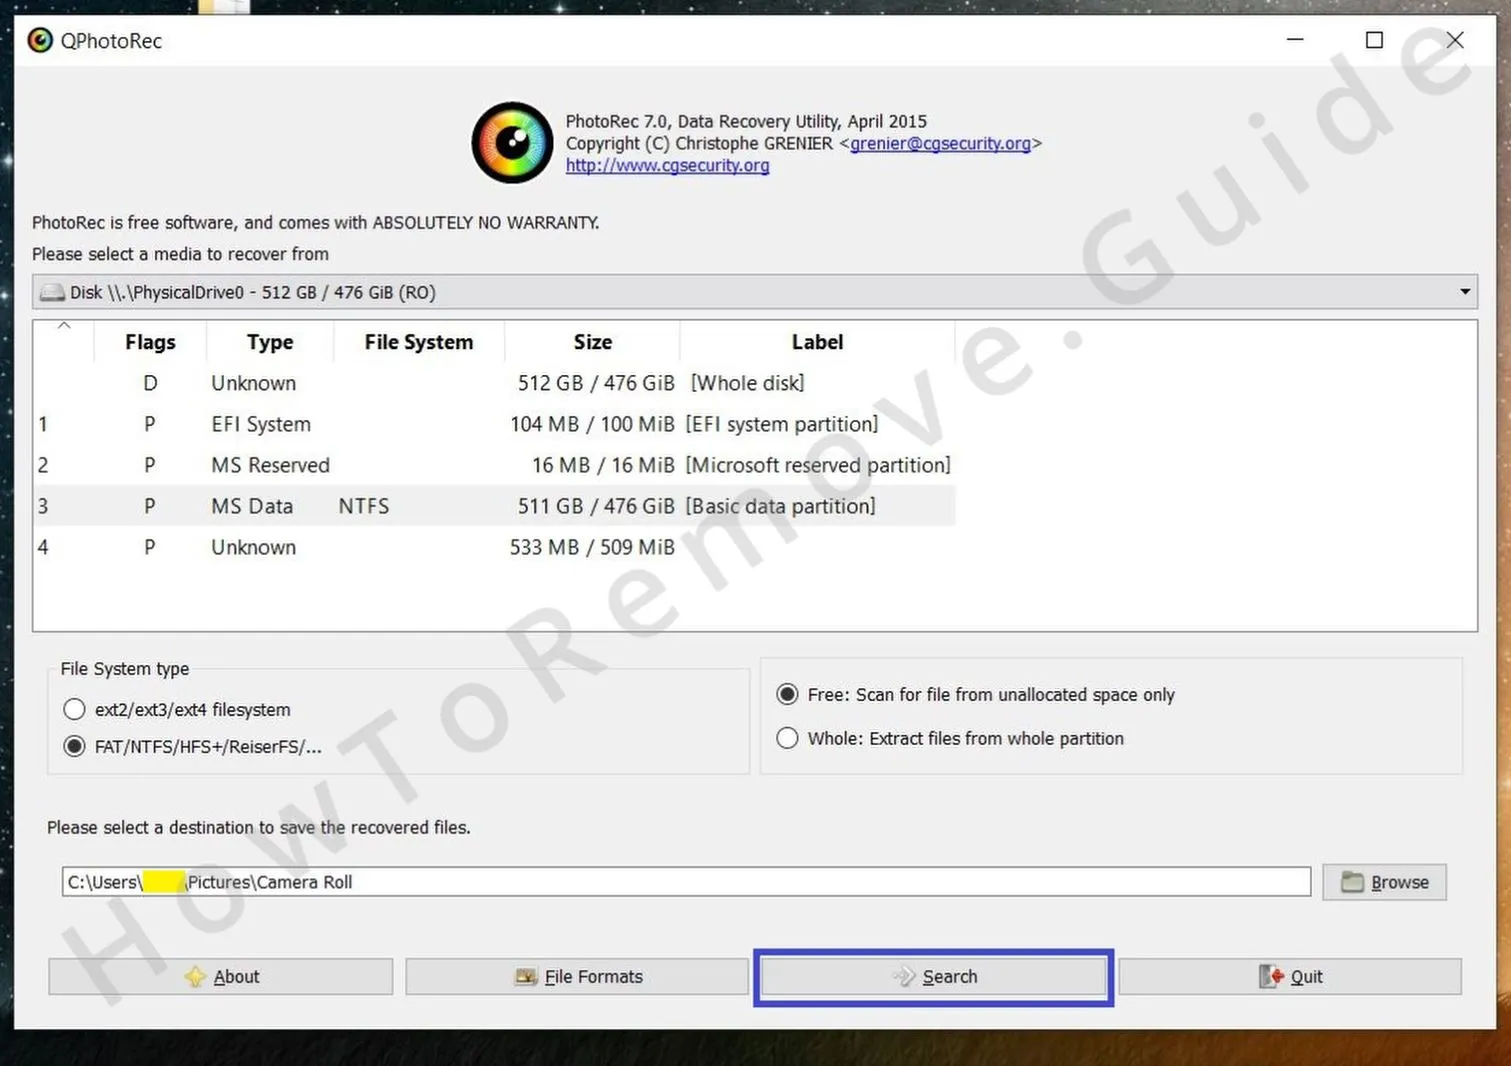
- Next, click the File Formats button from below, leave ticks only in the boxes for file types you want to restore, and click OK. If you don’t deselect file types you aren’t interested in (or simply don’t have), you’d be needlessly slowing down the process.
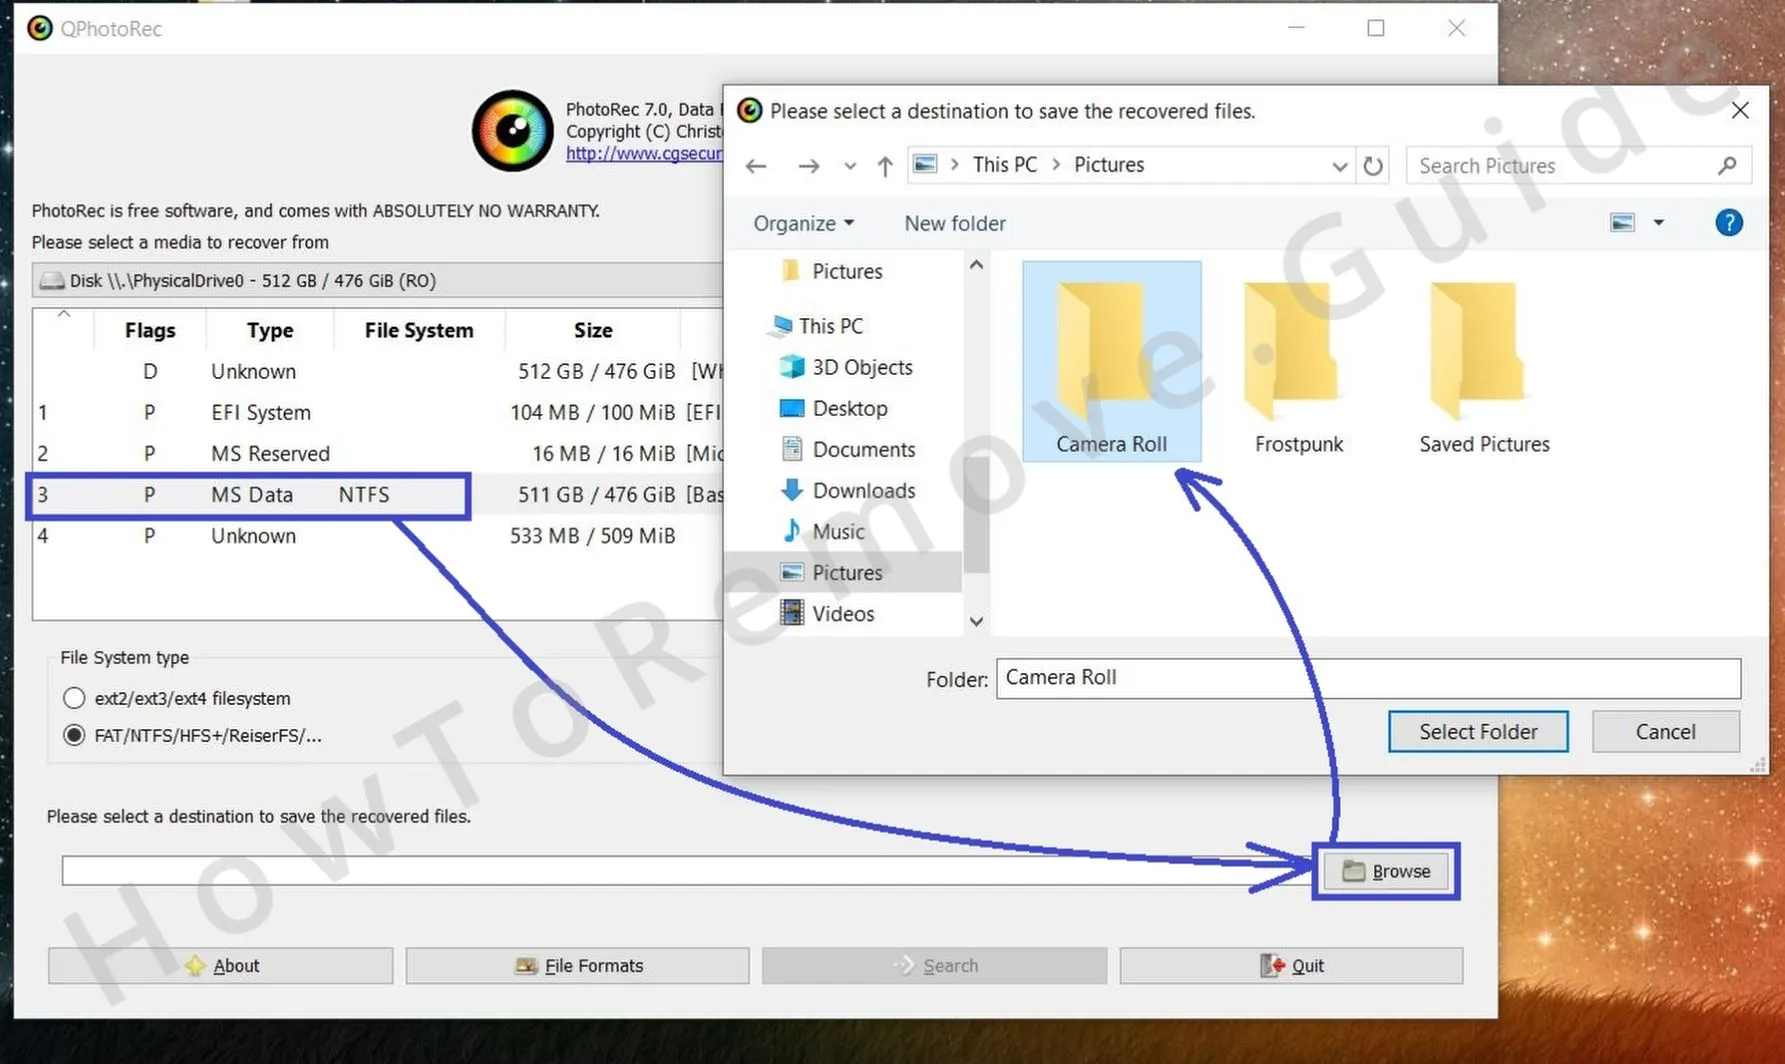
- Now click the Browse button and choose a directory where the restored files will be saved. We strongly recommend connecting an external drive or a flash memory stick to your PC and saving the files there as a precautionary measure against losing any data which doesn’t get restored correctly.
- Lastly, click the Search button which will begin the recovery process.
Patiently wait for the process to finish and once it’s done, click Quit and go to the specified destination folder for the recovered files to see if and how much of your data has been restored.
How to Restore .Qual Audio and Video Files With Media_Repair
Media_Repair is a free tool that lets you restore files that belong to certain commonly used audio and video formats, namely MP3, WAV, MP4, MOV, 3GP, and M4V. The tool requires a reference file, which should ideally be an identical unencrypted version of an encrypted file.
Media_Repair might also work if you use a totally different reference file as long as it’s recorded by the same device or created with the same program, with the same settings, and has the same format as the encrypted files you are looking to restore. However, the chances of a successful recovery with this method are understandably lower.
Here’s how to use this tool:
- Place the reference file or files you are going to use in the same folder as your encrypted data – this is done entirely for your convenience.
- Download Media_Repair from this link. It will be downloaded as a .ZIP file, so you’ll have to extract its contents.
- Then run the Media_Repair app that gets extracted.
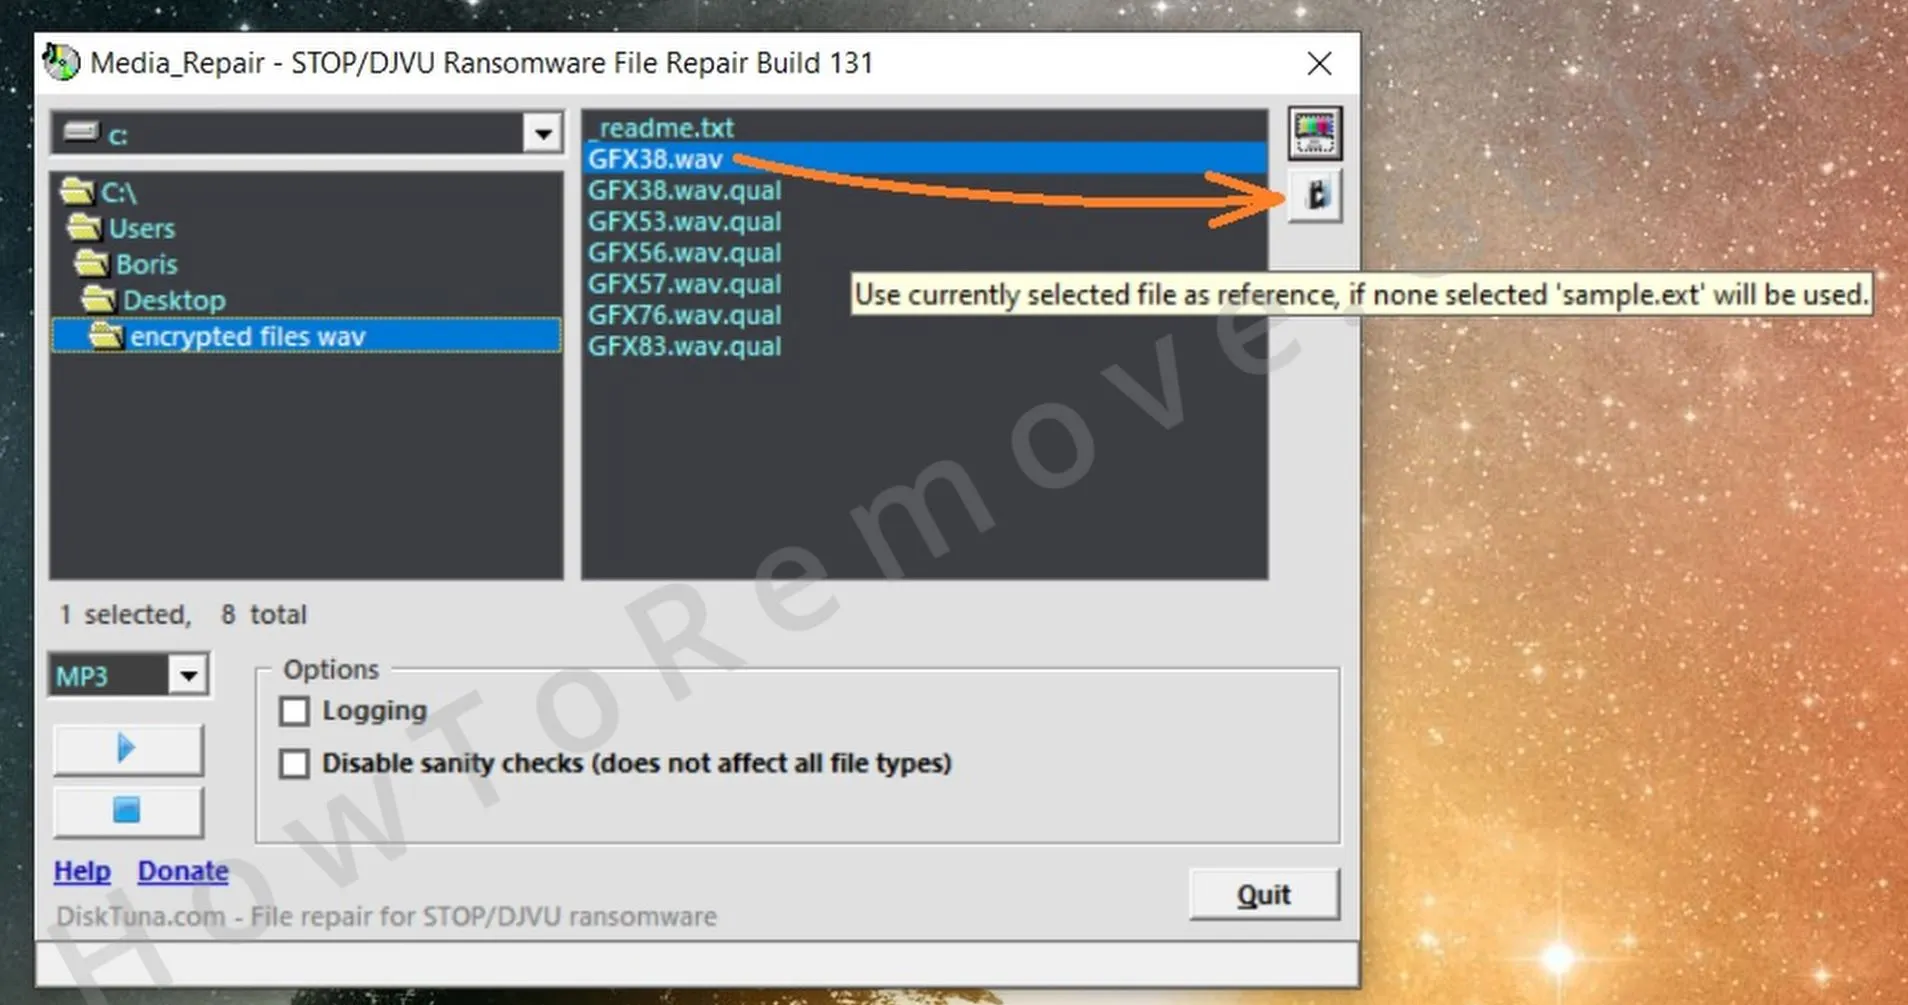
- In the left panel, navigate to the directory where the reference file and the encrypted files are stored.
- In the right panel, select one of the encrypted files and then click the monitor icon to the right. The tool will then tell you if the file might be recoverable.
- If Media_Repair tells you it might be able to restore your files, then select your reference file and click the lower icon to the right. This will tell the program that this is the file it must use as a reference.
- Next, hold down Ctrl and select all files that you want to recover that have the same format and are recorded by the same device as the reference file.
- After that, click the Play button and wait as Media_Repair attempts to recover the specified data.
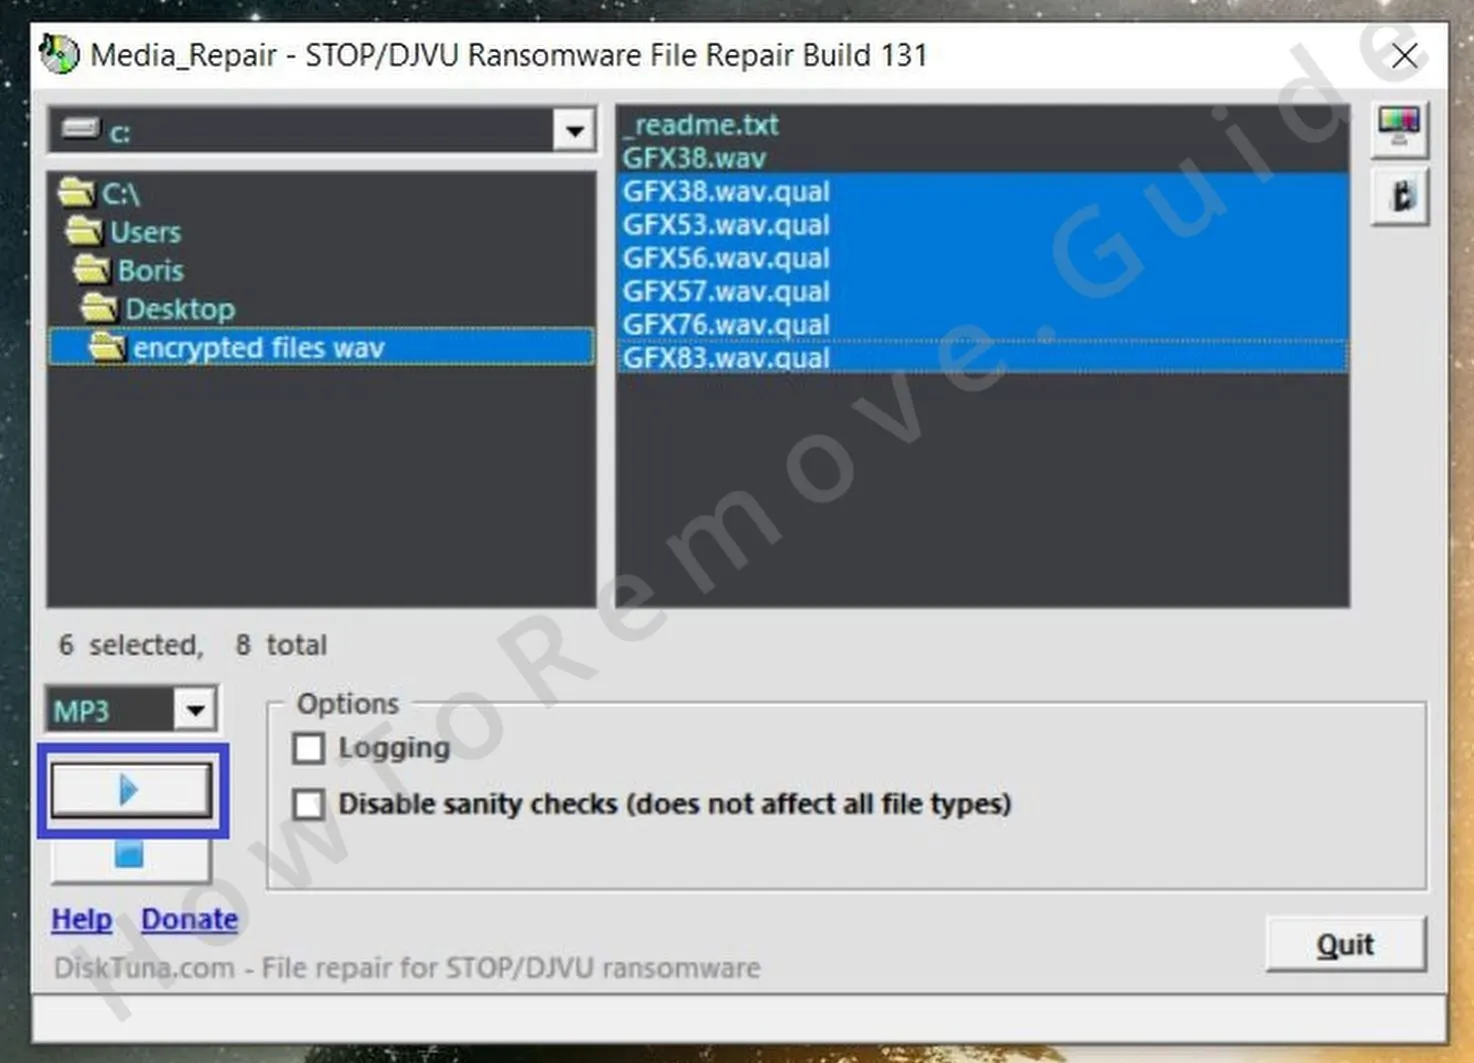
Note that you can pause the process at any time by clicking the Stop button. Once the recovery completes, go to the directory with the encrypted files and there you will find a new folder named “FIXED“. Open that folder and see if and how many of your files have been successfully restored. The tool doesn’t delete the original encrypted files, so if any of them didn’t get restored, you can still try on them alternative recovery methods.
Leave a Reply