BivaApp is a rogue software that hijacks Chrome, Edge, and other Chromium-based browsers. The rogue app is the latest in a long line of highly persistent and invasive hijackers, with some of the previous iterations being TruoApp, TroxApp, and CiviApp. It installs in Windows 10 and 11 systems by being bundled with unsafe program installers downloaded from questionable or pirate websites such as SteamUnlocked. Once in the system, the rogue app can introduce unwanted changes in the browser, get you exposed to scams and phishing content, and can make your system vulnerable to attacks from other malware.
BivaApp Removal Guide
BivaApp introduces various changes in the system by running rogue processes, creating helper files and registry entries, and introducing unwanted modifications in the browser’s settings. To fully get rid of the Biva app, you must take care of everything, or else the hijacker may return to bother you. We did thorough research on the methods to delete this rogue software, and now we’ll show you each step.
We must warn you that, despite our best efforts, the following instructions may not always have the same level of success due to the constantly changing and evolving nature of malware like the BivaApp. This guide works at the moment of writing but might become less effective in the future. If the suggested steps dont’ fully clean your PC, we recommend using the powerful malware removal tool you’ll find on this page, which should easily get rid of the Biva app.
Delete Biva App Processes and Files
The first phase of deleting this app is to run (or try to run) its uninstaller, then kill its processes, and finally delete its files:
- Go to your Start Menu, search for Folder Options, and press Enter.
- Click the View tab, check “Show Hidden Files and Folders”, then click Apply and OK.
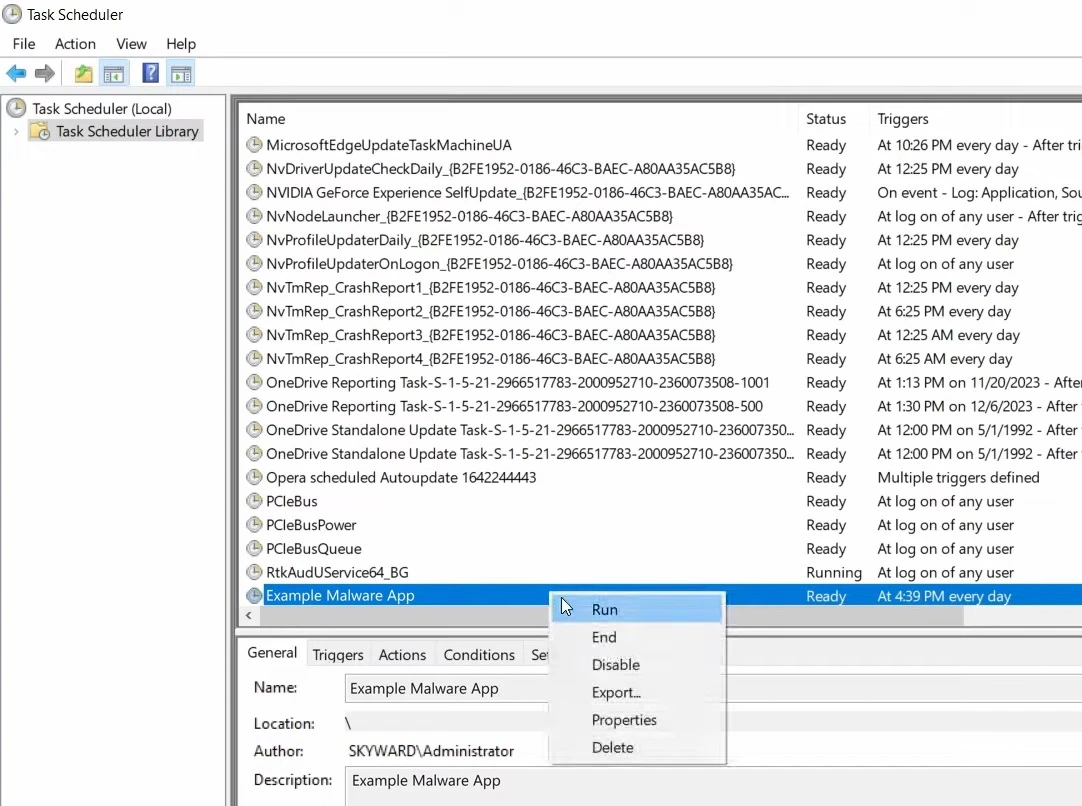
- Also, search for and open the Task Scheduler in the Start Menu, check the Task Scheduler Library folder for suspicious tasks related to BivaApp, and delete them.
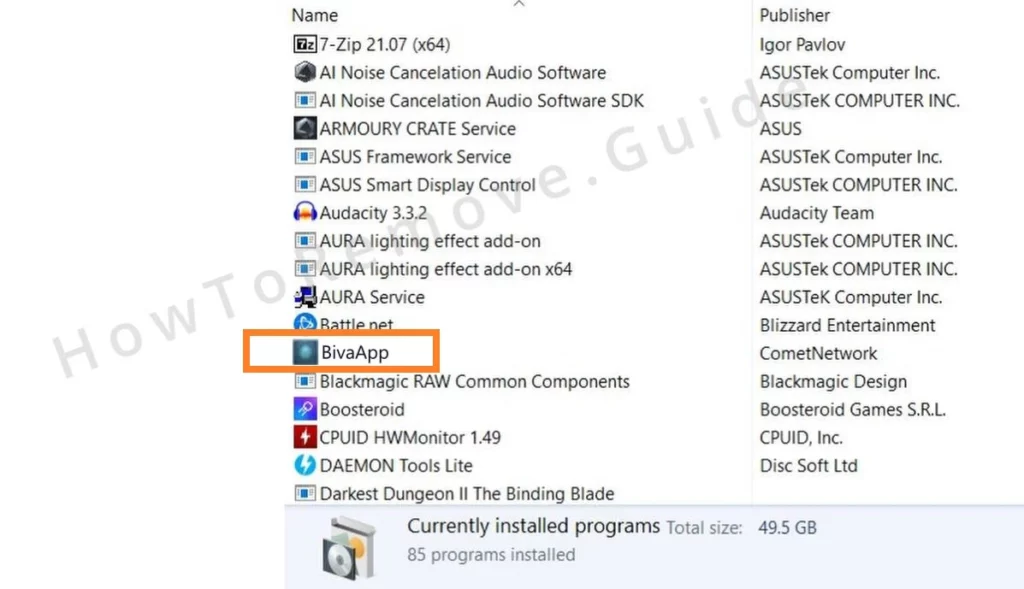
- Next, type Apps & Features in the Start Menu and open the first result.
- Look for the Biva app and other suspicious recently installed apps, select them, and click their uninstall button. It’s possible you get an error telling you that the uninstallation can’t be completed. If this happens, ignore it, and proceed with the next steps.
- Next, launch the Task Manager by pressing Ctrl + Shift + F and click on More Details if not all tasks are shown in the Task Manager window.
- Then look for the BivaApp process in the list and once you find it, right-click it, and select Open File Location.
- Leave the file location folder open and return to the Task Manager. Right-click the BivaApp process, and select End Task.
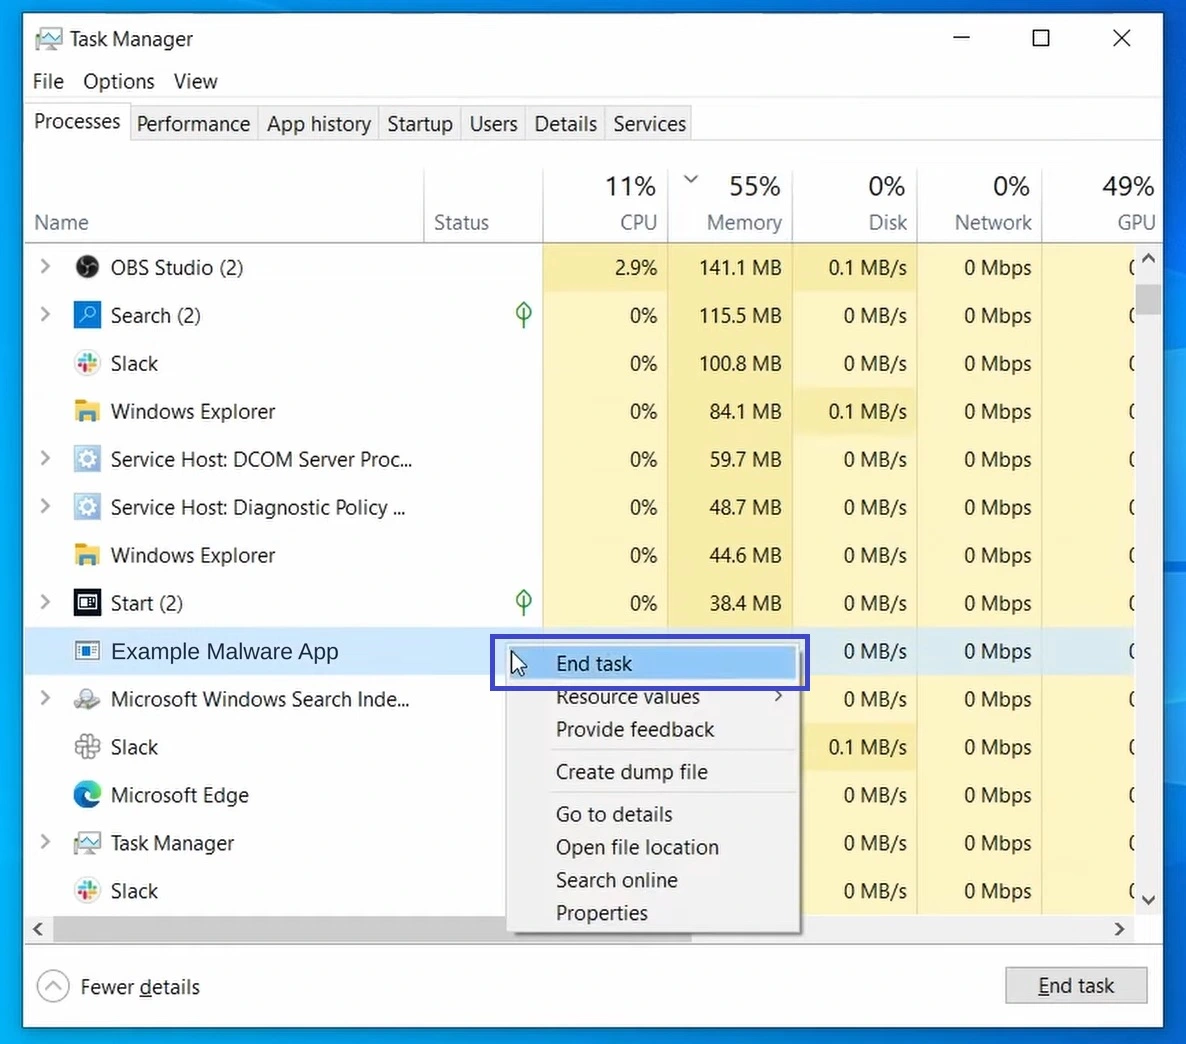
- Then quickly go back to the file location folder and delete everything that’s in it.
- It’s possible you get an error preventing you from deleting some or all of the folder’s contents. If this happens, download Lock Hunter, install it, then right-click the blocked files/folders, select the “What’s locking it” option, and then select Delete in the next window. Do this for everything in the BivaApp process folder and then delete the folder itself.
- Lastly, go to This PC > C: > Users > *YOUR USERNAME* > AppData > Roaming and look for a BivaApp folder or another folder with a suspicious name.
- If you find a suspicious folder, do not hesitate to delete it. Remember to use Lock Hunter if you are initially blocked from deleting the app.
Now that you’ve taken care of rogue BivaApp processes and files, it’s time to move on to releasing your browser from its grasp.

Get Rid of BivaApp Virus Policies
BivaApp might exploit the “Managed by your organization” policies feature of Chrome and other Chromium-based browsers to take over them and make changes that you aren’t allowed to reverse until the policy is in power. We’ll show you three methods to eliminate any such rogue policies:
- The first method is to search for “Edit Group Policy“, press Enter, then right-click the Administrative Templates folder under Local Computer Policy > Computer Configuration, and select Add/Remove Policies.
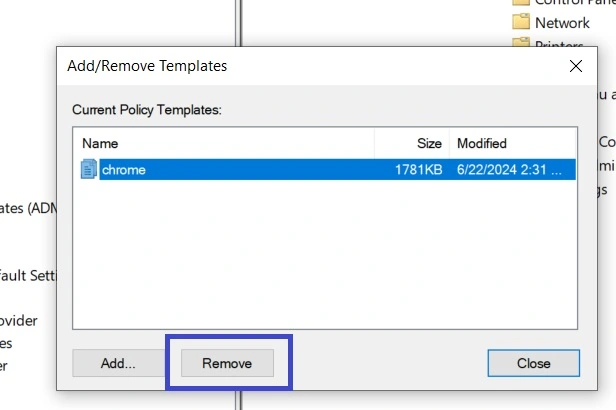
- Then see if there are any custom policies listed in the newly-opened window and remove all of them (unless you’ve intentionally added any of the policies).
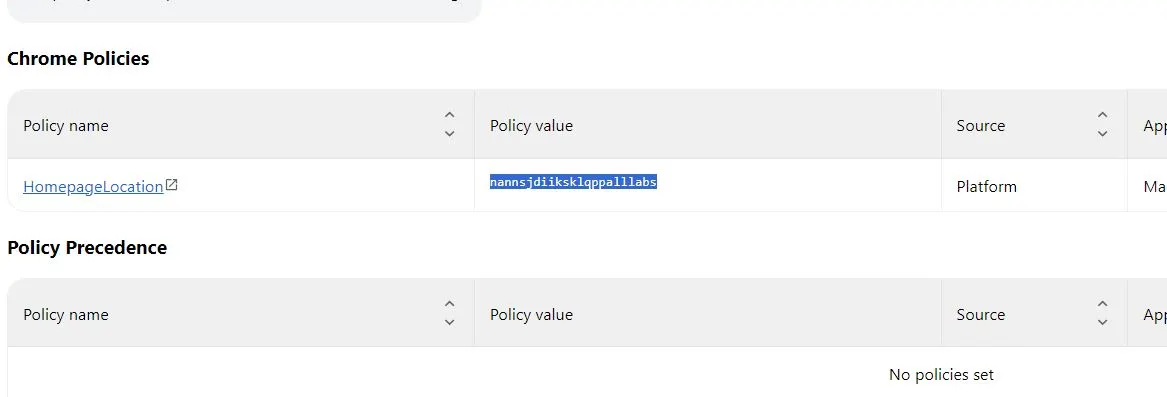
- Next, open your browser, type its name in the URL bar, followed by “://policy” (for example: Chrome://Policy or Edge://Policy). Then hit Enter to go to that address.
- There, look for any policies with random letters and numbers as their values, then copy those values and save them to a sticky note.
- Next, go to the browser’s Extensions Manager (browser menu > Extensions), toggle on the Developer Mode button, look for the IDs of any suspicious browser extensions you want to remove, and also save them in the sticky note.
- Next, open the Start Menu, type regedit, right-click it, and open it as administrator.
- Press Ctrl + F and search for the first copied value. Then delete the registry key (folder) that gets found, and search again to look for other related items.
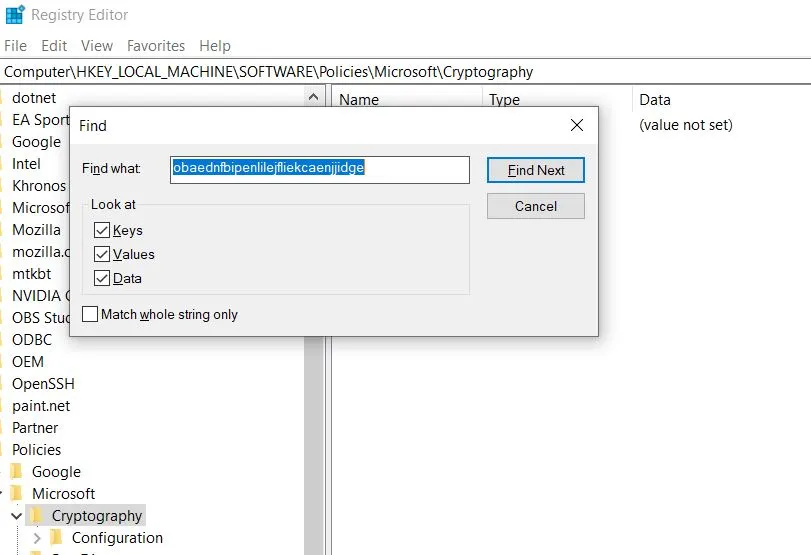
- Delete everything lined to the first value and when there are no more search results, search for the next value or extension ID.
Once you’ve deleted all related registry entries, your browser should no longer be locked by third-party policies. However, if the problem persists, go to this page to download the Chrome Policy Remover (it’s a free tool). Right-click it when it downloads, and select Run As Administrator > More Info > Run Anyway. A quick script will run in a CMD window which will delete all Chrome policies. Note that this app doesn’t work for other browsers.
Remove BivaApp From Chrome (or Another Browser)
Once you’ve deleted the BivaApp “Managed by your organization” policy in the affected browser, all that’s left to do is perform a thorough browser cleanup. This is to ensure that no changes introduced by the hijacker are allowed to remain in the browser and disrupt our online experience. The instructions we’ll give next are for Chrome, but the cleanup process for Edge, Brave, Opera GX, and other Chromium browsers is nearly identical.
- Open the browser, select its menu, and go to Extensions > Manage Extensions.
- Look through the installed browser add-ons and if there are ones you don’t trust or want, toggle off the enable/disable button, and then click Remove to uninstall them.
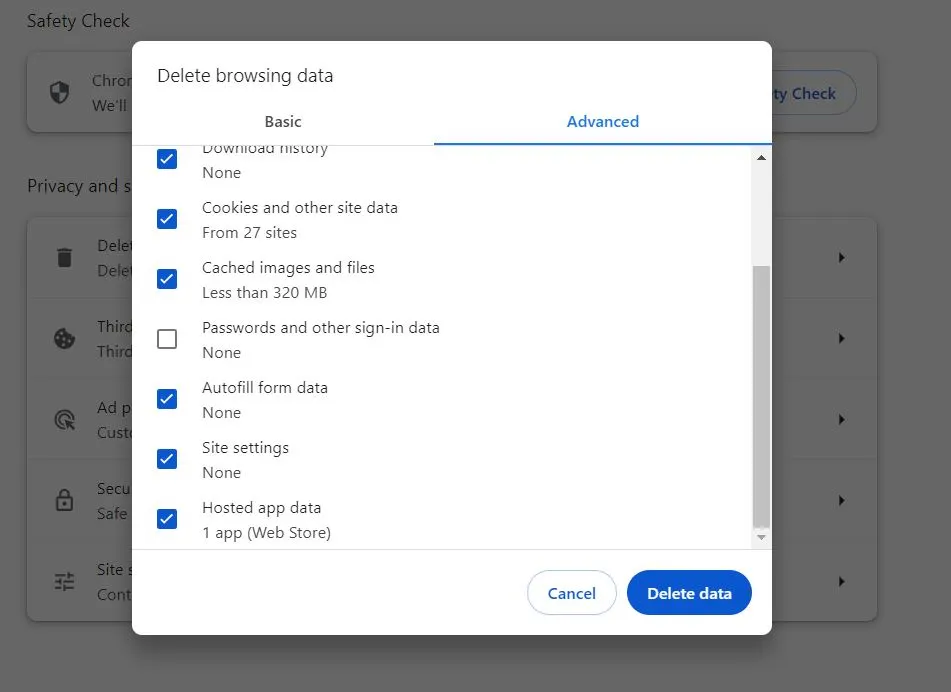
- Then go to the browser menu > Settings > Privacy and Security > Delete Browsing Data > Advanced. There, put ticks on everything except Passwords and clear the browser data.
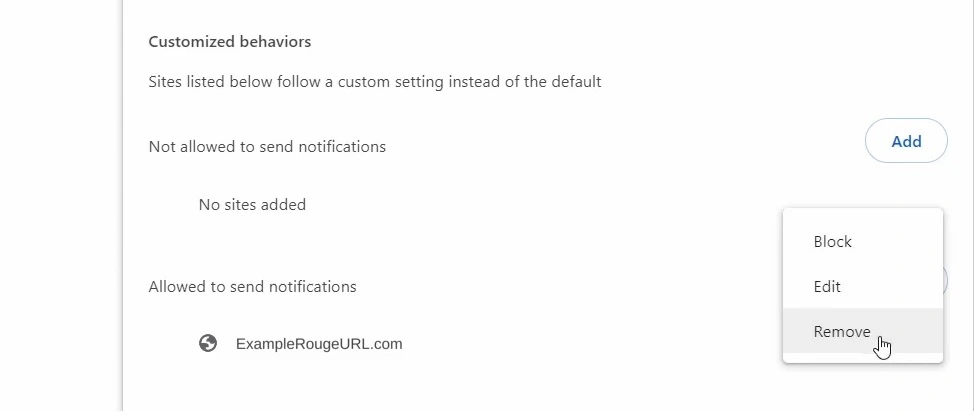
- Scroll down a bit, click Site Settings, and one by one, check each permission type for URLs you think are unsafe and related to BivaApp, and delete them.
- Similarly, check the Appearance and On Startup tabs for rogue URLs and delete anything suspicious you find.
- Lastly, go to the Search Engine tab, make sure your default search engine is set to something you want, and then go to Manage Search Engines.
- There, carefully look through the list of tools and if you find any questionable or unfamiliar search engines, click the three dots next to it, and select Delete.
Once you ensure all your browser settings are returned to normal and there are no more questionable extensions inside the browser, BivaApp should be fully gone from your system. However, bear in mind that hijackers get updated frequently, and these instructions may not resolve everything in 100% of cases.
If you didn’t manage to delete BivaApp in full even after completing every step we showed, then we suggest using the advanced removal software from this page. The program specializes in dealing with unwanted and rogue apps and hijackers such as this one and should be able to quickly hunt down and delete any remnants of the unwanted software.

Leave a Reply