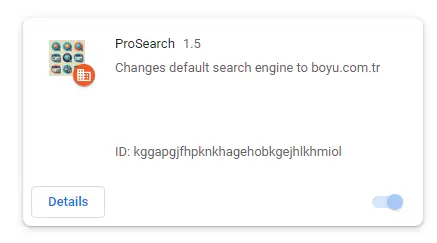
This time we are dealing with yet another extension that redirects users to boyu.com.tr – ProSearch. The version numbered in the extension is ProSearch 1.5, as you can see in the screenshot below. Do not be confused if you see a different number in your browser. The removal instructions work exactly the same. This is just a cosmetic change.
On this page we are giving you real curated instructions that were used to remove the ProSearch extension. After each section we are giving you alternative ways to accomplish this and/or workarounds if the malware tries to prevent you from removing it. Just do everything on this page and you can remove Prosearch. If you don’t want to perform these steps, we recommend using SpyHunter 5.
SUMMARY:
| Name | ProSearch |
| Type | Browser Hijacker Extension |
| Detection Tool |
We tested that SpyHunter successfully removes ProSearch* and we recommend downloading it. Manual removal may take hours, it can harm your system if you re not careful, and ProSearch may reinstall itself at the end if you don’t delete its core files. |
ProSearch Extension Removal Guide
Hijacker creators earn more money the longer their rogue app or site stays attached to your browser, so they make sure to make the hijacker’s removal as difficult as possible. That’s why we’ve prepared an advanced and in-depth removal tutorial. However, in some lucky instances, there might be a simpler and quicker solution, so we recommend trying this first:
- Open the browser that’s compromised.
- Look for a menu icon, three dots or three lines, at the top right. Click it.
- Next, enter “Settings” and locate the “Extensions” section. There, look for any extensions linked to ProSearch or ones that you don’t recognize.
- Click the Remove button of any browser extension you don’t think should be there.
- Then go to the Search Engine settings and ensure the browser’s default search tool is set to something trusted, like Google or Bing.
- Restart your browser and see if the hijacker is no longer there.
These quick steps might work in some cases, but don’t lose heart if they don’t. The actual removal process begins now, with the advanced steps we’ve shown below.

Important: Read Before Proceeding!
Most hijackers are distributed by being bundled with rogue software that users install on their PCs. The guide below will let you remove ProSearch, but not any malware that may have brought that hijacker to you in the first place.
Since ProSearch could have been bundled with all kinds of rogue apps, so we can’t provide specific removal steps. For this reason, we recommend that you secure your PC with the help of a specialized anti-malware tool that can run a system-wide malware sweep and let you delete anything suspicious. SpyHunter is a great tool for this purpose, and you can find it linked on this page.
How to Get Rid of ProSearch Extension Policies in Your Browser
The main obstacle you might face when trying to get rid of ProSearch is a rogue third-party policy that it has added to the browser. If you see the dreaded “Managed by your organization” message in your browser, this means such a policy is present. Removing it is your first task:
Type chrome://policy into Chrome’s address bar or edge://policy if you’re using Edge (same thing with other Chromium browsers – just change the name in the URL).
This will open a list of active policies applied to your browser. You’re looking for strange, randomized values. These indicate rogue policies tied to ProSearch.
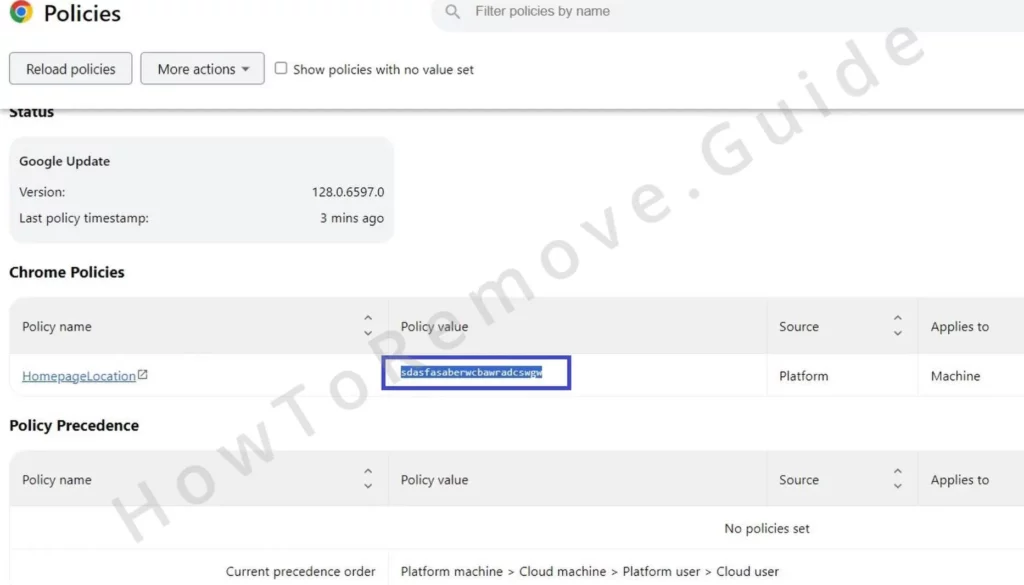
Copy these value strings and store them somewhere – a notepad file or a sticky note will do.
Then open your browser’s Extensions Manager again. It’s possible you can’t access it because of redirects to other pages triggered by the hijacker. If a redirect occurs, do this:
First, search for Folder Options in the Start Menu, open it, and enable the Show Hidden Files and Folders option in the View tab.
Then navigate through this path if you are using Chrome: C:\Users\[YourUsername]\AppData\Local\Google\Chrome\User Data\Default\Extensions.
Here are the paths for three other popular browsers
- MS Edge: C:\Users\USERNAME\AppData\Local\Microsoft\Edge\User Data\Default\Extensions
- Opera and Opera GX: C:\Users\USERNAME\AppData\Roaming\Opera Software\Opera Stable\Default\Extensions
- Brave: C:\Users\USERNAME\App Data\Local\Brave Software\Brave-Browser\User data\Default\Extensions
Delete all folders inside the respective extensions folder for your browser.
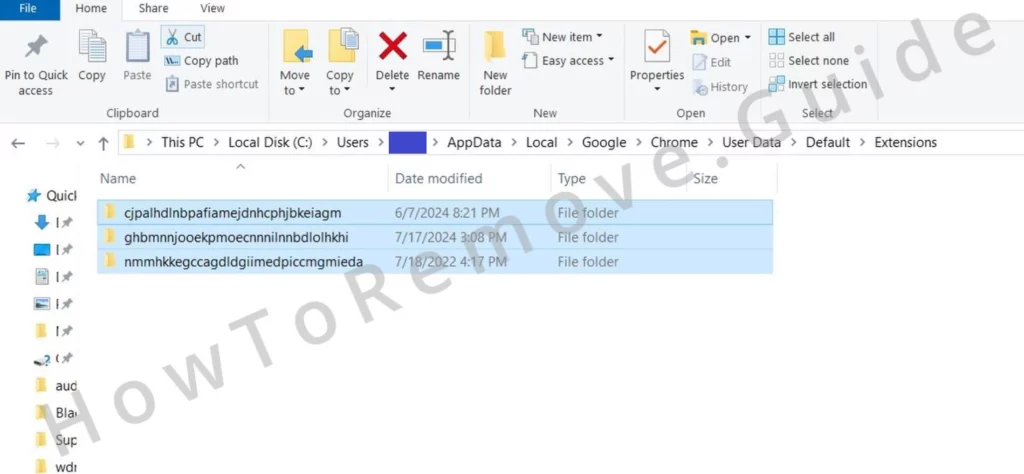
This will corrupt and disable all your extensions, but don’t worry about your legitimate extensions – they can be reinstalled easily.
Once this is done, revisit the Extensions Manager (you should be able to do it now).
Enable Developer Mode to reveal the unique IDs of each extension. Identify the problematic ones and save their IDs next to the rogue policy values from earlier.

How to Delete ProSearch Extension Keys From the Registry
Time to enter the system’s core. We’re diving into the Registry Editor. This step requires precision and missteps here can cause more damage. No pressure, though – you’ll be fine, as long as you follow our guidance.
Hit the Win + R keys to open the Run dialog. Type “regedit” and press Enter.
The Registry Editor opens. You’ll now search for those policy values you saved earlier. Use Ctrl + F to open up the search bar and then paste the policy value you saved. Click Find Next to begin the search.
If the search finds anything, delete the entire key (folder) in the left panel that contains the found item.
Hijackers sometimes block access to their registry keys, so you may be blocked from deleting them.
The solution is to right-click the folder containing the key. Choose “Permissions”. Select “Advanced”, then “Change”. Type everyone in the text box, then click Check names, and click OK.
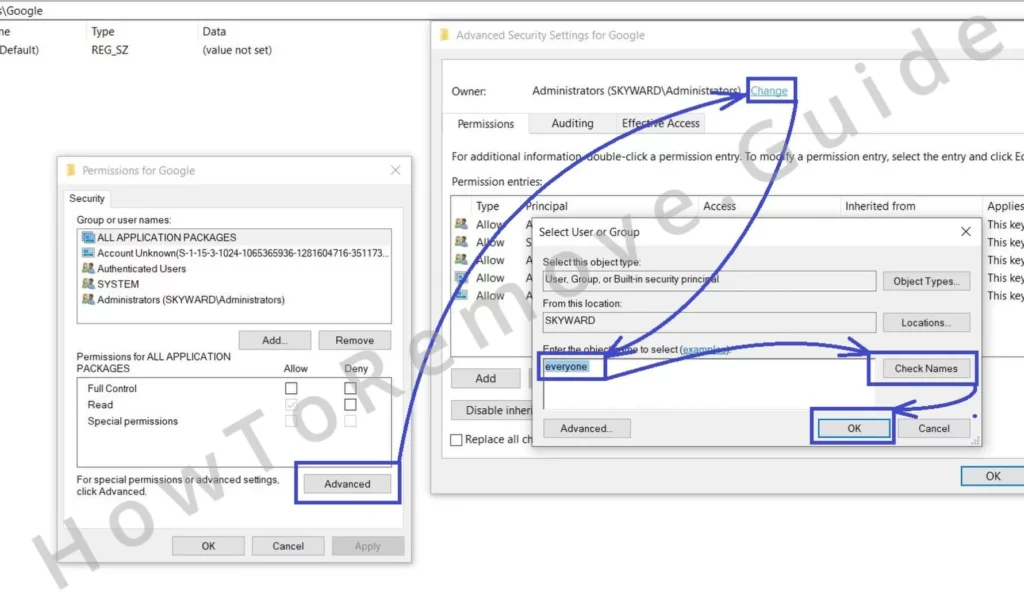
Put ticks in the two Replace options and save the changes.
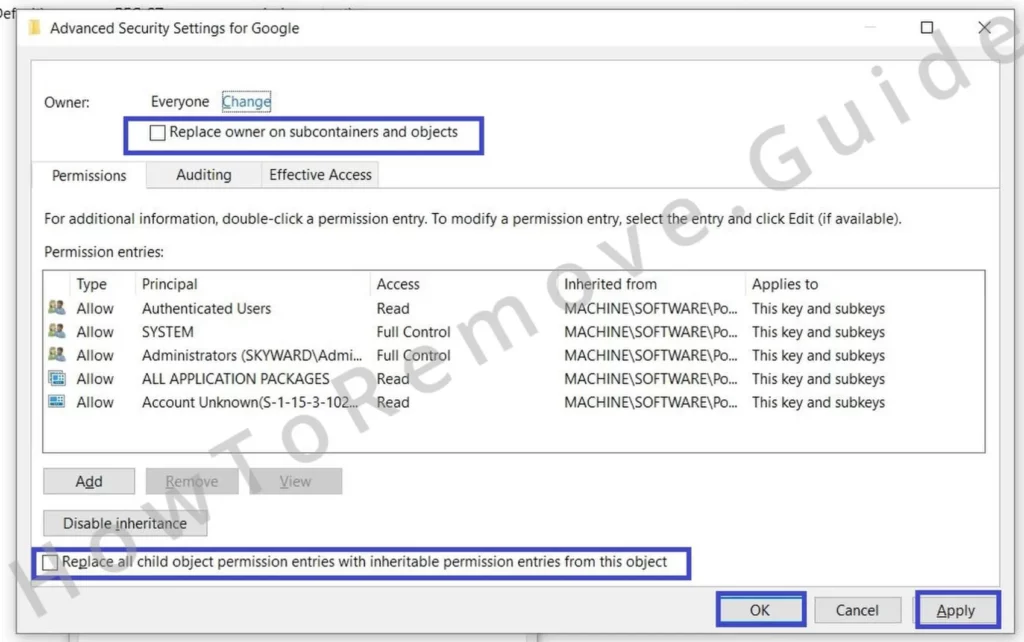
Now, try deleting the key again. Always run one more search after each deletion to ensure that there aren’t any more rogue entries left in the Registry.
Also, remember to search for the other rogue policy values and extension IDs you saved earlier.. Not done yet, though.
Alternative Methods to Delete ProSearch Virus Policies
ProSearch can be persistent. After cleaning the registry, it’s possible the hijacker still hangs around. If “Managed by your organization” continues to show up, more policy cleaning is necessary:
Type “Edit Group Policy” into the Start menu and open the tool. Expand under Local Computer Policy > Computer Configuration, right-click Administrative Templates, and click Add/Remove.
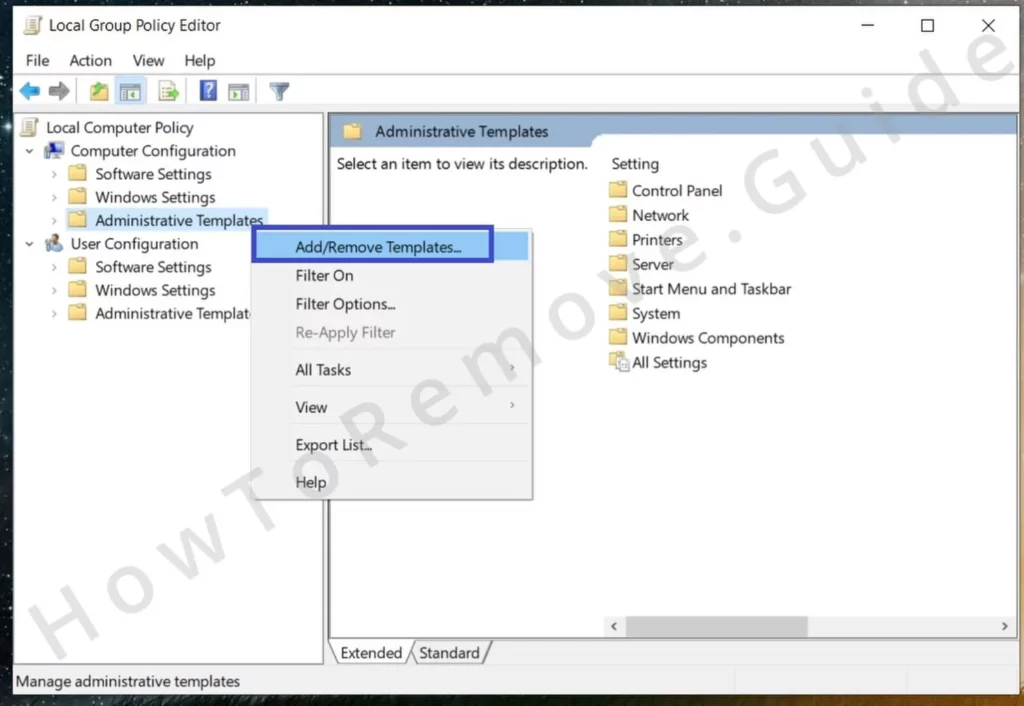
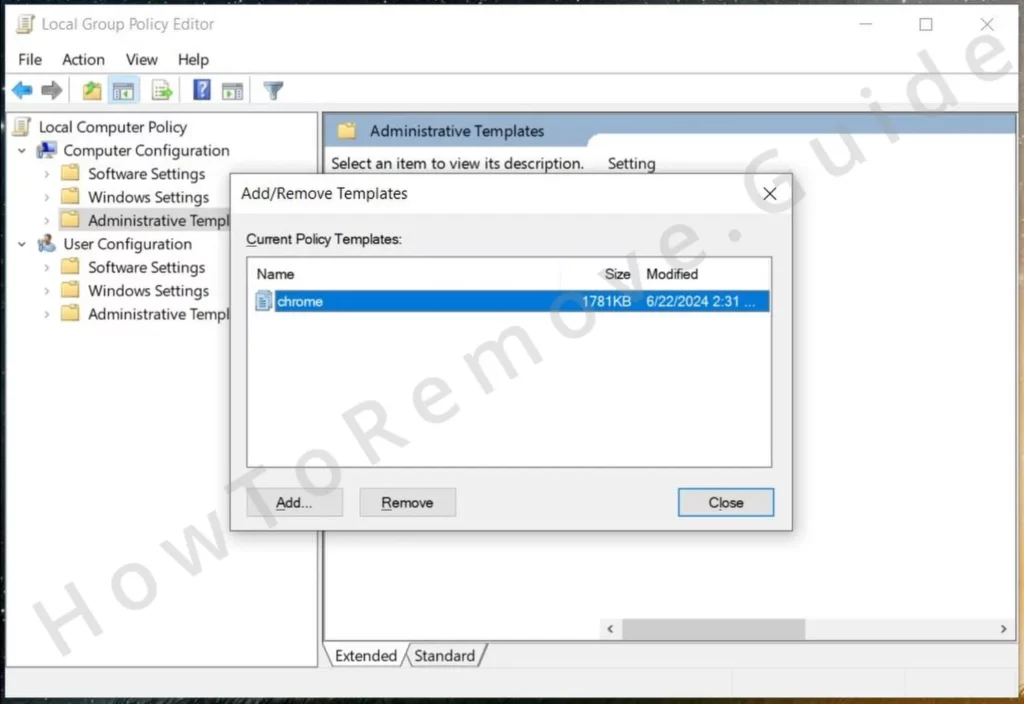
Delete all entries you see in the following list and then close the Group Policy Editor.
For Chrome users specifically, you can also use the Chrome Policy Remover tool. It’s totally free and it requires no installation.
Run it as an administrator and don’t worry about any Windows security warnings. Click More Info > Run Anyway if you get a warning and let the tool do its job.
The Chrome Policy Remover will automatically delete any remaining rogue policies. This will finally disable the hijacker’s control over your browser.
Uninstall the ProSearch Extension from your browser
Now that the policies have been dealt with, let’s secure the browser once and for all.
Open the browser’s settings. Go back to the Extensions section. Remove any remaining traces of ProSearch. Delete anything suspicious or unfamiliar.
Now is also a good time to repair any legitimate extensions that got corrupted earlier. Just attempt to open the extension and you’ll get a Repair button under it that lets you restore its folder.
Just be careful not to repair any extensions you want to remove. For them, just click the Remove button.
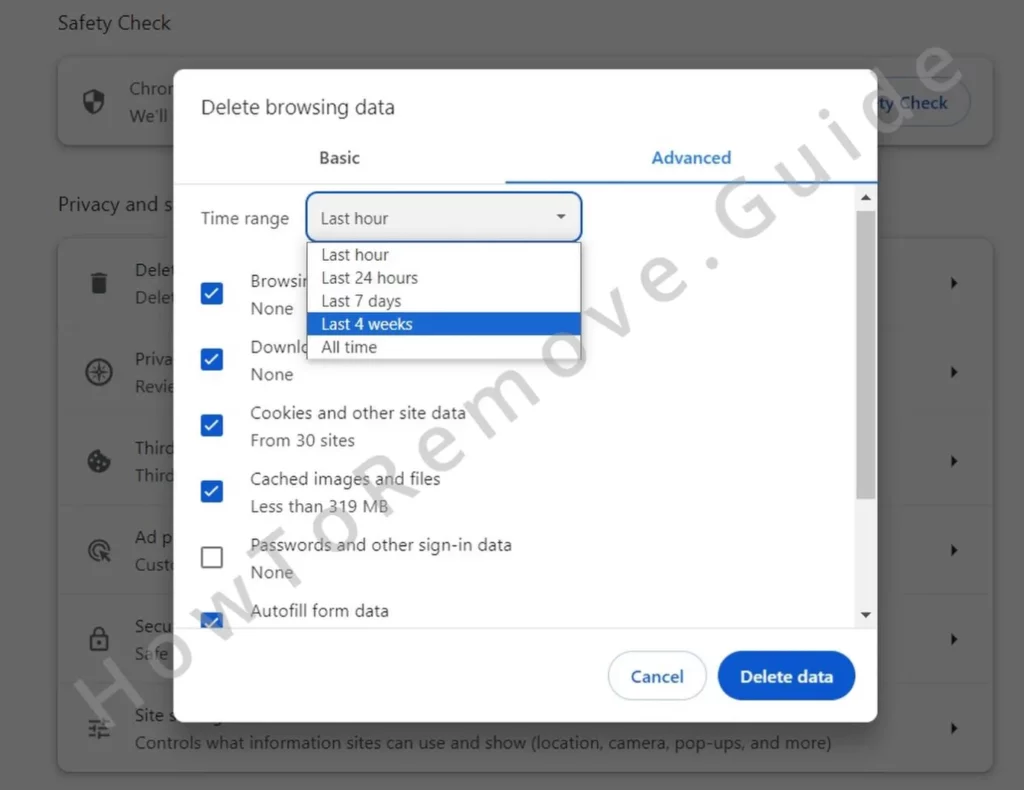
Next, head over to Privacy and Security settings. Clear your browsing data.
Make sure to delete all data types except your saved passwords and that you cover the timeframe when ProSearch first appeared. This will help remove any lingering cookies or stored data tied to the hijacker.
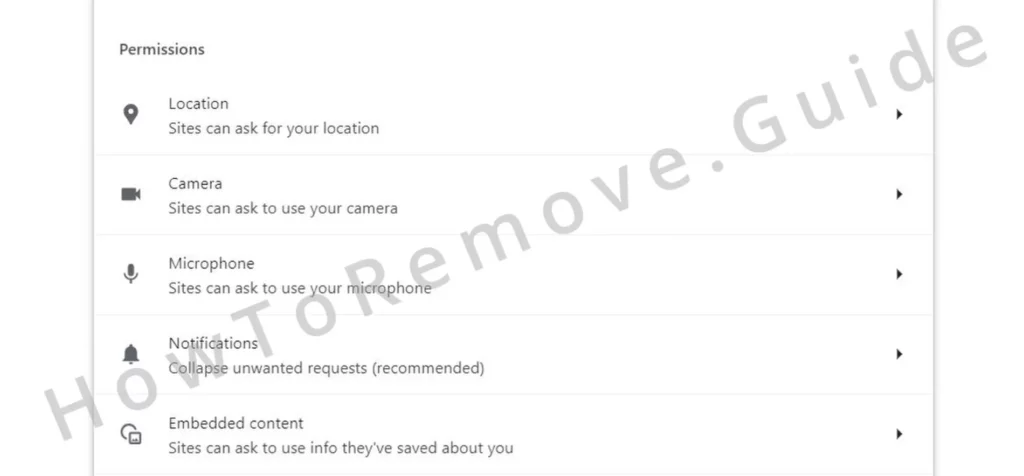
Also, check Site Settings while you’re there. Open each permission type and remove suspicious URLs you may find listed in the Allow list. Better yet, add ProSearch-related addresses to your block list.
Don’t overlook the Search Engine settings. Restore the search engine to your original preference.
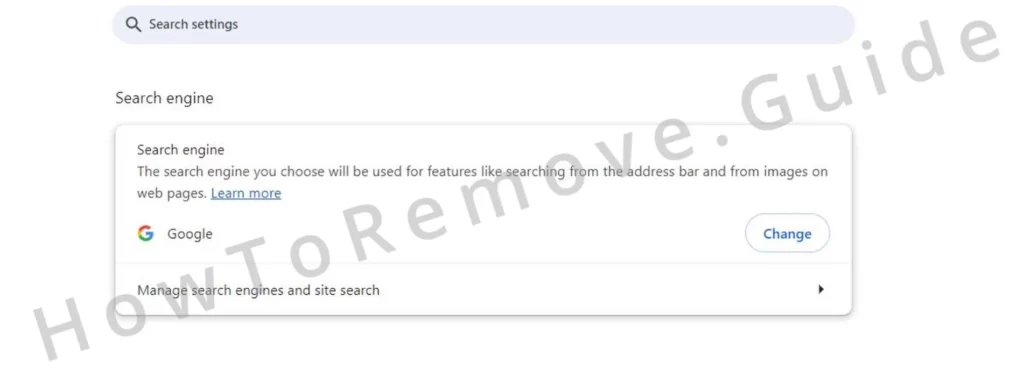
Then click Manage Search Engines and delete any rogue or unfamiliar ones.
Finally, check the On Startup and Appearance sections. If you see any URLs you didn’t add, delete them immediately.
Your browser should now be clean. However, if ProSearch has still somehow managed to evade your removal efforts and continues to bother you, it might be time to resort to using SpyHunter as a quick and effective way to clean both your browser and your entire system.

Leave a Reply