UpdateAgent
UpdateAgent is a type of program that infiltrates the main browsers on macOS computers. UpdateAgent does this for the purpose of converting these browsers into platforms for online advertising.
And usually, this is achieved by installing ad-generating components in the browsing program in question. Hence, users who’ve been affected by this type of software begin to notice vast increases in the quantity of banners, popups, in-text links and other types of online advertising materials while they’re browsing the web.
In addition, software like UpdateAgent, Navlibx, QSearch may alter some of the browser’s configurations, whether you’re using Chrome, Safari, Firefox or some other web browser. And these are usually pertaining to the default search engine, as well as the homepage URL. Therefore, you are likely to experience changes there, as well. Last but not least, your browsing program may begin to cause page redirects that automatically take you to various sponsored web locations, which can certainly be very annoying, too.
So, if you would rather not have to put up with your browser rebelling against you, you will have to remove UpdateAgent from your computer. And as this type of software tends to try and make this process difficult for users, you may benefit from a manual removal guide such as the one we’ve put together below.
UpdateAgent for Mac
UpdateAgent for Mac is a browser hijacker that takes charge of the main browsing program on your computer. UpdateAgent for Mac is not harmful, but most experts identify it as a potentially unwanted program or PUP.
This is due to several facts all at once. For one, as you’re no doubt already well aware of, UpdateAgent doesn’t exactly openly request your permission to be installed on your machine. Usually this happens in a sneaky and underhanded way, because no one in their right mind will want to have such software installed on their computer. In this case, UpdateAgent was likely included in the setup of some other application as an optional install. And if you weren’t paying too much attention to the setup, you likely missed the step where you could have left the browser hijacker out of the installation process.
What is UpdateAgent?
Another reason why UpdateAgent is seen as unwanted is that it may expose your system to viruses. UpdateAgent acts as a middle man between you and obscene amounts of content, and some of it may prove to be unsafe.
It may so happen, for example, that a spontaneous page redirect takes you to some infected website. Or you might click on an ad that is linked to some insecure web location. And as a result, your system may be attacked by ransomware, Trojan horse viruses and various other types of malicious code.
The UpdateAgent app
The UpdateAgent app is not a malicious piece of software, contrary to common belief. Nevertheless, the UpdateAgent app may have various negative consequences on your system, such as sluggishness and slowdowns.
Therefore, in order to avoid such things from happening to your Mac, it’s best to simply have the hijacker removed altogether.
SUMMARY:
| Name | UpdateAgent |
| Type | Malware |
| Danger Level | Medium (nowhere near threats like Ransomware, but still a security risk) |
| Detection Tool |
Remove UpdateAgent Malware from Mac
For a quick way to remove UpdateAgent try to do this inside your Mac browser:
- Open your Mac browser.
- Go to Preferences.
- Now navigate to the extensions sub-menu.
- Look for any unfamiliar entries, including UpdateAgent.
- Remove UpdateAgent from your Mac as well as any other suspicious-looking items by clicking on the trash bin icon.
If this does not help then continue reading this article for more detailed instructions on how to get rid of UpdateAgent!

The first thing you need to do is to Quit Safari (if it is opened). If you have trouble closing it normally, you may need to Force Quit Safari:
You can choose the Apple menu and click on Force Quit.
Alternatively, you can simultaneously press ⌘ (the Command key situated next to the space bar), Option (the key right next to it) and Escape (the key located at the upper left corner of your keyboard).
If you have done it right a dialog box titled Force Quit Applications will open up.
In this new dialog window select Safari, then press the Force Quit button, then confirm with Force Quit again.
Close the dialog box/window.

WARNING! READ CAREFULLY BEFORE PROCEEDING!
Start Activity Monitor by opening up Finder, then proceed to ![]()
Once there, look at all the processes: if you believe any of them are hijacking your results, or are part of the problem, highlight the process with your mouse, then click the “i” button at the top. This will open up the following box:

Now click on Sample at the bottom:
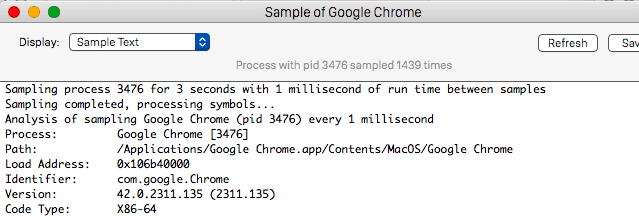
Do this for all processes you believe are part of the threat, and run any suspicious files in our online virus scanner, then delete the malicious files:


The next step is to safely launch Safari again. Press and hold the Shift key while relaunching Safari. This will prevent Safari’s previously opened pages from loading again. Once Safari is opened up, you can release the Shift key.
On the off chance that you are still having trouble with scripts interrupting the closing of unwanted pages in Safari, you may need to take some additional measures.
First, Force Quit Safari again.
Now if you are using a Wi-Fi connection turn it off by selecting Wi-Fi off in you Mac’s Menu. If you are using a cable internet (Ethernet connection), disconnect the Ethernet cable.

Re-Launch Safari but don’t forget to press and hold the Shift button while doing it, so no previous pages can be opened up. Now, Click on Preferences in the Safari menu,
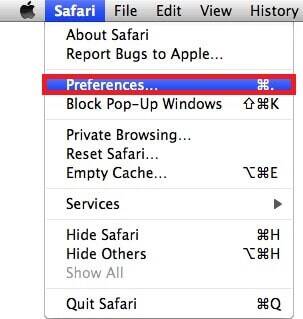
and then again on the Extensions tab,

Select and Uninstall any extensions that you don’t recognize by clicking on the Uninstall button. If you are not sure and don’t want to take any risks you can safely uninstall all extensions, none are required for normal system operation.
![]()
The threat has likely infected all of your browsers. The instructions below need to be applied for all browsers you are using.
Again select Preferences in the Safari Menu, but this time click on the Privacy tab,

Now click on Remove All Website Data, confirm with Remove Now. Keep in mind that after you do this all stored website data will be deleted. You will need to sign-in again for all websites that require any form of authentication.
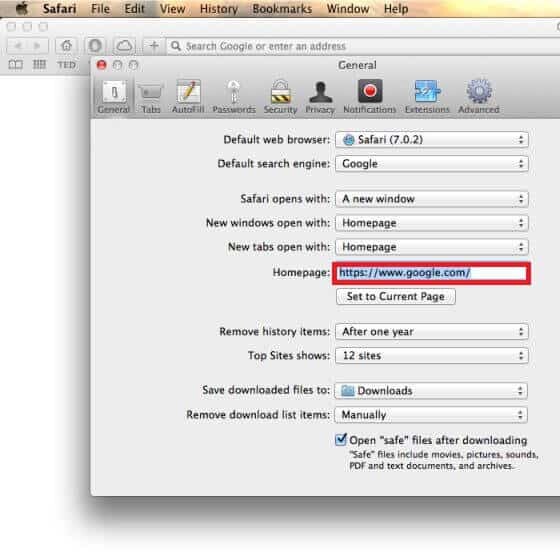
Still in the Preferences menu, hit the General tab

Check if your Homepage is the one you have selected, if not change it to whatever you prefer.
Select the History menu this time, and click on Clear History. This way you will prevent accidentally opening a problematic web page again.
![]() How to Remove UpdateAgent From Firefox in OSX:
How to Remove UpdateAgent From Firefox in OSX:
Open Firefox, click on ![]() (top right) ——-> Add-ons. Hit Extensions next.
(top right) ——-> Add-ons. Hit Extensions next.

The problem should be lurking somewhere around here – Remove it. Then Refresh Your Firefox Settings.
![]() How to Remove UpdateAgent From Chrome in OSX:
How to Remove UpdateAgent From Chrome in OSX:
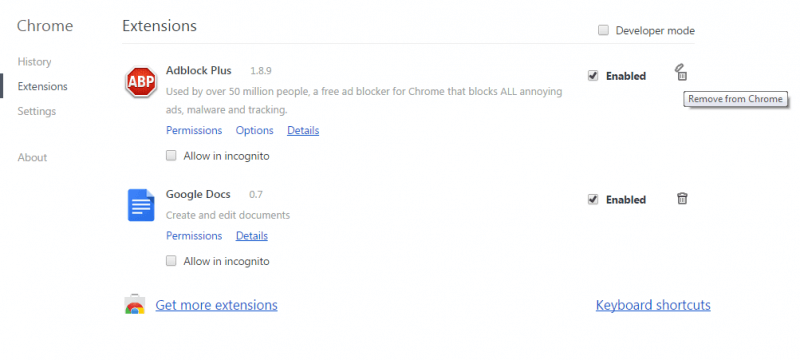
Start Chrome, click ![]() —–>More Tools —–> Extensions. There, find the malware and select
—–>More Tools —–> Extensions. There, find the malware and select ![]() .
.
Click ![]() again, and proceed to Settings —> Search, the fourth tab, select Manage Search Engines. Delete everything but the search engines you normally use. After that Reset Your Chrome Settings.
again, and proceed to Settings —> Search, the fourth tab, select Manage Search Engines. Delete everything but the search engines you normally use. After that Reset Your Chrome Settings.
If the guide doesn’t help, download the anti-virus program we recommended or try our free online virus scanner. Also, you can always ask us in the comments for help!

Leave a Reply