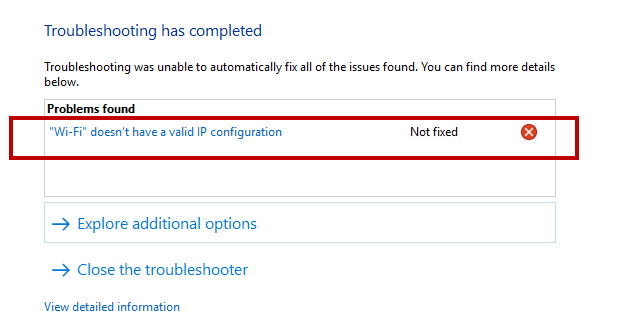
WiFi Doesn’t Have A Valid IP Configuration
“WiFi Doesn’t Have A Valid IP Configuration” is a commonly encountered Windows 10 error that indicates a problem with the computer’s Internet connection. The “WiFi Doesn’t Have A Valid IP Configuration” error could be caused by different connection issues.

In the next lines, we will focus on the most common reasons for the appearance of this error and we will provide you with guidance on how to deal with the specific problem causing your computer’s inability to connect to the Internet.
TCP/IP reset
- Open your Start Menu and type Command Prompt.
- Right-click on the first shown result and select the Run as Administrator option (you must be the computer’s Admin to do that).
- In the Command Prompt window that opens, type the following command exactly as it is written here: netsh winsock reset.

- Hit Enter and wait for the command to be executed.
- After the command executes, type another command and hit Enter after to execute it: netsh int ip reset
- Restart your computer and see if the problem’s fixed.
IP address renewal
- Once again, open the Command Prompt as explained in the previous step.
- This time, type the ipconfig /release command (do not forget the space between “ipconfig” and “/release”).

- Hit Enter to execute the command.
- Now type another command in the Command Prompt: ipconfig /renew (mind the space).
- Press Enter again to launch the command and after it is executed, restart the computer and see if you can connect to the Internet.
Reinstall Wireless Adapter Driver (if you are using Wi-Fi connection)
- Type Device Manager in the Start Menu search box.
- Click on the first result and in the Device Manager window that opens find the Network Adapters icon.
- Expand Network Adapters and right-click on the icon of your wireless connection device.
- Select the Uninstall device option and confirm the action when asked whether you are sure you want to do so. If you see an option labeled Delete the driver software for this device, check it before confirming the uninstallation.

- Restart the computer – this will result in the reinstallation of your wireless adapter’s driver and would hopefully fix the connection problem.
Manually set-up your IP
- Right-click on the Start Menu button and select Network Connections.
- Find and select Change adapter options under Change your Network settings.

- Right-click on the network connection you are currently using and select Properties.

- In the Networking tab, find the Internet Protocol Version 4 (TCP/IPv4) option and click on it.
- Next, select Properties and then check the Use the following IP address and the Use the following DNS server addresses options.

- Now fill in the IP addresses in the following way:
-
- IP address – 192.168.1.145
- Subnet mask – 255.255.255.0
- Default gateway – 192.168.1.1
- Preferred DNS server – 8.8.8.8
- Alternate DNS server – 8.8.8.4
- Click on OK and restart the computer.
Clean boot
- Type System configuration in the Start menu and open the first search result.
- In the General tab, select Selective startup and uncheck the Load startup items option.

- Now, open the Services tab, click on Hide all Microsoft services to only see the third-party services and then select Disable all.

- Next, the Startup tab, click on the Open Task Manager button and disable all the applications available in the newly-opened window.
- Click OK on everything and restart the machine. Once the computer boots, only Microsoft apps would start automatically. This would hopefully prevent any conflicts caused by third-party apps that may have been preventing your computer from connecting to the Internet.

Leave a Reply