As with any newly released software or program, or operating system as in this case, there are bound to be some bugs, faults, errors, etc. Microsoft’s latest creation, Windows 10 has seen quite a bit of those and today’s article features another one of its commonly reported issues – no start menu or start menu not working after a period of time. A bunch of users have been complaining lately that the start button has been either disappearing or not functioning and they have therefore been unable to access the start menu.
Many fixes have been offered by other fellow-users, some have been more effective than others, some tend to work for most people, whereas they’ve failed to do the trick on other machines. In this guide we’ve compiled a process of three parts: if the first doesn’t help, you proceed to the second, and if that one fails too, the third is bound to work for even the most capricious system. Ready? Here we go.
Windows 10 Start Menu Not Working/Opening Fix
Part I
- Hold down the key combination of Ctrl+Alt+Delete and click on Task Manager
- The Task Manager window will appear. If you aren’t seeing any processes in it, click on More Details at the bottom and you should end up looking at something like this (in case you aren’t already):

- After this, click on File at the top of the window and choose Run new task. Type in powershell and tick the box underneath that says Create this task with administrative privileges. Click OK.

- In the window that appears paste the following string: Get-AppXPackage -AllUsers | Foreach {Add-AppxPackage -DisableDevelopmentMode -Register “$($_.InstallLocation)\AppXManifest.xml”}
You can do that by copying it from here, then right clicking on the PowerShell title bar and selecting Paste. Hit Enter.
Part II
- In case the above didn’t work, repeat the above steps 1-3, with the only difference that you will be typing explorer instead of powershell. Remember to have the box underneath it ticked again.
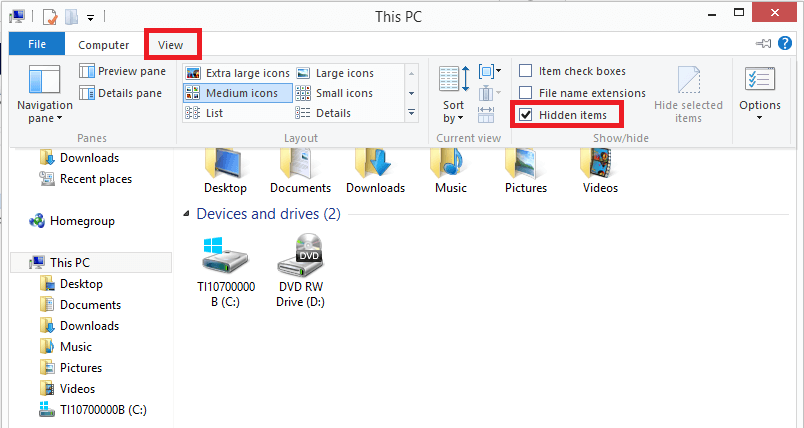
- In the File Explorer window that appears, go to the View tab and make sure the box beside Hidden Items is ticked.

- Go to Disk C: -> Users -> Your username or Owner -> AppData ->Local. Locate the folder titled TileDataLayer and rename it. You can add something to the end of it, for example. NOTE: If you see a box saying the name cannot be changed, you will have to create a new user with administrative privileges, restart your computer and then perform the same actions in that user’s folder.
Part III
- If Part II of this guide gave no results either, proceed to download the following batch file, saving it into your system 32/64/86 folder (which ever one is applicable for your PC) : http://click4this.info/10services_default.bat
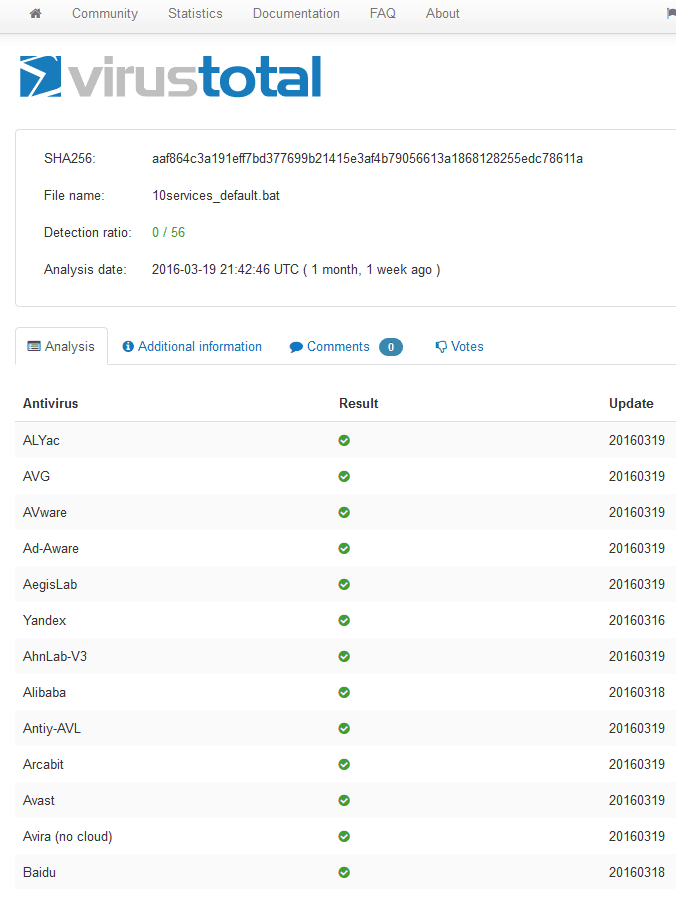
 As you can see in the screenshot, the file has been scanned for viruses and is completely safe. It was graciously provided by YouTube channel Windows 10 Guru
 - Repeat steps 1-3 from Part I again, only this time enter cmd. Press OK.
- Copy and paste the following command into the window: 10services_default.bat and hit Enter.
If this too does not work, the problem is most likely in your DropBox. Uninstall DropBox from your computer by going to Control Panel -> Uninstall a Program. Locate DropBox and right click on it to uninstall.

Leave a Reply