Ksearchy is a rogue Chrome extension by findflarex.com that functions as a browser hijacker that takes over the browser and introduces unwanted changes to its settings without asking for your permission. It replaces the default search engine with the fake search engine boyu.com.tr and redirects the user’s searches to modified SERPs.

The hijacker leverages Chrome’s policies feature indicated by the “Managed by your organization” message in the browser. This means you won’t be able to reverse any of the changes it has made until the rogue policy is removed.
As of the time of writing, the rogue extension is present in the Chrome Web Store, but we expect it will be taken down soon.
How to Get Rid of Ksearchy (Removal Guide)
If you have Ksearchy in your Chrome browser and are unable to remove it because it is “Managed by your organization”, then the following guide is for you. It will first explain how to get rid of the rogue policy that has locked your browser and then how to remove the hijacker and reverse any changes it has made in your browser.
SUMMARY:
Before you attempt to unlock your browser by deleting the Ksearchy “Managed by your organization policy, we strongly recommend you perform a couple of preparatory steps to ensure the hijacker doesn’t re-apply its policy:
- In the Start Menu, search for and open the Task Scheduler, click the Task Scheduler Library folder, and check it for suspicious tasks. Take your time to right-click each listed task, go to its Properties, and check its Actions tab to learn about what actions it performs.
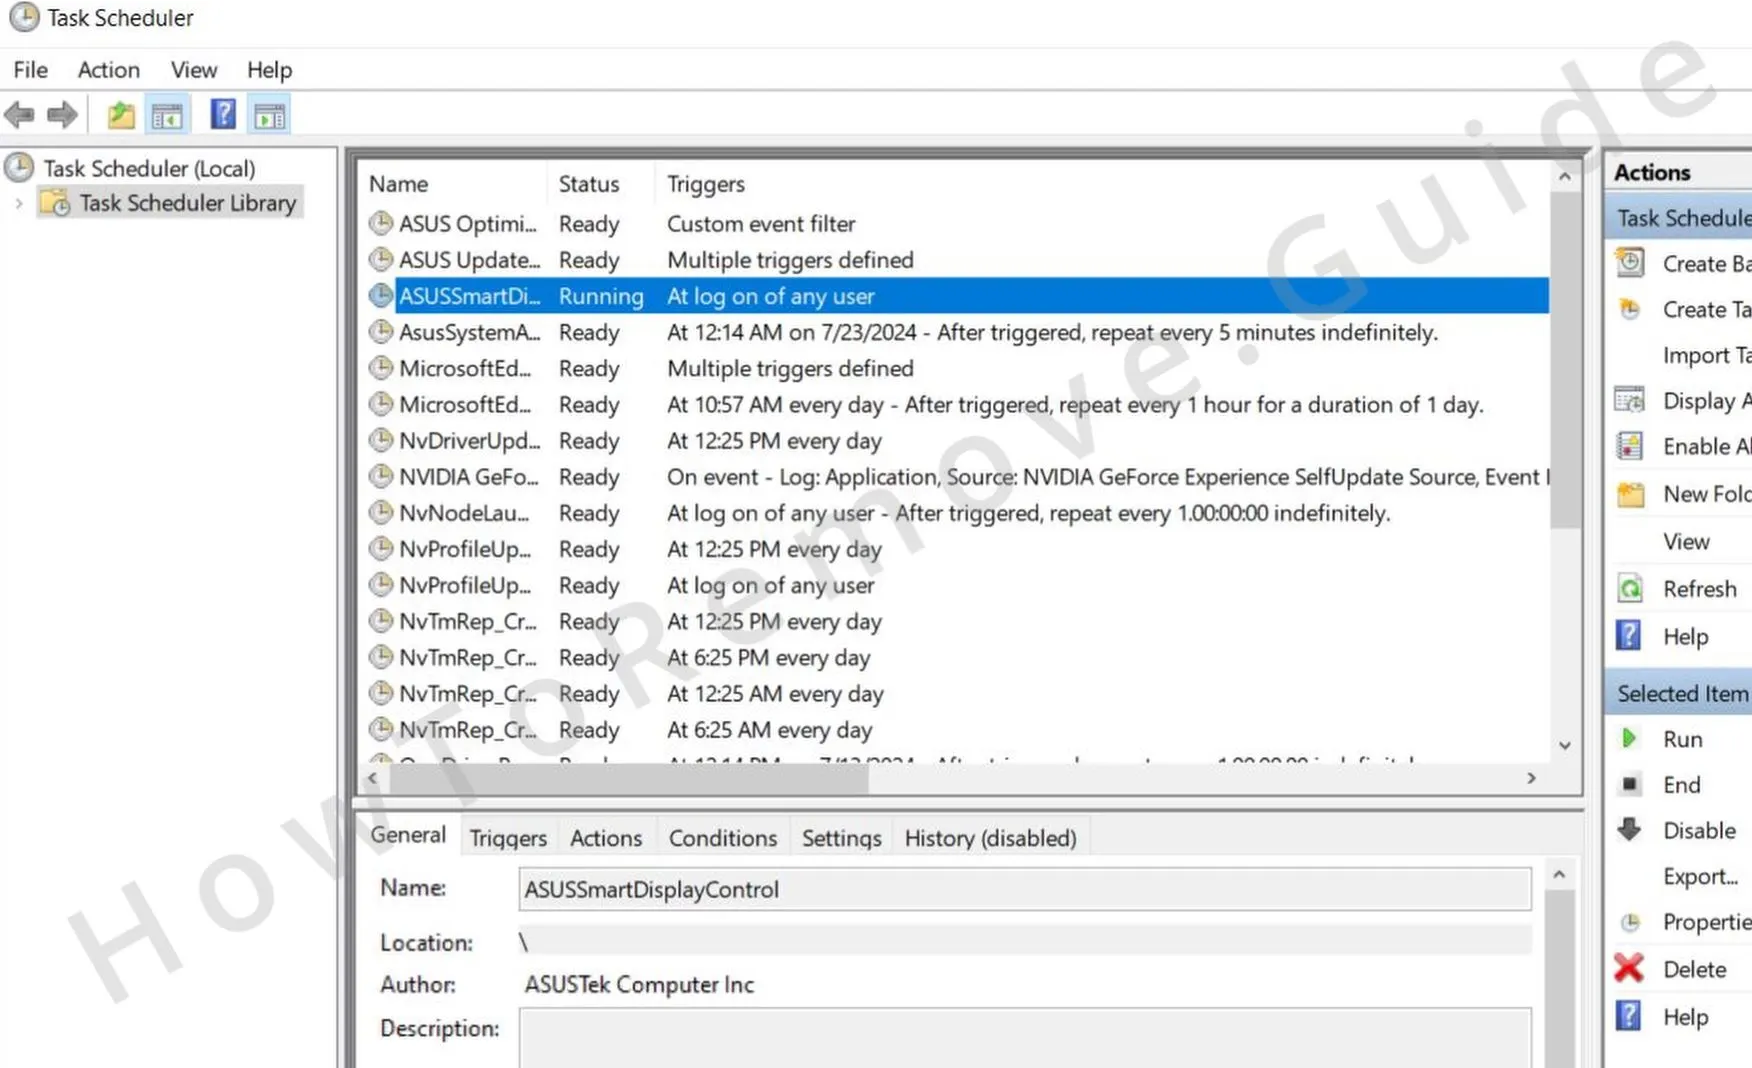
- If you think a particular task seems fishy and linked to Ksearchy, right-click it again and select Delete.
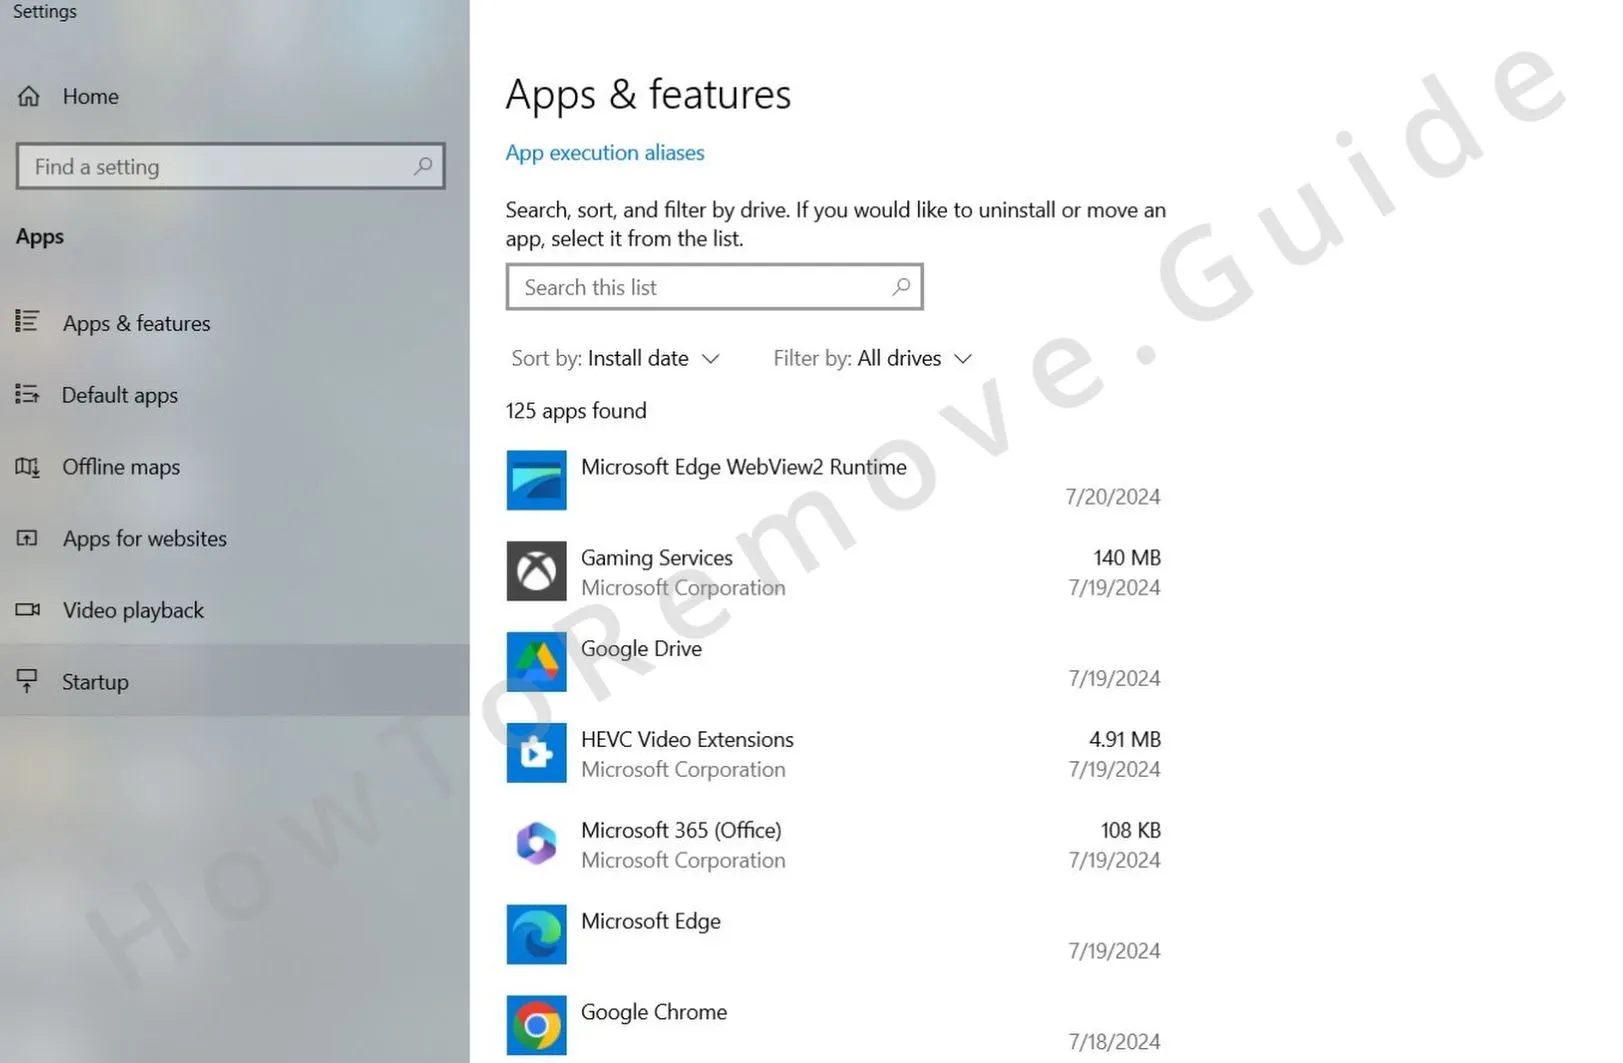
- Then open the Start Menu again, go to Settings > Applications, look for any recently installed apps that you don’t trust, and uninstall them.
- Next, search for Folder Options in the Start Menu, open the first result, click View, check Show Hidden Files and Folders, and click OK.
- Then go to C: > Program Files and look for any recently-created programs with names that you don’t recognize. If you see any suspicious folder, delete it.
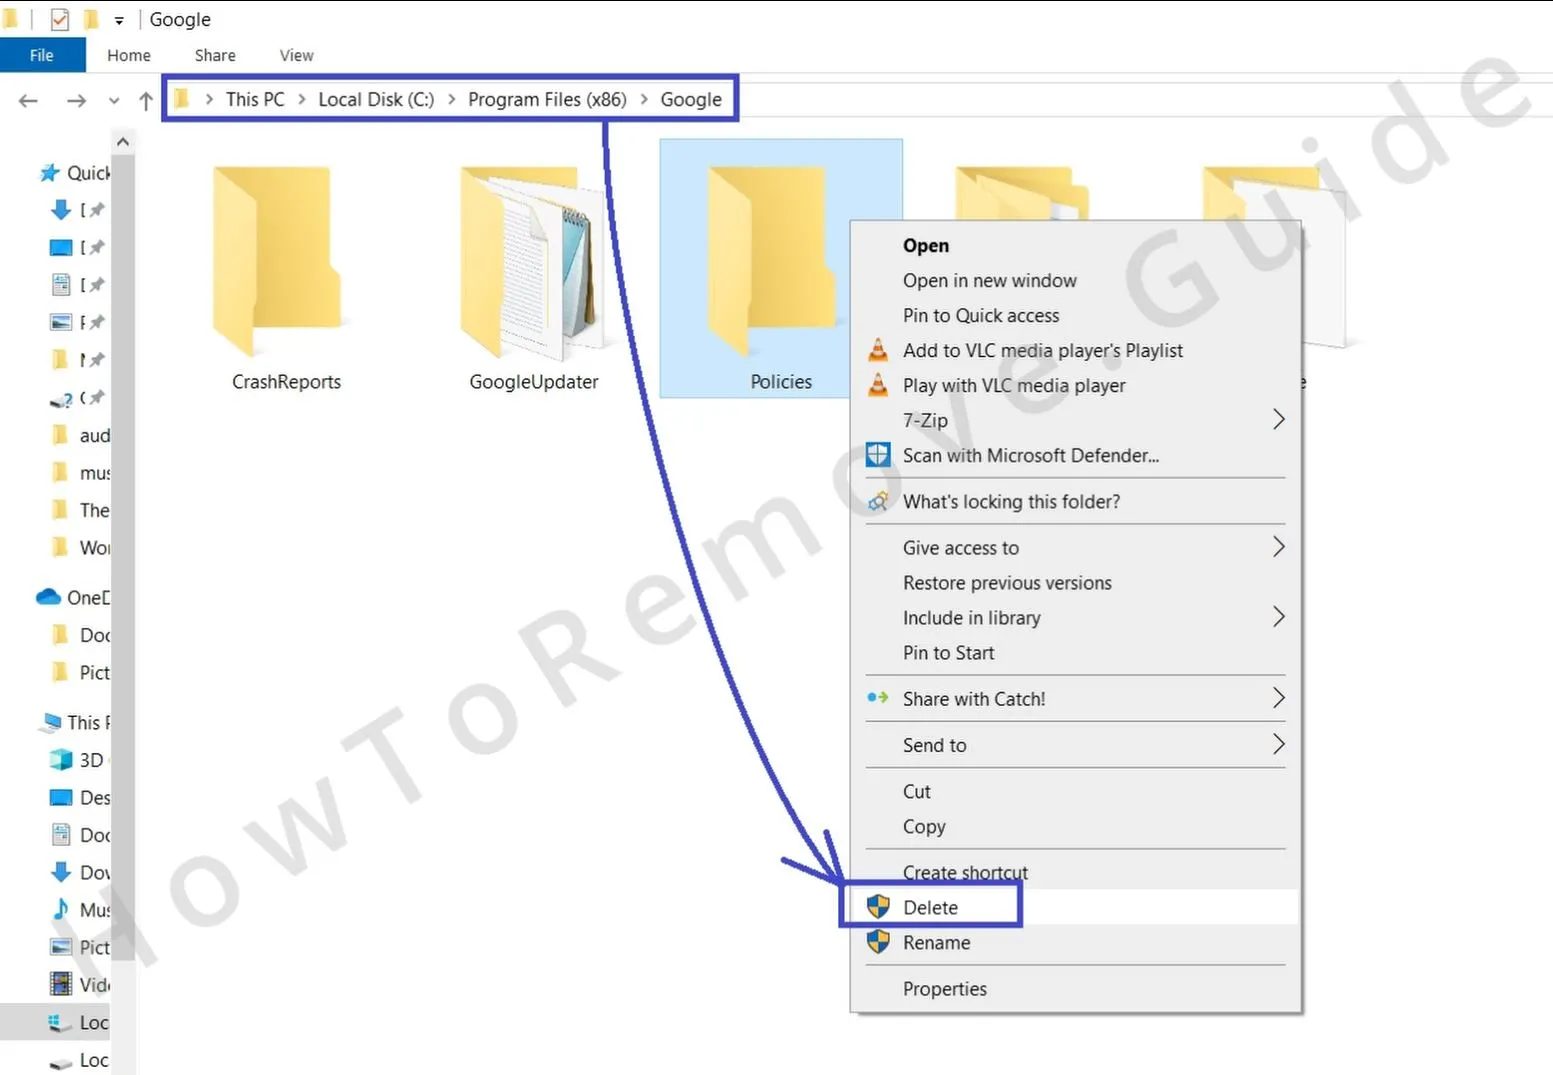
- Also go to C: > Program Files (86) > Google and delete the Policies folder.
Now everything should be ready to get to the main part of the Ksearchy removal.

Remove Ksearchy “Managed by Your Organization” Policy From Chrome
The key to removing hijackers like Ksearchy is to unblock your browser from their rogue policies. This can be done in several ways, which will be explained next:
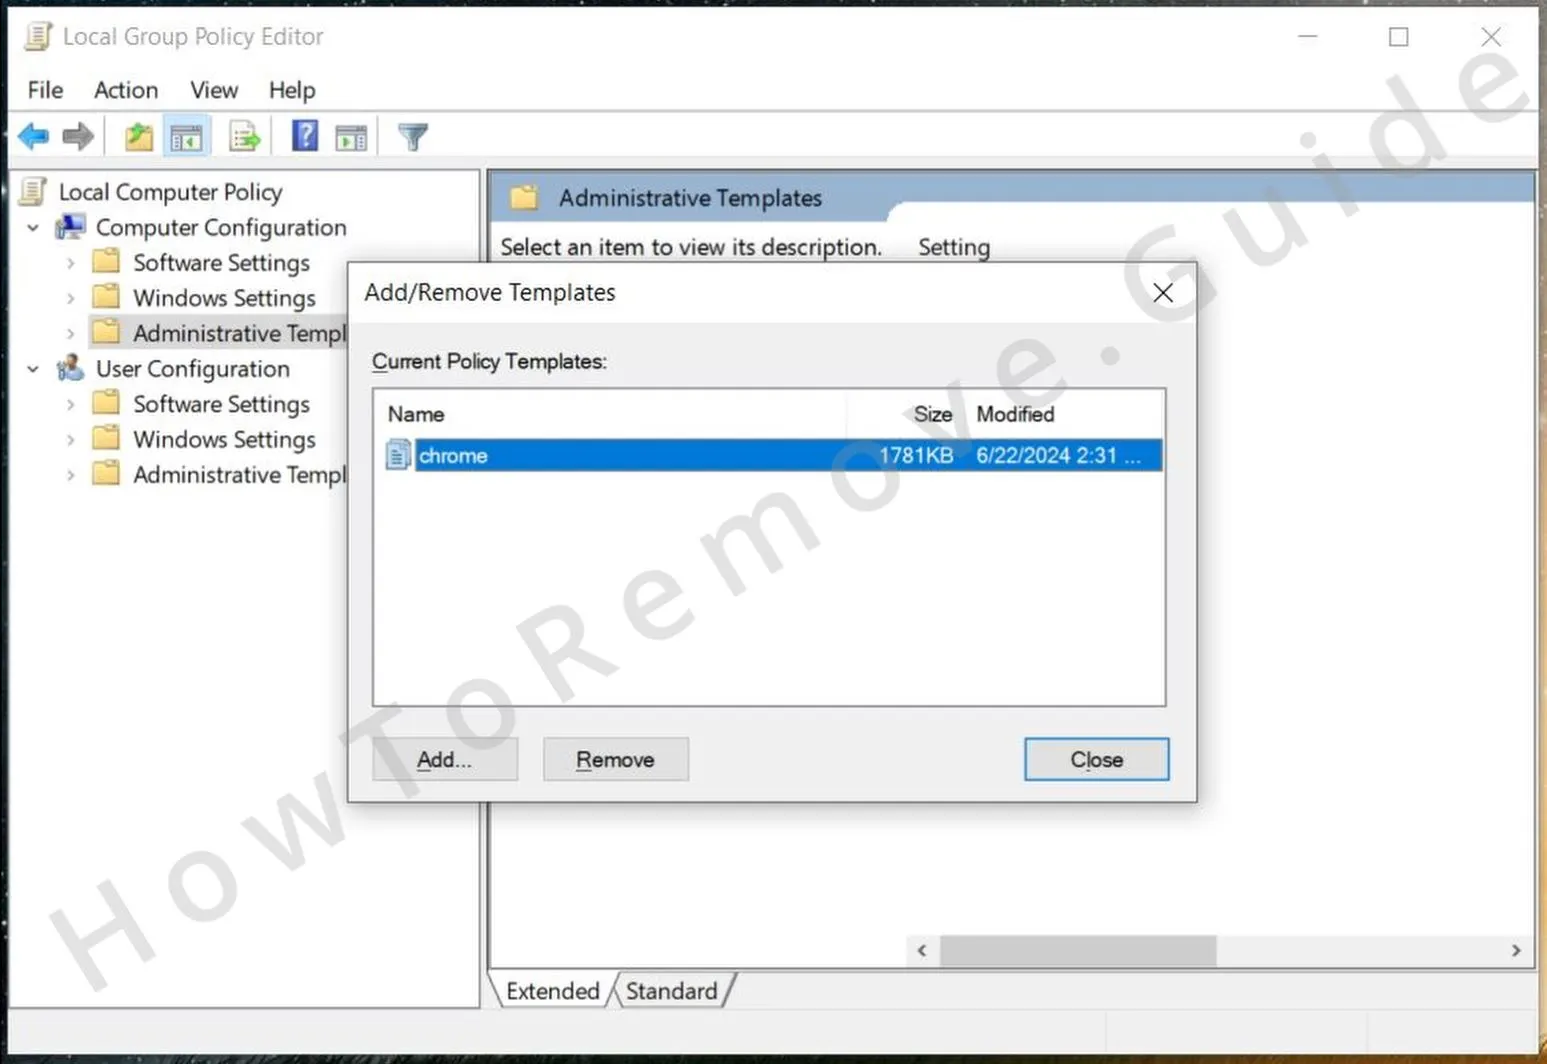
- Open the Group Policy Editor by searching for “Edit Group Policy” in the Start Menu and clicking on the first thing.
- Go to Local Computer Policy > Computer Configuration, right-click Administrative Templates, and select Add/Remove Templates.
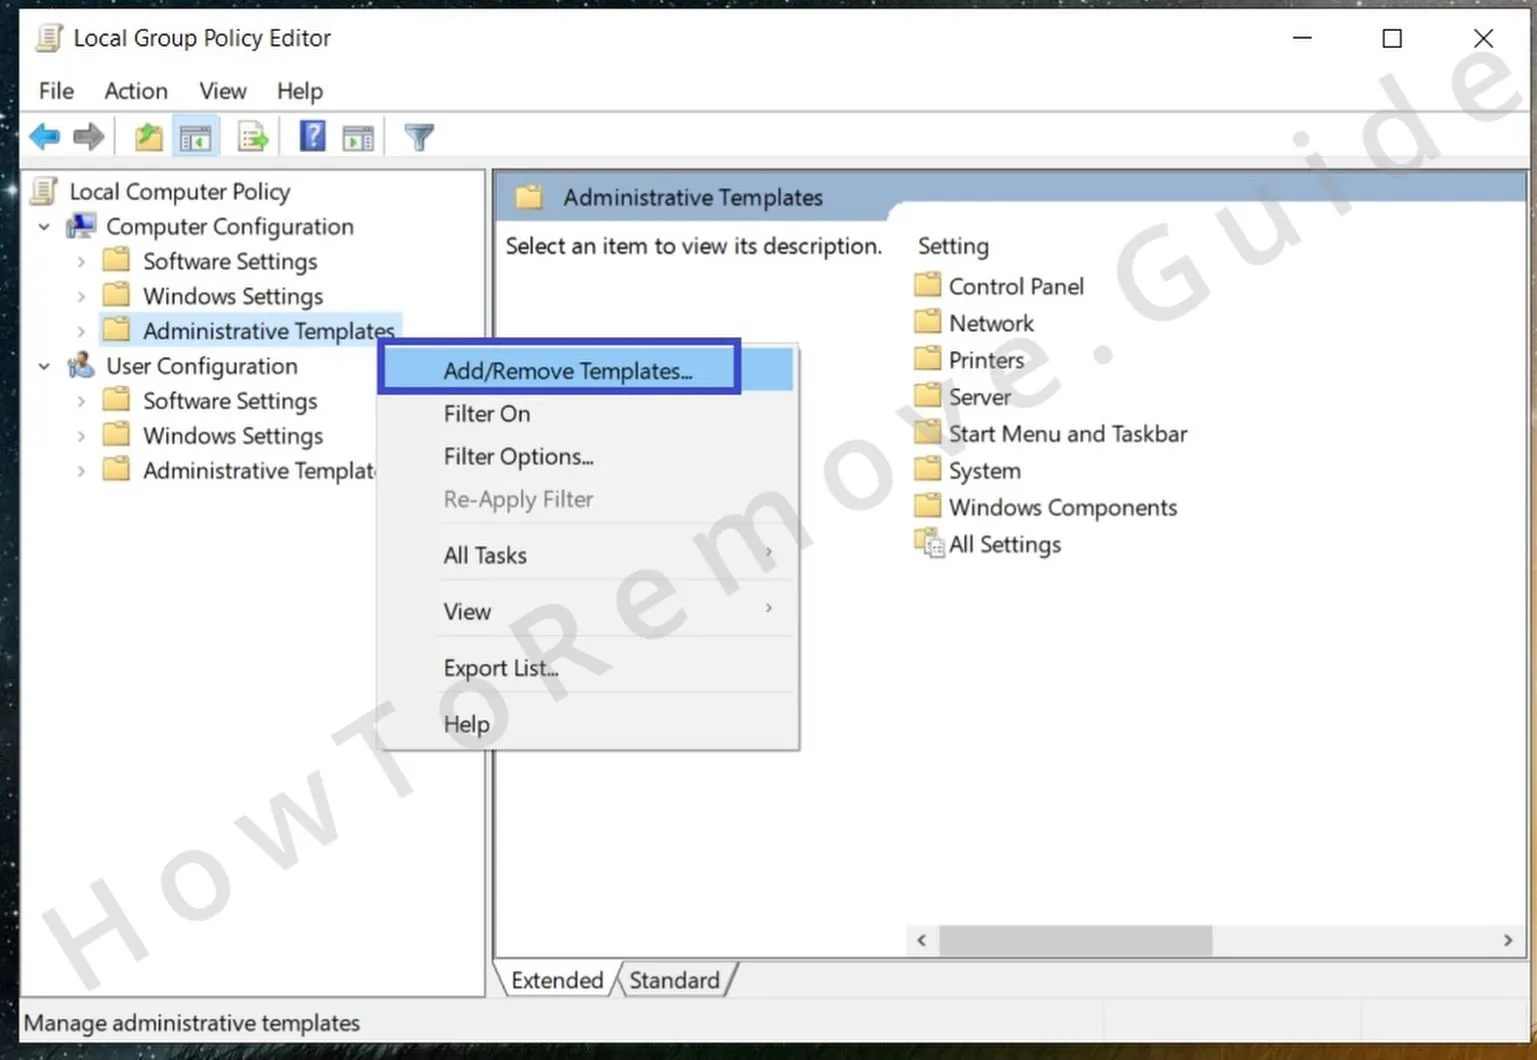
- Delete everything in the list that appears and close the list and the Policy Editor.
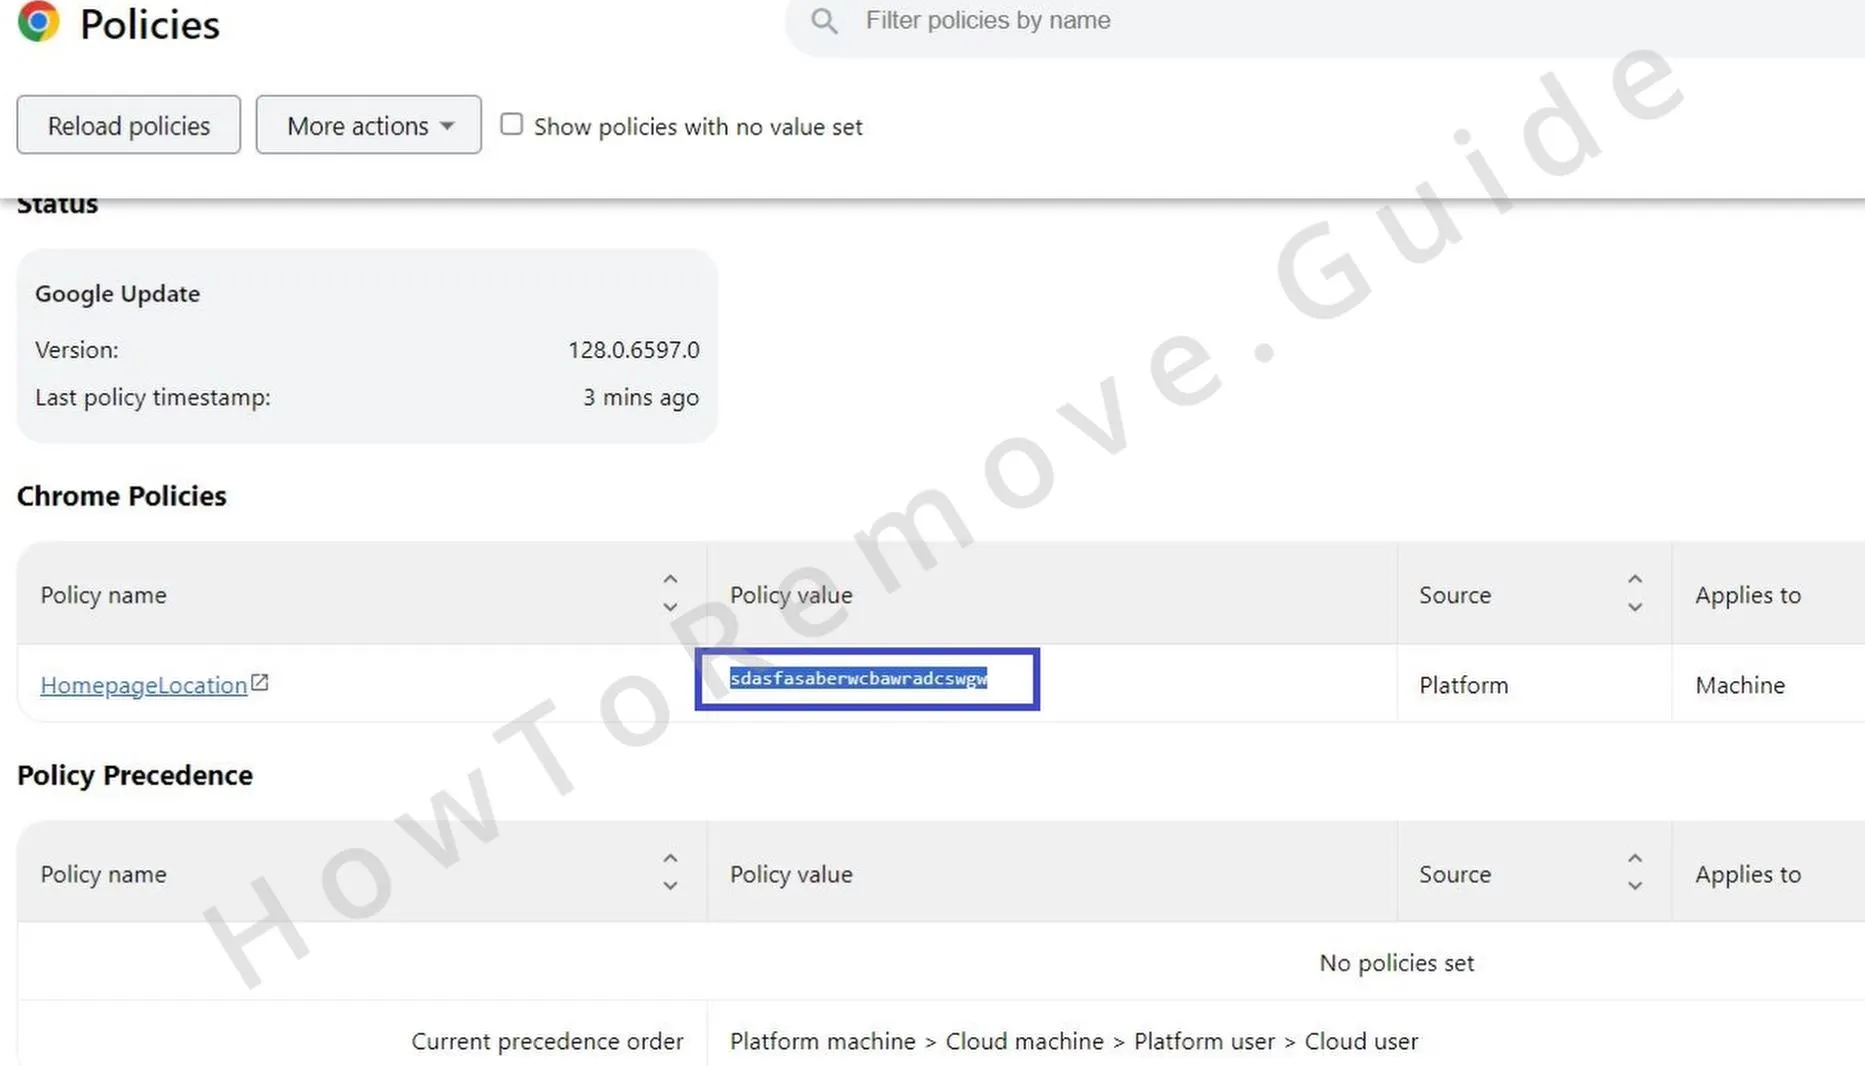
- Next, go into your browser, click in the URL tab, and type Chrome://policy and go to that address. If you are using a different browser, just change the name of the browser in the address (for instance, type Edge://policy if you are using Microsoft Edge).
- Look at the policies listed on that page and if you see any with random sequences of letters and numbers as their values, copy the values and save them somewhere (a notepad file or a sticky note for example).
- Then open the browser menu, go to Extensions > Manage Extensions, and click the Developer Mode button in the top-right to enable it.
- You should see ID values under each extension installed in your browser. Copy the Ksearchy ID and save it in the same notepad/sticky note. Also save the IDs of any other potentially unwanted extensions that you aren’t allowed to remove.
- Now go to your Registry Editor (search it in the Start Menu > right-click > Open as Administrator).
- Click Edit > Find, copy-paste the saved policy value in the search box, and click Find Next.
- When an item is found, delete its entire key (registry folder) in the left panel. Then search again, delete the next key, and keep doing that until no more results are left for this search.
- Then do the same with any other saved policy values and extension IDs.
- Once your searches no longer find anything, manually navigate to each of the following locations in the Registry Editor’s left panel and delete the bolded keys:
- HKEY_CURRENT_USER\Software\Google\Chrome
- HKEY_CURRENT_USER\Software\Policies\Google\Chrome
- HKEY_LOCAL_MACHINE\Software\Google\Chrome
- HKEY_LOCAL_MACHINE\Software\Policies\Google\Chrome
- HKEY_LOCAL_MACHINE\Software\Policies\Google\Update
- Next, go to File Explorer and visit the following folder: C: > Windows > System32.
- Once there, find and delete the GroupPolicy and GroupPolicyUsers folders.
- Then open a CMD window (type cmd in the Start Menu, right-click on the first item, and open it as Administrator).
- In the command prompt window, type this command “gpupdate /force” and press Enter to execute it. This should reset all group policies on your PC and remove the hijacker policy from Chrome.
- Finally, we also recommend that you download the free Chrome Policy Remover tool from here and use it to make sure there are truly no rogue policies left.
- Once you download the tool, right-click it, open it as administrator, then click More Info > Run Anyway and wait for the automated script to run. Once it’s ready, press Enter or click the X button to close the cmd window.
Note that some more aggressive antiviruses might directly delete or quarantine the Chrome Policy Remover. In such cases, you’ll have to temporarily disable the antivirus and then download the tool again.
![]()
How to Uninstall the Ksearchy Extension From Chrome
All that’s left to do now is to delete the rogue extension from your browser and to reverse any unwanted modifications it has likely made in your Chrome browser. Here’s how to do that:
- Once you open Chrome, navigate to its menu > Extensions > Manage Extensions, toggle off the Ksearchy extension to disable it, and then quickly click Remove and confirm the removal. Do the same thing with any other extensions that you do not trust.

- Then go to the browser menu again and open Settings > Privacy and Security > Clear Browsing Data.
- Click the Advanced tab, check all boxes with the exception of Passwords, set an appropriate time period that goes back to before the Ksearchy infected the browser, and then click Clear Data.
- Then look at the bottom of the Privacy and Security settings and click on Site Settings.
- Go through each permission type, check its “Allowed” section, and remove from it any sites that you didn’t intentionally allow to have the respective permission.
- Then check the Appearance and On Startup sections from the left and delete from them any sketchy URLs.
- Lastly, go to the Search Engine tab, change back the default search engine tool to the one you like, and click on Manage Search Engines.
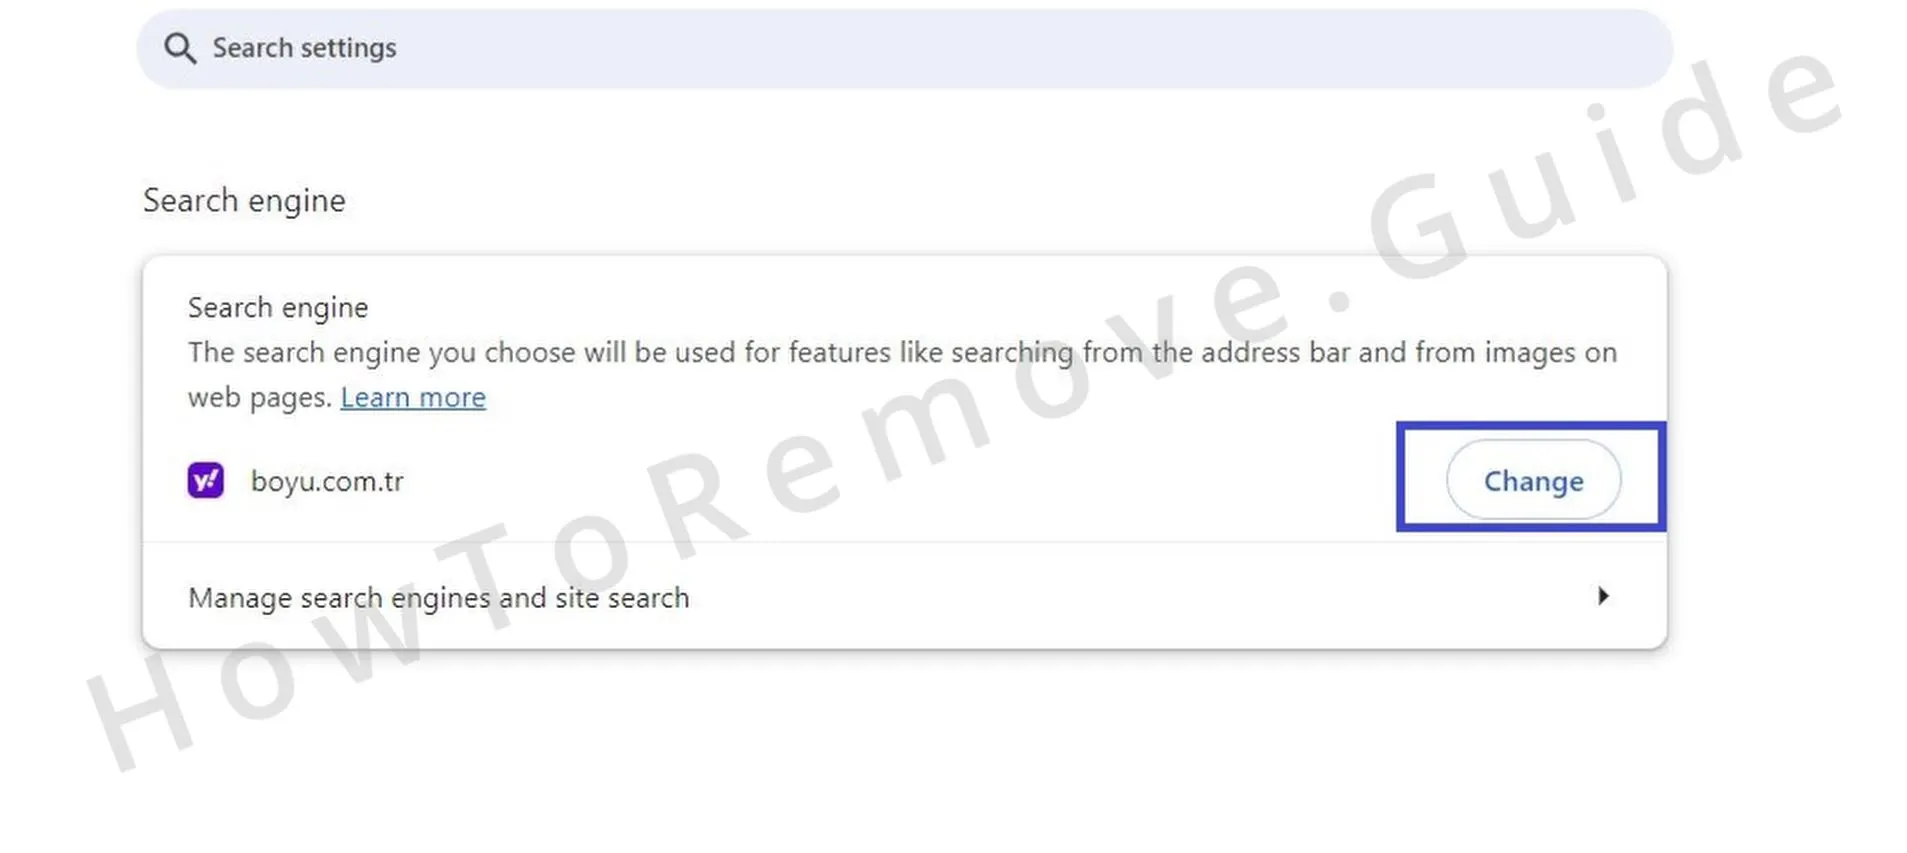
- There, look through the list of search engine tools and delete anything you don’t trust (for example, boyu.com.tr).
- Now see if there are any traces of Ksearchy left in the browser and if you still notice something unwanted, click the Reset Settings tab, select Restore Settings, and click Reset.
We also recommend that you go to C:\Users\*YOUR_USERNAME*\AppData\Local\Google\Chrome\User Data\Default\Extensions. There, you’ll see a bunch of folders with strings of seemingly random letters as their names. These are extension IDs – you must find the folder that has the same name as the Ksearch extension ID (the one that you saved earlier in a notepad/sticky note) and delete it.

As of the time of writing, the extension ID for Ksearchy is “gkklafnihmmlbkgpbcfjbfcdcpcmmemk“. This could change in the future, especially if new versions of the extension are released, so always make sure to first check the current ID in the Extensions Manager of your browser with Developer Mode turned on. Then find the folder with the same name in the location we specified above and delete it.

Once you’ve performed each of these steps, restart the computer, go back to Chrome, and open its extensions manager. If Ksearchy is no longer listed there, you’ve likely succeeded in dealing with the hijacker.
If the rogue extension is still bothering you or some of its settings changes have been reintroduced to the browser, then go to C: > Users > *YOUR ADMIN USER FOLDER* > AppData > Local and delete the Google folder located there. Note that this will delete all your personal data from the browser, including bookmarks and passwords.

After you do this, there should be nothing from the hijacker left in the browser. But if somehow the rogue extension causing problems and refuses to go away, we recommend using the anti-malware tool you’ll find linked on this page. It will allow you to clean your PC and browser from any remaining malware that you couldn’t manually remove.
How Did Ksearchy Get on Your PC?
Although Ksearchy is in the Chrome Web Store at the time of writing this post, most users don’t get it from there. Instead, this hijacker’s main distribution vector is file bundles. The rogue software gets added to program installers of questionable quality and distributed alongside them since most users forget to check the custom installation settings and disable any “bonus” elements.
Numerous reports from people who have Ksearchy in their Chrome browsers state that the hijacker came after they downloaded torrents or installed pirated software. Pirate sites like Steamunlocked are notorious for distributing downloads that contain hijackers and other forms of malware.
But know that it’s also possible to land something like Ksearchy after installing legitimate programs. For instance, game emulators like MuMu and Cemu as well as various Roblox and Minecraft mods can also carry hijackers. For this reason, it’s critical that you always pay attention to the settings and small text in the installers of all newly downloaded programs.
Ksearchy on the Chrome Web Store
Oddly enough, Ksearchy is still available on the Google Chrome Web Store, which got us curious to read more about what its devs have to say about it. Unsurprisingly, what little information is in the extension’s description only further proves we are looking at a blatant scam designed with the sole goal of promoting some sketchy sites.
In fact, there’s a linked Terms and Conditions page. Interestingly, it talks about the terms of service for “Magnasearch” and makes no mention of Ksearchy, but it’s pretty obvious it’s about the same thing, just with different names.
In any case, the Terms and Conditions page all but confirms the Ksearchy owners exert zero control when it comes to the quality and even the legality of the third-party content their extension redirects you to (via the boyu.com.tr search engine).

What this tells us is Ksearchy’s boyu.com.tr search engine can redirect you to a malware-infested page or a phishing site that steals your credit card details and the people behind it can’t be held responsible. We believe this is more than enough of a reason to do everything you can to get rid of this rogue extension and anything related to it currently on your PC.
But wait, that’s not all – there’s also an “About us” page which we won’t even comment on as it speaks for itself:

And then there’s also a Privacy Policy page that talks about an entirely different extension/search engine called “Telix Search”. Again, it’s probably just a reskin of the same browser hijacker. The Policy Privacy tells you that the app doesn’t collect data, but just by looking at the page itself, it doesn’t fill us with much confidence regarding the truthfulness of any statements made there.

So, overall, it’s more than obvious that Ksearchy is not something you should trust. It’s pretty clear that this is a blatant scam extension that will, at best, interrupt your browsing and, at worst, expose you to online scams and malware. You have every reason to be suspicious of this software and we strongly recommend completing the guide provided above in case you haven’t done that already.
Leave a Reply