Many Windows 10 users and some Windows 7 users complain about high CPU usage triggered by the MsMpEng process. Many may even think that this is the process of some virus program or a Trojan Horse that is currently consuming big amounts of CPU in order to carry out its nefarious tasks. However, this is definitely not the case with this process. The full name of the MsMpEng process is Antimalware Service Executable and this is actually the process for the Windows Defender program. The reason why it may oftentimes consume high amounts of CPU time is due to the scans that it carries out every now and then. There is a real-time scanning feature and a scheduled full system scan, both of which are likely to significantly increase the use of system resources. And while it is all done to boost the protection of your computer, it may sometimes be a bit irritating, especially if your machine starts to experience slow-downs and begins to lag due to the high resource usage. Additionally, the full scan of the system doesn’t need to be scheduled for every day – once a week or even once a month should be enough to keep your PC safe. Below, we will give you a comprehensible guide that will allow you to quickly fix this annoying inconvenience and optimize Windows Defender so that it doesn’t interfere with your day-to-day activities on your computer while still keeping the machine safe and protected.
Antimalware Service Executable High CPU Usage Fix Guide
Method 1: Optimizing the Windows Defender Schedule
- Open the Start Menu, type Administrative Tools in the search box and click on the first result.
- Find and open the Task Scheduler application.
- In the left panel, navigate the following folder path: Library > Microsoft > Windows > Windows Defender (the path may differ for some of you but should still be easy to find).
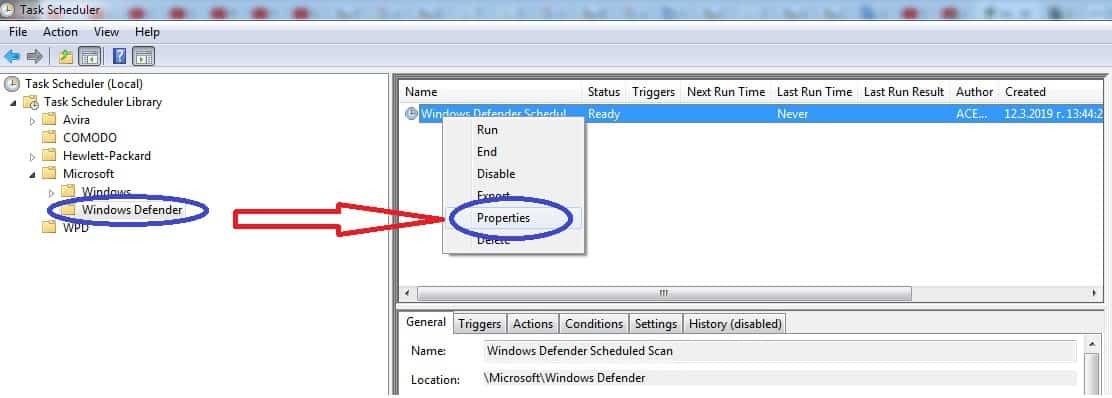
- Once you click on the Windows Defender folder, you should see a task named Windows Defender Scheduled Scan – left-click and then right-click on it and select Properties.
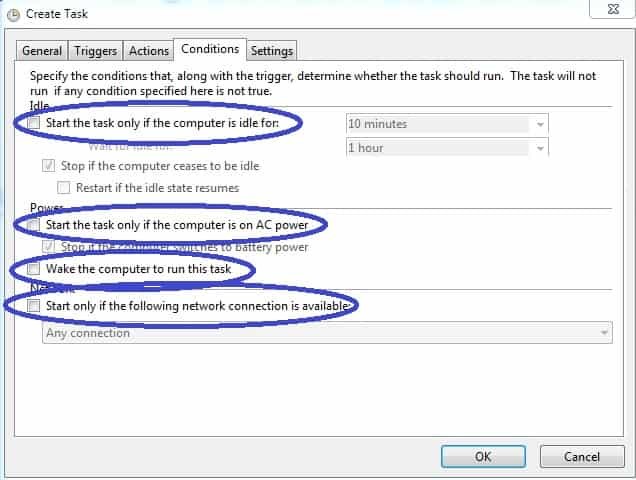
- In the Properties window, click on the tab labeled Conditions and then uncheck the tick-boxes below Idle, Power and below Network. Click OK and go back to the Properties window of the same task.
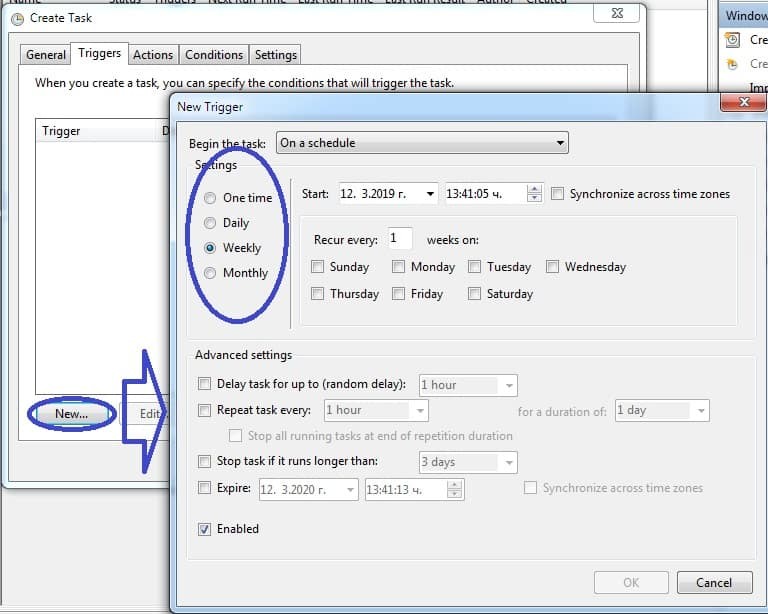
- Now go to the tab labeled Triggers and make a new trigger. Set the settings for the scheduled full scan in a way that suits you. If you don’t want a full scan to be run every day, schedule the scan to run once a week or even once a month. Then select the specific day in the week/month on which the scan would be conducted and select OK to confirm your choice and introduce the changes.
- Repeat steps 4 to 6 for any other Windows Defender tasks that may be there and then restart your computer so that you can be sure that all the changes you’ve made have been applied.
Method 2: Disabling the Windows Defender app from the Local Group Policy Editor
Important!: Only do this if you already have another security tool at your disposal that could keep your computer protected from potential threat. In case you do not, make sure that you first install such a tool and only then proceed with this method. (If you need suggestions about a reliable security program, you can try the tested and reliable security program from this page that can make sure that malware doesn’t enter your computer.)
Note: This method will only work on the Enterprise and Pro versions for Windows 10 as well as on the equivalents of these versions on older Windows systems. If you are using a less advanced version of Windows, proceed to the next method.
- On your key, press the Winkey and the R key, type gpedit.msc in the search box that will open and then hit the Enter key.
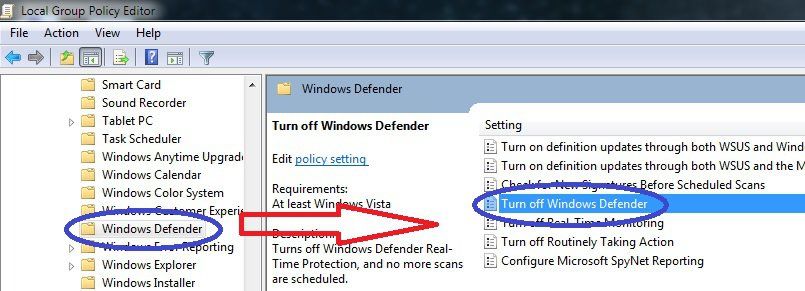
- In the Local Group Policy Editor panel, navigate the following path: Computer Configuration – Administrative Templates – Windows Components and, finally, Windows Defender.
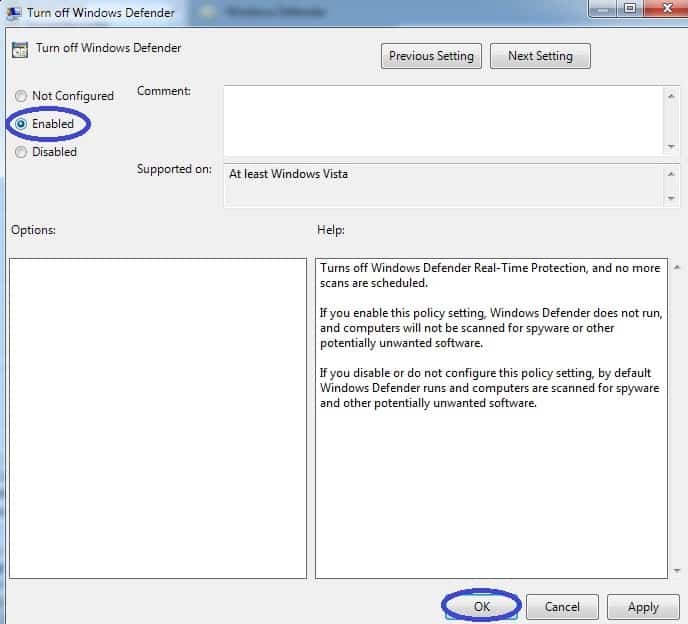
- Once you select the Windows Defender folder from the left panel, you will see some settings in the middle panel. Select the one named Turn off Windows Defender and open it.
- Now, select the Enable option and then click on OK.
- Restart the computer just to be sure that the changes get applied.
Method 3: Disabling the Windows Defender app from the Registry Editor
- Winkey+R again and now type regedit in the Run search box. Hit Enter to open the Registry Editor.
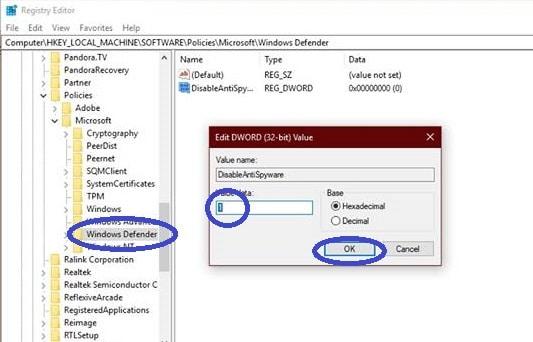
- Navigate to this folder in the left panel: HKEY_LOCAL_MACHINE\SOFTWARE\Policies\Microsoft\Windows Defender.
- Once you click on the Windows Defender folder, look at the central panel and see if there is an entry labeled DisableAntiSpyware. Double-click on it if you see it.
- Change the Value Data to a value of 1 and select OK.
Method 4: Using the Windows Defender Exclusions list
- Open the Task Manager (Ctrl+Shift+Esc) and look for the Antimalware Service Executable process in the Processes tab.
- Once you find the process, select it and then right-click on it. Then, choose the Open File Location entry.
- In the folder that opens, select the MsMpEng file and then copy its address from the address bar at the top of the folder.
- Press Winkey + I and in the window that opens select Update and Security and then click on Windows Defender from the left panel.
- Scroll down and until you find the Add an exclusion option and then paste the address that you copied in step 3. Click on OK to finish the process and reboot your computer so that the changes can take place.
Method 5: Check your PC for malware
Having malware in your computer that is the cause behind the issue you are facing is always a possibility. Therefore, it is always a good idea to scan your machine with a reliable high quality protection tool like the one included in the current page. If you have an antivirus program of your own, then be sure to issue a full system scan with it, especially if the methods given in this article did not solve the issue for you. Also, remember that you may always ask us questions related to the topic of this article inside the comments section down this page.
Leave a Reply