Last month, the latest Windows 10 update was released and it is currently available to all Windows 10 users who wish to install it. However, invariably, there are certain issues with this update both after it is installed and during its installation process. We already covered the most common problems users face after they install the May 2020 update of Windows 10 (also referred to as Windows 10 20H1/2004) in two previous articles that you can read herе and here.
Today, however, we will tell you about common problems users encounter when they try to install the update. The causes for these problems could vary greatly and so the approach one would need to take in order to deal with them will be different depending on the situation. We will try to cover all the main issues people encounter and we will give you some tips on how to overcome them and successfully install the update so let’s dive right in!
Try the built-in Windows troubleshooting tool
If you are facing any issues during the installation of the Windows 10 20H1 update, then we suggest that the first thing you try to troubleshoot the problem is, well, to try the built-in troubleshooting tool that Windows has. To access it, open your Start Menu, type settings in the search bar, and open the first search result. In the Settings window, click on the Update & Security icon and then select Troubleshoot. Next, click on the Windows Update option and then select Run the troubleshooter.
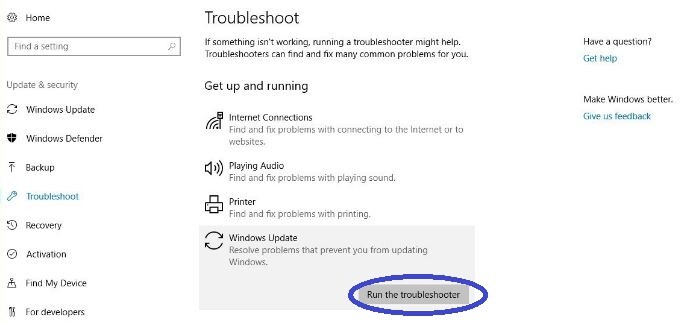
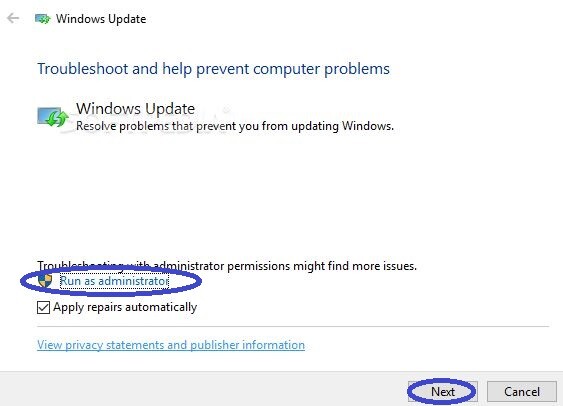
This will take you through a number of different steps that will hopefully allow you to find the root of the problem and deal with it (make sure that you select the Run as Administrator option to improve the effectiveness of the troubleshooter). Follow the prompts and the instructions from the Troubleshooter and, if the tool finds a solution for the problem, select the Apply this fix option.
Be warned, however, there are lots of problems that cannot simply be fixed using the Troubleshooter tool. If this is the case with your update installation problem, please, continue reading and try some of the other fixes we’ve prepared for you.
Check if you have enough HDD space
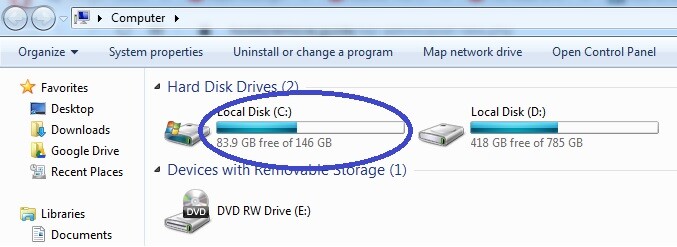
It is generally advisable to always have some free storage space on your computer that you keep unoccupied at all times. If there are barely a couple of gigabytes of free HDD/SSD space on your computer, this could cause all kinds of problems. One such problem could indeed be a failed Windows 10 update installation. The Windows 10 20H1 version requires 32GB of free HDD/SSD storage space – if you don’t have that much on your computer, then it is not surprising that you may experience problems when trying to install the new update. Check how much free storage space you have by opening This Computer/PC and taking a look at your C: drive (or the drive where Windows is installed on your computer). Look at the bar that represents how much free space you have on that drive – if there isn’t at least 35-40 GB of free storage, then you’d better free up some space on that drive and try to install the update again.
Reset the updating process
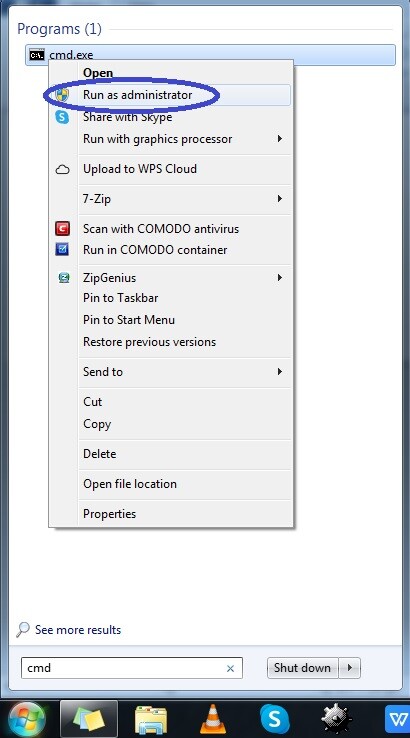
Sometimes, resetting the updating process may help clear any bugs that may be standing in the way of a successful installation of the update. Here is how you can do that using Command Prompt.
- In the search bar of the Start Menu, type cmd and right-click on the Command Prompt icon.
- Instead of opening it normally, click on Run as Administrator to open the app with Admin privileges.
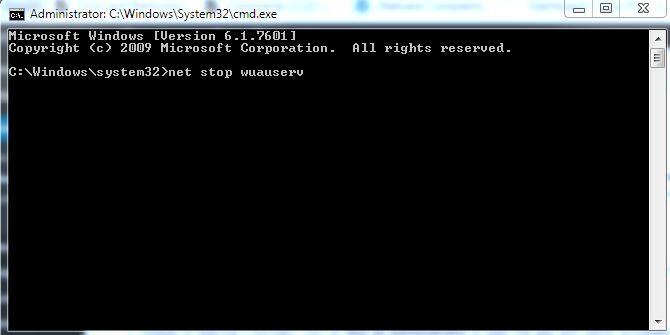
- In the Command Prompt window, type the following commands, pressing the Enter key after each one in order to execute them:
-
- net stop wuauserv
- net stop bits
- net stop cryptsvc
- Ren %systemroot%\SoftwareDistribution\SoftwareDistribution.bak
- Ren %systemroot%\system32\catroot2 catroot2.bak
- net start wuauserv
- net start bits
- net start cryptsvc
- Restart the computer and try to install the Windows 10 20H1 update once more.
Fix stuck Update Assistant
If, while your Windows 10 is being updated, the Update Assistant gets stuck and stops responding, here is an easy way to fix this and install the update normally:
- Firstly, restart the computer and try to run the Update Assistant once more.
- If the problem persists and you cannot update Windows, unplug the ethernet cable from your PC if the computer is physically connected to a network.
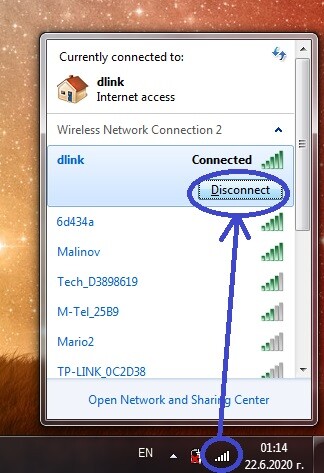
- If you are using Wi-Fi, either temporarily turn off your router or, if that’s not an option, disconnect your computer from the wireless network you are using by clicking on the network icon located in the right side of the Taskbar, selecting the network you are connected to, and then clicking on Disconnect.
- Wait for about a minute and then reestablish the connection to the Internet by plugging back in the ethernet cable, tuning on your router, or connecting to the Wi-Fi network you disconnected from in the previous step.
- Now, try running the Update Assistant again.
Temporarily disable your antivirus
Though rarely, sometimes a computer’ antivirus may interfere with the successful completion of a software update, including an update of the OS. If none of the previous fixing methods have helped you resolve your Windows 10 update problem, it may be worth the try to temporarily disable or even uninstall your antivirus software.
Each antivirus program is different so the way to disable yours could be different from the way I would disable mine. However, it shouldn’t be that difficult to do it. Usually, you can disable an antivirus from the program’s icon located on the left side of your Taskbar. Here is how I can disable mine:
- First, I right-click on the hidden icons’ menu and then I right-click again on the icon for my antivirus.
- I select the drop-down menu that controls the main functions of the program.
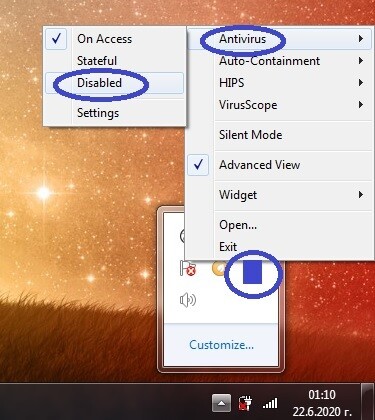
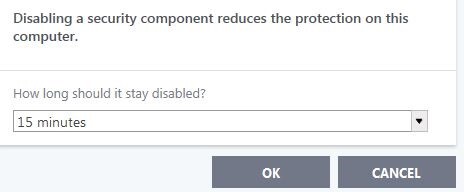
- I click on the Disable option and the antivirus asks me for how long I’d like to keep it disabled and so I select an option that suits my needs.
- After you disable your antivirus (you can also try uninstalling it), try running the update again. Regardless of whether the update installation is successful or not, do not forget to turn back on/reinstall your antivirus so that your PC is not left unprotected!
Final notes
These were some of the most common problems/corresponding solutions related to the installation of the Windows 10 20H1 update. If none of our fixing suggestions have helped you, it is possible that there may be a more serious issue with your computer that requires further investigation and troubleshooting.
If you have any questions or suggestions for other possible fixes, we would be glad to read your thoughts within the comments section down below!
Leave a Comment