What is Time Machine on Mac?
The Time Machine on Mac is a built-in tool that you to back up your entire system, personal data, and all apps installed on the machine on a particular date and time. With a Time Machine backup, you can restore individual files that got deleted or corrupted, or you can recover everything that was on the computer at the time the backup was made.
Creating such a backup is strongly recommended if you’re about to manually troubleshoot something on your Mac, such as attempting to remove a malware from it. In this article, we’ll show you how to set up a Time Machine backup, how to restore your entire system, and also how to restore individual files.

Setting up a Time Machine backup
To set up a Time Machine backup on your Mac, you’ll need an external drive or a network-attached storage device with enough space to use as your backup location. We recommend an external SSD that is at least as big as your Mac’s internal drive so that you can back up everything.
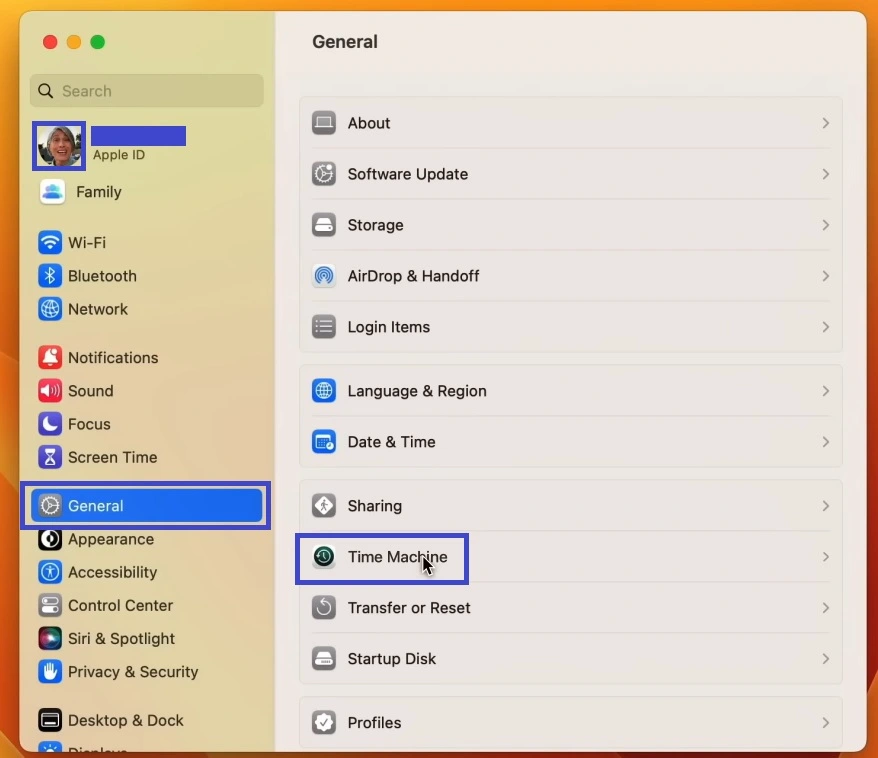
- Start by connecting the external drive to your Mac and then go to the Apple Menu, System Settings, General, and open Time Machine.
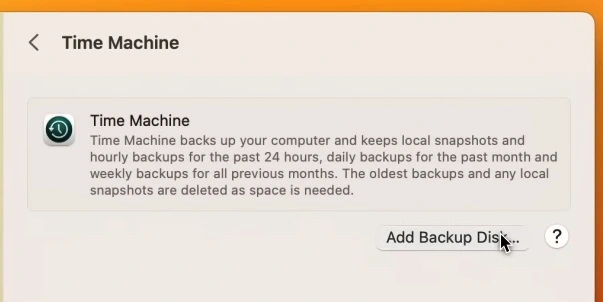
- There, click on Add Backup Disk, enter your password, and click on Modify Settings.
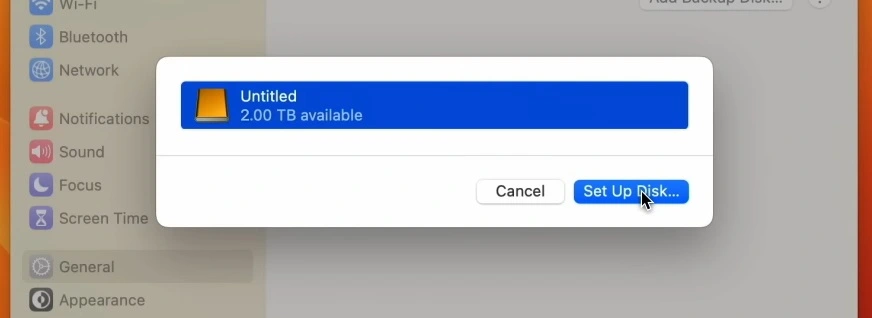
- Next, select your external drive and then click on Set up Disk. If asked to erase the drive, click on Erase.
- After that, check the option to Show the Time Machine in the Menu Bar, then select its icon from the top-right, and click on Back up Now.
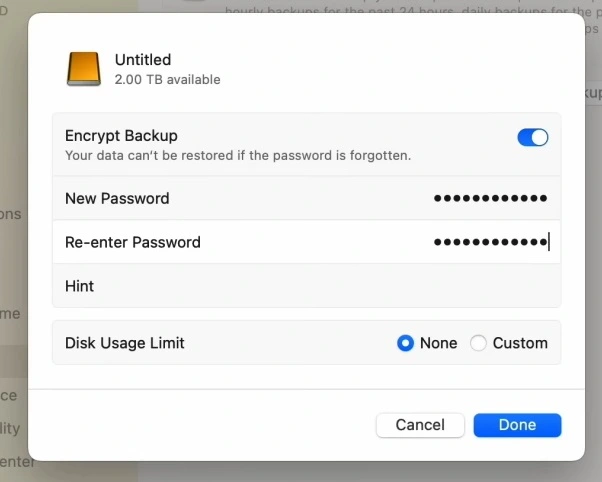
- Next, you must choose a password for the backup’s encryption, or alternatively you can toggle off this option and leave the backup unencrypted. Just make sure to remember the password you choose because you’ll need it later.
- After that, click Done and your first backup will begin shortly. Depending on how much data you have on your Mac, this may take a while to complete.
- If you aren’t worried about losing some of your data, or you have other backups of it, you can make the process quicker and save some backup space by clicking on Options and adding folders you want to exclude from the Time Machine backup.
Once the backup is ready, you can use it to restore your system settings and everything else you’ve backed up from that date and time.
How to use a Time Machine Backup
There are several ways you can use a Time Machine backup and for all of them you need to have the external backup drive connected to your Mac.
Method 1: Restoring individual files
The first and easiest one is when you want to restore a particular file or files that are no longer on your Mac, or that have become corrupted.
- To do that, go to the Finder folder where those files used to be, then press Command plus Space, type Time Machine, and hit Enter.
- This will allow you to scroll through backed up versions of that folder, so simply find the version in which the file or files you are looking for still exist in their intact states, and click Restore.

Method 2: Restoring the entire system
The second method is to use the Time Machine Backup from Recovery Mode and this will allow you to recover your entire system and backed up data from a particular date. We recommend this method if you have been troubleshooting or trying to remove a malware from your Mac and have accidentally deleted or changed something important in your system that has caused additional problems.
- The first thing to do here, after you connect the backup drive, is to turn off your Mac. Entering Recovery Mode is a bit different depending on whether you have an Intel or an Apple Silicon Mac.
- For Intel Macs, after the machine shuts down, press the power button, and then immediately press and hold the Command and R keys until a loading bar with the Apple logo appears on your screen.
- For Apple Silicon machines, after you shut down the Mac, press and hold the power button until you see an Options icon appear with your drive next to it.
- Next, select your Mac user account, then click next, and enter your password to proceed.
- On the following screen, select the Restore from Time Machine option, and click Continue.
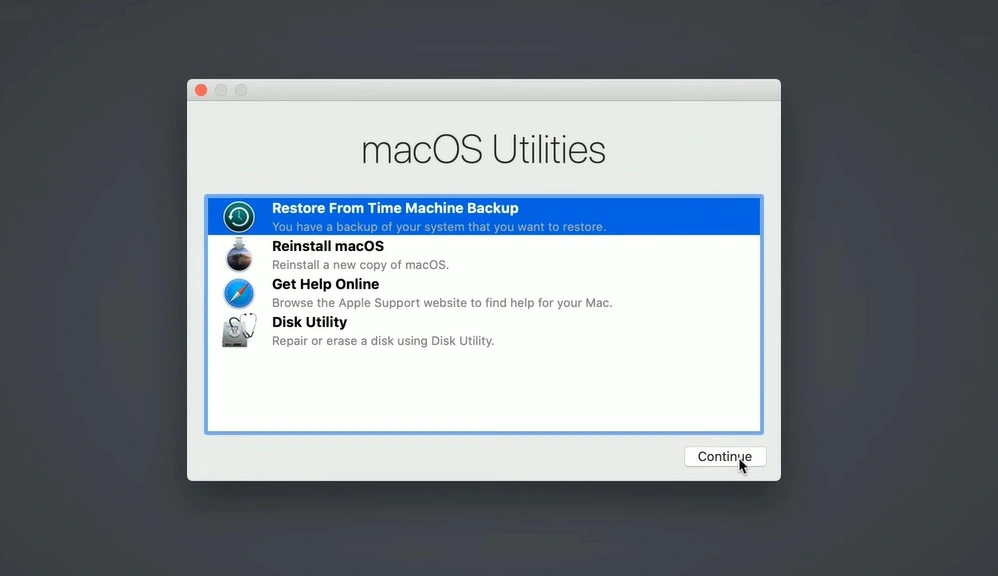
- Read the description of this feature to get more familiar with it and click on Continue again.
- Next, select your backup and if the drive is encrypted, you’ll need to click on Unlock and enter the password for that drive. If it’s not encrypted, simply click on Continue.
- You should now see the name of your Mac appear under the drive, so select it, and click Continue again.
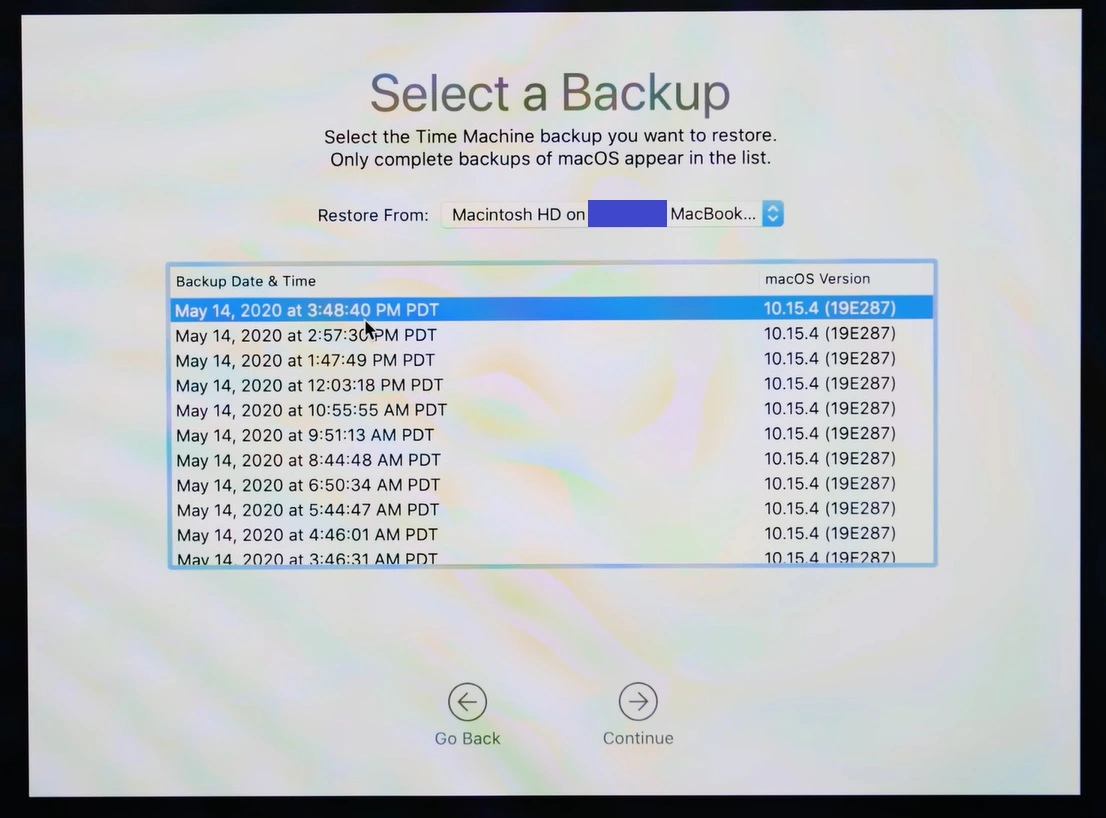
- Next, you’ll see all the different backup dates stored on the drive, so select the one from which you want to recover, and select Continue.
- When asked to choose a destination, select your Mac’s drive, and then click Restore.
- Finally, click Erase Disk in the prompt that appears to start restoration process.
- Note that this action will erase everything that’s currently stored on your Mac and will restore the machine how it was on the date of the backup you’ve selected.
- This process can take quite a while, especially if there’s a lot of data stored in the backup. To avoid running out of battery during this process, we recommend plugging your Mac to a power outlet.
- If your goal is to reverse something you’ve done that has caused problems in the system, you need to choose a backup that predates the actions you wish to reverse.

Method 3: Restoring data with Migration Assistant
The third method that you can use to restore data from a Time Machine backup is with the Migration Assistant. This is really only recommended if you are transferring data from an old Mac or a Windows PC to a new Mac.
- Start by making sure that your external backup drive is connected to your Mac, then press Command plus Space, type Migration Assistant, and hit Enter.
- Then click on Continue, enter your password, and click OK. This will close everything else on your Mac, leaving only the Migration Assistant open.
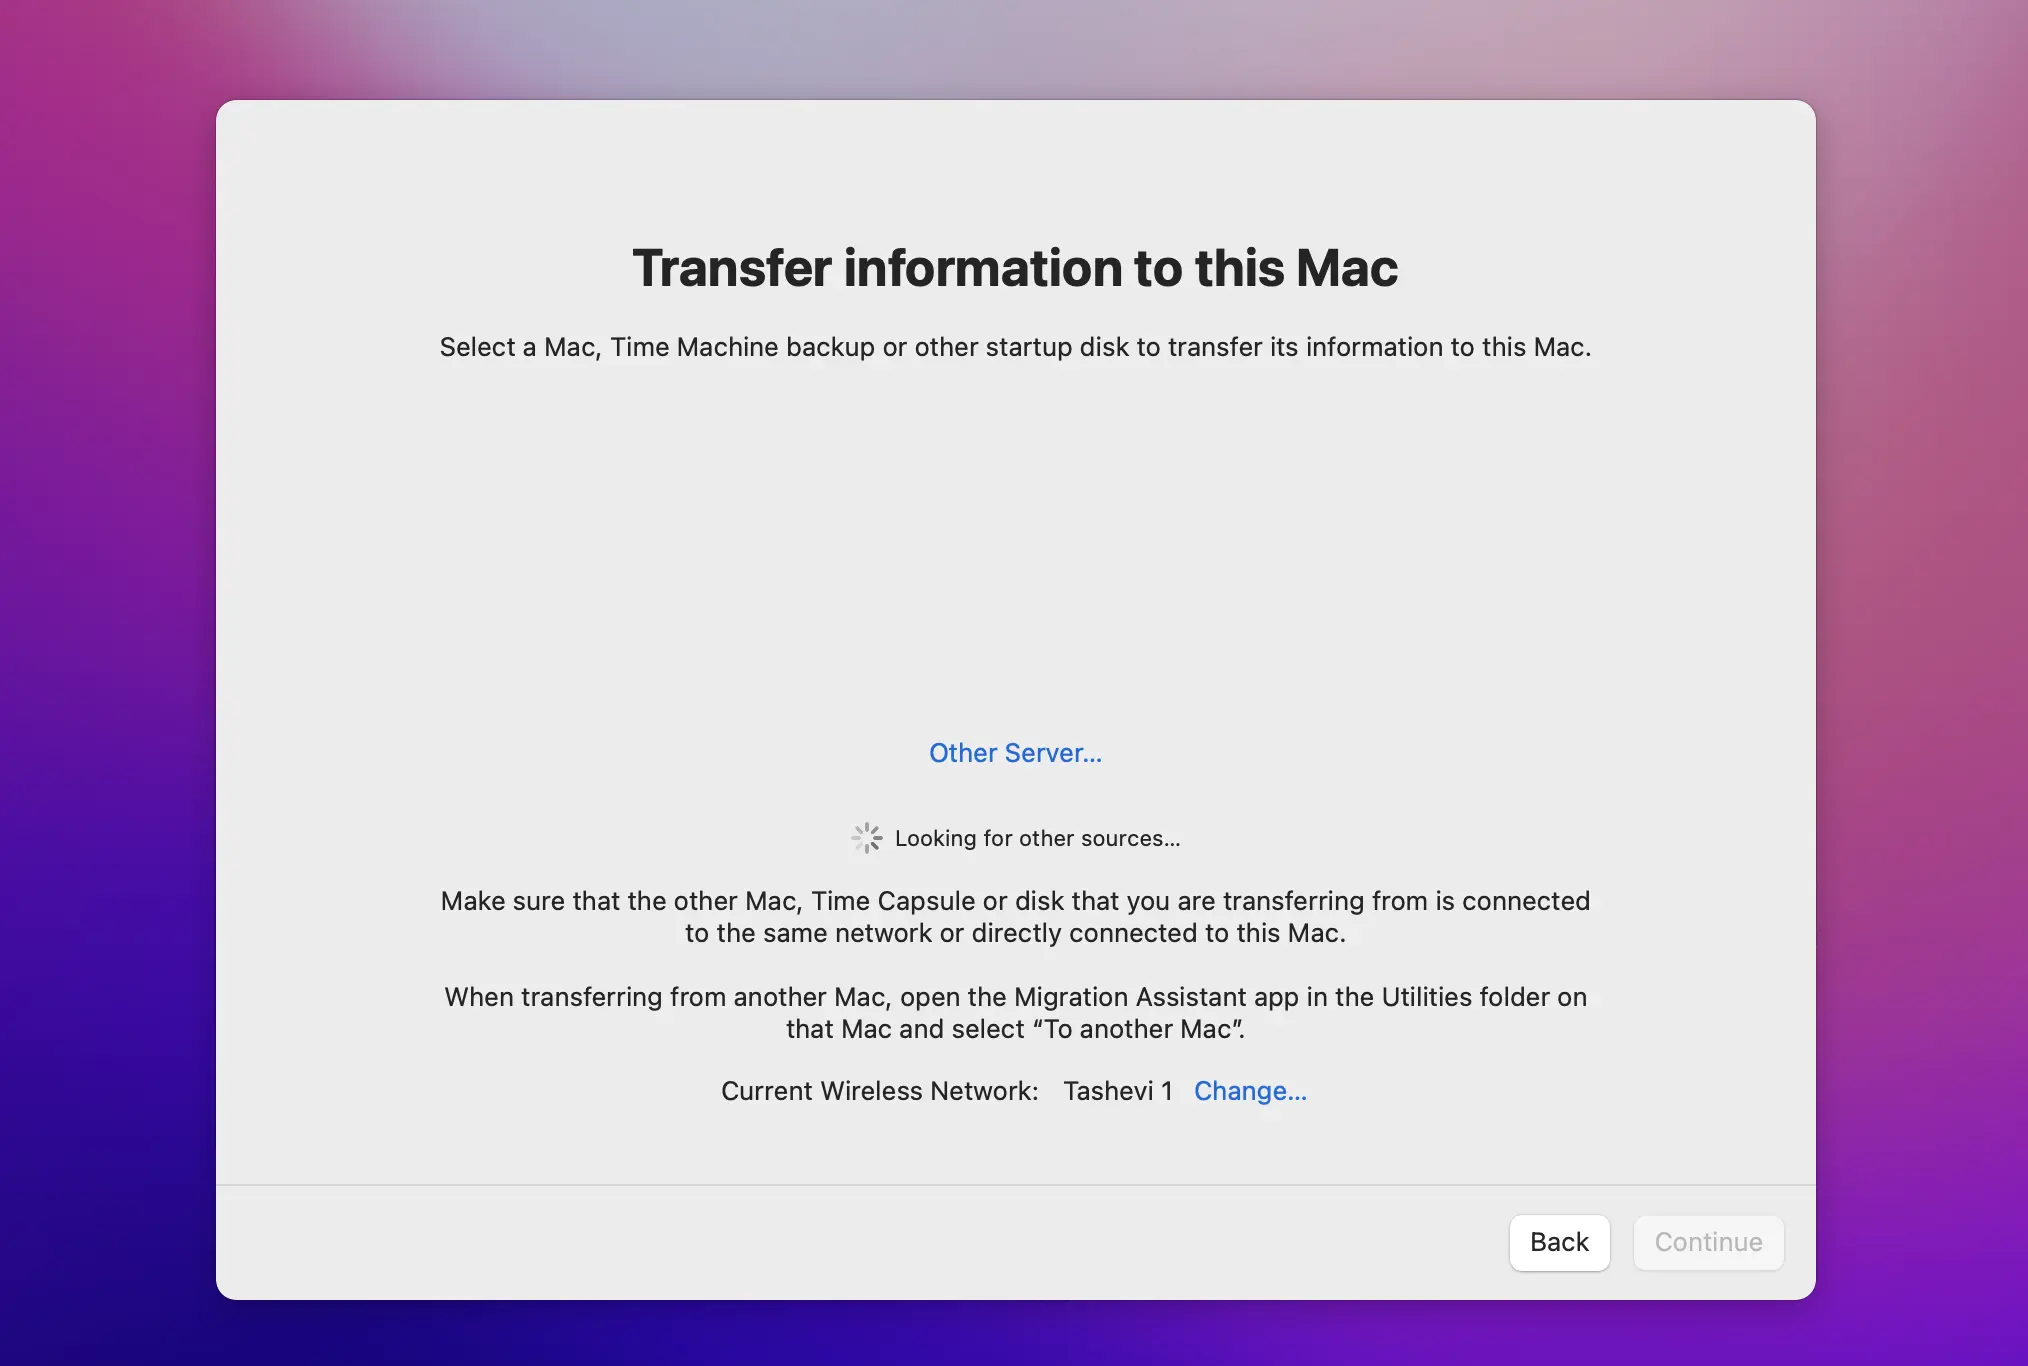
- Next, select the first transfer option – the one that has Time Machine backup in it – and click Continue.

- Wait for the Assistant to detect your backup drive, then select it, and click Continue again.
- You should now see the different backup dates saved on the drive, so select the one you want to use, and click Continue once more.
- If you get asked to update to the latest version of macOS, you can choose to update now or skip this step – it doesn’t really matter which one you opt for.
- Next, you’ll get to choose which parts of the backup you want to transfer, so if you think you don’t need something, deselect it, press Continue.
- After that, you will have the option to set a password for any user profiles you may be importing, so do that if you want, and click Continue one last time.
- Finally, click Agree and then click it again in the prompt that appears and the process will begin.
- This can take a while depending on how much data you are transferring, so be patient, and, once again, make sure your Mac is connected to a power source.
Leave a Reply