Windows 10 Taskbar Not Working
As cool as the new Windows 10 is, it does not come without it’s downsides. Ever since it release, users have been reporting different (mostly minor) issues with different aspects of the new OS. There’s the problem with Cortana’s search box and there’s the issue with Winkey + X shortcuts not working – topics that we’ve already covered on our site. These are just some of the reported inconveniences, that you may have to deal with if you are using the Windows 10 OS. In this particular article, we will cover the topic of Windows 10 taskbar and menu not working.
Generally this is not a big deal, but can turn out quite frustrating if the issue persists. There are different ways to fix it, but none of them is guaranteed to remove the problem, since there are several different reasons that may have caused in the first place. Each of them may require a different approach. In most cases, the problem is caused due to corruption of Windows files. This may be after downloading of updates, that contain bugs, or might be a bug in the current version of Windows, that is causing it. Possibilities may vary.
A possible fix
Fortunately the method of fixing it, that we will guide you through, should work in most cases and shouldn’t prove to be difficult to execute. As we already mentioned, the chances are that one or more Windows files in your system got corrupt somehow. Note that there’s no need for a virus or other unwanted software to be in your system for the corruption to happen, so if there are no other symptoms, there’s no need to worry. Interrupted updates, problems with Microsoft servers and more can be behind this. In order to fix it, you will have to repair the corrupt files. Here’s how it’s done:
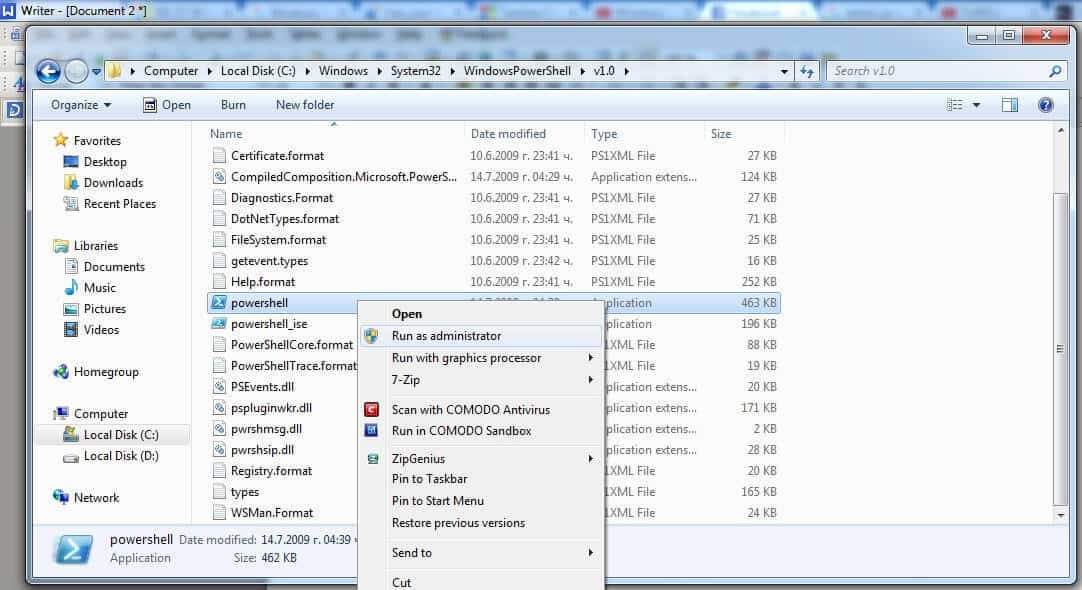
Firstly, you’ll need to open PowerShell with Administrator rights. Various ways to do that, but since we assume that neither your Windows menu search box nor your taskbar are working, we will need to manually access the Powershell folder in order to open it with Admin rights. It should be located in
C -> Windows -> System 32 -> WindowsPowerShell -> v1.0 -> powershell.
Right-click on the icon and chose Run as Administrator.
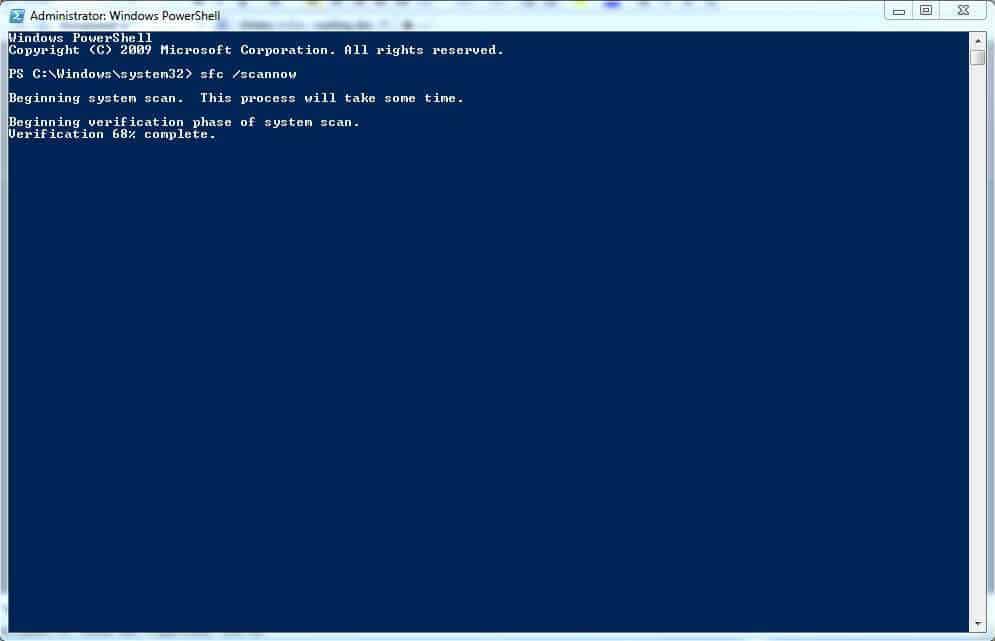
After you’ve opened the power shell type in command
sfc /scannow
and hit Enter. This may take some time so be patient.
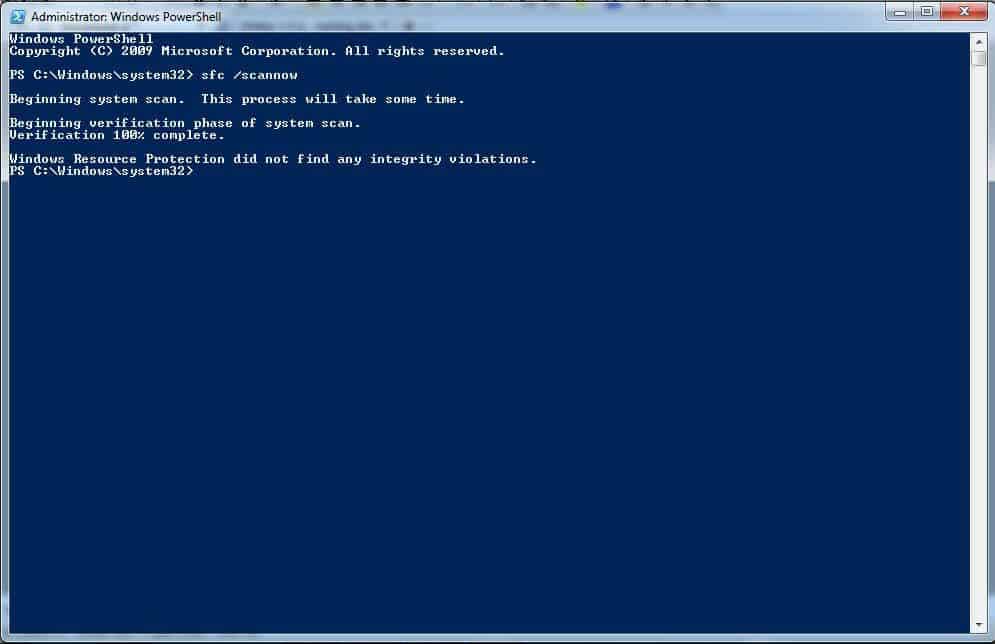
- Once the scanning is done you will be notified what the results are. One out of three possible messages will be displayed in the text field: If you don’t have any corrupted files, you will see Windows did not find any integrity violations. This would mean that the problem is not caused by corrupt system files and the problem can’t be fixed by this guide.
- If corrupt files were found, but Windows managed to fix them automatically, you will receive the message Windows Resource Protection found corrupt files and repaired them. If that’s the case, you will probably not need to take any further action, because you problem should have been fixed by now.
- The third possible message you may receive is Windows Resource Protection found corrupt files but was unable to fix some (or all) of them. If you see this message, it means that you will have to manually repair the corrupted files. Here’s how to do that:
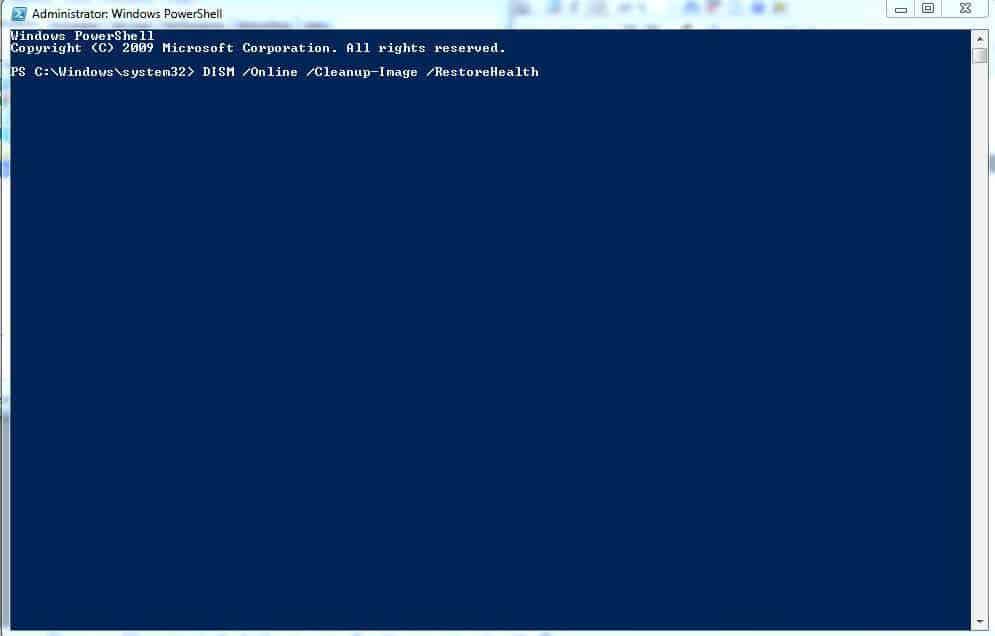
Once again use the PowerShell window and type the command
DISM /Online /Cleanup-Image /RestoreHealth
This will downloads files, that will replace the corrupt ones. Before doing this, make sure that you have internet connection, else nothing will happen. Again, this is going to take a while, so be patient.
If all goes well, following these steps will likely solve your problem caused by corrupted windows files.
Did we help? Do you have any questions or suggestions? Feel free to let us know in the comment section below this article.
Leave a Reply