Safe Finder
Safe Finder is an aggressive Mac browser hijacker aimed at altering browser settings in order to promote questionable websites and fake search engines. Experts report that Safe Finder causes sudden page redirects in the browser and collects user data without permission.

Though Safe Finder isn’t categorized as a virus and is usually not seen as a particularly serious threat to the system, its presence there is definitely not desirable and could lead to numerous problems if not removed on time.
The main goal of Safe Finder (and other apps like it) is to use the users’ browsers as platforms for online promotion and aggressive advertising of different sites, products, or services. As soon as it gets in the browser, this hijacker will replace the default homepage to search.safefinder.com and make it so that your online searches are handled by this fake search engine.
The reason we say the Safe Finder search engine is fake is that every time you try to search for something using it, you will be redirected to a Bing or a Yahoo page with results for your search. The fact that you get redirected to Bing/Yahoo isn’t the problem – after all, those are two of the most popular search engines out there, and they are perfectly safe to use. The issue is that your browser would probably get rerouted through several other sites before it lands on the Bing/Yahoo page. The redirects through those other sites usually take less than a second, so many users don’t even register them. The idea behind those redirects is to artificially boost the view count of the sites that the browser gets rerouted through. However, the sites that get promoted in this way are usually ones with low reputation and questionable content. Even though your browser visits each of them for a split second, this could be enough for your privacy and security to become threatened. Many of those sites collect browsing data without permission and may gain permissions in your browser without your informed approval. For that reason, you should try to avoid using the Safe Finder search engine if possible and also do what you can to delete the hijacker from your browser(s) so that you’d be able to restore your default homepage and search engine.
Another problem with this hijacker is that it may automatically install additional unwanted components in the browser, including rogue add-ons that may negatively impact the browser’s performance as well as compromise your online security and privacy.
Hopefully, once you get rid of Safe Finder, you should be able to eliminate any changes that it has made in the browser.
Safe Finder cannot be removed from Mac
If Safe Finder cannot be removed from Mac, that’s because it’s using the enterprise policy of the infected browser that prevents users from deleting certain apps. Even if Safe Finder cannot be removed at the moment, deleting its files should allow you to uninstall it.

Many users are having problems with removing this hijacker from their browser (any type of browser and not only Safari). One of the main reasons why it may be difficult to eliminate Safe Finder is the built-in enterprise policy that most modern browsers have. The purpose of this feature is to prevent users from making certain changes to the browser settings of their work computers. In such cases, only the network Administrator should have the privilege to make those changes. Safe Finder is able to abuse this feature and prohibit its victims from revoking the changes made by the hijacker in the browser. In such cases, it doesn’t matter if you are the system Admin, you still wouldn’t be able to revoke the browser changes made by Safe Finder. When you attempt to delete the hijacker from the infected browser, you are likely to be shown a message that reads “settings managed by your organization” or something similar. This can definitely be quite frustrating, especially if you see it on your personal computer. The good news is that there are ways to make this message disappear and to successfully delete the hijacker. We will tell you about how this can be done in our Safe Finder removal guide that is available down below.
One thing that may potentially make it a bit more difficult to eliminate this hijacker is not knowing what program introduced it to your Mac. Usually, if a Mac user gets any type of malware or unwanted software, it is because some rogue app downloaded from an unreliable site/app store has been installed on the computer. Many such Mac apps carry within themselves hidden hijacker components. This is why, if you wish to prevent the installation of other hijackers in the future, it is strongly recommended that you don’t download any apps on your Mac that are not from the official Mac App Store. If you absolutely have to download something from a third-party source, at least make sure that the third-party source is reliable and the app you are about to download is safe. One way to do this is by searching for user opinions regarding the app and its developer.

Another possible cause of the hijacker infection in the browser is the user clicking on “Allow” when a misleading browser pop-up shows up on their screen. Such pop-ups are usually displayed by unreliable sites in an attempt to gain permission to show additional pop-ups in the browser and to make changes in its settings. Depending on what has caused the hijacker infection in your Mac, the way to get rid of Safe Finder may be different. In our guide, we’ve tried to cover everything and show you methods that can help you get rid of the hijacker.
SUMMARY:
| Name | Safe Finder |
| Type | Browser Hijacker |
| Detection Tool |
How to remove Safe Finder on Mac
To remove Safe Finder from your Mac, you will have to clean your browsers, find and quit its process, and delete the hijacker app and files.
- Check each of your browsers for unfamiliar/unwanted add-ons and delete anything that you think shouldn’t be in them.
- Use the Activity Monitor utility to look for rogue processes and quit anything unwanted you may find.
- Check the Applications folder for apps that may be responsible for infecting you with the hijacker and uninstall any such apps.
- Check the next four folders for malware files and delete what you find: /Library/LaunchAgents, /Library/LaunchDaemons, ~/Library/Application Support, and ~/Library/LaunchAgents.
These four steps provide an outline for the entire removal process of the hijacker. However, we understand that you may need a bit more detailed explanation with regard to one or more of the steps. For that reason, below you can find a detailed version of the guide that will show you exactly how each one of the steps needs to be performed.
Remove Safe Finder from Safari
To remove Safe Finder from Safari, you must make sure that any unwanted/rogue browser extensions are deleted, and then you must revoke any browser settings changes made by the hijacker.
- Launch the browser, go to the menu labeled Safari from the top, and select the Preferences button
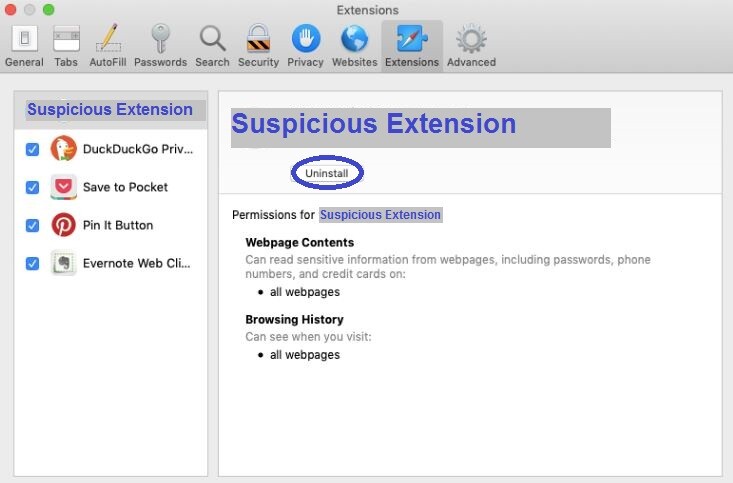
- Go to Extensions and look for anything that may be unwanted or that hasn’t been added by you to the browser.
- If you spot any undesirable items in the Extensions section, remove them from the browser.
- Repeat steps 1 to 3 with the other browsers on your computer.
If after you removed the unwanted extension/extensions from the browser you are still seeing symptoms related to Safe Finder (for instance, if the homepage is still set to search.safefinder.com), then you should also complete the following steps to ensure the full deletion of the hijacker and its browser changes.
- Open the Privacy tab from the Preferences bar and click on Remove All Website Data. From the dialogue window that shows up, select Remove Now to launch the action and wait for the data deletion to finish.
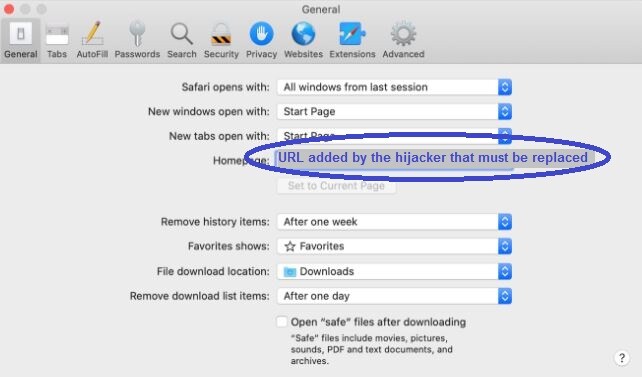
- Also go to the General tab and there delete what’s currently in the homepage address field (the address there would likely be search.safefinder.com) and replace it with the address of a legitimate site.
- Lastly, open the menu labeled History, select the Clear History option, set the command to All History, and click Clear History again to initiate the action.
Remove Safe Finder from Chrome
To remove Safe Finder from Chrome, it’s important to clean the browser from any rogue add-ons installed in it and then restore any settings that have been altered by the hijacker.
- Type ://settings in the Google Chrome URL bar and hit Enter.
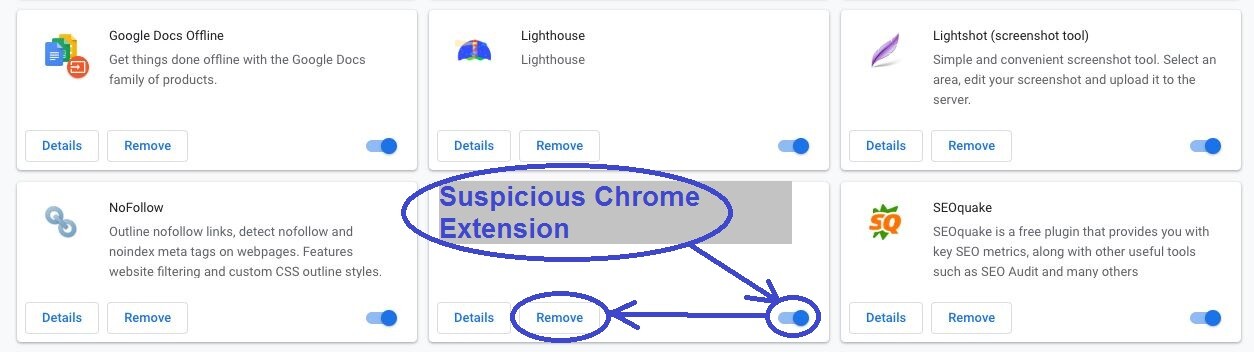
- Select Extensions and look for any items that may be linked to Safe Finder.
- If you see such extensions, disable them and then remove them from the browser.
- Next, go to the Settings page again and select the Appearance section.
- See what the URL for the new tab page address is – if it is search.safefinder.com or any other unwanted address, replace it with the address of a reputable website that you’d prefer to be the browser’s new tab page.
- Now go to the Search Engine settings and then click on Manage Search Engines. On that page, disable any unfamiliar search engines that you see by clicking the three-dot icon next to them and then selecting the Remove from list option.
- Lastly, from the Privacy and Security settings, click on Clear browsing data, put ticks in all boxes but the Passwords one, and then select Clear Data. Wait for the process to complete without quitting the browser before the completion.
How to get rid of Safe Finder
To get rid of Safe Finder, you should disable its process (or processes) from the Activity Monitor utility.
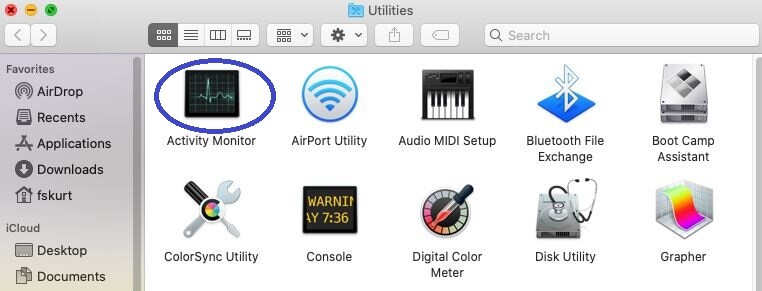
- Click on the Finder button from the top and then go to Applications.
- In the Applications folder, open Utilities and then launch the Activity Monitor tool.
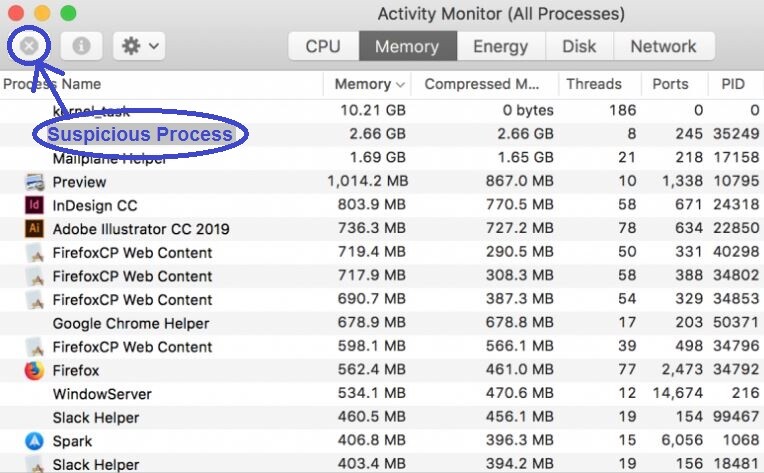
- In the Activity Monitor, try to find a process that you think may be related to Safe Finder – focus on the processes that are using the most RAM and CPU as the one that’s coming from Safe Finder is likely resource-intensive.
- If you find a process named Safe Finder or another one that looks questionable, select it and then click on the X in the top-left to quit the process to get rid of Safe Finder.
The following are tips that may help you recognize the malicious process and quit it.
- As was already stated above, the rogue process will probably be consuming lots of system memory, RAM, and battery life, so look at the most resource-intensive processes while searching for it.
- We recommend searching online for information about the processes you think may be rogue – often a seemingly suspicious process may turn out to be a legitimate one from your macOS. Therefore, it’s best to see what researchers and other users have said about any processes you think could be rogue.
- You can also learn more about the suspected process by clicking on it, then selecting Sample > Save, saving the sample to your Desktop, and then testing the sample file for malware with the help of the free online malware scanner we’ve posted right below: Each file will be scanned with up to 64 antivirus programs to ensure maximum accuracyThis scanner is free and will always remain free for our website’s users.This file is not matched with any known malware in the database. You can either do a full real-time scan of the file or skip it to upload a new file. Doing a full scan with 64 antivirus programs can take up to 3-4 minutes per file.
 Drag and Drop File Here To Scan
 Analyzing 0 sEach file will be scanned with up to 64 antivirus programs to ensure maximum accuracyThis scanner is based on VirusTotal’s API. By submitting data to it, you agree to their Terms of Service and Privacy Policy, and to the sharing of your sample submission with the security community. Please do not submit files with personal information if you do not want them to be shared.
If malware gets detected in the sample file, delete that file, and then quit the process that it comes from.

After the hijacker process has been successfully stopped, you should also check your system for rogue Safe Finder files and delete them. There are several directories that are the most likely to have such files stored in them and below we will show you how to get to them and clean them from any unwanted files.
- From your keyboard, select the following keys by pressing them together, in that order: Command + Shift + G.
- In the Go to Folder window that opens, copy-paste the following folder location and click on GO: /Library/LaunchAgents.
- Search that folder for suspicious files added after Safe Finder infected your browser and if you find any, delete them. Do not forget to use the scanner we posted earlier in this guide to test any files that you think may be suspicious. If the scanner flags them as malware, you should most definitely delete them.
- Also, if you see any of the following files in the /Library/LaunchAgents folder, delete them as well since they are known to be related to Safe Finder:
- com.msp.agent.plist
- com.updater.mcy.plist
- com.pcv.hlpramc.plist
- com.avickUpd.plist
- The next folder you must visit is /Library/LaunchDaemons. In it, too, search for recently-added suspicious files that must be deleted. Also, delete the following files if you see them in that folder:
- plist, com.startup.plist
- com.ExpertModuleSearchDaemon.plist
- com.ExpertModuleSearchDaemon.plist
- Also go to the ~/Library/LaunchAgents folder, delete any questionable files that you may find in it. If you see any of the files that we listed under Step 3 in that folder, delete them as well.
- The last folder that you should check is ~/Library/Application Support. In it, you must look for entire sub-folders that may be linked to Safe Finder. The following are examples of such folders that are confirmed to be related to the hijacker and so if you see them, you must delete them:
- OperativeProgram
- ControlFraction
- ConsumerOpinion
- AnalyzerSkill
- FractionData
- After you are done with deleting rogue files, go to Finder > Applications, look for apps that may be responsible for bringing the hijacker into your system, and if you see anything questionable, send it to the Trash.
- Next, select the Apple menu (top-left), select System Preferences, then go to Users & Groups, and select Login Items. If any of the items shown in that list seem related to Safe Finder, be sure to remove them.
- Go back to System Preferences, select Profiles, and delete any profiles listed there that you do not recognize and that haven’t been created by you or by anybody else who regularly uses that computer. Note that even if a given profile seems to have a legitimate name, if it is unfamiliar to you, it should be deleted. Here are several examples of seemingly legitimate profiles that must have been added by the hijacker:
- Safari Settings
- Chrome Settings
- Main Search Platform
- Lastly, do not forget that our comments section is always open to our readers, and you can ask us for further assistance in case you haven’t been able to perform a certain step or remove the hijacker.